Table of Contents
Advertisement
Quick Links
Advertisement
Table of Contents

Related Manuals for Vision Fitness ST720


Summary of Contents for Vision Fitness ST720
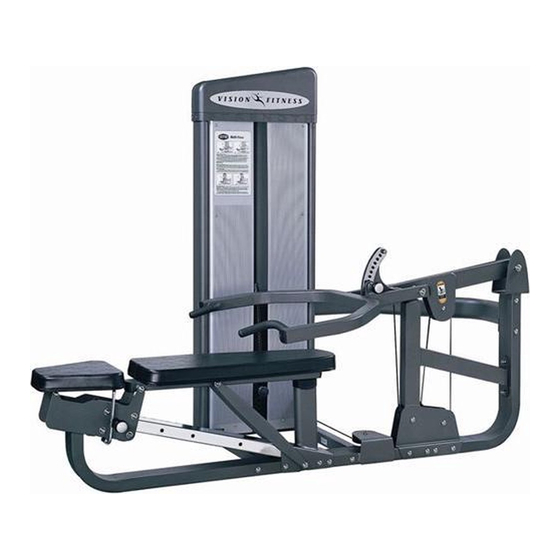
- Page 1 A s s e m b l y & Owner’s Guide ST720 MULTI-PRESS...
-
Page 3: Table Of Contents
A S S E M B L Y G U I D E ASSEMBLY GUIDE ....4 HARDWARE BAGS ....6 STEP 1: ORANGE BAG . - Page 4 A s s e m b l y & O w n e r ’ s G u i d e ST720 MULTI-PRESS To avoid possible damage to this Multi-Press, please follow these assembly steps in the correct order. Before...
- Page 5 STEP STEP STEP STEP STEP STEP Pinch Point Decal (both sides) STEP General Warning Decal STEP STEP Serial #...
-
Page 6: Step 2: Blue Bag
ORANGE BAG M10 x 70 Bolt Quantity: 2 BLUE BAG M10 x 70 Bolt Quantity: 4 HARDWARE INCLUDED M10 x 20 Bolt Quantity: 2 M10 x 125 Bolt Quantity: 3 M10 x 120 Bolt Quantity: 2 10.2 x 22 x 2 Flat Washer Quantity: 6 M10 Nylon Nut... -
Page 7: Step 3: Pink Bag
HARDWARE INCLUDED PINK BAG M10 x 20 Bolt 10.2 x 22 x 2 M10 Nylon Nut Quantity: 2 Flat Washer Quantity: 10 Quantity: 22 M10 x 60 Bolt Quantity: 2 M10 x 70 Bolt Quantity: 2 M10 x 120 Bolt Quantity: 2 M10 x 123 Bolt Quantity: 4... -
Page 8: Step 4: Green Bag
HARDWARE INCLUDED GREEN BAG 10.2 x 22 x 2 M10 Nylon Nut Flat Washer Quantity: 1 Quantity: 2 BLACK BAG M5 x 10 Bolt 5.2 x 10 x 1.5 Flat Washer Quantity: 24 Quantity: 24 M8 x 62 Bolt Quantity: 2 13 x 26 x 2.5 Flat Washer Quantity: 4... -
Page 9: Step 7: Red Bag
HARDWARE INCLUDED YELLOW BAG M12 x25 Bolt Quantity: 2 12.2 x 21.5 x 3 20.7x 29.1 x 0.3 13 x 26 x 2.5 Lock Washer Wavy Washer Flat Washer Quantity: 2 Quantity: 1 Quantity: 2 130mm Axle illustration not to scale Bushing (F10) Quantity: 1 illustration not to scale... - Page 10 HARDWARE INCLUDED LIGHT BLUE BAG PURPLE BAG M5 x 10 Bolt M10 x 30 Bolt Quantity: 22 Quantity: 3 M5 x 15 Bolt Quantity: 6 M10 x 60 Bolt Quantity: 2 Slip-On Nut illustration not to scale Quantity: 2...
- Page 11 ORANGE BAG STEP • Slide the sliding seat bottom assembly (AH1) onto the sliding seat support tube (AH2), rollers first. Disengage pull pin of seat bottom assembly until it locks into one of the range of motion holes in the support tube.
- Page 12 BLUE BAG STEP • Slide a bolt (M10x125) and a flat washer (10.2x22x2) through the hole, right of center, on the seat back support post (AT3). Attach another flat washer (10.2x22x2) and a nut (M10) to the back side. • Place the T-shaped end of center floor support (without pulley) (AG3) up against main floor support (AC1).
- Page 13 PINK BAG STEP • Take the swing arm support (AC3) and insert into the end of the main floor support tube (AC1). Align holes in both tubes. Vertically insert and tighten two bolts (M10x20) (10.2x22x2). • Place the swing arm pulley bracket (AC2) over the main floor support, aligning the holes along the intersection point of swing arm support (AC3) and main floor...
- Page 14 GREEN BAG STEP • Grab the seat back support (AT1) and align the holes at the end of the tube with the open holes in the sliding seat bottom assembly (AH1). Connect with arrow up using one bolt (M10x140), two flat washers (10.2x22x2), and a nylon nut (M10).
- Page 15 BLACK BAG STEP • Secure top and bottom shield brackets QO5) to weight stack tower (AB1) using bolts (M5x10), flat washers (5.2x10x1.5), and lock washers (5.1x9.3x1.3) provided. Repeat for all side brackets (QO4). • Place two rubber weight plate bumpers (K10) over the holes in the lower cross tube of the weight stack tower.
- Page 16 YELLOW BAG STEP • Attach the swing arm (AF1) to swing arm support (AC3) by guiding the small axle (FO8) through the bracket on the swing arm support. Once through the wall of the bracket, slide a wavy washer (20.7x29.1x0.3) over the axle, before sliding the axle through the swing arm (AF1).
- Page 17 RED BAG STEP • Attach pulleys A and B to the weight stack tower with a bolt (M10x48), a flat washer (10.2x22x2) on each side, and a nut (M10). • With loop end of cable (F17) in hand, guide it through hole in top of weight stack tower and around pulleys A and B.
- Page 18 LIGHT BLUE BAG STEP • Align holes in rear shield (QO3) with the holes in the brackets on the back side of the weight stack; secure using 10 bolts (M5x10). Take the left (QO1) side shield and repeat on front side of weight stack tower using six bolts (M5x10).
-
Page 19: Step 9: Purple Bag
PURPLE BAG STEP • Secure seat bottom (JO1) to seat bottom frame (AT2) using three bolts (M10x30). • Secure seat back (JO2) to seat back support (AT1) using two bolts (M10x60). -
Page 20: Resistance Training Benefits
Use this manual to guide you through the basic exercises you can perform on your VISION FITNESS gym. To achieve maximum results and avoid possible injury, consult a fitness professional to formulate a complete exercise program. -
Page 21: Training Programs
SPRINT 8 This program is exclusive to VISION FITNESS exercise equipment. This is a program that stresses high intensity, a moderate amount of resistance, and as many repetitions that a person can perform in a specified period of time (usually 20-30 seconds). -
Page 22: Stretching
STRETCHING Flexibility Training is not associated with fitness as often as cardiovascular exercise or Strength Training, even though it is just as important. A good stretching program will help to maintain flexibility of the hips and lower back. A flexible person will be less likely to injure themselves in common activities, such as reaching, twisting and turning, or in uncommon activities such as the annual softball tournament. - Page 23 BICEP/CHEST STRETCH Grasp an immovable object (pole or corner of a wall) with your feet planted firmly and evenly on the floor. With the palm of your stretched side facing forward, rotate your hips away from that hand. Be careful not to rotate too far or hyperextend the elbow joint.
-
Page 24: Maintenance Schedule
MAINTENANCE SCHEDULE FOR BEST PERFORMANCE WE RECOMMEND THE FOLLOWING MAINTENANCE SCHEDULE: Check the integrity and function of the following parts. Replace all worn components immediately. CHECK END FITTINGS AND CABLE JACKET COATING. CHECK TIGHTNESS OF WEIGHT STACK LOCKING NUT. REPLACE CABLES ANNUALLY. WIPE DOWN AND DRY. -
Page 25: Commercial Warranty
WARRANTY REGISTRATION Your warranty card must be completed and sent to VISION FITNESS before a warranty claim can be processed. You may also register via our website at www.visionfitness.com. Inside the enclosed warranty card you will find a customer survey. Your care in completing the survey will be of value to us in serving you in the future. - Page 32 500 South CP Avenue • P.O. Box 280 • Lake Mills. WI 53551 toll free 800.335.4348 • phone 920.648.4090 • fax 920.648.3373 www.visionfitness.com ©2007 Vision Fitness. All Rights Reserved. 2.07 OM18.45PRD REV2...