ViewSonic PJ658 User Manual
Viewsonic lcd projector user guide
Hide thumbs
Also See for PJ658:
- User manual (69 pages) ,
- Specification sheet (2 pages) ,
- Bedienungsanleitung (69 pages)
Table of Contents

Related Manuals for ViewSonic PJ658


Summary of Contents for ViewSonic PJ658
- Page 1 ViewSonic ® PJ658 LCD Projector - User Guide - Guide de l’utilisateur - Bedienungsanleitung - Guía del usuario - Guida dell’utente - Guia do usuário - Användarhandbok - Käyttöopas - Руководство пользователя - 使用手冊 - 使用手冊 - 사용자 안내서 Model No. : VS11361...
-
Page 2: Compliance Information
92/31/EEC and 93/68/EEC Art.5 with regard to “Electromagnetic compaty”, and 73/23/EEC as amended by 93/68/EEC Art.13 with regard to “Safety.” User Information for all Countries Notice: Use the cables which are included with the unit or specified. ViewSonic PJ658... -
Page 3: Important Safety Instructions
ViewSonic PJ658... -
Page 4: Copyright Information
Microsoft, Windows, Windows NT, and the Windows logo are registered trademarks of Microsoft Corporation in the United States and other countries. ViewSonic, the three birds’ logo, OnView, ViewMatch, and ViewMeter are registered trademarks of ViewSonic Corporation. VESA is a registered trademark of the Video Electronics Standards Association. DPMS and DDC are trademarks of VESA. -
Page 5: About This Manual
(5) Audio/Video cable (6) Soft case (7) Quick Start Guide and ViewSonic Wizard CD (8) Lens cover, Rivet and Strap NOTE • Keep the original packing materials for future reshipment. For moving the projector, be sure to use the original packing materials. Use special caution for the lens part. -
Page 6: Table Of Contents
Using the menu function ..24 EASY Menu ....25 ViewSonic PJ658 Aspect, Auto keystone Execute, Key- stone, Picture mode, Brightness, Con-... -
Page 7: Projector Features
Strap Fix the strap to the strap ring of the lens cover. Put the strap into the groove on the rivet. Push the rivet into the strap hole. ViewSonic PJ658 Projector features / Preparations Strap ring Bottom side Strap hole... -
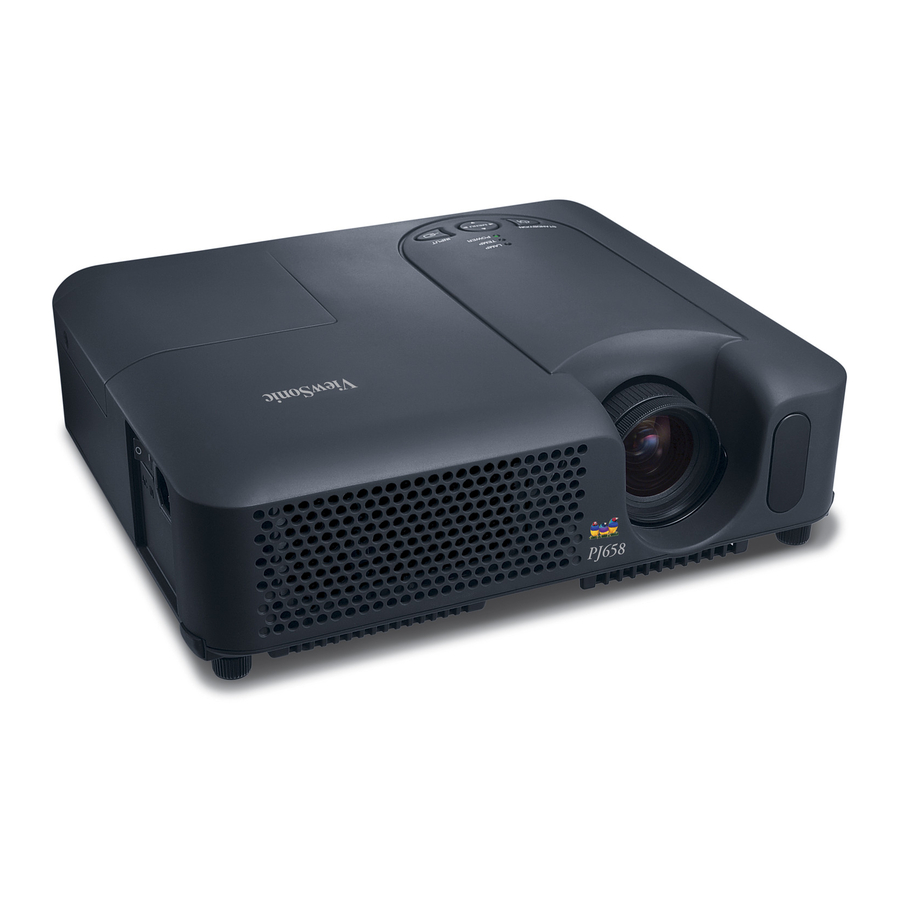
Page 8: Part Names
Part names Part names Projector Lamp cover (Lamp unit is inside.) Zoom ring Focus ring Vent Lens Lens cover WARNING ►During use or immediately after use, do not touch around the lamp and vents of the projector. ( ) It could cause a burn. Control buttons Bottom side Remote sensor... - Page 9 10 minutes without operating. Only push the Restart switch in these exceptional instances. ViewSonic PJ658 Rear-Left side AUDIO IN1 port (In the default setting, the AUDIO IN1 port is the audio port for the RGB IN1 port, however, it is possible to change the settings.)
-
Page 10: Control Buttons
VIDEO button ASPECT button HOME button MAGNIFY ON button OFF button END button FREEZE button POSITION button ESC button Battery cover (on the back) ViewSonic PJ658 SEARCH VIDEO BLANK ASPECT AUTO MAGNIFY HOME PAGE UP VOLUME PAGE DOWN MUTE FREEZE... -
Page 11: Setting Up
fire, an electric shock and/or malfunction to the pro- jector. • Do not place the projector near a humidifier, a smoking space or a kitchen. ►Adjust the direction of the projector to keep the light from directly hitting the projector's remote sensor. ViewSonic PJ658 Setting up... -
Page 12: Arrangement
4.5 (176) 5.4 (211) 23 200 (5.1) 6.0 (235) 7.2 (282) 30 250 (6.4) 7.5 (294) 9.0 (353) 38 300 (7.6) 9.0 (352) 10.8 (423) 46 ViewSonic PJ658 16:9 4 : 3 screen (c) Screen height [cm (inch)] down (16) (22) -
Page 13: Adjusting The Projector's Elevator
When you release the elevator buttons, the elevator feet will lock into posi- tion. If necessary, you can also finely adjust the height of the projector by twisting the elevator feet by hand. ViewSonic PJ658 Elevator feet Elevator button Setting up... -
Page 14: Using The Security Bar
How to attach An anti-theft chain or wire can be at- tached as shown in the illustration. (Anti-theft chains or wires of up to 10mm in diameter can be used) ViewSonic PJ658 Security Bar Anti-theft chain or wire [sold separately]... -
Page 15: Connecting Your Devices
• Please take advantage of this function by connecting the accessory RGB cable to the RGB IN1 port (DDC 2B compatible). Plug-and-Play may not work properly if any other type of connection is attempted. • Please use the standard drivers in your computer as this projector is a Plug-and-Play monitor. ViewSonic PJ658 Setting up... -
Page 16: Examples Of Connection With A Computer
Audio out RS-232C Stereo mini audio cable RGB out Connecting to a monitor (output) RGB in Connecting to a speaker with amplifier (output) ViewSonic PJ658 USB cable AUDIO IN3 VIDEO S-VIDEO RS-232C cable Stereo mini audio cable Audio out AUDIO IN3... -
Page 17: Setup Menu
Audio (L) out Video out Audio (R) out Audio (L) out S-Video out Component video out Audio (R) out Audio (L) out SCART cable SCART ViewSonic PJ658 Audio/Video cable VIDEO S-VIDEO Audio cable VIDEO S-VIDEO S-Video cable Component video cable VIDEO S-VIDEO... -
Page 18: Connecting Power Supply
• Never modify the power cord. Never attempt to defeat the ground connection of the three-pronged plug. Connect the connector of the power cord to the AC inlet of the projector. Firmly plug the power cord's plug into the outlet. ViewSonic PJ658 AC inlet Connector of the power cord... -
Page 19: Remote Control
Align and insert the two AA batteries according to their plus and minus termi- nals as indicated in the remote control. Close the battery cover. Replace the battery cover in the direction of the arrow and snap it back into place. ViewSonic PJ658 Remote control... -
Page 20: Using The Remote Control
• Since the remote control uses infrared light to send signals to the projector (Class1 LED), be sure to use the remote control in an area free from obstacles that could block the re- mote control’s output signal to the projector. ViewSonic PJ658 approx. 3 meters 30º 30º... -
Page 21: Power On/Off
Power on/off WARNING ►When the power is on, a strong light is emitted. Do not look into the lens of projector. Also do not peep at the inside of projector through a hole. NOTE • Turn the power on/off in right order. Please power on the projector prior to the connected devices. -
Page 22: Operating
TURN ON is selected for the AUTO SEARCH item in the OPTION menu the projector will check the RGB IN1 port first. If no input is detected at the port, the projector will check the RGB IN2 port. ViewSonic PJ658 RGB IN2 SEARCH VIDEO... -
Page 23: Searching An Input Signal
Searching an input signal Press the SEARCH button on the remote control. The projector will start to check its input ports in order to find any input signals. When an input is found, the projector will stop searching and display the image. If no signal is found, the projector will return to the state selected before the operation. -
Page 24: Using The Automatic Adjustment Feature
● When this function is performed at a video signal, a certain extra such as a line may appear outside a picture. ViewSonic PJ658 . For a component video signal, the SEARCH VIDEO... -
Page 25: Correcting The Keystone Distortions
● The projector automatically exits the MAGNIFY mode when the input signal is changed, or when the display condition is changed. ● Although in the MAGNIFY mode, the keystone distortion condition may vary, it will be restored when the projector exits the MAGNIFY mode. ViewSonic PJ658 Operating SEARCH VIDEO ASPECT... -
Page 26: Freezing The Screen
● The projector automatically returns to the input signal screen when one of the projector’s buttons or the remote control buttons is pressed or one of the com- mands (except get commands) is transmitted from the control port. ViewSonic PJ658 SEARCH VIDEO BLANK... -
Page 27: Operating The Computer Screen
Press keyboard’s PAGE UP key POSITION MENU Press keyboard’s PAGE DOWN key ENTER Press keyboard’s ESC key RESET ViewSonic PJ658 Available function Move pointer Left click with mouse Operating Remote control operation Use ▲, ▼, ◄, ► buttons Press ENTER button... -
Page 28: Multifunctional Settings
Even if you don't do anything, the dialog will auto- matically disappear after about 10 seconds. ● Some functions cannot be performed when a certain input port is selected, or when a certain input signal is displayed. ViewSonic PJ658 VIDEO ASPECT MAGNIFY HOME... -
Page 29: Easy Menu
• When this function is performed, a certain extra such as a line may appear. Using the buttons ◄/► adjusts the brightness. BRIGHTNESS See the item BRIGHTNESS in the PICTURE menu. ViewSonic PJ658 Description NORMAL CINEMA DYNAMIC WHITEBOARD BOARD(GREEN) BOARD(BLACK) FAULT) -
Page 30: To Advanced Menu
Refer to description of LANGUAGE in the SCREEN menu. Select “Go to Advanced Menu” and press the button ► or the EN- Go to TER button to use the menu of PICTURE, IMAGE, INPUT, SETUP, Advanced Menu SCREEN or OPTION. ViewSonic PJ658 Description... -
Page 31: Picture Menu
• When this function is performed, a certain extra such as a line may appear. ViewSonic PJ658 Description To adjust CUSTOM Ramp Gray scale of 15 steps PICTURE Menu ������������... - Page 32 • There may be some noise and/or the screen may flicker for a mo- ment when an adjustment is made. This is not a malfunction. ViewSonic PJ658 Description HIGH DEFAULT � HIGH CUSTOM � MID DEFAULT � MID CUSTOM LOW DEFAULT � LOW CUSTOM � Hi-BRIGHT-1 DEFAULT � Hi-BRIGHT-1 CUSTOM Hi-BRIGHT-2 DEFAULT �...
-
Page 33: My Memory
To load saved adjustment settings press the MEMORY button. When there are no saved adjustment settings the following dialog is displayed. ViewSonic PJ658 Description LOAD1 LOAD2 LOAD3 LOAD4 SAVE4 SAVE3 SAVE2 SAVE1 �������������������... -
Page 34: Image Menu
Using the buttons ▲/▼ adjusts the horizontal phase to eliminate flicker. Right Left H PHASE • This item can be selected only for an RGB signal or a component video signal. ViewSonic PJ658 ������������ ��������� � ������� � �������... - Page 35 For a component video signal The horizontal phase will be automatically set to default. • The automatic adjustment operation requires about 10 seconds. Also please note that it may not function correctly with some input. ViewSonic PJ658 Description IMAGE Menu...
-
Page 36: Input Menu
• The AUTO mode automatically selects the optimum mode. • The AUTO operation may not work well at some signals. In such a case, it might be good to select a suitable mode except AUTO. ViewSonic PJ658 ������������ ��������� �... - Page 37 • In the SYNC ON G mode, the picture may be distorted with certain input signals. In such a case, remove the signal connector so that no signal is received and turn SYNC ON G off, and then reconnect the signal. ViewSonic PJ658 Description N-PAL M-PAL NTSC4.43 INPUT Menu ������������...
-
Page 38: This Projector
◄ button. The screen will then return to the RESOLUTION menu displaying the previ- ous resolution. *1 Not all resolutions are guaranteed. *2 For some pictures, this function may not work well. ViewSonic PJ658 Description ������������� �������� ������ RESOLUTION MENU... -
Page 39: Setup Menu
This function will be unavailable when Transition Detector is on. Using the buttons ▲/▼ turns off/on the whisper mode. NORMAL WHISPER WHISPER • When the WHISPER is selected, acoustic noise and screen bright- ness are reduced. ViewSonic PJ658 ������������ ��������� � ������� ������� �... - Page 40 ◄/► (2). When off is selected, all audio ports do not work for the input port. (1) RGB1 RGB2 COMPONENT S-VIDEO VIDEO (2) 1 2 3 ViewSonic PJ658 Description ������ ������� �� �����...
-
Page 41: Screen Menu
• To avoid remaining as an afterimage, the MyScreen and the ORIGINAL screens will change to the BLACK screen after several minutes. • For the MyScreen, please refer to the MyScreen item. ViewSonic PJ658 Description NORSK NEDERLANDS PORTUGUÊS 日本語 ... - Page 42 TURN ON TURN OFF When the TURN ON is selected, the item MyScreen is locked. Use MyScreen Lock this function for protecting the current MyScreen. • This function will be unavailable when MyScreen Password in the Security Menu is on. ViewSonic PJ658 Description...
- Page 43 PUT buttons when finished entering text. To revert to the previous name without sav- ing changes press the ESC or ◄ button and the INPUT button simultaneously. ViewSonic PJ658 Description and press the ENTER or IN- SCREEN Menu ����������� ������������...
-
Page 44: Option Menu
If one of the projector’s buttons or the remote control buttons is pressed or one of the commands (except get commands) is transmitted from the control port during the corresponding time, projector will not be turned off. ViewSonic PJ658 MENU [RGB1] PICTURE IMAGE INPUT... - Page 45 • AUTO KEYSTONE EXECUTE: Performs automatic KEYSTONE correction. • MY MEMORY: Loads MY MEMORY settings. • PICTURE MODE: Changes the PICTURE mode. • FILTER RESET: Displays the filter time reset confirmation dia- logue. ViewSonic PJ658 Description AUTO OFF AUTO OFF ENABLE DISABLE OPTION Menu...
- Page 46 STANDBY/ON button are locked. TURN ON TURN OFF • Please use to avoid a mischief and touching accidentally. This function does not have any effect on the remote control. ViewSonic PJ658 Description FACTORY RESET INFORMATION REMOTE FREQ.
- Page 47 Note that the items LAMP TIME, FILTER TIME, LAN- GUAGE and OPTION_SECURITY are not reset. RESET CANCEL ViewSonic PJ658 Description INPUT-INFORMATION INPUT-INFORMATION 1024x768 @60Hz...
-
Page 48: Changing The Password
1.2-3 Move the cursor to the right side of the EN- 1.2-4 Move the cursor to the right side of the NEW NOTE : Please do not forget your PASSWORD. ViewSonic PJ658 Description to select SECURITY and press the ► but- ton. The ENTER PASSWORD box will be displayed. -
Page 49: Setting The Password
2.2-2 Use the ▲/▼ buttons on the MyScreen PASS- The ENTER PASSWORD BOX (small) will be dis- played. 2.2-3 Use the ▲/▼/◄/► buttons to enter the PASS- ViewSonic PJ658 Description ENTER PASSWORD BOX. played, press and hold the RESET button on the remote control for about 3 seconds. -
Page 50: Using The Pin Lock Function
3.1 Registering the PIN Code 3.1-1 Use the ▲/▼ buttons on the SECURITY menu 3.1-2 Use the ▲/▼ buttons on the PIN LOCK on/off ViewSonic PJ658 Description CHECK PASSWORD BOX and press the ► button to display the PASSWORD for about 20 seconds, please make note of the PASS- WORD during this time. - Page 51 Inquiring Code is displayed the projector will turn off. 3.3-2 Contact your dealer with the 10 digit Inquiring Code. Your PASSWORD ViewSonic PJ658 Description /RGB and INPUT buttons. Use the ▲/▼ buttons to select TURN OFF and the PIN BOX will be displayed.
-
Page 52: Using The Transition Detector Function
Pressing the ENTER button on the remote controll or the INPUT button on the projector will close the PASSWORD BOX. NOTE : Please do not forget your Transition Detector PASSWORD. ViewSonic PJ658 Description Transition Detector select Transition Detector and press the ► or the ENTER button to display the Transition Detector on/off menu. - Page 53 4.4-1 Follow the procedure in 4.1-1 to display the Transition Detector on/off 4.4-2 Select TURN OFF to display the ENTER 4.4-3 Contact your dealer with the 10 digit Inquiring ViewSonic PJ658 Description menu. Enter the registered PASSWORD and the screen will return to the Transition Detector on/off menu.
-
Page 54: Maintenance
When the pictures appear dark, or when the color tone is poor, please replace the lamp as soon as possible. Do not use old (used) lamps; this is a cause of breakage. ViewSonic PJ658 HIGH VOLTAGE HIGH TEMPERATURE HIGH PRESSURE... - Page 55 Lamp (continued) A lamp has a finite product life. Using the lamp for long periods of time could cause the pictures darker or the color tone poor. Note that each lamp has a dif- ferent lifetime, and some may burst or burn out soon after you start using them. Preparation of a new lamp and early replacement are recommended.
-
Page 56: Air Filter
filter cover first, to prevent pen- etration of dust or the like. While supporting the projector with one hand, use your other hand to pull the filter cover forward in the direction of the arrow. Remove the air filter. ViewSonic PJ658 Handle Filter cover... - Page 57 (3) Point at the “FILTER TIME” using ▼/▲ button, then press the ► button. A dialog will appear. (4) Press the ▲ button to select “RESET” on the dialog. It performs resetting the filter time. ViewSonic PJ658 locations. Air filter’s knob Air filter...
-
Page 58: Other Care
After making sure that the projector is cool adequately, lightly wipe with gauze or a soft cloth. If soiling is severe, dip soft cloth in water or a neutral cleaner diluted in water, and wipe lightly after wringing well. Then, wipe lightly with a soft, dry cloth. ViewSonic PJ658... -
Page 59: Troubleshooting
TO REMOVE WARNING MES- SAGE, RESET FILTER TIMER. SEE MANUAL FURTHER INFO. ViewSonic PJ658 Description There is no input signal. Please confirm the signal input connection, and the status of the signal source. The horizontal or vertical frequency of the input signal is not within the specified range. -
Page 60: Regarding The Indicator Lamps
(discre- tionary) Blinking Lighting Lighting Blinking Blinking Lighting ViewSonic PJ658 TEMP indica- The projector is in a standby state. Turned Please refer to the section “Power On/Off”. Turned The projector is warming up. Please wait. The projector is in an on state. - Page 61 45 minutes. After the projector has sufficiently cooled down, please make confirmation of the attachment state of the lamp and lamp cover, and then turn the power on again. ViewSonic PJ658 TEMP indica- The cooling fan is not operating.
-
Page 62: Phenomena That May Be Easy To Be Mistaken For Machine Defects
Correctly set up the signal source device by referring to the outputted. manual of the source device. The input changeover settings are mismatched. Select the input signal, and correct the settings. ViewSonic PJ658 Cases not involving a machine defect Refer- ence page 56, 57 12, 13 –... - Page 63 Color tone is COLOR SPACE setting is not suitable. poor. Change the COLOR SPACE setting to AUTO, RGB, SMPTE240, REC709 or REC601. ViewSonic PJ658 Cases not involving a machine defect Troubleshooting Refer- ence page 12,13 12, 13...
- Page 64 NOTE • Although bright spots or dark spots may appear on the screen, this is a unique characteristic of liquid crystal displays, and it does not constitute or imply a machine defect. ViewSonic PJ658 Cases not involving a machine defect Refer- ence...
-
Page 65: Warranty And After-Service
Ports Lamp Optional Air filter parts Others ViewSonic PJ658 Liquid crystal projector 1.6 cm (0.63 type) TFT active matrix 786,432 pixels (1024 horizontal x 768 vertical) Zoom lens F=1.7 ~ 1.9 f=18.9 ~ 22.6 mm 200W UHB 1W x 1 AC100-120V/3.3A, AC220-240V/1.4A... - Page 66 Specifications Specifications (continued) 306 mm ViewSonic PJ658...
-
Page 67: Customer Support
Africa/Other www.viewsonic.com countries India www.in.viewsonic.com Hong Kong www.hk.viewsonic.com/support/ Macau www.hk.viewsonic.com/support/ Korea www.viewsonic.com ViewSonic PJ658 T=Telephone E-mail F=Fax T= 800 688 6688 service.us@viewsonic.com F= 909 468 1202 T= 866 463 4775 service.ca@viewsonic.com T= 0207 949 0307 service.eu@viewsoniceurope.com Contact your reseller service.eu@viewsoniceurope.com AUS= 1800 880 818 service@au.viewsonic.com... -
Page 68: Limited Warranty
However, if you register your product serial number with ViewSonic, along with your PIN code, it will be retained on file with your registration should you need it in the future.”...