Table of Contents
Advertisement
Quick Links
Advertisement
Table of Contents

Related Manuals for Uniden TRU 8866 Series


Summary of Contents for Uniden TRU 8866 Series
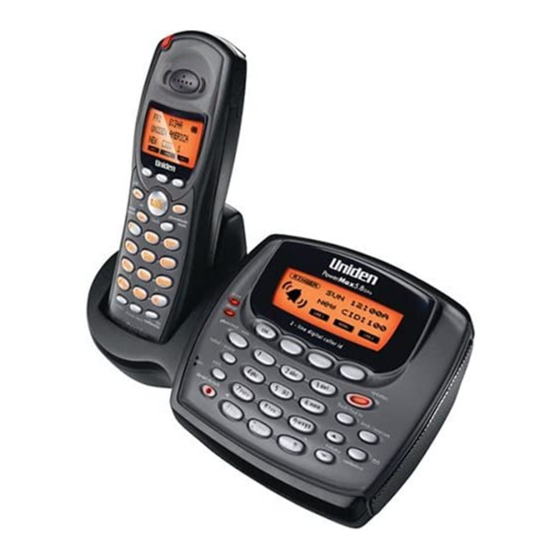
- Page 1 T R U 8 8 6 6 S E R I E S O W N E R ' S M A N U A L...
-
Page 2: Table Of Contents
Welcome/Features/Terminology Controls & Functions Display and Icons Soft Key Function In standby mode In talk mode Setting up the Phone A. Choose the best location B. Install the rechargeable battery pack into the handset C. Connect the base unit and charge the handset D. -
Page 3: Welcome/Features/Terminology
Welcome Congratulations on your purchase of the Uniden Two Line Digital Expandable Cordless Telephone System! This unit is different from conventional cordless telephones. When the base unit is connected to AC power and a telephone line, it can support up to ten handsets. - Page 4 Uniden is a registered trademark of Uniden America Corporation. AutoTalk, AutoStandby, DirectLink, IntegriSound and Random Code are trademarks of Uniden America. Terminology •Standby Mode - The handset maybe sitting or off the cradle, but is NOT in use. talk/flash, speaker, or the LINE1 or LINE2 soft key has not been pressed.
-
Page 5: Controls & Functions
Controls & Functions w w w . u n i d e n . c o m 1. Handset Antenna 2. Beltclip Hole 3. Speakerphone Speaker and Ringer 4. Handset Battery Compartment 5. New Message LED 6. Handset Earpiece 7. LCD Display 8. - Page 6 22. in use LED phonebook (P. 41) 24. cid (P. 51) 25. charge LED 26. Base Charging Contacts 27. redial/ pause (P. 32 & 30) 28. mic (microphone) 29. exit (P. 45) [ 5 ] C O N T R O L S & F U N C T I O N S 30.
-
Page 7: Display And Icons
Display and Icons Example of the standby mode display • Handset •Base Ringer Volume Level This icon changes depending on ringer volume level (High, low and off) ICON Appears During Standby/Talk Standby Standby/Talk Talk Talk Talk Standby w w w . u n i d e n . c o m Ringer off icon (when the ringer is off)/ day of the week and time / battery icon Handset ID and Banner Number of new Caller ID calls received (If there are no new Caller ID messages,... -
Page 8: Soft Key Function
Soft Key Function "Soft" keys are keys that change function during the operation of the phone. There are three soft keys on the base and three on each handset. Soft keys allow you to: - Access the main menu The function of each soft key is determined by the icon that appears directly above it. For example, when the handset is in standby mode, pressing soft key 1 activates Line1. -
Page 9: Setting Up The Phone
Setting up the Phone A. Choose the best location When choosing a location for your new phone, here are some important guidelines you should consider: • The location should be close to both a phone jack and a continuous power outlet (one which is not connected to a switch). -
Page 10: Install The Rechargeable Battery Pack Into The Handset
1) Press down on the handset battery case cover (use the •Use only the Uniden finger indention for a better grip) and slide the cover (BT-446) rechargeable downward to remove. -
Page 11: Connect The Base Unit And Charge The Handset
C. Connect the base unit and charge the handset 1) Connect the AC adapter to the DC IN 9V jack and to a standard 120V AC wall outlet. Note: • Connect the AC adapter to a continuous power supply (i.e., an outlet that is not controlled by a switch). •... -
Page 12: Mount The Base Unit On A Wall
D. Mount the Base Unit on a Wall Standard wall plate mounting This phone can be mounted on any standard wall plate. 1) Make the AC adapter and the telephone line cords through the hole on the wall mount adapter. 2) Plug the AC adapter into the DC IN 9V jack. -
Page 13: Direct Wall Mounting
Direct wall mounting If you don't have a standard wall plate, you can mount your phone directly to the wall. Before doing this, consider the following: • Avoid electrical cables, pipes, or other items behind the mounting location that could cause a hazard when inserting screws into the wall. -
Page 14: Expanding Your Phone
Expanding Your Phone note Ten Handset Expandability Your phone supports up to ten handsets, including any handsets supplied with your IMPORTANT phone. You can now place a fully-featured If you purchase a cordless handset anywhere AC power is TCX805 and TCX860 available to connect the handset charger. -
Page 15: Changing The Digital Security Code
4) Charge the handset battery pack for at least 15-20 hours before using your new cordless telephone for the first time. Changing the Digital Security Code The digital security code is an identification code used to connect the handset and the base unit. -
Page 16: Register The Tcx805 And Tcx860 Expansion Handset To Main Base
Register the TCX805 and TCX860 expansion handset to main base Before an expansion handset is registered, the battery pack MUST be charged for 15 hours. To register TCX805 or TCX860 handset, simply place it in the main base. While the handset is registering, Reg istration complete. -
Page 17: Installing The Beltclip
Your phone is ready for hands-free conversations. (Headset may be purchased by calling the Uniden Parts Department or visiting the web site. See page 62.) w w w . u n i d e n . c o m... -
Page 18: Main Menu Options
Main Menu Options note Your phone has six main menu options: DirectLink Mode, Room/Baby Monitor, Handset Setup, Base Setup, Global Setup and Deregister HS. You can change Room/Baby Monitor, and Global Setup settings from the base or from any • For Global Setup, handset. -
Page 19: Setting Menu Options
Setting Menu Options Using the interface Below are some tips for using the software interface on your phone. Press the MENU soft key to access the main menu. • Use volume up/down • to scroll through options. • Press the OK soft key to make a selection. •... - Page 20 Handset Setup / Base Setup The following submenu options must be set separately for each handset and the base. Selecting a Telephone Line TEL-LINE allows you to set default telephone line. The line you select will be used when you make a call. If you select currently free.
- Page 21 3) Press volume up/down to adjust the ringer settings (Ringer Volume Off, Ringer Volume Low, or Ringer Volume High). You will hear a ringer or melody at the Selected volume (if you select Ringer Volume Off, no ringer or melody will sound).
- Page 22 Distinctive Ringer Setup (Handset only) Distinctive Ringer allows you to assign a designated ring tone to a stored phonebook number. When a call is received and the Caller ID information matches the information in one of the phonebook memory entries, the phone uses the distinctive ring assigned to that particular caller.
- Page 23 Setting Anykey Answer (Handset only) Anykey Answer allows you to answer the phone by pressing any number key, /tone/<, or #/> on the handset. 1) Press the MENU soft key. Select the Handset Setup menu, and then the Anykey Answer submenu. 2) Press vol/ /cid or vol/ O f f...
- Page 24 Selecting a Language You can change the language the menu display will use. Choose from English, French, or Spanish. 1) Press the MENU soft key. Select the Handset Setup menu or the Base Setup menu, and then the Language submenu. 2) Press volume up/down to choose "English,"...
- Page 25 Setting the Key Touch Tone (Handset only) Key Touch Tone is the tone your keypad makes when keys are pressed. You can turn this tone on or off. 1) Press the MENU soft key. Select the Handset Setup menu, and then the Key Touch Tone submenu. 2) Press vol/ /cid or vol/ O f f...
- Page 26 The handsets have a variety of animation displays. Below are examples of the animation screens and what they mean: Turning on the phone Hanging up the phone Confirmation (Done!) Find Handset/Paging the Handset Deleting (Deleted!) Also, the animation display changes depending on the ringer volume setting. Out of Range Unavailable Low Battery...
-
Page 27: Global Setup
Global Setup If you change one of the global settings, you change that setting for all registered handsets and the base. Only one handset or the base can change global settings at a time. Setting Day and Time Day & Time sets the day and time of your display. 1) Press the MENU soft key. - Page 28 Setting CIDCW (Caller ID on Call Waiting) CIDCW sets the Caller ID on Call Waiting (CIDCW) displays the name and number of an incoming call while you are on the line. Call Waiting Deluxe (CWDX) allows you to handle call waiting calls in seven different ways. 1) Press the MENU soft key.
- Page 29 Setting the Dial Mode Dial Mode sets the dial mode to tone or pulse. Most phone systems use tone dialing; the default setting is tone dialing. Set the dialing mode to match the dialing system used by your local phone service. •...
-
Page 30: Using Your Phone
Using Your Phone note Making and Receiving Calls If you subscribe to two phone lines, those lines will be completely independent on your phone. For example, you can have one handset talking on Line 1 while another handset •To set "Autotalk," see and the base unit participate in a 3-way conference on Line 2. - Page 31 From the Handset Speakerphone 1) Remove the handset from the base. 2) Press speaker. 3) Listen for the dial tone. 4) Dial the number. 5) When the other party answers, talk into the microphone. From the base 1) Press speaker. The phone will automatically select a free line.
-
Page 32: Switching To The Handset Speakerphone During A Call
note If the handset is off the base, press talk/flash or the correspond soft key (LINE1 or LINE2). If Any Key Answer is on, you can also press any key on the number keypad. From the base Press speaker or the correspond soft key (LINE1 or LINE2). -
Page 33: Placing A Call On Hold
Placing a Call on Hold 1) During a call, press intcom/hold on the handset or intercom/hold on the base. The line soft key (LINE1 or LINE2) to be placed on hold will flash. The call will be put on hold. If you leave a call on hold for more than 10 seconds, the display screen will read 2) To talk to the caller, press talk/flash or speaker on a handset (or speaker on the... -
Page 34: Adjusting The Earpiece And Speaker Volume
You can also display the redial list for redial number with the handset in talk mode. Press the MENU soft key, then select the redial menu. Press volume up/down to select the number you want to dial. Press the DIAL soft key to redial number. Deleting a Redial Record 1) With the phone in standby mode, press vol/ p (or redial/pause on the base). -
Page 35: Muting The Ringer
Muting the Ringer Do Not Disturb (DND) The do not disturb feature (DND) allows you to mute the ringer on the base and any registered handsets at the same time. The phone must be in standby mode. Press and hold do not disturb on the base. You will hear a confirmation tone, and the DND LED illuminates. -
Page 36: Tone Dialing Switch-Over
With the base While using the base speakerphone, press the MUTE soft key on the base to mute the microphone. MUTE soft key again or press speaker. Tone Dialing Switch-over If your telephone company requires pulse dialing, you can switch-over to tone dialing after the call connects. This feature is useful when you need tone dialing to use any automated menu systems, such as telephone bank tellers, telephone prescription refills, customer support menus,... -
Page 37: Privacy Mode
Privacy Mode Privacy mode prevents interruption from other registered handsets or the base. This works only when the phone is in use. On the base While you are talking on the phone, press the PRIVACY soft key. If you do not see the PRIVACY soft key (for example, if you have Call Waiting Deluxe enabled), follow the steps for the handset, below. -
Page 38: Conferencing With One Outside Line
From a second handset 1) Press corresponding soft key (LINE1 or LINE2) on the handset to join the call. 2) To hang up, return the handset to the cradle, or press end on the handset. The base or other handset will still be connected to the call. -
Page 39: Using One Touch Voice Mail Access
Using One Touch Voice Mail Access If you subscribe to voice mail service, you can use your phone to access your voice mailbox. The New Message LED flashes on the handset and icon appears on the base whenever you have messages waiting in your voice mailbox. -
Page 40: Setting Voice Mail Tone
3) Use the number keypad to enter your personal access number (up to 20 digits). If you have an access number already entered, the current number will appear in the display. To delete that number, press the DELETE soft key, then the OK soft key. -
Page 41: Resetting The New Message Led And Envelope Icon
Resetting the New Message LED and Envelope icon If the LED remains on or the envelope icon still appears after you’ve retrieved your messages, you may need to reset the indicators. With the phone is in standby mode, press and hold flash/find handset on the base until the paging sound stops (about 5 seconds). -
Page 42: Setting Up The Phonebook
Setting up the Phonebook You can store names and numbers in your phone’s phonebook, search for names alphabetically, and dial phonebook entries with just a few key presses. Phonebook memory is stored independently in the base and the cordless handsets. You can store up to 100 numbers in the base and up to 100 numbers in each handset. - Page 43 2) Press the STORE soft key. S t or e /E di t N a me 3) Enter the name (up to 16 characters) by using the number keypad. If a name is not required, go to step 4. <No Name> will be used as the name. Refer to the letters on the number keys to select the desired characters.
- Page 44 4) Press the OK soft key to store the name; S t or e/ E di t N o . note 5) Use the number keypad, phone number (up to 20 digits). If you make an error, use the DELETE soft key to erase the incorrect digits. When •Selecting a Phonebook you are finished, press the OK soft key to store the number.
-
Page 45: Storing A Redial Record
Storing Caller ID messages in the Phonebook Messages shown in the Caller ID list can be stored in the phonebook (see page 51). The phone number and name of the party on the Caller ID list can be stored in memory. -
Page 46: Viewing The Phonebook
Viewing the Phonebook 1) Press phonebook. 2) Press volume up/down to scroll through the phonebook locations. Phonebook locations appear in alphabetical order (from first to last when you press volume down, from last to first when you press volume up). You can also use the letters on the number keys to select the first letter of the desired name. -
Page 47: Making Calls Using The Phonebook
Making Calls Using the Phonebook 1) View the phonebook location to dial (see "Viewing the Phonebook" on page 45). 2) When the phone is in standby mode, press talk/flash or speaker on the handset (or speaker on the base). The phone will automatically select a free line. -
Page 48: Editing Or Erasing A Stored Name, Phone Number, Distinctive Ring And Speed Dial
Editing or Erasing a Stored Name, Phone Number, Distinctive Ring and Speed Dial 1) When the phone is in standby mode, press phonebook. To delete all phonebook locations, press the DELETE soft key. select 2) Use volume up/down or the number keypad to select desired phonebook entry (see "Viewing the Phonebook"... -
Page 49: Copying Phonebook Locations
Copying Phonebook Locations Copy Phonebook allows you to transfer stored phonebook locations from handset to handset or from base to handset (or from handset to base) without having to manually re-enter names and numbers. You can transfer one memory (phonebook location) at a time, or all memory locations at once. -
Page 50: Caller Id And Cidcw (Caller Id On Call Waiting)
Caller ID and CIDCW (Caller ID on Call Waiting) note You must subscribe to Caller ID services through your local telephone provider to use these features. When the telephone rings, the Caller ID feature allows you to view the caller’s •If you answer a call name, phone number, date and time of call. -
Page 51: Call Waiting Deluxe Features
You may receive any one of the following messages: When a private name is received; When a private number is received; When a unknown name is received; When a unknown number is received; When invalid data is received; Data errors appear as " ." Call Waiting Deluxe Features Your phone gives you new options for call waiting. -
Page 52: Viewing The Caller Id List
Answer/Drop 1 - Disconnects the first call, and connects to the new caller. note Conference - Starts a conference call with your first and second callers. Drop First/Drop Last - During a conference call, allows you to choose to drop •Check with your local the first or last caller. -
Page 53: Deleting Information From The Caller Id List
To view the Caller ID messages with alphabetical search, press the number key pad (2-9 and 0) with the letter associated with the first letter of the desired message. Once you view the Caller ID list with alphabetical search, you cannot switch back to historical order unless you exit and re-enter the operation. -
Page 54: Calling A Party From The Caller Id List
3) Press volume up/down to choose 4) Press the note Calling a Party from the Caller ID List •When a long distance call has been set, " " 1) Select the Caller ID message (see "Viewing the Caller ID appears in the display. List"... -
Page 55: Multi-Handset Features
Multi-Handset Features The features in this section require a minimum of two handsets to operate. To add additional handsets to your system, see "Expanding Your Phone" on page 13. Using the DirectLink Mode In DirectLink Mode, a pair of handsets can function as two-way radios. - Page 56 DirectLink call 1) When the phone is in DirectLink standby mode, press the DirecLink soft key (example of DirectLink from handset #1). 2) Select the handset to which you wish to DirectLink with by pressing the number keys (0-9). Your handset will then page the other handset.
-
Page 57: Intercom
Intercom The intercom feature lets you communicate with another handset or the base without using the phone line. Making an Intercom Page From a handset 1) With the phone in standby mode, press intcom/hold. 2) Use vol/ /cid or vol/ or the handset you want to talk with, and then press the OK soft key. -
Page 58: Call Transfer Feature
From a handset 1) Pick up the handset from the cradle. (If AutoTalk is enabled, the handset will note automatically answers when you pick it up. Or if Any Key Answer is enabled, pressing a number key, 2) Press talk/flash, intcom/hold, or the ANSWER soft key. •If all handsets and the base are paged, only the first party to... -
Page 59: Answering A Call Transfer Page
To cancel the transfer, press talk/flash, the CANCEL soft key or speaker on the initiating handset. From the base 1) During a call, press intercom/hold on the base. The line soft key (LINE1 or LINE2) to be placed on hold will flash. The Call will be put on hold. 2) Use volume/ or volume/ to, and then press the OK soft key. -
Page 60: Room/Baby Monitor
Room/Baby Monitor note This feature allows you to monitor sounds in another room. Place the base or a handset in the room you wish to monitor; it will function as a microphone. A second handset can be set •This feature only works when both handsets to function as a remote speaker, allowing you are within the range of... -
Page 61: Note On Power Sources
When the operating time becomes short, even after a battery is recharged, please replace the battery. With normal usage, your battery should last about one year. Please contact your place of purchase or the Uniden Parts Department for a replacement battery. -
Page 62: Low Battery Alert
Low battery alert When the battery pack is very low, the phone is programmed to eliminate functions note in order to save power. The battery pack needs to be charged when: Even when the battery - The empty battery icon appears. pack is not being used, L ow B a tt e ry it will gradually... -
Page 63: General Information
Battery part number: BT-446 Capacity: 800mAh, 3.6V • To avoid damage to the phone use only Uniden AD-0006 and BT-446 with your phone. • If the handset is left off of the base, the actual Talk mode duration will be reduced respective to the amount of time the handset is off the base. -
Page 64: Troubleshooting
Troubleshooting If your phone is not performing to your expectations, please try these simple steps first. Symptom • Make sure the AC adapter is plugged into the base or the charger (if you have more than one The charge LED won't illuminate when the handset is placed in •... - Page 65 Symptom • The handset was picked up before the second ring. • The call was placed through a switchboard. The Caller ID does not display. • Call your local telephone company to verify your Caller ID service is current. There may be a problem with your Caller ID service.
-
Page 66: Liquid Damage
DO NOT use a microwave oven to speed up the drying process. This will cause permanent damage to the handset, base and the microwave oven. After following these steps, if your cordless telephone does not work, please send to: Uniden America Corporation Parts and Service Division 4700 Amon Carter Blvd. -
Page 67: Precautions & Warranty
Changes or modifications to this product not expressly approved by Uniden, or operation of this product in any way other than as detailed by the owner's manual, could void your authority to operate this product. -
Page 68: One Year Limited Warranty
Uniden service center for a defect or malfunction covered by this warranty, (E) used in any conjunction with equipment or parts or as part of any system not manufactured by Uniden, or (F) installed or programmed by anyone other than as detailed by the owner's manual for this product. -
Page 69: I.c. Notice
I.C. Notice TERMINAL EQUIPMENT NOTICE: This equipment meets the applicable Industry Canada Terminal Equipment Technical Specifications. This is confirmed by the registration number. The abbreviation, IC, before the registration number signifies that registration was performed based on a Declaration of Conformity indicating that Industry Canada technical specifications were met. -
Page 70: Index
Index 20 ring options ... . . 20 Animation screen ... . 24 Anykey Answer ....22 Area Code . -
Page 71: Main Menu Flow Chart
Main Menu Flow Chart •From standby mode •Base •Handset MENU w w w . u n i d e n . c o m MENU ∨ ∨ ∧ ∧ Enter ∨ ∨ M A I N M E N U F L O W C H A R T [ 7 0 ] ∨... - Page 72 •Base •Handset ∨ ∨ ∧ ∧ ∨ ∨ [ 7 1 ] M A I N M E N U F L O W C H A R T w w w . u n i d e n . c o m...
-
Page 73: Memory List
Memory List Name Phone No. w w w . u n i d e n . c o m Name Phone No. Name Phone No. M E M O R Y L I S T [ 7 2 ]... - Page 74 Memo w w w . u n i d e n . c o m [ 7 3 ]...
- Page 75 Having Trouble? Our customer care specialists are here to help you! Visit our website at www.uniden.com or call our Customer Service Hotline at 1-800-297-1023, Mon-Fri, 7 a.m. to 7 p.m. or Sat/Sun, 9 a.m.
- Page 76 T H A N K Y O U F O R B U Y I N G A U N I D E N P R O D U C T. UPZZ01772BA(0) ©2005 Uniden America Corporation, For t Worth, Texas. Contains additional foreign articles. Custom manufactured in China.