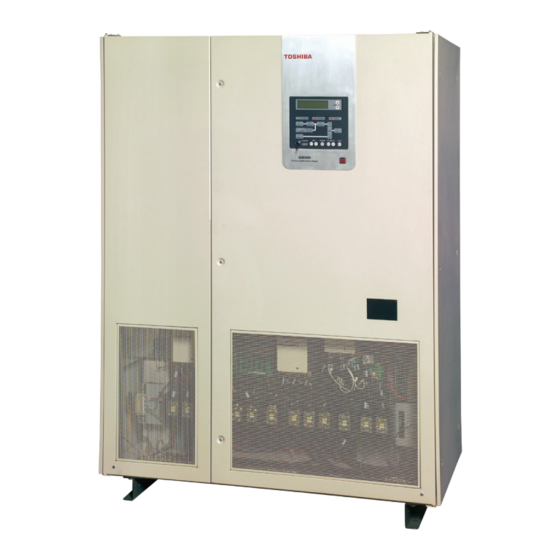
Toshiba G8000 SERIES Installation And Operation Manual
480/480 v 80/100/125/150/225/300/500 kw
Hide thumbs
Also See for G8000 SERIES:
- Dimensions (1 page) ,
- Installation manual (41 pages) ,
- Installation and operation manual (74 pages)
Table of Contents

Related Manuals for Toshiba G8000 SERIES


Summary of Contents for Toshiba G8000 SERIES
- Page 1 UNINTERRUPTIBLE POWER SYSTEM (UPS) G8000 SERIES INSTALLATION and OPERATION MANUAL 480/480 V 80/100/125/150/225/300/500 kW Document: 61001-002 April 2013 © Copyright 2013 Toshiba International Corporation All rights reserved.
- Page 3 UNINTERRUPTIBLE POWER SYSTEM (UPS) G8000 SERIES INSTALLATION and OPERATION MANUAL 480/480 V 80/100/125/150/225/300/500 kW Document: 61001-002 April 2013 © Copyright 2013 Toshiba International Corporation All rights reserved. G8000 Series Installation and Operation Manual...
-
Page 4: Qualified Personnel Only
“Unintended Usage”). Unintended Usage includes atomic energy control instruments, airplane or spaceship instruments, transportation instruments, traffic signal instruments, combustion control instruments, life support equipment, all types of safety devices, etc. Unintended Usage of Toshiba products listed in this document shall be made at the customer’s own risk. - Page 5 Unless otherwise specified, the warranty period for the UPS or UPS part is 12 months from the shipment date (see Toshiba International Corporation bill of lading). Unless otherwise specified, the warranty period for a UPS battery is 36 months from the shipment date (see Toshiba International Corporation Bill of Lading for shipping date). JOB NUMBER MODEL NUMBER...
- Page 6 Toshiba International Corporation reserves the right, without prior notice, to update information, make product changes, or discontinue any product or service identified in this publication. Toshiba is a registered trademark of the Toshiba Corporation. All other product or trade references appearing in this manual are registered trademarks of their respective owners.
-
Page 7: Table Of Contents
Storage/Operating Environment ..................23 Operating Precautions ....................23 Maintenance Precautions ....................25 Disposal ........................26 Installation..........................27 10.1 Unpacking ........................28 10.2 UPS Clearance ......................28 10.3 Anchor Bolts .......................29 UPS Wiring .........................30 11.1 80/100/125 kVA Terminal Blocks and Power Cables ...........32 G8000 Series Installation and Operation Manual... - Page 8 Types of Errors ......................70 15.2 Faults and Warnings Data Screen ................71 15.3 LCD Fault & Warning Displays ...................72 15.4 Fault Messages ......................73 15.5 LCD Scroll (w/ faults or warnings) ................75 15.6 Restoring UPS Operation ..................76 G8000 Series Installation and Operation Manual...
- Page 9 100kVA IPG ...........................82 125kVA IPG ...........................85 150kVA IPG ...........................88 225kVA IPG ...........................91 300kVA IPG ...........................94 500kVA IPG ...........................97 Appendix B - Outline Drawings ....................101 Appendix C - 500kVA Input- and Output- Cabinet Joining Instructions .......105 G8000 Series Installation and Operation Manual...
- Page 10 G8000 Series Installation and Operation Manual...
-
Page 11: Introduction
• Safety Precautions • Installation Precautions Please read the G8000 Series Operation Manual for important instructions on operating the UPS. This manual and the accompanying drawings should be considered a permanent part of the equipment and should be readily available for reference and review. Dimensions shown in the manual are in metric and/or the English customary equivalent. -
Page 12: General Safety Instructions
Ground Symbol indicates the location of the equipment grounding conductor. Electrical - Voltage & Shock Hazard Symbol indicates parts inside may cause electric shock. Explosion Hazard Symbol indicates parts may explode. G8000 Series Installation and Operation Manual... -
Page 13: Signal Words
• Be trained in the proper care and use of protective equipment such as safety shoes, rubber gloves, hard hats, safety glasses, face shields, flash clothing, etc., in accordance with established safety practices. G8000 Series Installation and Operation Manual... -
Page 14: Factory Authorized Personnel
For further information on workplace safety visit www.osha.gov. Factory Authorized Personnel Factory authorized personnel have been factory trained and certified to install, service, and repair the UPS. Contact the Toshiba Customer Support Center for assistance in locating the factory authorized personnel nearest you. Important Safety Instructions The following contains important instructions that should be followed during the installation, operation, and maintenance of the G8000 Series UPS. -
Page 15: Safety Precautions
(computer, personal equipment, office equipment, measuring equipment, industrial robotics, domestic appliances, etc.). These Toshiba products are neither intended nor warranted for use in equipment that, if a malfunction or failure occurs, may result in loss of human life or bodily injury (collectively referred to as “Unintended Usage”). -
Page 16: General Maintenance
Use a vacuum cleaner to clean the UPS. Only factory authorized personnel sould perform internal general maintenance on the UPS. Contact the authorized Toshiba Customer Support Center or an authorized Toshiba representative for informaton on proper disposal of UPS components. - Page 17 - Do not swing or tilt the UPS when lifting and/or transporting. See manual for complete details. FORKS (4 Ft. Minimum length) WARNING: Risk of tipping. For safe handling, lift from back and sides only (as shown above) G8000 Series Installation and Operation Manual...
-
Page 18: Inspection/Storage
• Locations that are subject to extreme temperature changes or high humidity • Locations that are subject to high levels of dust or metal particles • Locations that are subject to excessive vibration • Inclined floor surfaces G8000 Series Installation and Operation Manual... -
Page 19: Installation Precautions
Electrical shock, injury or UPS failure may occur if non-authorized technicians attempt to modify or relocate the UPS. Please contact Toshiba Customer Support Center if you plan to move or make modifications to the UPS G8000 Series Installation and Operation Manual... - Page 20 UPS unit is switched to AC Bypass mode and the UPS control panel display verifies the unit is Bypass mode. Switching to the external bypass while the unit is in UPS mode may damage the UPS. G8000 Series Installation and Operation Manual...
- Page 21 6) DO NOT install the UPS in areas near sources of electrical noise. Ensuring a proper earth ground will reduce the effects of electrical noise and will reduce the potential for electrical shock. G8000 Series Installation and Operation Manual...
- Page 22 3) Always ground the unit to reduce the potential for electrical shock and to help reduce electrical noise. 4) A separate ground cable should be run inside the conduit with the input power, output power, and control circuits. G8000 Series Installation and Operation Manual...
-
Page 23: Wiring/Connection
NOTICE Follow the torque criteria for tightening screws. Loose connections may cause fire due to heating. See Chapter 11 - UPS Wiring G8000 Series Installation and Operation Manual... -
Page 24: Warning Labels
4.3, Transporting/Unpacking, are in the manual packet, and attached to the UPS shipping cover- ing and shipping pallet. NOTICE Make sure all the warning labels are installed in the appropriate locations. If a label is missing or illegible, contact Toshiba Customer Support Center or an authorized representative. 48082 40308... -
Page 25: Warning Label Locations
(control power source switch) Risk of electrical shock. Do not turn off while operating. Disconnect UPS and electrically test heat sink before touching. PN 40831 Warning Label Locations FIGURE 6.2 – 80/100/125 KVA UPS WARNING LABELS G8000 Series Installation and Operation Manual... - Page 26 FIGURE 6.3 – 150/225 KVA UPS WARNING LABELS FIGURE 6.4 - 300 KVA UPS WARNING LABELS G8000 Series Installation and Operation Manual...
- Page 27 FINAL LAYOUT NOT AVAILABLE AT THIS TIME: CONTACT THE FACTORY FOR ADDITIONAL INFORMATION FIGURE 6.3 – 500 KVA UPS WARNING LABELS G8000 Series Installation and Operation Manual...
-
Page 28: Weight And Dimensions
300 kVA 4575 lb. (2075 kg) 4725 lb. (2143 kg) 500 kVA (Input Cabinet) 1570 lb. (712 kg) ~1620 lb. (735 kg) 500 kVA (Output Cabinet) 4950 lb. (2245 kg) ~5100 lb. (2313 kg) 1 - Weights are approximate. G8000 Series Installation and Operation Manual... -
Page 29: Transporting
UPS. (See Figure 4.1 Exterior Handling label.) The UPS may be packed in a crate for extra protection during transportation. Avoid impact or vibration against the UPS during transportation. DO NOT expose the UPS directly to water. G8000 Series Installation and Operation Manual... -
Page 30: Transporting By Crane
FIGURE 8.2 - ANGLE MORE THAN 60° FIGURE 8.3 - UNEVEN CABLES FIGURE 8.4 - ACCEPTABLE OPERATION FIGURE 8.5 - UNACCEPTABLE OPERATION FIGURE 8.4 - ACCEPTABLE OPERATION FIGURE 8.5 - UNACCEPTABLE OPERATION G8000 Series Installation Manual G8000 Series Installation and Operation Manual... -
Page 31: Transporting By Forklift
Insert the forks here Secure the forks against the base then lift 300 kVA Base Insert the forks here Secure the forks against the base then lift FIGURE 8.6 -TRANSPORTING 80-300 KVA UPS BY FORKLIFT G8000 Series Installation and Operation Manual... - Page 32 Insert the forks here. Secure forks against Secure forks against the base and then lift. the base and then lift. FIGURE 8.7 -TRANSPORTING 500 KVA UPS BY FORKLIFT See Appendix C for cabinet mating insturctions) G8000 Series Installation and Operation Manual...
-
Page 33: Storage/Operating Environment
Initial startup/comisioning of the UPS should be performed by factory authorized personnel. 1) The UPS should not be powered up until the entire operation manual has been read. 2) The voltage of the input power source must be within the rated input voltage range. The G8000 Series Installation and Operation Manual... - Page 34 UPS. 4) If using the UPS to provide power to motors that require high starting current or with motors that require a long starting time, call Toshiba support for guidance in over sizing the UPS for lock rotor current.
-
Page 35: Maintenance Precautions
3) The maximum ambient operating temperature is 86 °F (30 °C) at 1.0 PF, and 104 °F (40 °C) at 0.8 PF. 4) Only factory authorized personnel should service the UPS. Contact Toshiba for the the nearest authorized service center. -
Page 36: Disposal
It is illegal to dump lead-acid batteries in landfills or dispose of them improperly. Please help protect the Earth by contacting the environmental protection agencies in your area, the battery manufacturer, or call Toshiba toll-free at (877) 867-8773 for more information about recycling batteries. -
Page 37: Installation
UPS to move it. Always use a crane, forklift, or pallet jack for transporting and positioning the UPS. Pushing/pulling on the sides of the unit to move it may result in damage to the UPS. See Figure 4.1 Exterior Handling label. G8000 Series Installation and Operation Manual... -
Page 38: Unpacking
Unpack the UPS indoors on a paved floor. The UPS should be as close as possible to its final storage location. Overhead traveling cranes should be used to unpack any G8000 Series UPS. If an overhead traveling crane is not available, allow enough space for forklift operations to unpack the UPS crate. Then remove the crate. -
Page 39: Anchor Bolts
29.7 in. (755 mm) 33.9 in. 20.0 in. 22.4 in. 20.0 in. (862 mm) (508 mm) (568 mm) (508 mm) 12 x 0.5 in. - Dia. (12 mm) FIGURE 10.3 HOLE LOCATIONS/DIMENSIONS ON BOTTOM OF UPS G8000 Series Installation and Operation Manual... -
Page 40: 11 Ups Wiring
FIGURE 11.1 - EXTERNAL WIRING DIAGRAM An external maintenance bypass may be installed in parallel with the UPS to allow servicing of the G8000 while maintaining power to the UPS load. Contact the Toshiba Customer Service for further information. G8000 Series Installation Manual... - Page 41 FIGURE 11.1 - EXTERNAL WIRING DIAGRAM An external maintenance bypass may be installed in parallel with the UPS to allow servicing of the G8000 while maintaining power to the UPS load. Contact the Toshiba Customer Service for further information. G8000 Series Installation Manual...
-
Page 42: 11.1 80/100/125 Kva Terminal Blocks And Power Cables
Recommended external cable sizes for both 75 °C and 90 °C copper wire for a single battery string are listed in Table 11.1–11.2. For two or more battery strings consult with Toshiba Technical Support. Ensure that your installation adheres to local and NEC electrical codes. - Page 43 Maximum cable size for terminal lugs 1-11: 2 x 6 to 2/0 AWG; Battery Terminals 12-13: 2 x 6 AWG to 350 kcmil. Cable sized for neutral current=1.7Xphase current. Size cable appropriate to actual load type: balanced, unbalanced, non-linear. G8000 Series Installation and Operation Manual...
-
Page 44: 150, 225, 300, And 500 Kva Buss Strip Terminals And Power Cables
Note: Contact the factory if using more than one battery string, flywheel, or combination battery and flywheel. – AC INPUT BATTERY BYPASS INPUT AC OUTPUT 3-phase 3-wire 3-phase 4-wire 3-phase 4-wire FIGURE 11.6 - TERMINAL BUSS ARRANGEMENT FOR 300 KVA UPS G8000 Series Installation and Operation Manual... - Page 45 For UPS’ equipped with buss strip terminals for the A/C INPUT, BYPASS INPUT, A/C OUTPUT and BATTERY connections, Toshiba recommends using the compression lugs listed in Table 11.3, or their equivalent, for cable terminations to be mounted on the bus strips.
- Page 46 Recommended external cable sizes for both 75 °C and 90 °C copper wire for minimum battery configurations are listed in Table 11.4–11.7. For extended runtime battery strings configurations consult with Toshiba Technical Support. Ensure that your installation adheres to local and NEC electrical codes.
- Page 47 (2) AWG 2/0 (2) AWG 2/0 300 in.-lb. (33.9 N•m) One battery string. (Consult factory if using more than one battery string.) Fastener torque specified for: 1/2 in. diameter grade 5 steel bolt. Per flywheel unit G8000 Series Installation and Operation Manual...
- Page 48 (3) 400 kcmil – (3) 500 kcmil 540 in.-lb. (61 N•m) Fastener torque specified for: 1/2 in. diameter grade 5 steel bolt. Cable sized for neutral current=1.7Xphase current. Size cable appropriate to actual load type: balanced, unbalanced, non-linear. Ground cables G8000 Series Installation and Operation Manual...
-
Page 49: Ups Power Cable Conduit Landing Plates
Order in Top Conduit WIRES 23.74 in. Landing Plate BASE PLATES - DIMENSIONS UPS BASE BOTTOM ENTRY DIMENSIONS 5.9 in. FRONT OF UPS 23.73 in. 5.9 in. FIGURE 11.9 - BOTTOM CONDUIT LANDING PLATES FOR 80/100/125 KVA G8000 Series Installation and Operation Manual... - Page 50 Order in Top Conduit Landing Plate BATTERY TOP ENTRY DIMENSIONS AC OUT- BYPASS 0.7 in. 4.36 in. FRONT OF UPS INPUT 0.7 in. FIGURE 11.11 - TOP ACCESS CONDUIT LANDING PLATE (150 AND 225 KVA ONLY) G8000 Series Installation and Operation Manual...
- Page 51 28.0” X 6.3” (711 MM X 161 MM) 28.0” X 6.3” (711 MM X 161 MM) 28.0” X 6.3” (711 MM X 161 MM) FIGURE 11.13 - TOP CONDUIT LANDING PLATES FOR THE 500 KVA UPS G8000 Series Installation and Operation Manual...
-
Page 52: External Breakers
The ground wire must have a crimp terminal with a 1/2 in. (12 mm) diameter bolt hole. The ground bus has 33/64 in. (13 mm) bolt hole. The connect the crimp terminal and ground bus together using a 7/16 in. (10 mm) diameter bolt. G8000 Series Installation and Operation Manual... - Page 53 To facility earth ground G8000 - 500 kVA Ground 10 mm or 7/16 in. Bolt 12 mm or 1/2 in. Terminal AWG 1/0 (50 mm ground wire FIGURE 11.14 - EARTH GROUND WIRE CONNECTIONS G8000 Series Installation and Operation Manual...
-
Page 54: Control Wires
72B Aux. Contact Auxiliary A-contact Output External EPO Ext EPO (Customer) N.O. Contacts Output External EPO Ext EPO (Customer) N.O. Contacts Note: All control wiring should be #18 AWG (0.823 mm ) or larger. G8000 Series Installation and Operation Manual... -
Page 55: Grounding Configuration
The neutral line at the input source is usually grounded. The neutral terminal in the UPS cabinet should be disconnected from the ground bus. The neutral connection for the UPS bypass input should be grounded. G8000 Series Installation and Operation Manual... - Page 56 < UPS Cabinet > Output Distribution Remove φ φ φ Jumper φ Cable φ φ φ φ To the Load FIGURE 11.17 - JUMPER CABLE BETWEEN THE NEUTRAL TERMINAL & GROUND BUS G8000 Series Installation and Operation Manual Remove Jumper Cable...
- Page 57 φ Remains in Place φ φ φ To the Load FIGURE 11.19 - GROUNDING CONFIGURATION FOR NON-GROUNDED DELTA-INPUT Remove Input Source Jumper Cable < UPS Cabinet > Output Distribution G8000 Series Installation and Operation Manual φ φ φ φ φ...
- Page 58 Figure 11.20. Input Source < UPS Cabinet > Output Distribution φ φ φ φ φ φ φ φ To the Load Remove Jumper Cable FIGURE 11.20 - GROUNDING CONFIGURATION WITH CORNER-GROUNDED DELTA-INPUT. G8000 Series Installation and Operation Manual...
-
Page 59: Ups Specifications
292 A 359 A 365 A 533 A 805 A 1073 A 1193 A Battery Capacity 88 kWB 108 kWB 110 kWB 160 kWB 242 kWB 323 kWB 478 kWB Required for Full Load Output G8000 Series Installation and Operation Manual... - Page 60 (1159 kg) (1392 kg) (2143 kg) Floor Loading 210 Lbs/ft² 210 Lbs/ft² 203 Lbs/ 245 Lbs/ft² 240 Lbs/ft² 247 Lbs/ft² (1023 kg/m2) (1023 kg/m2) ft² (990 kg/ (1196 kg/ (1173 kg/ (1204 kg/m²) m²) G8000 Series Installation and Operation Manual...
-
Page 61: Model Number
SNMP; Modbus RTU; Modbus TCP; BACNET, METASYS ing (Optional) Display LCD Touch Panel for Local Monitoring, Operation and control Emergency Power Included Config- Input Conv. 6-diode Bridge Rectifier uration Battery Cct IGBT Chopper Out. Inv. IGBT Converter with PWM G8000 Series Installation and Operation Manual... -
Page 62: Typical Efficiency Vs. Load
91.7% 92.3% 93.3% 225 kVA 87.9% 91.9% 92.3% 91.9% 300 kVA 88.8% 91.6% 92.2% 92.8% 500 kVA 91.6% 91.1% 90.2% 93.3% * Actual efficiency may differ due to manufacturing variations and input power quality. G8000 Series Installation and Operation Manual... -
Page 63: Operator Interface
UPS LED “ON” when the inverter output is connected to the UPS output. AC OUTPUT LED “ON” with AC output connected to the bypass/inverter sources. BYPASS LED “ON” when the bypass power supplies the load G8000 Series Installation and Operation Manual... -
Page 64: Key-Switch And Buttons
The key-switch and operating buttons on the graphic display panel are shown in Figure 13.1. See the sections titled “Key-switch” and “Operating buttons” for each function. FIGURE 13.1 – GRAPHIC DISPLAY PANEL KEY-SWITCH/OPERATING BUTTONS G8000 Series Installation and Operation Manual... -
Page 65: Lcd/Led Indicators
13.2 LCD/LED Indicators FIGURE 13.2 – GRAPHIC DISPLAY PANEL LCD/LED INDICATORS G8000 Series Installation and Operation Manual... -
Page 66: Lcd Indicators
Displays detailed data when a fault occurs. Warning Display Displays detailed data when a warning occurs. NORMAL DISPLAY SCROLL UP FAULT DISPLAY SCROLL DOWN WARNIG DISPLAY FIGURE 13.3 - CHANGING SCREENS WITH SCROLL BUTTONS G8000 Series Installation and Operation Manual... -
Page 67: Normal Display
SYNC. MEASUREMENT SCREENS O/P VOLTAGE Output Voltage: Shows the output line-to-line output voltage. VOLT. 480[V] FREQ. 60.0[Hz] O/P CURRENT (R.M.S.) Output Current: Shows the RMS output current (%) for each phase.. 50[%] 50[%] 50[%] G8000 Series Installation and Operation Manual... - Page 68 Date is displayed in the mm-ddyyy format. The unit does not calculate daylight savings time. TIME 03-24-06 13:58 Time is displayed in the 24-hour format (e.g. 1:58 P.M. = 1358 Hrs.) G8000 Series Installation and Operation Manual...
-
Page 69: Fault Display
09-09-06 08:05:30 ↓ANOTHER ITEM FAULTS & WARNINGS This screen is displayed if there are no warnings recorded, or after the reset button is pressed. NO ALARM NO WARNING G8000 Series Installation and Operation Manual... -
Page 70: Lcd Scroll
VOLT. 480[V] BATT-V 400[V] FREQ. 60.0[HZ] BATT- I 0[A] O/P CURRENT (R.M.S.) BATTERY 50[%] BACK-UP RATING 10[MIN] 50[%] DISCHARGING 15[MIN] 50[%] O/P CURRENT (PEAK) AC INPUT 50[%] AC I/P-V 480[V] 50[%] FREQ. 60.0[HZ] 50[%] G8000 Series Installation and Operation Manual... -
Page 71: Operating The Ups
If the UPS produces smoke or smells strange, immediately turn off all AC and DC input circuit breakers. Continued operation may result in fire. Contact Toshiba or Authorized representatives. DO NOT turn off the control power supply switch (8A) during UPS operation. -
Page 72: Operation Types
2. Make sure the temperature in the UPS/Battery room is within specified limits. 3. Before starting the UPS, check the power source to make sure AC input power is on. 4. Make sure battery breaker’s auxiliary A-contact is connected to the terminal block TB1. G8000 Series Installation and Operation Manual... -
Page 73: Startup Procedures
Press the “RUN” button for at least 0.5 seconds. UPS STARTING WAIT FOR A WHILE CONVERTER LED is “ON” and INVERTER LED flashes. INVERTER AC INPUT CONVERTER FLOAT CHARGE EQUAL CHARGE SWITCH BATTERIES DISCHARGE AC OUTPUT BYPASS BYPASS INPUT G8000 Series Installation and Operation Manual... - Page 74 If the AC switch does not function, contact Toshiba or authorized representatives. If the bypass power source is out of specification, this operation will be inhibited. In order to switch manually, press the “UPS” button for 5 seconds or more. G8000 Series Installation and Operation Manual...
-
Page 75: Switch Power Supply (Ups To Bypass)
To change from Bypass to UPS supply, follow EQUAL CHARGE SWITCH BATTERIES the Startup Procedures - STEP 5. DISCHARGE AC OUTPUT If the AC switch does not function, contact BYPASS Toshiba or authorized representatives. BYPASS INPUT G8000 Series Installation and Operation Manual... -
Page 76: Stop
AC OUTPUT LED are “OFF”. BYPASS BYPASS INPUT STEP 3 BYPASS Wait until procedure is completed. PRESS ‘RUN’ SWITCH INVERTER CONVERTER AC INPUT FLOAT CHARGE EQUAL CHARGE SWITCH BATTERIES AC OUTPUT DISCHARGE BYPASS BYPASS INPUT G8000 Series Installation and Operation Manual... -
Page 77: Complete Shutdown
Be sure to perform the procedure as STEP 6 specified in this manual. Turn off all breakers at AC Input, Bypass Input, and AC Output. Shutdown is completed and UPS is isolated. G8000 Series Installation and Operation Manual... -
Page 78: Changing Between Float Charge And Equalize Charge
This should be done once every six months if possible. The G8000 UPS will automatically perform the equalize recharge after battery backup operation. G8000 Series Installation and Operation Manual... -
Page 79: Changing To Float Charge From Protection Charge (If Applicable)
(about 24 hours), this mode will automatically be changed back to float charge. Thus, it is not usually required to change the recharge mode manually back to the float charge. G8000 Series Installation and Operation Manual... -
Page 80: Emergency Power Off (Epo)
An error or a phenomena related to an error occurred. Since this problem does not directly affect operation, the system switches to synchronized mode. (Guidance) An error or indication of an error has occurred, but operation was not affected. G8000 Series Installation and Operation Manual... -
Page 81: Faults And Warnings Data Screen
Indicates whether there is a fault screen before or after this screen. Indicates there is a fault screen before this screen. Scroll Indicator ↓ Indicates there is a fault screen after this screen. ↓ Indicates there are fault screens before and after this screen. G8000 Series Installation and Operation Manual... -
Page 82: Lcd Fault & Warning Displays
FAULTS & WARNINGS 1 FUSE BLOWN 09-09-06 08:05:30 FIGURE 15.2 - FAULT DISPLAY UPS SUPPLY AC-VO 480[V] AC- I O 50[%] FAULTS & WARNINGS 1 UPS OVERLOAD 09-09-06 08:05:30 FIGURE 15.3 - WARNING DISPLAY G8000 Series Installation and Operation Manual... -
Page 83: Fault Messages
AC INPUT UNDERVOLTAGE - AC INPUT VOLTAGE IS TOO LOW. AC PHASE ERR AC INPUT PHASE ROTATION ERROR. AC I/P OV AC INPUT OVERVOLTAGE - AC INPUT VOLTAGE IS TOO HIGH. I/P FREQ. ERR AC INPUT FREQUENCY ERROR. G8000 Series Installation and Operation Manual... - Page 84 BYPASS ASY. Bypass input frequency error. TABLE 15.7 - WARNING (GUIDANCE) Item LCD Message Indication Description BATT. OVER HEAT Battery temperature is too high. 80B1 BATT. UV (ALM) Battery voltage is near cutoff voltage. G8000 Series Installation and Operation Manual...
-
Page 85: Lcd Scroll (W/ Faults Or Warnings)
Function SCROLL UP Scrolls to the previous screen. SCROLL DOWN Scrolls to the following screen. Resets the UPS faults and warnings shown on the LCD and deletes fault history data stored in RESET memory. G8000 Series Installation and Operation Manual... -
Page 86: Restoring Ups Operation
Electric shock, personal injury or fault may result if unauthorized personnel attempt to modify or relocate the UPS. Be sure to contact toshiba customer service if you need to modify or relocate the UPS. Do not open the front and/or rear panels. -
Page 87: Periodic Maintenance/Parts Replacement
Aluminum electrolytic capacitors: Replace once every 7-10 years. • Fuses: Replace once every 7-10 years • Cooling fan: Replace once every 7-10 years • Batteries (If applicable): See the Backup Battery Cabinet manual for specific test, maintenance and replacement instructions. G8000 Series Installation and Operation Manual... - Page 88 G8000 Series Installation and Operation Manual...
-
Page 89: Appendix A - Installation Planning Guides
10. DC wires should be sized to allow not more than a 2-volt Fax: (713) 896-5212 drop at maximum discharge current. Web Site: www.toshiba.com/ind 11. Weights do not include batteries or other auxiliary equipment external to the UPS. Rev. 2.2 Page 1 of 3 G8000-IPG-80kVA G8000 Series Installation and Operation Manual... - Page 90 G8000 Series UPS TOSHIBA Installation Planning Guide for 80kVA UPS Standard System: 480V Input, 480Y/277V Output (P/N T80S3K08KK6XSxx) G8000 80KVA OUTLINE DRAWING G8000 80kVA UPS Cabling Connection Dimensions Rev. 2.2 Page 2 of 3 G8000-IPG-80kVA G8000 Series Installation and Operation Manual...
- Page 91 Use 1/2” (12mm) diameter anchor bolts. The UPS base has four pre-drilled 5/8” (16 mm) holes provided. See the figure below for dimensions and locations. Anchorage Pattern for G8000 80kVA UPS Rev. 2.2 Page 3 of 3 G8000-IPG-80kVA G8000 Series Installation and Operation Manual...
-
Page 92: 100Kva Ipg
10. DC wires should be sized to allow not more than a 2-volt Fax: (713) 896-5212 drop at maximum discharge current. Web Site: www.toshiba.com/ind 11. Weights do not include batteries or other auxiliary equipment external to the UPS. Rev. 2.2 Page 1 of 3 G8000-IPG-100kVA G8000 Series Installation and Operation Manual... - Page 93 G8000 Series UPS TOSHIBA Installation Planning Guide for 100kVA UPS Standard System: 480V Input, 480Y/277V Output (P/N T80S3K10KK6XSxx) G8000 100kVA UPS Cabling Connection Dimensions G8000 100KVA OUTLINE DRAWING Rev. 2.2 Page 2 of 3 G8000-IPG-100kVA G8000 Series Installation and Operation Manual...
- Page 94 Use 1/2” (12mm) diameter anchor bolts. The UPS base has four pre-drilled 5/8” (16 mm) holes provided. See the figure below for dimensions and locations. Anchorage Pattern for G8000 100kVA UPS Rev. 2.2 Page 3 of 3 G8000-IPG-100kVA G8000 Series Installation and Operation Manual...
-
Page 95: 125Kva Ipg
10. DC wires should be sized to allow not more than a 2-volt Fax: (713) 896-5212 drop at maximum discharge current. Web Site: www.toshiba.com/ind 11. Weights do not include batteries or other auxiliary equipment external to the UPS. Rev. 0 Page 1 of 3 G8000-IPG-125kVA 0.8PF G8000 Series Installation and Operation Manual... - Page 96 G8000 Series UPS TOSHIBA Installation Planning Guide for 125kVA UPS Standard System: 480V Input, 480Y/277V Output (P/N T80S3K12KK6XS2xx) G8000 125KVA OUTLINE DRAWING G8000 100kVA UPS Cabling Connection Dimensions Rev. 0 Page 2 of 3 G8000-IPG-125kVA 0.8PF G8000 Series Installation and Operation Manual...
- Page 97 Use 1/2” (12mm) diameter anchor bolts. The UPS base has four pre-drilled 5/8” (16 mm) holes provided. See the figure below for dimensions and locations. Anchorage Pattern for G8000 100kVA UPS Rev. 0 Page 3 of 3 G8000-IPG-125kVA 0.8PF G8000 Series Installation and Operation Manual...
-
Page 98: 150Kva Ipg
10. DC wires should be sized to allow not more than a 2-volt Fax: (713) 896-5212 drop at maximum discharge current. Web Site: www.toshiba.com/ind 11. Weights do not include batteries or other auxiliary equipment external to the UPS. Rev. 2.2 Page 1 of 3 G8000-IPG-150kVA G8000 Series Installation and Operation Manual... - Page 99 G8000 Series UPS TOSHIBA Installation Planning Guide for 150kVA UPS Standard System: 480V Input, 480Y/277V Output (P/N T80S3K15KK6XSxx) G8000 150kVA UPS Cabling Connection Dimensions Rev. 2.2 Page 2 of 3 G8000-IPG-150kVA G8000 Series Installation and Operation Manual...
- Page 100 Use 1/2” (12mm) diameter anchor bolts. The UPS base has four pre-drilled 5/8” (16 mm) holes provided. See the figure below for dimensions and locations. Anchorage Pattern for G8000 150kVA UPS Rev. 2.2 Page 3 of 3 G8000-IPG-150kVA G8000 Series Installation and Operation Manual...
-
Page 101: 225Kva Ipg
10. DC wires should be sized to allow not more than a 2-volt Fax: (713) 896-5212 drop at maximum discharge current. Web Site: www.toshiba.com/ind 11. Weights do not include batteries or other auxiliary equipment external to the UPS. Rev. 2.3 Page 1 of 3 G8000-IPG-225kVA G8000 Series Installation and Operation Manual... - Page 102 G8000 Series UPS TOSHIBA Installation Planning Guide for 225kVA UPS Standard System: 480V Input, 480Y/277V Output (P/N T80S3K22KK6XSxx) G8000 225kVA UPS Cabling Connection Dimensions Rev. 2.3 Page 2 of 3 G8000-IPG-225kVA G8000 Series Installation and Operation Manual...
- Page 103 Use 1/2” (12mm) diameter anchor bolts. The UPS base has four pre-drilled 5/8” (16 mm) holes provided. See the figure below for dimensions and locations. Anchorage Pattern for G8000 225kVA UPS Rev. 2.3 Page 3 of 3 G8000-IPG-225kVA G8000 Series Installation and Operation Manual...
-
Page 104: 300Kva Ipg
10. DC wires should be sized to allow not more than a 2-volt Fax: (713) 896-5212 drop at maximum discharge current. Web Site: www.toshiba.com/ind 11. Weights do not include batteries or other auxiliary equipment external to the UPS. Rev. 2.3 Page 1 of 3 G8000-IPG-300kVA G8000 Series Installation and Operation Manual... - Page 105 G8000 Series UPS TOSHIBA Installation Planning Guide for 300kVA UPS Standard System: 480V Input, 480Y/277V Output (P/N T80S3K30KK6XSxx) G8000 Series Installation and Operation Manual G8000 300kVA UPS Cabling Connection Dimensions...
- Page 106 Install anchor bolts to secure the UPS to the floor. Use 1/2” (12mm) diameter anchor bolts. TheUPS base has eight pre-drilled 5/8” (16 mm) holes provided. See the figure below for dimensions and locations. Anchorage Pattern for G8000 300kVA UPS G8000 Series Installation and Operation Manual...
-
Page 107: 500Kva Ipg
10. DC wires should be sized to allow not more than a 2-volt Fax: (713) 896-5212 drop at maximum discharge current. Web Site: www.toshiba.com/ind 11. Weights do not include batteries or other auxiliary equipment external to the UPS. Rev. 0.0 Page 1 of 3 G8000-IPG-500kVA G8000 Series Installation and Operation Manual... - Page 108 G8000 Series UPS TOSHIBA Installation Planning Guide for 500kVA UPS Standard System: 480V Input, 480Y/277V Output (P/N T80S3K50KK6XSxx) G8000 300kVA UPS Cabling Connection Dimensions G8000 Series Installation and Operation Manual...
- Page 109 Use 1/2” (12mm) diameter anchor bolts. The UPS base has eight pre-drilled 5/8” (16 mm) holes provided. See the figure below for dimensions and locations. Anchorage Pattern for G8000 500kVA UPS Rev. 0.0 Page 3 of 3 G8000-IPG-500kVA G8000 Series Installation and Operation Manual...
- Page 110 G8000 Series Installation and Operation Manual...
-
Page 111: Appendix B - Outline Drawings
Appendix B - Outline Drawings G8000 Series Installation and Operation Manual... - Page 112 G8000 Series Installation and Operation Manual...
- Page 113 FIGURE B.3 - G8000 300 KVA OUTLINE DRAWING G8000 Series Installation and Operation Manual...
- Page 114 G8000 Series Installation and Operation Manual...
-
Page 115: Appendix C - 500Kva Input- And Output- Cabinet Joining Instructions
4. On Input cabinet: Open the door, remove back panel (retain hardware). See FIG. 3. Insert 1/2-13X1.75” bolt, flat & lock washer assembly (supplied); two in the front and two in the back. See FIG. 4 & FIG. 5. G8000 Series Installation and Operation Manual... - Page 116 7. Insert DC Bus (qty. 2) between the cabinets as shown in FIG. 5 & FIG. 6 and con- nect on corresponding output and input cabinet DC bus using 1/2-13X1.25” bolt, flat, belleville washer and nut (supplied). G8000 Series Installation and Operation Manual...
- Page 117 ENSURE NO LOOSE HARDWARE, METAL SHAVINGS, TOOLS, ETC. ARE LEFT BE- HIND INSIDE THE CABINET. CLOSE THE CABINETS FRONT AND BACK. RECOMMENDED TORQUE VALUES OF 3/8” STEEL BOLT IS 220 IN-LBS, 1/2” STEEL BOLT IS 390 IN-LBS. G8000 Series Installation and Operation Manual...
- Page 118 G8000 Series Installation and Operation Manual...
- Page 120 INDUSTRIAL DIVISION 13131 West Little Your road, Houston, Texas 77041 Tel (713) 466-0277 Fax (713) 466-8773 U.S. (877) 867-8773 Canada (800) 872-2192 Mexico 01/800/527-1204 www.toshiba.com/ind Printed in the U.S.A.