Table of Contents
Advertisement
Quick Links
Advertisement
Table of Contents

Related Manuals for Philips FWM185/55


Summary of Contents for Philips FWM185/55
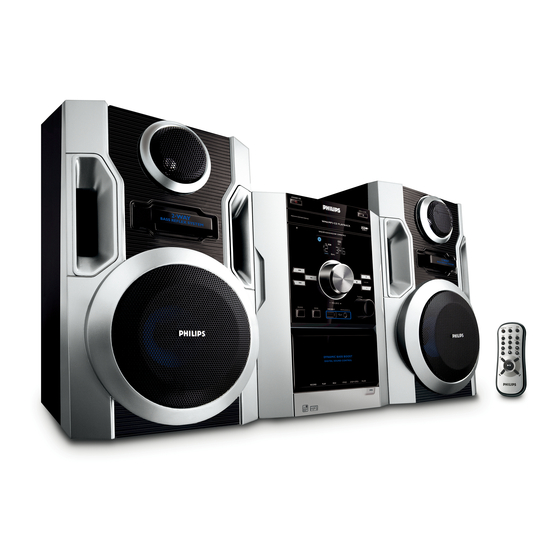
- Page 1 Mini Hi-Fi System FWM185...
- Page 2 País de Origen: China Nº de Serie: LEA CUIDADOSAMENTE ESTE INSTRUCTIVO AVISO IMPORTANTE Philips Mexicana, S.A. de C.V. no se hace responsable por daños o desperfectos causados por: – Maltrato, descuido o mal uso, presencia de insectos o roedores (cucarachas, ratones etc.).
- Page 3 ≤ ™ ¡ £ ≤ ™ &...
- Page 4 English ------------------------------------------------ 6 Español --------------------------------------------- 24 Português ------------------------------------------ 43...
-
Page 5: Table Of Contents
General Information Supplied accessories ... 6 Environmental Information ... 6 Safety information ... 6 Preparation Rear connections ... 7 Optional connection ... 8 Inserting batteries into the remote control ... 8 Controls Controls on the system and remote control ... 9 Basic Functions Switching the system on ... -
Page 6: General Information
General Information IMPORTANT! PLEASE NOTE THAT THE VOLTAGE SELECTOR LOCATED AT THE REAR OF THIS SYSTEM IS PRESET AT 220V FROM THE FACTORY. FOR COUNTRIES THAT OPERATE AT 110V-127V, PLEASE ADJUST TO 110V-127V BEFORE YOU SWITCH ON THE SYSTEM. Supplied accessories –... -
Page 7: Rear Connections
Rear connections The type plate is located at the rear of the system. Power – Before connecting the AC power cord to the wall outlet, ensure that all other connections have been made. – If your system is equipped with a Voltage Selector, set the VOLTAGE SELECTOR to the local power line voltage. -
Page 8: Optional Connection
Preparations Antenna Connection Connect the supplied MW loop antenna to the respective terminal. Adjust the position of the antenna for optimal reception. MW Antenna ● Position the antenna as far as possible from a TV, VCR or other radiation source. Optional connection The optional equipment and connecting cords are not supplied. -
Page 9: Controls On The System And Remote Control
Controls on the system and remote control LCD Display – shows the status of the system. iR SENSOR – infrared sensor for remote control. PROG – programs CD tracks and reviews the program. STANDBY ON y – switches the system on or to normal standby mode. -
Page 10: Basic Functions
Basic Functions IMPORTANT: Before you operate the system, complete the preparation procedures. Switching the system on ● Press STANDBY-ON y. ➜ The system will switch to the last selected source. To switch the system to standby mode ● Press STANDBY-ON y. ➜... -
Page 11: Cd/Mp3/Wma Operation
IMPORTANT: The lens of the CD player should never be touched. Playing a disc This CD player plays Audio Discs including CD- Recordables, CD-Rewritables and MP3 CD. ¶ CD-ROM, CD-I, CDV, VCD, DVD or computer CDs, however, are not possible. Press SOURCE once or more to select CD. -
Page 12: Discs For Playback
CD/MP3/WMA Operation Discs for playback This system can playback all digital audio CD, finalised digital audio CD-Recordable (CDR) discs and finalised digital audio CD-Rewritable (CDRW)discs. MP3-CDs (CD-ROMs with MP3 tracks) Supported MP3 disc formats: – ISO9660, Joliet, UDF 1.5 – Maximum title number: 511 (depending on filename length) –... -
Page 13: Radio Reception
Tuning to radio stations Press SOURCE once or more to select TUNER. Press BAND once or more to select desired waveband: MW, FM MONO or FM ST (stereo). Adjust the TUNING control knob to tune to a desired radio frequency. Note: –... -
Page 14: Tape Operation/Recording
Tape Operation / Recording IMPORTANT! – Before playing a tape, check and tighten slack tape with a pencil. Slack tape may get jammed or may burst in the mechanism. – C-120 tape is extremely thin and is easily deformed or damaged. It is not recommended for use in this system. -
Page 15: Recording From The Radio
To select and record a particular passage within a CD track: ● Press and hold down on REW à or F.FWD á. Release the control when you recognize the passage you want. ● To interrupt CD playback press 2; . ●... -
Page 16: External Sources
External Sources Using a USB mass storage device By connecting a USB mass storage device to the Hi-Fi system, you can enjoy the device's stored music through the powerful speakers of Hi-Fi system. Compatible USB mass storage devices With the Hi-Fi system, you can use: –... -
Page 17: Playing A Usb Mass Storage Device
How to organize your MP3/WMA files on the USB mass storage device This Hi-Fi system will browse the MP3/WMA files in the folders/sub-folders/titles order. Example: Root Title 001 Title 002 Title 003 Album 01 Title 001 Title 002 Title 003 Album 02 Album 03 Title 001... -
Page 18: Clock/Timer
Clock/Timer Setting the clock In standby mode, press and hold CLOCK. ➜ The clock digits for the hours flash. Adjust the VOLUME control knob or press VOLUME 3/4 on the remote control to set the hours. Press CLOCK. ➜ The clock digits for the minutes flash. Adjust the VOLUME control knob or press VOLUME 3/4 on the remote control to set the minutes. -
Page 19: Setting The Timer
Setting the timer ● The system can switch on to CD, TUNER, or USB mode automatically at a preset time, serving as an alarm to wake you up. IMPORTANT! – Before setting the timer, ensure that the clock is set correctly. –... -
Page 20: Specifications
Specifications AMPLIFIER 1 KHz (Low channel - both channels driven) ... 30 W per channel (8 Ω) 10 KHz (High channel - both channels driven) ... 30 W per channel (8 Ω) Total output power ... 120 W Signal-to-noise ratio ... ≥ 62 dBA (IEC) Frequency response ... -
Page 21: Maintenance
Cleaning the disc lens ● After prolonged use, dirt or dust may accumulate at the disc lens. To ensure good playback quality, clean the disc lens with Philips CD Lens Cleaner or any commercially available cleaner. Follow the instructions supplied with cleaner. -
Page 22: Troubleshooting
Troubleshooting WARNING Under no circumstances should you try to repair the system yourself, as this will invalidate the warranty. Do not open the system as there is a risk of electric shock. If a fault occurs, first check the points listed below before taking the system for repair. If you are unable to remedy a problem by following these hints, consult your dealer or service centre. - Page 23 The remote control does not function The timer is not working. The Clock/Timer setting is erased. Troubleshooting – Reduce the distance between the remote control and the system. – Insert the batteries with their polarities (+/– signs) aligned as indicated. –...
- Page 29 ACRE BARRA S FRANCISCO CRUZEIRO DO SUL 68-33224432 CASTELO RIO BRANCO 68-32217642 COLATINA RIO BRANCO 68-32249116 GUARAPARI LINHARES ALAGOAS S GABRIEL DA PALHA ARAPIRACA 82-5222367 SAO MATEUS MACEIO 82-32417237 VILA VELHA PALMEIRA DOS INDIOS 82-4213452 VITORIA UNIAO DOS PALMARES 82-32811305 GOÍAS AMAPÁ...
-
Page 32: Laser Product
Meet Philips at the Internet http://www.philips.com FWM185 CLASS 1 LASER PRODUCT Printed in China PDCC-LL-0710...