Table of Contents
Advertisement
Advertisement
Table of Contents

Related Manuals for Philips TD6726/BG051P


Summary of Contents for Philips TD6726/BG051P
- Page 2 In case your Philips product is not working correctly or is defective, please return your phone to the place of purchase or the Philips National Service Centre. In the event you require service whilst in another country a dealer address can be given to you by the Philips Consumer Help Desk in that country.
- Page 3 MAIN ACCESS MENU Shared phonebook Options: Private phonebook Options: Internal list: base and handsets Standby mode Options: SHARED PRV PHONEBK INTERCOM SERVICES List of network services SETTINGS Options: CALL LOG REDIAL Miscellaneous settings Options: List of incoming calls and messages Options: List of outgoing calls (redial)
-
Page 4: Table Of Contents
SECURITY ... 8 Security information ...8 Power connection ...8 Telephone connection ...8 Environmental protection ...8 INSTALLATION ... 9 Choosing the location of the charging unit and base station ...9 Installing the charging unit on a level surface ...9 Wall mounting the charging unit ...9 Installing the base station ... - Page 5 Private and shared phonebooks ... 23 Storing your callers telephone numbers ...23 Viewing a phonebook entry ...24 Making a call ...24 Deleting an entry from a phonebook ...24 Modifying a phonebook entry ...25 Voice dial (Zenia Voice 6626) ... 25 Recording voice dial ...25 Making a call via voice dial ...26 Listening to a voice dial ...27...
- Page 6 SYSTEM CONFIGURATION ... 36 Overview of the configuration menu ...36 Settings ... 36 Using keypad shortcuts ... 37 Handset sound settings ...38 1.1 Earpiece volume ... 38 1.2 Loudspeaker volume ... 38 1.3 Headset volume ... 39 1.4 Ringer type ... 39 1.5 Ringer volume ...
- Page 7 5.7 Switching music on hold on/off ...48 5.8 Inserting a pause between digits ...48 5.9 Automatically inserting a prefix ...48 5.0 Setting up prefixes ...48 Security ... 49 6.1 Setting call barring ...49 6.2 Setting forbidden prefixes ...49 6.3 Activating/ deactivating Pin code protection ...49 6.4 Changing the Pin code ...50 List of all handsets registered to the base station (RC code) ...
-
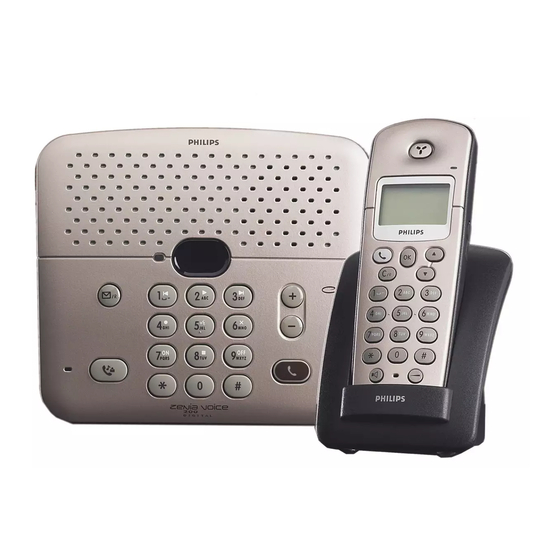
Page 8: Zenia 6326 Base Station
Microphone Dial keys and answer phone controls With a view to improving products and services, Philips reserves the right to modify the specifications mentioned in this publication, at any time and without notice Copyright Philips 2000 - All rights reserved... -
Page 9: Handset Overview
KEYS • Carries out operation displayed on the last line of the screen. • Makes, accepts or ends a call. • Cancels a character during input. • Moves up one menu level. • Enables you to use the "recall" function during a call. •... - Page 10 Displayed The current entry is at the end of the list. Displayed The selected entry of the shared phonebook is associated with a voice recognition signal. 10 MAY 10:05 Philips 1 SHARED Handset Incoming call or new messages indicator Microphone...
-
Page 11: Security
Electric voltage of the telephone network corresponds to TNV-3 classification (Telecommunication Network Voltage), as defined in the EN 60-950 standard. Environmental protection Your telephone handset also benefits from the Philips EcoDesign program, which takes into account the relation between product and environment during its entire service life. -
Page 12: Installation
: "This equipment is not designed for making emergency telephony calls when the power fails. Alternative arrangements should be made for access to emergency services". Choosing the location of the charging unit and base station Place the charging unit near a 220 V/ 240 V - 50 Hz wall socket. In order to reduce possible interference, do not place the charging unit and the base station at less than 50 cm from any other electronic equipment (telephone, TV set, computer, etc.). -
Page 13: Installing Or Replacing Batteries
Your telephone handset is powered by two rechargeable NiMh batteries, type AAA/ R03. When replacing the batteries, please use the following model: PHILIPS MULTILIFE R03NM, or PANASONIC 650 mAh. NiMh batteries must be disposed of in accordance with applicable waste disposal regulations. -
Page 14: Using The Telephone
To view one of these menus, press the menu is displayed. To go back to "standby mode", press the Using the telephone 10 MAY 10:05 Philips 1 SHARED (Shared phonebook), (Internal list), (List of services), (Configuration), (List of incoming calls), (List of outgoing calls). -
Page 15: Making A Call From The Handset
Making a call from the handset From "standby mode", dial the number on the keypad (up to 26 digits). PREDIAL The dialled number is displayed on two lines as you enter the 012345 digits. RECORD To correct an error: • move the cursor using the scroll arrows •... -
Page 16: Making A Call From The Zenia Voice 6326 Base Station
Making a call from the Zenia Voice 6326 base station The handsfree speakerphone allows calls to be made or accepted without using a handset . Dialling a number using the To use these keys you must have previously stored the numbers (see “3.4 Storing direct dial keys (6326 base station only)”, page 43). -
Page 17: Making A Call From The Zenia Voice 6626 Base Station
Making a call from the Zenia Voice 6626 base station Press the key. The green light starts flashing and you hear the dial tone. Dial the number using keys The number is dialled automatically. The loudspeaker and the microphone of the base station are switched on automatically. -
Page 18: Redial List
From "standby mode", press the scroll keys the "REDIAL" menu (Redial list). The indication "REDIAL" appears on the last line of the 10 MAY 10:05 Philips 1 display. REDIAL Validate by pressing the The first entry in the redial list appears on the screen. -
Page 19: Deleting An Entry
Deleting an entry From "standby mode", go to the redial list. 10 MAY 10:50 Philips 1 The entry corresponding to the last call is displayed. REDIAL Scroll through the list by pressing the scroll keys REDIAL LIST The entry to be deleted is displayed. -
Page 20: Storing An Entry
Storing an entry From "standby mode", go to the redial list. The entry corresponding to the last outgoing call made is displayed. Scroll through the list by pressing the scroll keys REDIAL LIST The number to be stored is displayed. 01712345678 Press the OPTIONS... -
Page 21: Answering A Call From The Base Station (6326 And Voice 6626)
Answering a call from the base station (6326 and Voice 6626) The handsfree speakerphone allows calls to be made or accepted without using a handset . An incoming call is received. The green light starts flashing. To answer the call, press the The loudspeaker and the microphone of the base station are switched on automatically. -
Page 22: Putting An Incoming Call On Hold
Putting an incoming call on hold You can put a call on hold: The external caller either hears music, if music on hold is activated (see “5.7 Switching music on hold on/off”, page 48), or a waiting tone. 1) From handset Select the "HOLD"... -
Page 23: Call Log
From "standby mode", press the scroll keys many times as required to access the "CALL LOG" 10 MAY 15:30 menu. Philips 1 CALL LOG Confirm by pressing the The first entry in the call log is displayed. CALL LOG 01/02... -
Page 24: Deleting An Entry From The Call Log
: You can directly call the telephone number corresponding to the entry viewed by pressing the • When viewing the list, if a voice message is associated with the call viewed, the E symbol is displayed, to listen to this message, select the "LISTEN" option and press the key. -
Page 25: Storing An Entry From The Call Log
Storing an entry from the call log : This function is subject to network selection. From "standby mode", go to the call log. Scroll through the list by pressing the scroll keys as many times as required. CALL LOG The number to be stored is displayed. 01/02 01:59 0165346523... -
Page 26: Private And Shared Phonebooks
Private and shared phonebooks Your telephone comes with two phonebooks, a private one and a shared one: you therefore have the ability to store telephone numbers either in a private phonebook not accessible from other handsets, or in a shared common phonebook. In each phonebook, you can store the telephone number and name of 100 callers, either by transferring them from the call log or the redial list, or by entering them manually. -
Page 27: Viewing A Phonebook Entry
From "standby mode", press the scroll keys many times as required to go to the "SHARED" or "Prv 10 MAY 10:05 phonebk" menu. Philips 1 SHARED Confirm by pressing the The first entry in the selected phonebook is displayed. SHARED... -
Page 28: Modifying A Phonebook Entry
Modifying a phonebook entry Having selected the entry to be modified in the phonebook, the corresponding name and telephone number are displayed on the screen. Confirm by pressing SHARED The validation prompt "Change" is displayed. Change SELECT Confirm by pressing the Now you can change the telephone number. -
Page 29: Making A Call Via Voice Dial
VOICE DIAL Recording... Press the After 2 seconds you will hear the recording. The handset suggests attempt n° 2. VOICE DIAL Attempt n° 2 Press the RECORD Again, clearly say the name corresponding to the selected entry. VOICE DIAL Within 2 seconds, you will hear the recording. Stored The confirmation prompt "Stored"... -
Page 30: Listening To A Voice Dial
PROBLEM Background noise ! Too long ! Too short ! Too similar ! Too different ! Listening to a voice dial Select the person from the shared phonebook whose voice dial SHARED Voice dial you wish to listen to. SELECT Using the scroll keys function. -
Page 31: Using The Intercom
Making an internal call (intercom) From the handset From "standby mode", press the scroll keys Select "INTERCOM". 10 MAY 10:05 Philips 1 Press the INTERCOM Press the scroll keys select the base station or handsets you wish to call. INTERNAL LIST... -
Page 32: Transferring An External Call To Another Handset
You can adjust the loudspeaker volume using the keys. Transferring an external call to another handset From the base station During the call, press the The external caller will either hear music (if music on hold is activated, see “5.7 Switching music on hold on/off”, page 48) or a waiting tone. -
Page 33: Answering An Internal Call
INTERNAL LIST Base SELECT Confirm the selection by pressing the As soon as the selected handset answers, "CALLING" will CALLING appear on the first line of the screen. Base Select the "TRANSFER" option. TRANSFER Press the handset. The external call is transferred to the handset. Your handset reverts to "standby mode". -
Page 34: Using The Answer Phone (Zenia Voice 6626 Only)
You can access the answer phone (listening to messages, call screening, message recording, configuration) either from a handset registered to the base station (see “Answer phone settings (Zenia Voice 6626)”, page 44) or via the base station. Your answer phone can operate in the following two answering modes: •... -
Page 35: Screening And Intercepting Incoming Calls
Screening and intercepting incoming calls While the answer phone is recording a caller's message: • the E symbol on the screen flashes, • the t symbol on the screen is displayed. You can listen to the call before deciding to answer by pressing the The / icon on the screen is displayed. -
Page 36: Deleting A Message Received
To listen to this message, select the "PLAY" option, then CALL LOG confirm using the PLAY Deleting a message received You can delete one or more messages by viewing the call log. Scroll through the call log using the scroll keys CALL LOG John Smith 0171235678... -
Page 37: Listening To Messages Received
Listening to messages received You have not read the first message. In that case, the red light flashes and the display shows the number of new messages received (messages and memos). Press the key to listen to the messages received. A voice indicates the number of new messages you have received. -
Page 38: Recording A Memo (Local Message)
To listen to your personal OGM, press the : To modify your personal OGM, all you have to do is record a new one, by following the procedure previously described. Recording a memo (local message) With this function you can leave a memo for another person in your home. With the phone in "standby mode", press the "Please speak after the tone"... -
Page 39: System Configuration
Settings From "standby mode", go to "SETTINGS" by pressing the scroll keys 10 MAY 10:05 Philips 1 Confirm by pressing the SETTINGS The first sub-menu appears in the middle of the display. SETTINGS Select the desired menu using the scroll keys... -
Page 40: Using Keypad Shortcuts
currently selected. FUNCTION X.X.X Setting 1 If you want to change it, press the scroll keys many times as required and select the desired setting. SELECT The empty " " box in front of this setting indicates that it is not currently selected. -
Page 41: Handset Sound Settings
Handset sound settings Select "SETTINGS", and by using the keys, navigate through the menu to access the desired settings. Sub-menu 1 Handset sounds 1.1 Earpiece volume 1.2 Loudspeaker volume 1.3 Headset volume 1.4 Ringer type 1.5 Ringer volume 1.6 Key tones 1.7 Earpiece tone 1.8 Loudspeaker tone 1.9 Headset tone... -
Page 42: Headset Volume
1.3 Headset volume Go to the "SETTINGS" menu, then to the "Handset sounds" sub-menu and select "Headset volume". Select the desired volume level from the three options available. 1.4 Ringer type Go to the "SETTINGS" menu, then to the "Handset sounds" sub-menu and select "Ringer type". -
Page 43: Handset Settings
Handset settings Select "SETTINGS", and by using the keys, navigate through the menu to access the desired settings. Sub-menu 2 Handset settings 2.1 Language 2.2 Back light 2.3 Display contrast 2.4 Lock 2.5 Babysit mode 2.6 Base selection 2.7 Register 2.1 Selecting a language Go to the "SETTINGS"... -
Page 44: Locking And Unlocking The Keypad
Although a handset can be subscribed to up to 4 base stations it can only operate on one base station at a time. To simplify the base station selection, rename your handset (default is "Philips"). (see “Renaming a handset”, page 50). -
Page 45: Base Settings
Base settings Select "SETTINGS", and by using the keys, navigate through the menu to access the desired settings. Sub-menu 3 Base settings 3.1 Base ringer (type) 3.2 Base ringer 3.3 Set date & time 3.4 Store direct dial keys (6326 base station) 3.5 Registration mode 3.1 Selecting the ringer type (base station) Go to the "SETTINGS"... -
Page 46: Storing Direct Dial Keys (6326 Base Station Only)
3.4 Storing direct dial keys (6326 base station only) Select the "SETTINGS" menu, then the "System settings" sub-menu and select "Direct dial keys". DIAL KEYS 3.4.1 Confirm by pressing the 1 : 0170712 CHANGE The telephone number stored for the M1 key is displayed, or the message "Empty"... -
Page 47: Answer Phone Settings (Zenia Voice 6626)
Answer phone settings (Zenia Voice 6626) Select "SETTINGS", and by using the navigate through the menu to access the desired settings. Sub-menu 4 Answer phone 4.1 Answer mode 4.2 Record memo 4.3 Record pers. OGM 4.4 Record ringer 4.5 Rings before answer 4.6 Voice prompts 4.7 Record quality 4.8 Remote control... -
Page 48: Recording A Personal Ogm
4.3 Recording a personal OGM Go to the "SETTINGS" menu, then "Answer phone" sub-menu, and select "Record pers. OGM". The recording window is displayed. Press the key, then say your personal OGM. Press the key again in order to confirm the message. A confirmation signal beep is heard, the message "Stored"... -
Page 49: Modifying The Number Of Rings Before Answer
4.5 Modifying the number of rings before answer You can modify the number of rings (Toll saver, 3, 4, 5) before the answer phone answers a call. Go to the "SETTINGS" menu, then to the "Answer" sub-menu, and select "Rings before answer". Select the option of your choice from the four possibilities available. -
Page 50: Line Settings
Line settings Select "SETTINGS", and by using the navigate through the menu to access the desired settings. : Line default settings may vary according to the country. Sub-menu 5 Line settings 5.1 Dial mode 5.2 Network type 5.3 Operator type 5.4 Recall type 5.6 View total time 5.7 Music on hold... -
Page 51: Selecting Flash Time
5.4 Selecting flash time You may need to change this when connected to a PABX. Go to the "SETTINGS" menu, then to the "Line settings" sub-menu, and select "Recall type". Select one of the two options "Short flash" or "Long flash". 5.6 Displaying/deleting total time for your calls Go to the "SETTINGS"... -
Page 52: Security
Security Select "SETTINGS", and by using the navigate through the menu to access the desired settings. This menu is secured by a Pin code (default is the RC code, printed on the back of the base station). Enter the Pin via the keypad. As you type it in, stars appear on the second line of the screen. -
Page 53: Changing The Pin Code
6.4 Changing the Pin code This code will be requested for remote control of the answer phone or for telephone configuration. (see “6.3 Activating/ deactivating Pin code protection”, page 49). The default Pin is printed on the back of the base station (RC code). To change it, proceed as follows: Go to the "SETTINGS"... -
Page 54: List Of Network Services
List of network services Your telephone is programmed with a list of telephone services provided by your main national operator. However, to adapt the system to your needs, you can modify, delete or add services (up to 15). Each service consists of a name (up to 14 characters) and a number (up to 26 digits). The list of services is managed like a phonebook. -
Page 55: Maintenance And Troubleshooting
M aintenance and troubleshooting Base station problems The table below lists the possible problems you may encounter with when using the base station. Zenia 6326 and Zenia Voice 6626 base stations PROBLEM CAUSE Green light is The base station is not off. -
Page 56: Zenia 6626 Base Station (Continued)
Zenia 6626 base station (continued) PROBLEM CAUSE The answer phone Memory is full (an error does not record beep is heard). your personal OGM. An error beep is The answer phone is heard from the already operating (play base station when or record). -
Page 57: Problems With The Handset
Clean them with a clean and dry cloth. Refer to “1.6 Switching key tones on/off”, page 39. Check the connection between charging unit and electricity socket. Please contact your PHILIPS dealer in order to purchase new batteries. Retry when the current call is finished. -
Page 58: Maintenance
PROBLEM CAUSE Base station not ready. The handset you are An error beep is calling is already on a heard during a call or out of range of call. the base station. The handset batteries are low (the call may be interrupted). -
Page 59: Handset Indicators
Handset indicators Green light Flashing Briefly flashing Base station indicators Red light Flashing Flashing rapidly Green light Flashing Character table Keys Digits 1x press 2x press 3x press " 4x press ’ 5x press 6x press Letters 7x press 8x press 9x press 10x press 11x press... -
Page 60: Personal Notes
Index Activating/ deactivating voice prompts Answer phone checking messages remotely deleting a message received listening to messages received screening incoming calls Answering an external call from base station from handset Answering an internal call Automatic prefix Back light Base station installation personal ringer registration mode... -
Page 61: Index
Identifying the caller Indicators Installation Intercom function Internal call from base station from handset Keypad locking overview shortcuts List of handsets List of network services Loudspeaker tone Loudspeakers Maintenance Making a call from base station from handset from phonebook with voice dial Memo Menu configuration... - Page 62 Redial list of outgoing calls Redial list deleting storing Redial number deleting storing Screening calls Security code Security information Selecting a language Selecting the base station Setting forbidden prefixes prefixes Setting the earpiece volume Setting the headset volume Setting the loudspeaker volume Setting the ringer volume base station headset...
-
Page 63: Remote Control
Remote control (using a tone telephone) Dial your telephone number. After listening to the outgoing message, press the key, then enter your code (4 digits). During message playback: • ... 8 Stop message playback • ... 6 Erase message • ... - Page 64 Remote control (Cont.) (using a tone telephone) You have just checked your answerphone After listening to your messages, you have 20 seconds to: • Start message playback ... • ... 5 Check outgoing message • ... 9 Switch off answerphone •...