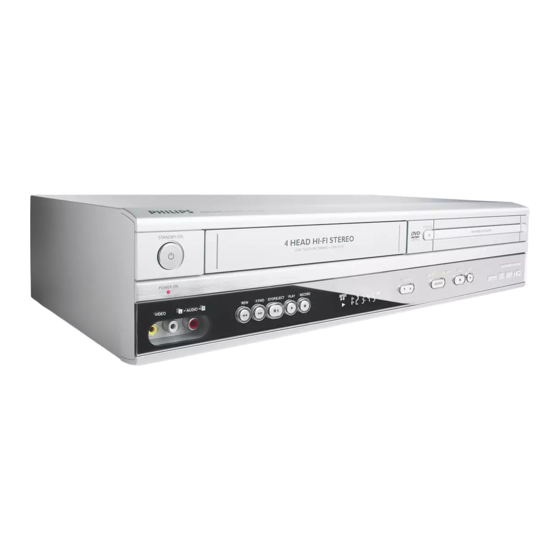
Philips DVP620VR/05 User Manual
Philips dvd/vcr player dvp620vr direct dubbing
Hide thumbs
Also See for DVP620VR/05:
- Service (398 pages) ,
- Service manual (104 pages) ,
- Quick use manual (2 pages)
Table of Contents
Advertisement
Quick Links
Advertisement
Table of Contents

Related Manuals for Philips DVP620VR/05


Summary of Contents for Philips DVP620VR/05
- Page 1 Digital Video Disc Player & Video Cassette Recorder VIDEO Plus+ and PlusCode are registered trademarks of Gemstar Development Corporation.The VIDEO Plus+ system is manufactured under license from Gemstar Development Corporation. 620VR 620VR...
-
Page 2: Introduction
• “PBC” appears on the front panel display when a Video CD with PBC function is loaded. Thank you for purchasing this Philips DVD/ VCR.This Owner’s Manual explains the basic operation of this DVD/ VCR. Environmental Information All unnecessary packaging has been omitted. -
Page 3: Table Of Contents
Introduction Environmental Information..... 2 Supplied Accessories ......2 Interference . -
Page 4: Functional Overview
Functional Overview Front Panel STANDBY-ON POWER ON VIDEO L -- AUDIO -- R F.FWD STOP/EJECT PLAY RECORD CHANNEL 1. ySTANDBY-ON button (DVD,VCR) to switch the player to ON or OFF 2. POWER-ON light (DVD,VCR) light appears when DVD/ VCR turns on. 3. -
Page 5: Rear Panel
Rear Panel DIGITAL ANALOG S-VIDEO AUDIO OUT AUDIOOUT AV2(DECODER) DVD/VCR AV1(TV) OPTICAL COAXIAL 3 4 5 6 1. MAINS (AC Power Cord) connect to a standard AC outlet 2. OPTICAL (Digital audio out) jack (DVD only) connect to digital (optical) audio equipment Remote Control STATUS/EXIT SYSTEM... -
Page 6: Setting Up Your Dvd/Vcr
Setting Up your DVD/VCR Important for the United Kingdom This apparatus is fitted with an approved moulded 13 Amp plug.To change a fuse in this type of plug proceed as follows: 1 Remove fuse cover and fuse. 2 Fix new fuse which should be a BS1362 3A,ASTA or BSI approved type. -
Page 7: Connecting To Optional Equipment (For Dvd Features)
• Do not spill water or put anything wet on the remote con- trol. Playable Video Cassette Tapes Philips Consume Electronics recommends that only video cas- sette tapes that have the VHS mark and High Quality (HQ) sys- tem is compatible with this DVD/ VCR.This DVD/ VCR has an Automatic Head Cleaner. -
Page 8: Video Channel Setting
Setting Up your DVD/VCR Video Channel Setting Video channel setting will be necessary, if your DVD/VCR is connected to the TV via the coaxial cable. 1 Insert a pre-recorded tape into the DVD/VCR.The DVD/VCR will turn on and start playback automatically. If playback does not start, press PLAY B . -
Page 9: Sorting And Clearing Tv Channels Manually
Sorting TV channels manually After you have performed the automatic channel search you may not agree with the sequence in which the individual TV channels have been allocated to the programme positions (pro- gramme numbers) of the DVD/ VCR.You can use this function to individually sort the TV channels already saved. -
Page 10: Vcr Playback
DVD/ VCR when the DVD/ VCR stops the playback. DIGITAL STUDIO PICTURE CONTROL Philips has developed a system which produces the best possible playback quality. For old and often-used video cassettes, this sys- tem reduces interference. For new or high quality cassettes, it emphasises the details. -
Page 11: Vcr Manual Recording
General information Use 'Manual Recording' to make a spontaneous recording (for example, a programme currently being shown). If you want to start and stop a recording manually, read the section 'Recording without automatic switch-off'. Read the section 'DIRECT RECORD' if you want to record a programme currently being shown. -
Page 12: Direct Dubbing
VCR Manual Recording Direct dubbing Follow the steps below to copy a DVD or video disc to a videotape.This will be possible only if the DVD is not copy protected. 1 Put a videotape in the cassette compartment. Make sure the tape’s record tab is intact and the tape is long enough to record the disc. -
Page 13: Programming A Recording (Without The Video Plus+ System)
“- -” appears at PROG. . • The programme number of the TV channel has not yet been assigned to the Plus Code number. Using numerical key pads, select the corresponding programme number (name) of the TV channel. The following message appears on the screen: “ERROR” •... -
Page 14: How To Check, Or Delete A Programmed Recording (Timer)
Programming a Recording (TIMER) How to check, or delete a programmed recording (TIMER) 1 Press VCR, then DISC/VCR MENU. 2 Press K/L to select “TIMER”.Then press B. 3 Press K/L to select “TIMER LIST” , then press B. 4 Select timer block with B. Timer block disappeared when I pressed g . -
Page 15: Other Functions
Switching the status display off or on Along with the on screen menu, the status display also displays information on the current operating status (counter, playback, recording,TV channel, etc.) on the TV screen.You can switch off the information about the operating status so that the sta- tus display is not recorded when copying videocassettes. -
Page 16: Playing A Disc
Playing a Disc Basic Playback DVD-V Getting Started Turn on the power of the TV, amplifier and any other compo- nents which are connected to the DVD/VCR. Make sure the TV and audio receiver (commercially available) are set to the correct channel. 1 Press STANDBY-ON. -
Page 17: Slow Forward / Slow Reverse
Slow Forward / Slow Reverse 1 During playback, press PAUSE k. 2 Press g or h . • Slow motion playback will begin and sound will be muted. 3 Press g or h repeatedly to select the required speed. Slow forward or reverse speed varies with the disc. Approximate speed is 1(1/16), 2(1/8), and 3(1/2). -
Page 18: Program
Playing a Disc Program JPEG You may determine the order in which tracks will be played. 1 In stop mode, press MODE. • The PROGRAM screen will appear. 2 Press to select a track, then press OK. • Up to 99 programmes can be stored. -
Page 19: Subtitle Language
Subtitle Language DVD-V The DVD/VCR allows you to select a language for subtitle dur- ing DVD disc (if available) playback. 1 Press DVD, then SUBTITLE during playback. 2 Press SUBTITLE repeatedly to select your desired subtitle lan- guage. • The selected language will be displayed on the display bar at the top of the screen. -
Page 20: Dvd Setup
DVD Setup Audio Setting Choose the appropriate Audio settings for your equipment as it only affect during the playback of DVD discs of the DVD/VCR. 1 Press SYSTEM MENU in stop mode. 2 Press B to select CUSTOM, then press OK. CUSTOM mode will appear. -
Page 21: Language Code List
Language Code Language French [FRE] Abkhazian 4748 Frisian Afar 4747 Galician Afrikaans 4752 Georgian Albanian 6563 German [GER] Amharic 4759 Greek [GRE] Arabic 4764 Greenlandic Armenian 5471 Guarani Assamese 4765 Gujarati Aymara 4771 Hausa Azerbaijani 4772 Hebrew Bashkir 4847 Hindi Basque 5167 Hungarian [HUN]... -
Page 22: Specifications
• After prolonged use, dirt or dust may accumulate at the disc (PAL/NTSC) lens.To ensure good playback quality, clean the disc lens with Philips CD Lens Cleaner or any commercially available cleaner. Follow the instructions supplied with the cleaner. 20 Hz - 44 kHz... -
Page 23: Troubleshooting
WARNING Under no circumstances should you try to repair the system yourself, as this will invalidate the warranty. Do not open the sys- tem as there is a risk of electric shock. If a fault occurs, first check the points listed below before taking the system for repair. Problem No power No picture... - Page 24 PHILIPS PORTUGUESA, S.A. Consumer Information Centre Rua Dr. António Loureiro Borge, nr. 5 Arquiparque, Miraflores P-2795 L-A-VEHLA PORTUGAL Phone: 021-4163063 PHILIPS CE, The Philips Centre, 420 - 430 London Road, Croydon, Surrey CR9 3 QR UNITED KINGDOM Phone: 0208-665-6350 PHILIPS KUNDECENTER Frederikskaj 6, 1780 København V...