Table of Contents
Advertisement
Quick Links
Printed on 70% Recycled Paper
HDD/DVD VIDEO RECORDER
RD-XS55KU
OWNER'S MANUAL
OPERATIONS
GUIDE
Read "INSTALLATION GUIDE" first.
Before connecting, operating, or adjusting this
product, carefully read the Important Safety,
Installation, Care, and Service Information in the
INSTALLATION GUIDE.
P000458240
Printed in China
H
PM0026072010
DIGITAL VIDEO
IMPORTANT NOTE
© 2006 Toshiba Corporation
Advertisement
Table of Contents

Related Manuals for Toshiba RD-XS55KU


Summary of Contents for Toshiba RD-XS55KU
- Page 1 OPERATIONS GUIDE Read “INSTALLATION GUIDE” first. IMPORTANT NOTE Before connecting, operating, or adjusting this product, carefully read the Important Safety, Installation, Care, and Service Information in the INSTALLATION GUIDE. P000458240 Printed in China PM0026072010 © 2006 Toshiba Corporation DIGITAL VIDEO...
-
Page 2: Table Of Contents
Introduction Table of contents Introduction Caution for safety ... 4 About this product ... 5 Choosing a disc ... 6 Index to parts and controls ... 12 Front panel ... Rear panel ... Remote control ... Display ... Before operating this recorder ... 20 ®... - Page 3 Library Using Library data ... 132 Basic operation of the Library system ... Searching for a desired title ... 133 Changing the listing order ... Searching ... Jumping ... Viewing Library data ... 135 Viewing title information ... Viewing disc information ... Maintenance of Library data ...
-
Page 4: Introduction
Introduction Introduction Caution for safety Read “SAFETY PRECAUTIONS”, “IMPORTANT SAFETY INSTRUCTIONS”, “Precautions” and all other sections of the “INSTALLATION GUIDE” that came with this product prior to reading this “OPERATIONS GUIDE”. -
Page 5: About This Product
Introduction About this product Some differences Because of its recording capability and hard disc drive (HDD), this DVD recorder operates more like a computer and differently than a standard DVD player. In addition to containing a microprocessor, it contains a HDD, an operating system, random access memory (RAM), and a DVD-RAM/RW/R drive. -
Page 6: Choosing A Disc
• Because of problems and errors that can occur during the creation of DVD and CD software and/or the manufacture of DVD and CD discs, Toshiba cannot assure that this HDD/DVD Video Recorder will successfully play every disc bearing the DVD and CD logos. - Page 7 • This recorder uses the NTSC color system, and cannot play DVD video discs recorded in any other color system (PAL, SECAM, etc.), even if they have region marks • Toshiba cannot guarantee that all discs bearing the DVD or CD logos will operate as expected. Please see the discussion of compatibility on page 5.
- Page 8 Introduction Choosing a disc (Continued) On DVD-RAM discs Use only DVD-RAM discs that comply with DVD- RAM standard Version 2.0, 2.1 or 2.2. The recorder cannot record on a disc formatted in any other standard. When using such a disc, initialize it by using the disc-format function of this recorder.
- Page 9 On DVD-R discs Standards DVD-R for General Ver.2.0 discs can be used for recording and playback. Discs compatible with the following recording speeds can also be used: Ver. 2.0/2X Ver. 2.0/4X Ver. 2.0 or 2.1/8X Ver. 2.0 or 2.1/16X Select discs labeled “for video,” “for recording,” “120 min.”...
-
Page 10: Structure Of Disc Contents
Introduction Choosing a disc (Continued) Structure of disc contents Normally, DVD video discs are divided into titles, and the titles are subdivided into chapters. VIDEO CDs/audio CDs are divided into tracks. DVD video disc Title 1 Chapter 1 Chapter 2 Chapter 1 Chapter 2 Chapter 3 VIDEO CD / audio CD Track 1 Track 2... - Page 11 Discs and purposes The table shows main functions which are available on this recorder per disc category. This will help you choose discs. DVD-RAM disc Suitable for repeat use of the Characteristics on this disc, and data storage for recorder video library.
-
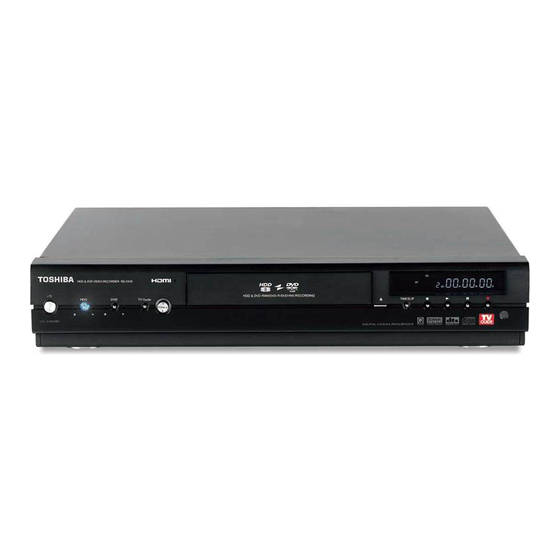
Page 12: Index To Parts And Controls
Introduction Index to parts and controls See pages with arrows for details. Front panel All operations can be possible from the supplied remote control. * The above illustration displays the front panel with the cover open. See the following page on how to open or close the cover. q ON/STANDBY button / ON/STANDBY indicator page 20 Turns the power on/restores the unit in the... - Page 13 (STOP) button page 50, 61 Stops playback or recording. !8 TIME SLIP button/TIMESLIP indicator page 68, 69 Selects the time slip mode. Illuminates in the time slip mode. !9 INPUT2 jacks page 49 Use this when recording from other input source such as a VCR or a camcorder.
-
Page 14: Rear Panel
Introduction Index to parts and controls (Continued) Rear panel q AC IN socket page 21 in “INSTALLATION GUIDE” w Ventilation fan Do not block the ventilating holes. e DIGITAL AUDIO OUT BITSTREAM/PCM OPTICAL jack page 29 in “INSTALLATION GUIDE” Use this to connect the recorder to an audio receiver equipped with an optical digital audio input jack. - Page 15 o OUTPUT jacks page 21, 23, 24, 28 in “INSTALLATION GUIDE” Outputs video and audio signals to a connected TV or amplifier. !0 G-LINK jack page 25 in “INSTALLATION GUIDE” ® Connect the supplied G-LINK you are connecting this recorder to a cable/ satellite box.
-
Page 16: Remote Control
Introduction Index to parts and controls (Continued) Remote control... - Page 17 OPEN/CLOSE button page 20 Buttons for TV operation page 50 in “INSTALLATION GUIDE” HDD button page 45, 50 TIMESLIP button page 68, 69 EASY NAVI button page 29 Info button page 23 Menu button page 23 SLOW button page 62 FRAME/ADJUST button page 62, 72 Direction buttons ( / / / )
-
Page 18: Display
Introduction Index to parts and controls (Continued) Display q PBC indicator Illuminates when a PBC-controllable VIDEO CD is loaded. w Program recording indicator Illuminates when the recorder holds a timer program. e Bit rate indicator Illuminates when displaying the bit rate selected for recording, or when displaying the actual bit rate. - Page 19 Dimming the display Pressing DIMMER button on the remote control changes the brightness of the display (normal/dimmed/off). Switching the display Every time you press FL SELECT button, the display changes between the channel, title number, and time. The display may not change, depending on the disc or recording conditions. !4 TITLE indicator Illuminates when a title number is displayed.
-
Page 20: Before Operating This Recorder
Introduction Before operating this recorder Is your recorder ready? • Refer to “INSTALLATION GUIDE” manual and finish the necessary preparations. • Turn on the connected equipment such as a TV or audio system and select the input from the recorder. Turning the power on (This owner’s manual instructions are based on the premise that all proper connections have been... - Page 21 OPEN/CLOSE button on the remote control. This may turn the recorder on and open the disc tray. If it still wouldn’t open, contact your nearest TOSHIBA dealer. Turning the power off Press ON/STANDBY on the front panel of the recorder or on the remote control.
- Page 22 Introduction Before operating this recorder (Continued) Start-up/Shutdown (closing) icons These icons are displayed at the top right corner of the screen when startup or finishing. While they are flashing, the recorder is operating as follows: Start-up, reading a disc, finishing the recording Loading Unloading a disc, finishing the...
-
Page 23: Using Tv Guide On Screen
Introduction Using TV Guide On Screen The TV Guide On Screen system in your recorder is a free interactive program guide that provides up to 8 days of program listings for over-the-air, cable-ready and analog cable in your area. The system allows you to easily find, set up reminders and schedule recordings of your favorite TV programs. -
Page 24: Services And Options
HDD/DVD Video Recorder and the data provided by the third party. In the event that you experience any performance issues ® with your TV Guide On Screen system, please do not hesitate to contact the Toshiba America Consumer Products, L.L.C. Consumer Solutions Department by calling (800) 631-3811 or by visiting http://www.tacp.com/customersupport/contact.asp Services and options For more details press Info while navigating through the various options and services. - Page 25 To search by entering a keyword 1) Press to select “KEYWORD” then press ENTER. “Keyword Search” appears. 2) Press to select “new search” then press ENTER. “Search Options” appears. 3) Press to select “category” then press 4) Press to select “enter keyword” then press ENTER. The keyboard appears.
- Page 26 Introduction ® Using TV Guide On Screen (Continued) To delete recorded programs (“view as” is set to “group”) 1) Press to select a TV program and press ENTER. 2) Press to select an episode and press Menu. “Episode Options” appears. 3) Press to select “delete episode”...
- Page 27 SETUP If you select this service and press ENTER, options to change settings are listed. To execute the setup again 1) Press to select “Change system settings” then press ENTER. Your current settings are displayed. 2) Press to select your answer then press ENTER. 3) Follow the on-screen guidance.
- Page 28 Introduction ® Using TV Guide On Screen (Continued) To change recording defaults 1) Press to select “Change default options” then press ENTER. 2) Press to select “Record defaults” then press Menu. “Record Defaults” appears. e.g. start Record Defaults go to Service Bar start 1 min early 2 min late...
-
Page 29: Key Operation - Easy Navi & Quick Menu
Introduction Key operation The EASY NAVI button opens “EASY NAVI Main Menu”, a main gate to the functions of this recorder. From this menu, you can access the desired functions while viewing a current picture. Additionally, QUICK MENU button provides you a sub menu of the current function. EASY NAVI Press EASY NAVI. - Page 30 Introduction Key operation - EASY NAVI & QUICK MENU (Continued) To exit the EASY NAVI Press EASY NAVI again. Note • For a disc other than the specified one, the finder cannot be operated. To play the disc, exit the EASY NAVI then press the PLAY button, or select the “Play Contents”...
-
Page 31: Recording
Hint on reading this manual The following icons show the playable discs for each function described on this instruction manual. : HDD : DVD-RAM disc DVD-RAM : DVD-RW disc DVD-RW : DVD-R disc DVD-R : DVD video disc DVD-VIDEO : VIDEO CD : Audio CD (For CD containing JPEG or MP3/WMA files, page 74, 76.) -
Page 32: Before Recording
Recording Before recording Please be sure to read this critical background information prior to making a recording. This recorder is equipped with a built-in HDD. Conventional video cassette recorders have required tapes to record, while this recorder enables recording on the HDD whenever you want, without selecting an available tape or confirming its recording time or tape remaining. - Page 33 Note on recording on a DVD-R disc Confirm disc compatibility and prepare an available DVD-R disc to record on ( page 6, 9). To play a DVD-R disc recorded on this recorder on other devices, finalize the DVD-R disc on this recorder.
-
Page 34: Initializing A Dvd-Ram/Rw Disc (Logical Format)
Recording Before recording (Continued) Initializing a DVD-RAM/RW disc (Logical format) Be sure to read this section prior to using a DVD-RAM/RW disc on this recorder for the first time. For DVD-R, initializing is not necessary. A disc should be initialized in the following cases: (The recorder may display a message to request you to do so.) e.g. -
Page 35: Dvd-Ram Physical Format
4) Press to select “Start,” then press ENTER. e.g. DVD format Entire disc contents excluding library data will be erased if disc is formatted. Proceed? Start Cancel Format 5) Press to select “Start,” then press ENTER. Initialization starts. e.g. DVD format Formatting Format When the initialization is completed, the setup... -
Page 36: Entering Characters
Recording Before recording (Continued) Entering characters e.g. CONTENT Title information MENU Cursor An entered character will appear here. Chapter Language English Spanish French German Italian etc... Select Cursor Operation guidance of the remote control To enter the character, normally use buttons on the remote. - Page 37 Entering characters The cursor may be followed by unwanted characters. You can erase them if necessary by either of the following measures: Erasing characters • Erasing all the characters on the writing board Select “Clear All” by pressing press ENTER button. Alternatively, press CLEAR button.
-
Page 38: Selecting A Disc According To Purposes Of Use (Dvd-Ram/R/Rw)
Recording Before recording (Continued) Selecting a disc according to purposes of use (DVD-RAM/R/RW) There are various types of discs having different standards. Select one for your purpose of use. • Editing after recording (e.g. deleting unnecessary portions, dividing chapters). • Recording so that the sound of bilingual broadcast can be switched. -
Page 39: Setting For Recording On A Dvd-R/Rw Disc In Video Mode
Setting for recording on a DVD-R/RW disc in Video mode This setting is necessary to play the contents on a DVD-R/RW disc with other DVD players. Items to set up When recording in Video mode, there are some restrictions by DVD-Video standard. Therefore, it is necessary to set up these items below. -
Page 40: Setting A Timer Recording Using Tv Guide On Screen
Recording DVD-RAM DVD-RW DVD-R Setting a timer recording using TV Guide On Screen To record TV programs and end them automatically, follow the procedures of this chapter. When using a satellite box, only manual timer recordings are available for setting recordings. page 43. -
Page 41: Changing The Recording Options
Changing the recording options Start Press TV Guide, then press program to record. Or to search for a TV program, see TV Guide ENTER Press Menu. “Episode Options” appears. Menu Press to select “set recording” then press ENTER. “Record Options” appears. e.g. - Page 42 Recording Setting a timer recording using TV Guide On Screen Note If you cancel the selections, select “cancel” then press ENTER button. Frequency of recordings/reminders and icon Recording Reminder Meaning Icon Once One time execution Regularly For a program on the same channel and at the same start time Daily*...
-
Page 43: Setting Recording By Specifying Details Manually
Setting recording by specifying by details manually 1) Press TV Guide. 2) Press to select “SCHEDULE”. 3) Press Menu. “Schedule Options” appears. 4) Press to select “new manual recording” then press ENTER. “Record Options” appears. 5) Set the details. to input digits. to change the parameter. - Page 44 Recording Setting a timer recording using TV Guide On Screen Deleting a recording 2 ways are available. On LISTINGS 1) Press TV Guide. 2) Select a TV program you have set to record (icon displayed). 3) Press Menu. “Episode Options” appears. 4) Press to select “delete recording”, then press ENTER.
-
Page 45: Recording A Tv Program
Recording DVD-RAM DVD-RW DVD-R Recording a TV program To record a TV program currently being broadcast, follow the procedures of this chapter. Preparation • When you record on a DVD-RAM/R/RW disc, load it into the recorder. - Load a disc which has sufficient space available to record the program. - Make sure the loaded disc is not write-protected. - Page 46 Recording Recording a TV program (Continued) Customizing the MN mode 1) During stop or at step 3 on QUICK MENU. 2) Press to select “User record quality” then press ENTER. 3) Change the setting for each recording media. • Press to select “HDD”...
- Page 47 Notes • During recording, you cannot change the recording parameters, such as modes, channels, etc. • The number of titles cannot exceed 99 for a DVD-RAM/R/RW disc or 396 for the HDD. • One continuous recording cannot exceed in any case 9 hours. Recording automatically stops at 9 hours. •...
- Page 48 Recording Recording a TV program (Continued) To play a recorded title while recording another on the same disc (Recorded Title Play) DVD-RAM During recording, you can play a title recorded on the same disc. 1) While recording, press CONTENT MENU. 2) Press to select a desired title, then press ENTER.
-
Page 49: Recording An External Source
Recording DVD-RAM DVD-RW DVD-R Recording an external source You can record programs from connected equipment on the HDD or a DVD-RAM/R/RW disc. Connect according to A or B. • To record a clearer picture, use the S video jack. To video output jack External equipment To audio... - Page 50 Recording Recording an external source (Continued) Start Press INPUT SELECT repeatedly so that “L-1,” “L-2,” or “L-3” appears on the front panel display, corresponding to the input in which the device is connected. Each time you press the button, the indicator changes. INPUT SELECT L-1: To record pictures from equipment connected to the INPUT1 jacks on the rear panel.
- Page 51 Notes on recording from a connected VCR or camcorder Check the condition of the source equipment before playing. Set the equipment in a good condition, e.g. clean the head or adjust the tracking, etc. to obtain optimum playback. Bad conditions may produce noises in playback. These noises may be detected as copy protection signals, resulting in a stoppage of the recording.
-
Page 52: Dv Recording (Recording From A Digital Video Camera)
Recording DVD-RAM DVD-RW DVD-R DV recording You can connect a DV format digital video camera to the DV IN terminal to record from it. Preparation • Press HDD or DVD button to select a recording media • Connect a DV format digital video camera to the DV IN terminal on the front panel. DV IN terminal Start (Recording from a digital video camera) - Page 53 Press to make the settings. As you select each item, an explanation is provided. To change the picture and sound rates: ENTER 1) Press buttons to select “Change” then press ENTER button. 2) On the “User record quality” display, press ADJUST button to select a setting number.
- Page 54 Recording DV Recording (Recording from a digital video camera) (Continued) Notes • The DV IN terminal of this recorder supports only input from a DV format digital video camera. It cannot output to a connected device. Some models of DV format digital video cameras may be not compatible.
-
Page 55: Deleting Recorded Contents
Recording DVD-RAM DVD-RW DVD-R Deleting recorded contents Important note Any deleted title/chapter (original) cannot be restored. Before deleting, be sure to check contents on the disc. On a finalized DVD-R/RW disc, this feature is not possible. To delete a title (chapter) Start Deleting multiple specified parts 1) Press HDD or DVD to select a disc that contains... -
Page 56: Others
Recording Others To protect recorded content You can protect recorded contents of the HDD or a DVD-RAM disc from unexpected deletion. Protection is provided for each title (original). 1) Perform steps 1 and 2 in “Playing recorded contents (CONTENT MENU)” ( select a title. - Page 57 D /M1, D /M2 Sound recording format onto DVD-RAM discs. When recording, sounds are converted into digital signals and compressed. In playback, they are extracted to the original sound. The standard differenciates D /M1 D /M2 in data volume to use. D /M1 and D /M2 are applied the digital recording technology for consumer products of Dolby Laboratories.
-
Page 59: Playback
Playback Play your favorite contents. Playing recorded contents (CONTENT MENU) Playing a DVD video disc Other playback functions... -
Page 60: Playing Recorded Contents (Content Menu)
Playback DVD-RAM DVD-RW DVD-R Playing recorded contents (CONTENT MENU) Titles and chapters recorded on the HDD or a DVD-RAM/R/RW disc are displayed in thumbnail view, so that you can easily locate a desired one. You can play recorded TV programs also from TV Guide On Screen. See Start Notes •... - Page 61 Reading CONTENT MENU Each recorded content is displayed as its thumbnail. CONTENT 1 / 2 Title List Page MENU HDD : 2006/03/24 07 : 00 am TV : 4 (0:53:45) Original 2006/03/29 09 : 00 pm TV : 3 (0:52:40) Original 2006/04/07 11 : 00 am TV : 4...
-
Page 62: Playing At Various Speeds
Playback Playing recorded contents (CONTENT MENU) (Continued) Playing at various speeds Playing in slow-motion (Not available in CD playback) Press SLOW during playback. : Forward slow-motion : Reverse slow-motion Each time you press the SLOW button, the slow-motion speed changes. •... - Page 63 Resuming playback from the location last stopped (Title resume) The recorder memorizes the location you last stopped playback to resume from there. To use this function, set “HDD/RAM title play” ( page 183) to “Title resume.” The recorder will memorize the location you last stopped at in each title, so you can resume playback from there.
- Page 64 Playback Playing recorded contents (CONTENT MENU) (Continued) Playing all titles (original) in a disc (Play All ORG Titles) You can play all Original titles in the HDD or a DVD- RAM disc in the order of the thumbnails on CONTENT MENU, as if they were recorded in one video tape.
- Page 65 Changing the order of titles You can change the order or sort the titles by genres. 1) Press CONTENT MENU. CONTENT MENU appears. 2) Press QUICK MENU. Quick Menu appears. 3) Press to select “Display changeover”, then press ENTER. e.g. CONTENT 1 / 2 Title List...
-
Page 66: Playing A Dvd Video Disc
Playback DVD-RW DVD-R DVD-VIDEO Playing a DVD video disc You can also play VIDEO CDs, audio CDs or finalization processed DVD-R discs in the same manner. To play recorded contents, follow the instructions on Preparation • Turn on a TV or audio system and select the corresponding input source that the recorder is connected to. •... - Page 67 Resuming playback from the location last stopped at (Resume Play) DVD-RW DVD-R DVD-VIDEO You can resume playback from the location where you stopped at. If you press PLAY button after stopping playback, the playback resumes from the location you have stopped. If you stop playback by pressing STOP button twice, the resume playback feature will be cancelled.
-
Page 68: Other Playback Functions
Playback Other playback functions Pausing a TV broadcast to resume later (Pause TV) This function enables you to pause a TV broadcast and resume viewing at a later, more convenient time, by storing the TV broadcast temporarily on the HDD. Start Notes •... -
Page 69: Playing A Tv Program Currently Being Recorded (Chase Play)
Playing a TV program currently being recorded (Chase Play) You can begin playback from the beginning of a program currently being recorded. You will find this function of great advantage on long programs, as you do not have to wait for the end of recording to begin playback. -
Page 70: Zooming A Picture
Playback Other playback functions (Continued) Watching a TV broadcast in the sub window (P in P playback) DVD-RAM DVD-RW DVD-R During playback, you can watch a TV broadcast in the sub window. (P in P : Picture in Picture) 1) During playback, press P in P. A sub window (program on the air or on the recording) appears. -
Page 71: Locating By Entering The Number Of A Desired Section
Locating by entering the number of a desired section DVD-RAM DVD-RW DVD-R DVD-VIDEO Normally titles, chapters, and tracks are numbered. By entering these numbers, you can access a desired section. 1) Press T.SEARCH. e.g. Title Chapter 0001 Search 2) Press to select a section (title or chapter) you want to locate. -
Page 72: Selecting The Sound
Playback Other playback functions (Continued) Selecting the sound You can select a preferred language and a sound format. Start MTS Broadcast Compatibility This recorder can receive or record MTS (Multichannel TV sound) broadcast. By connecting the recorder to your stereo system or stereo TV, you will try the SAP or stereo sound. SAP (Second Audio Program broadcast) A separate audio program, usually broadcast in a second language with the main language. - Page 73 Notes • Some discs allow you to change audio selections only via the disc menu. If this is the case, press MENU button and choose the appropriate language from the selections on the disc menu. • When you turn on the recorder or replace a disc, the recorder returns to the initial default setting. ( Depending on a disc, a specific type of audio the disc has is output.
-
Page 74: Viewing Jpeg Files
Playback Other playback functions (Continued) Viewing JPEG files You can play JPEG files that have been recorded on a CD-R or CD-ROM on the recorder. Preparations • Prepare a compatible disc ( • Set “Priority contents” ( • Make your TV shape conform to the 4:3 picture size. Only 4:3 pictures can be played regardless of the function settings via the on-screen displays of the recorder ( to other sizes, e.g. - Page 75 1) Press CONTENT MENU. “CONTENT MENU Picture List” appears. Depending on the disc, the recorder creates either temporary folder, “Auto” or “All”. “Auto”: For CD of which compatibility confirmed by TOSHIBA. Only playable files are listed. e.g. CONTENT 1 / 3 Picture List...
-
Page 76: Playing Mp3/Wma Files
Playback Other playback functions (Continued) Playing MP3/WMA files You can play MP3/WMA files that have been recorded on a CD-R or CD-ROM on this recorder. Preparations • Make sure that a disc you want to play is compatible with this recorder. See •... -
Page 77: Playable Files
MP3 and WMA formats, prior to the downloading thereof. Toshiba has no right to grant and does not grant permission to download any copyrighted content. buttons. -
Page 78: Checking The Current Status And Settings
Playback Other playback functions (Continued) Checking the current status and settings You can confirm operational status and setting details. Operational status and setting details Start DVD-RAM Press DISPLAY. The following on-screen display appears. (The actual display varies depending on the disc.) DISPLAY e.g. -
Page 79: Using The Time Bar
Using the time bar The time bar shows the current progress in playback or recording. Start Note • Time display is an approximation. During playback or recording, press TIME BAR. The time bar appears. (The actual display varies depending on the disc.) TIME BAR Locator (Shows the current location.) e.g. -
Page 80: Functions In Quick Menu
Playback Other playback functions (Continued) Functions in Quick Menu Besides these examples, various other ones are introduced on respective pages for your convenience. page 30 on how to operate Quick Menu. To play repeatedly (Repeat playback) DVD-RAM DVD-RW DVD-R You can repeat a desired section. 1) During playback, press QUICK MENU. - Page 81 Cancel random (in Random play mode) Resumes normal playback. Notes • Some discs may not permit random playback operation. • You cannot use the random playback function in conjunction with the memory playback function. • You cannot use the random playback function in conjunction with the repeat playback function.
-
Page 83: Editing
Editing You can create your own movie from your assembled scenes. Save your favorite videos in DVD discs. Creating your own title Creating a DVD-Video using DVD-R/RW DVD-Video finalizing process Other editing functions... -
Page 84: Creating Your Own Title
Editing Creating your own title You can edit recorded contents and create your own library. Note on deleting unnecessary scenes It is not recommended that you delete many chapters from titles recorded on the HDD to remove unnecessary parts of the titles and copy those contents on a DVD-RAM disc. The reason is that discontinuous space inside the HDD expands and recorded contents are stored in gaps between used locations. -
Page 85: Basic Flow
Basic flow Recording a TV program Record a TV program and it becomes a original title. e.g. Title: The world of cats and dogs. Chapter editing Divide the original title into chapters. Title 1: “The world of cats and dogs” (Original) Chapter 1 Chapter 2 Chapter 3 Chapter 4 Chapter 5 Chapter 6 Divide chapters and create divisions of chapter... -
Page 86: 1: Changing A Name Of A Recorded Title
Editing Creating your own title (Continued) 1: Changing a name of a recorded title Start DVD-RAM DVD-RW Press CONTENT MENU, then press to select a title. Press QUICK MENU then select “Title information” by pressing Menu, then press ENTER. “CONTENT MENU Title information” appears. QUICK MENU e.g. -
Page 87: 2: Dividing A Recorded Title Into Several Chapters
2: Dividing a recorded title into several chapters 1 title is created by recording at a time, which includes 1 chapter. By dividing it into several chapters, it will be easier to access a desired scene, and your editing or playback will be much easier. Simple method To create chapters in a title, insert a chapter mark. - Page 88 Editing Creating your own title – 2: Dividing a recorded title into several chapters (Continued) Press to select “Chapter function”, then press ENTER. The submenu appears. e.g. CONTENT Title List ENTER MENU Quick Menu HDD : Title information Create thumbnail High speed dubbing Rate conversion dubbing Chapter function...
- Page 89 At a point where you want to make a chapter division, press PAUSE. The picture pauses. PAUSE e.g. EDIT Chapter Editing MENU 00 : 00 : 00 Press to select “Divide,” then press ENTER. A chapter division is created at the selected location, and the first scene of the new chapter is registered as a chapter thumbnail.
- Page 90 Editing Creating your own title – 2: Dividing a recorded title into several chapters (Continued) Notes • This recorder supports a limited number of chapters on a disc. If exceeded, a message appears. In this event, reduce the number of chapters by merging chapters. ( page 91) •...
- Page 91 Merging chapters 1) Perform steps 1 to 5 on pages 87 to 88, to view the EDIT MENU Chapter Editing display. 2) Press to highlight a chapter. Pressing PICTURE SEARCH button can access preceding or following pages. 3) Press QUICK MENU. e.g.
-
Page 92: 3: Collecting Necessary Scenes
Editing Creating your own title (Continued) 3: Collecting necessary scenes Create a “Playlist” to omit unnecessary scenes for dubbing, or compile desired scenes. Start DVD-RAM Press CONTENT MENU. “CONTENT MENU Title List” appears. CONTENT MENU Pressing the HDD or DVD button can switch the drives. Press QUICK MENU. - Page 93 Press to select “Playlist editing”, then press ENTER. “EDIT MENU Playlist editing” appears. e.g. EDIT Playlist Editing MENU ENTER Title: Press to select a title or chapter. To select between titles and chapters, press e.g. EDIT Playlist ENTER MENU Editing Title: Press ENTER.
- Page 94 Editing Creating your own title – 3: Collecting necessary scenes (Continued) Notes • You can access “EDIT MENU Playlist Editing” also by selecting “Playlist editing” on EDIT MENU. • If you delete titles and chapters (Original), the corresponding titles and chapters (Playlist) are also deleted. Contrarily, if you delete titles and chapters (Playlist), the corresponding titles and chapters (Original) are not deleted.
- Page 95 Canceling selection of a part 1) From EDIT MENU Playlist editing, press to select a part to cancel. 2) Press QUICK MENU. Quick Menu appears. 3) Press to select “Cancel selected title”, then press ENTER. The part you have selected is canceled. Confirming the first and last scenes of a part or a Playlist You can play the first and last 3 seconds of a scene...
- Page 96 Editing Creating your own title – 3: Collecting necessary scenes (Continued) Making a Playlist of recorded contents where starting times are the same (i.e. daily or weekly recordings) This will help to sort serials. 1) From “CONTENT MENU Title List”, press QUICK MENU.
-
Page 97: 4: Dubbing To Save
4: Dubbing to save You can dub (copy or move) contents recorded in the HDD or DVD-RAM/R/RW, between HDD and DVD-RAM drive or within the same drives. Learn about dubbing on this recorder to select the best method. Purpose Dubbing a whole title or a chapter Converting a title (Playlist) into a title (Original) Dubbing a title reducing its data size... - Page 98 Editing Creating your own title – 4: Dubbing to save (Continued) From DVD-RAM DVD-R/RW (Not finalized yet) DVD-RAM DVD-RAM DVD-R/RW DVD-R/RW • It is not possible to copy to a DVD-R/RW of DVD-VR mode. • “High speed dubbing” between the HDD and a DVD-R/RW recorded on other equipment is not possible. •...
- Page 99 Recording and playback while dubbing Dubbing process by “High speed dubbing” and “Dub selected items” procedures will allow you to make a recording or playback of other titles. Notes • Timer programmed recording have priority over other operations. Dubbing may be stopped if a timer program recording starts.
- Page 100 Editing Creating your own title – 4: Dubbing to save (Continued) A: High speed dubbing (Dubbing only a specified part) DVD-RAM DVD-RW DVD-R This section explains how to dub a specific title or chapter. To select several parts and dub them all at once, refer to page 102.
- Page 101 A part will be copied to the same disc and the copied part will become another title. This operation is useful to change a Playlist to Original. Network: To copy to another TOSHIBA DVD recorder within the same network. See “Network Navi” ( “Copy” or “Move” is automatically selected in the following cases.
- Page 102 Editing Creating your own title – 4: Dubbing to save (Continued) A: High speed dubbing (Dubbing specified parts together) DVD-RAM DVD-RW DVD-R This section explains how to copy several specific titles or chapters. Assigned names of titles/chapters or other information can also be copied. A title or chapter becomes a title by being copied. Start Press HDD or DVD to select a disc that contains titles or chapters you want to copy.
- Page 103 Press to select a part (a title or chapter) to copy. • To go to the next or previous page, press PICTURE SEARCH ( ENTER • To select a chapter, first select the title that contains the chapter you want, then press To go back to the title display, press e.g.
- Page 104 Editing Creating your own title – 4: Dubbing to save (Continued) Notes • This procedure of “Dub Selected Items” of specified parts does not move them. If you do not want to leave the items on the original disc, delete them in the procedure for “Deleting recorded contents” ( •...
- Page 105 Cancelling selection of an item 1) Press to select an item then press QUICK MENU. Quick Menu appears. e.g. EDIT Dub Selected Items MENU Quick Menu Cancel selected title Preview Preview all selected items Title information Clear all selected items Auto power off Exit Capacity...
- Page 106 Editing Creating your own title – 4: Dubbing to save (Continued) B: Rate conversion dubbing (Dubbing at a modified bit rate) DVD-RAM DVD-RW DVD-R You can reduce the recorded picture or sound rate when copying. This procedure enables content originally recorded onto the HDD at high rate setting to be dubbed onto a DVD-RAM disc at a reduced bit rate.
- Page 107 Press to select “Copy” or “Same Disc”. Copy: After the operation is completed, a specified part will remain on the disc where it was previously located. ENTER Same Disc: A part will be copied to the same disc and the copied part will become another title.
- Page 108 Editing Creating your own title – 4: Dubbing to save (Continued) Rate Conversion Dubbing for multiple parts Start Press HDD or DVD to select a disc containing the parts you want to dub. Press EDIT MENU. “EDIT MENU Main Menu” appears. EDIT MENU Press to select “Rate Conv.
- Page 109 Cancelling dubbing during rate conversion dubbing 1) Press QUICK MENU. 2) Press to select “Cancel dubbing”. 3) Press ENTER. Note • A portion of content from the start of recording to the moment you cancel dubbing will be copied. Turning off the power automatically after dubbing 1) While dubbing, press QUICK MENU.
- Page 110 Editing Creating your own title – 4: Dubbing to save (Continued) C: Line-U dubbing (Recording pictures while viewing them) You can record the picture being played back in either disc, or to the other disc, if the content is not copy-protected. This procedure can be used also to copy contents of a DVD-R/RW you created ( Preparation •...
- Page 111 Notes • The following combinations of a source and a destination disc are possible. HDD to HDD, HDD to DVD-RAM, HDD to DVD-R/RW, DVD-RAM to HDD, DVD-R/RW to HDD • A title dubbed by this procedure has black pictures at both the beginning and the end of the title. Therefore thumbnails in CONTENT MENU may be black.
-
Page 112: Creating A Dvd-Video Using Dvd-R/Rw
* Discs made by this procedure will comply with the DVD-Video standard. However, it is not guaranteed to play properly on all DVD video players (including TOSHIBA products). Depending on the disc, there may be a difference of data capacity between DVD-R and DVD-RW. It may be possible that contents you have just recorded onto a DVD-R cannot be recorded onto a DVD-RW. - Page 113 Press EDIT MENU. EDIT MENU Press then press ENTER. ENTER Start Press chapter) to copy to a DVD-R/RW disc. ENTER “EDIT MENU Main Menu” appears. e.g. EDIT Main Menu MENU Chapter Editing Chapters can be divided on frame basis. Chapters can be merged and assigned names.
- Page 114 Editing Creating a DVD-Video using DVD-R/RW (Continued) Press ENTER. A cursor appears in the lower area (destination media). e.g. EDIT DVD-Video Create MENU (Selected Items) ENTER Cursor Capacity Press to select a location to place the selected part, then press ENTER. If there are no parts in the lower area, leave the cursor to the left and press ENTER button.
- Page 115 Press to select “Next”, then press ENTER. A screen is displayed to select options. e.g. EDIT DVD Video Creation(Option Settings) MENU ENTER Menu Create Start Play After play one title After play final title Writing Test Set Aspect Ratio Press to set the items.
- Page 116 Editing Creating a DVD-Video using DVD-R/RW (Continued) Press to select “Next”, then press ENTER. A display of title menu selection appears if “Menu Create” is set to “Title+Chapter” or “Title” at step 7. ENTER ENTER To view your captured images ( next page.
- Page 117 Press ENTER on “EDIT MENU DVD-Video Creation (Chapter Menu Select)” display. A confirmation message is displayed. ENTER Press to select “Yes”, then press ENTER. The current broadcast picture appears and dubbing starts. The progress is displayed on the screen and in the front panel display on the recorder.
- Page 118 184). • Content recorded on a recorder other than this recorder (including TOSHIBA products) cannot be copied to a DVD- R/RW disc using High Speed Dubbing. First set “DVD compatible mode” to “Main” or “SAP” and record them onto the HDD.
- Page 119 Using a favorite scene as a menu You can select favorite scenes from the recorded contents and use them as menus of DVD-Video Created ( page 116) DVD-R/RW. 1) Press CONTENT MENU. 2) Press to select a title which contains a scene to use as menus. 3) Press QUICK MENU.
- Page 120 Editing Creating a DVD-Video using DVD-R/RW (Continued) To improve legibility of characters on menus Press to set “Back ground color” to “On”. Then select “Color” (“White” or “Black”) according to the menu’s tone, and set “Permeation Ratio”, which sets the how translucent the selected Back ground color is.
- Page 121 If a message appears while selecting a part You may receive a message, such as “Selection of Writing Test in the next option setting is recommended to check whether Aspect Ratio coexists”. If a copy- prohibited content is included, or if the aspect ratio is changed meanwhile, cancel the selection.
-
Page 122: Dvd-Video Finalizing Process
Editing DVD-RW DVD-R DVD-Video finalizing process The recorder processes recorded data in a DVD-R/RW disc so that it can be played on other compatible devices. Important • You cannot rewrite data onto a disc after you execute the DVD-Video finalizing process. However, the disabled rewritability of a DVD-RW disc can be restored by canceling the process of the disc ( Video finalizing process is not available. - Page 123 Press to select. As you select each item, its function is explained. When “Menu Create” is set to “None”: ENTER “Start play” and “After play one title” are automatically omitted. Press to select “Next”, then press ENTER. Information on data to be processed appears. e.g.
- Page 124 Editing DVD-Video finalizing process (Continued) Press to select the title menu, then press ENTER. A display of chapter menu selection appears if “Menu Create” is set to “Tltle+Chapter” or “Chapter” at step 3. ENTER Press to select the chapter menu. A selected menu is applied to all chapters.
- Page 125 Notes • DVD-R/RW discs recorded on this recorder may not be recognized on other devices unless you execute DVD- Video finalizing process to them. • You can record onto a DVD-R disc additionally to the limit of the disc capacity, unless you execute the DVD-Video finalizing process to it.
-
Page 126: Other Editing Functions
Editing Other editing functions Changing the picture on CONTENT MENU You can register your favorite scene as a thumbnail displayed on CONTENT MENU. On a finalized DVD-R/RW disc, this feature is not available. Start DVD-RAM Press CONTENT MENU, then press to select a title. - Page 127 Notes • There may be a small difference between a thumbnail made on the Create Thumbnail display and that displayed in CONTENT MENU. Operation with PICTURE SEARCH button may extend the difference. • You cannot create thumbnails of chapters in a title that contains a still picture. •...
-
Page 128: Combining Two Titles (Original) Into One
Editing Other editing functions (Continued) Combining two titles (Original) into one Use this feature to combine two titles into one. The second title is deleted as the second title is added to the end of the first title. Start DVD-RAM Press HDD or DVD to select a disc that contains titles or chapters you want to merge. - Page 129 Notes • You cannot stop the combining process after it has started. • You cannot combine titles if their length will exceed 9 hours. • You cannot combine a protected title or a title containing still pictures. • The title name of the first title is given to the title after combining. •...
- Page 131 Library To facilitate your collecting. Using Library data Searching for a desired title Viewing Library data Checking remaining space...
-
Page 132: Library
Library DVD-RAM Using Library data The recorder has a “Library Management” database which memorizes various properties of recordings made on this recorder, including date, media, title, genre, etc. Using this database, you can search for desired or available discs. You can utilize Library data as follows. •... -
Page 133: Searching For A Desired Title
Library DVD-RAM Searching for a desired title From the “LIBRARY MENU Title Summary (All Titles)”, you can select a title by using change the listing order or sort the titles, search may be easier. Changing the listing order Arrange 1) From Quick Menu, select “Arrange” by then press ENTER. -
Page 134: Jumping
Library Searching for a desired title (Continued) Jumping Jump 1) From the Quick Menu, select “Jump” by then press ENTER. The submenu appears. e.g. Title Summary LIBRARY (All Titles) MENU Quick Menu Date Time CH Genre DVD space remaining Appoint character DVD all disc no. -
Page 135: Viewing Library Data
Library DVD-RAM Viewing Library data This section explains how to check and maintain the Library data. Viewing title information Title information 1) From Quick Menu, select “Title information” by then press ENTER. You can view information about the selected title. e.g. -
Page 136: Maintenance Of Library Data
Library Viewing Library data (Continued) Maintenance of Library data The recorder usually controls the Library database system automatically. However, in the following cases, you must maintain and create data manually. • When you want to add information about a title, (for example when you use a DVD-RAM disc recorded on another device, etc.), to the Library system of the recorder. - Page 137 Erasing unnecessary data When the Library database is full (3000 entries).→ Select “Del title information”. 1) Press LIBRARY. 2) Press to select a title. 3) Press QUICK MENU. 4) Press to select “Library management” then press ENTER. 5) Press to select “Del title information”, then press ENTER.
- Page 138 Library Viewing Library data (Continued) Saving the Library data in a DVD-RAM disc 1) Load a DVD-RAM disc to save the Library data. 2) Press LIBRARY. 3) Press QUICK MENU. 4) Press to select “Library management”, then press ENTER. 5) Press to select “Create backup”, then press ENTER.
-
Page 139: Checking Remaining Space
Library DVD-RAM Checking remaining space You can check the remaining space of each disc prior to recording. Viewing a number and space of a disc DVD all disc no. 1) From the Quick Menu, select “DVD all disc no.” then press ENTER. You can view numbers, names and estimated remaining spaces about all the registered discs. -
Page 141: Network Navi
Network Navi Operate the recorder with a PC. What is Network Navi? Preparation for Network Navi 1: Connection to a PC 2: Recorder’s setup - Network Setting 3: Setting up the PC 4: Starting Network Navi 5: Network Navi settings Network Navi features Displaying thumbnails (Title List) -
Page 142: What Is Network Navi
Network Navi Network Navi What is Network Navi? Network Navi can operate and set the recorder using a web screen. You need a PC that can be connected to the recorder with a Local Area Network (LAN). If you have an always-on internet connection, you can use email to remotely set a timer recording. Main features of Network Navi Editing titles using a PC As in the “CONTENT MENU”... -
Page 143: Operating Environment
Operating environment The recorder complies with the 802.3 standard of IEEE (Institute of Electrical and Electronic Engineers). The following environment is required to use the Network Navi features. Please check these conditions before connecting to a PC. Windows ® 2000/XP Mac OS X (10.4) Color monitor: 16-bit color or greater, 800 x 600... - Page 144 PC and the settings of such software, certain features contained in this recorder may not be usable. Note: Toshiba is not responsible for any malfunction of the recorder and/or the Network Navi features due to communication errors/malfunctions associated with your broadband internet connection and/or your PC, or other connected equipment.
-
Page 145: Preparation For Network Navi
Network Navi Preparation for Network Navi Follow the procedures 1 to 4 to use Network Navi. 1: Connection to a PC A PC with a LAN connection is required. The main method for PC connection is either a direct connection or through a constant and continuous (“always-on”) internet connection. - Page 146 Network Navi Preparation for Network Navi (Continued) Back view of the recorder Regarding the cable used: • When connecting directly to this recorder, use the included LAN crossover cable. • When connecting using a router, use a commercially available LAN straight cable (category 5/CAT5).
-
Page 147: 2: Recorder's Setup-Network Setting
2: Recorder’s setup - Network Setting Start While stopped, press SETUP. The setup screen will be displayed. SETUP DVD player settings DVD disc menu language English Select “Management settings” by press ENTER. ENTER Management settings Network Setting Genre setting Front Display Select “Network Setting”... - Page 148 Network Navi Preparation for Network Navi (Continued) Note: Toshiba recommends that you take the following minimum general security precautions in connection with choosing a User Name and Password in connection with the Network Navi features of the recorder: • Choose a unique User Name and Password that would be difficult for someone else to guess (e.g., do not use the same password that you use for your email account, router, etc.).
- Page 149 Default Gateway (Setting unnecessary) DNS, DNS Server Auto Manual Proxy Server Up to 63 single-byte alphanumeric characters or symbols Proxy Port MAC Address (Unable to set) Connection Check* * When “Connection Check” is pressed, items that were changed on the “Address/Proxy” and “Mail Setting” screens will be saved, and you will not be able to return to the previous setting.
- Page 150 Network Navi Preparation for Network Navi (Continued) Setting example - Sender of timer recording setting mail and receiver of completion notice e.g. homeadd@yyy.zzz.com e.g. mobileadd@yyy.zzz.com Timer recording Completion notice setting mail from: received at: Settings Mail Function Enable Mail Keyword POP3 Server Address yyy.zzz.com POP3 User Name...
-
Page 151: 3: Setting Up The Pc
3: Setting up the PC Settings for the PC will be different depending on the operating system. Please read the user’s manual of your PC for details. The following instructions are for Windows When using the PC with an always-on internet connection, the setting is normally already at “Auto” (automatically obtained IP address). -
Page 152: 4: Starting Network Navi
Network Navi Preparation for Network Navi (Continued) 4: Starting Network Navi Start Network Navi to set up/operate the recorder using a PC. The following instructions are for Windows Launch the internet browser to start using the Network Navi on the PC. Enter the address http://RD-XS55, and press the ENTER key of the PC. -
Page 153: 5: Network Navi Settings
147) on the recorder. Set up for exporting CSV File Format Program Description Include Exclude Other Settings Upgrade page address www3.toshiba.co.jp/dvd/mtn/ Access Port Number Normally set to 1048 It can be set between 1048 and 1999. Net Monitor Settings page 164. -
Page 154: Network Navi Features
Network Navi Network Navi Network Navi features Displaying thumbnails (Title List) ... 155 Operating with the remote control screen ... 157 Net Keyboard ... 158 Operation using the Virtual Remote Control ... 159 Using Library Information (Library) ... 160 Finding the disc containing the title you want to view (Sorting Library information) ... 160 Viewing title information ... -
Page 155: Displaying Thumbnails (Title List)
Displaying thumbnails (Title List) When the “Title List Editor” is clicked in the Main Menu, the thumbnails and information of the titles recorded on the HDD, DVD-RAM, or DVD-R/RW will be displayed. The title information such as the title names and genres can be changed*. It will take some time for them to be displayed. * •... - Page 156 Network Navi Network Navi features (Continued) Click on an item that you want to change, and select a value or input data. For the content of settings, see the following “Items for setting”. After the setting is completed, click “Save”. The title information will be set.
-
Page 157: Operating With The Remote Control Screen
Operating with the remote control screen Using this feature, you can operate the recorder using a PC just like using the remote control included with the recorder. Click “Virtual Remote Control” on the Main Menu. Click on a button on the remote control screen. The remote control screen will operate in the same way as when you press a button on the regular remote control. -
Page 158: Net Keyboard
Network Navi Network Navi features (Continued) View of the Virtual Remote Control Main panel Switch between the Main panel and Sub panel by clicking these areas. Net Keyboard If the recorder’s character input window is started while the Virtual Remote Control is displayed, the Net Keyboard screen will be displayed on the PC. -
Page 159: Operation Using The Virtual Remote Control
Operation using the Virtual Remote Control You can have remote control operations using the mouse of a PC. Setting up the Virtual Remote Control If the remote control screen is starting up, begin the setup after the screen has finished displaying. 1 Click “Setup Menu”... -
Page 160: Using Library Information (Library)
Network Navi Network Navi features (Continued) Using Library information (Library) Like in the “Library”, you can easily find a disc with remaining space or a desired disc by using stored information for each title such as the recorded time and date, where it is recorded, the title name, and the genre. -
Page 161: Setting For Custom Menu Addition (Custom Menu Editor)
Setting for custom menu addition (Custom Menu Editor) When creating a DVD-R/RW, this feature will allow you to set and add 16 types of images that are separate from the 8 types of custom menu which initially came with the recorder. You will need: Images that you want to use on the menu screen (Windows bitmap format (bmp),* dpi)) - Page 162 Network Navi Network Navi features (Continued) Select “Font Color”, “Cursor Position Color”, and “Cursor Enter Color”. Click “Save”. The user custom menu that was set will be sent to the recorder. The set custom menu will be displayed towards the bottom of this screen. Deleting the user custom menu Select “Number”...
-
Page 163: Net Dubbing
Net Dubbing You can perform dubbing by designating equipment (Toshiba’s HDD & DVD video recorder) on the same network as the dubbing destination. Net Dubbing can also be performed in “Dub Select Items”. The following conditions are required to use this feature. - Page 164 Network Navi Network Navi features (Continued) Directly connecting Net Dubbing compatible models By directly connecting with the Net Dubbing compatible device, you can dub without the network environment. It is necessary to set the compatible device’s IP address to an address that is different but within the same subnet as the recorder’s.
-
Page 165: Net Monitor
Net Monitor A TV program which is being broadcasted or has been recorded can be viewed on a PC that is connected to the recorder. (In other cases, Net Monitor may not operate normally.) Net Monitor can be used to stream content (live tuner or recorded content) from the recorder to the PC for viewing in your home office. - Page 166 Network Navi Network Navi features (Continued) View of the monitor window Since an image that is displayed in the monitor window is more compressed than that on TV, the image will be less clear. Notes • The aspect ratio displayed in the monitor window is 4:3. •...
- Page 167 On “Net Monitor is not available” due to recorder conditions A message will be displayed and viewing of the monitor cannot be done under conditions such as the following: The recorder condition Recorder tuner conditions: 15 seconds before the timer recording, in Timeslip mode, during timer recording, or during regular recording.
-
Page 168: Setting A Timer Recording Using Email
Network Navi Network Navi features (Continued) • Toshiba is not responsible for any damage or loss caused directly or indirectly by the failure of the recorder to record content intended to be recorded. • Toshiba is not responsible for, nor has any control over, any content recorded and/or viewed using the recorder. -
Page 169: Useful Features Of Timer Recording Setting Using Email
Useful features of timer recording setting using email Receiving timer recording setting email The recorder receives timer recording setting email on the POP server at 15-minute intervals. Note • The recorder cannot receive timer recording setting email while displaying a GUI on a connected TV. Therefore, a prolonged GUI view on the TV may cause failure in timer recording setting using email. -
Page 170: If You Are Having A Difficulty With Network Navi Features
Network Navi Network Navi features (Continued) If you are having a difficulty with Network Navi features... The following are Network Navi features each of which must be set for proper operation. Complete the basic settings as in the table below, and then make appropriate changes to the settings. If the Network Navi features are not operating, check the settings again to make sure all inputs are correct. -
Page 171: Function Setup
Function setup You can change the default settings to customize performance to your preference. Customizing the function settings... -
Page 172: Customizing The Function Settings
Function setup DVD-RAM DVD-RW DVD-R DVD-VIDEO Customizing the function settings You can change the default settings to customize performance to your preference. Start Notes • SETUP button is available even during normal playback. However some items may be grayed out and they cannot be selected. - Page 173 Setting DVD player settings DVD disc menu language DVD-VIDEO DVD audio language DVD-VIDEO DVD subtitle language DVD-VIDEO DVD dynamic range control DVD-VIDEO Karaoke vocal DVD-VIDEO DVD parental lock DVD-VIDEO DVD title stop DVD-RW DVD-R DVD-VIDEO Picture/Audio settings Pause/Still DVD-RAM DVD-RW DVD-R DVD-VIDEO Output Black level...
- Page 174 Function setup Customizing the function settings (Continued) Setting Display settings TV shape DVD-RAM DVD-RW DVD-R On screen display DVD-RAM DVD-RW DVD-R DVD-VIDEO Transparency DVD-RAM DVD-RW DVD-R DVD-VIDEO Startup screen Screen protector DVD-RAM DVD-RW DVD-R DVD-VIDEO Background Closed caption Operational settings Operation beep DVD-RAM DVD-RW...
- Page 175 Setting DVD recorder operation User record quality DVD-RAM DVD-RW DVD-R Picture record mode DVD-RAM DVD-RW DVD-R Input Black level DVD-RAM DVD-RW DVD-R Aspect ratio (Video mode) DVD-RW DVD-R DVD compatible mode DVD-RAM DVD-RW DVD-R DVD-Video:CHP create DVD-RW DVD-R Rec DNR DVD-RAM DVD-RW DVD-R...
-
Page 176: Dvd Player Settings
Function setup Customizing the function settings (Continued) DVD player settings DVD disc menu language DVD-VIDEO English: To display disc menus in English. French: To display disc menus in French. Spanish: To display disc menus in Spanish. Others: To make a further language choice. After pressing ENTER button, follow steps 1) –... - Page 177 3) Press buttons to shift. Select the proceeding character by pressing buttons (or ADJUST button). 4) Press ENTER button. Notes • Some DVD video discs may be set to display subtitles in a different language from that you selected. A prior subtitle language may be programmed by the disc.
- Page 178 Function setup Customizing the function settings (Continued) Country/Area AUSTRALIA BELGIUM CANADA CHINA CHINA HONG KONG DENMARK FINLAND FRANCE GERMANY INDONESIA ITALY JAPAN MALAYSIA NETHERLANDS NORWAY PHILIPPINES RUSSIAN FEDERATION SINGAPORE SPAIN SWEDEN SWITZERLAND TAIWAN THAILAND UNITED KINGDOM UNITED STATES 3) Select the desired limitation level by pressing buttons, and then press ENTER button.
-
Page 179: Picture/Audio Settings
Picture/Audio settings Pause/Still DVD-RAM DVD-RW DVD-R DVD-VIDEO Auto: Normal setting. Pause the moving image without blurring. Frame: Displays high resolution still image. Output Black level DVD-RAM DVD-RW DVD-R DVD-VIDEO You can adjust the black level of the output signal. Standard: Normal black level. - Page 180 Function setup Customizing the function settings (Continued) Play DNR DVD-RAM DVD-RW DVD-R Selects a setting for playback at a reduced noise level. Press buttons to select an item then select “On” or “Off” using buttons. 3D-DNR: Off: Not activated. Reduces the noise levels of brightness signals and color signals present in the video signal during playback.
-
Page 181: Display Settings
SAP (Second Audio Program broadcast) is separate audio program, usually broadcast in a second language with the main language. Off: The main sound is received. SAP sound (second language) is received. Display settings TV shape DVD-RAM DVD-RW DVD-R DVD-VIDEO Select a picture size according to the aspect ratio of your For details on this setting, see “TV shape setting”... -
Page 182: Operational Settings
Off: Deactivates the screen protector function. Activates the screen protector function. Note • Toshiba does not guarantee that this function protects the TV screen by all means. Background Selects a screen color when receiving no video signals such as selecting a non-broadcasting channel. -
Page 183: Dvd Recorder Operation
Instant replay interval DVD-RAM DVD-RW DVD-R DVD-VIDEO Sets how far back is replayed when INSTANT REPLAY button is pressed. 5 sec. : 10 sec. : 30 sec. : 5 min. Title thumbnail point DVD-RAM DVD-RW DVD-R For recorded titles, sets how far a scene from the start is set as the title thumbnail. - Page 184 Function setup Customizing the function settings (Continued) Picture record mode DVD-RAM DVD-RW DVD-R Adjusts problems with the brightness of video signals of TV broadcasts or other external input. Press buttons to select the source, and to select the mode. (Only use this setting when you cannot adjust the brightness satisfactorily with the Custom picture setting in Picture/Audio settings ( page 179) of this recorder.)
- Page 185 DVD-Video:CHP create DVD-RW DVD-R To set whether chapters are to be automatically created at a selected interval during DVD-R/RW recording. Off: Chapters are not set. 5 min. : 10 min. : 15 min. : 20 min. To set the interval at which chapters are automatically created to 5, 10, 15 or 20 minutes.
-
Page 186: Management Settings
Function setup Customizing the function settings (Continued) Management settings Network Setting See “Network Navi” ( page 147). Genre setting DVD-RAM DVD-RW DVD-R This registers a frequently used genre name onto the menu. Genre names registered here are displayed in the “Genre”... -
Page 187: Initial Settings
HDD format Initializes the HDD. Normally it is not required to initialize the HDD. However when the HDD does not function correctly, initializing the HDD may solve the situation. If you initialize the HDD, all titles and library information stored in the HDD are permanently deleted. - Page 188 Function setup Customizing the function settings (Continued) Setting of picture and sound quality for recording Picture quality setting Sound setting D/M1 D/M2 L-PCM...
-
Page 189: Others
Others Before calling service personnel Output sound conversion table Error codes on the display window Recording duration Language Code List Specification... -
Page 190: Before Calling Service Personnel
Others Before calling service personnel If you experience any of the following difficulties while using this unit, check the list below before consulting your nearest Toshiba dealer. Power The power is not turned on. • The power cord is not connected securely. - Page 191 Recording Cannot be recorded on a DVD-RAM disc. • The disc is protected from deleting data. → Set the write-protect tab to the opposite of “PROTECT” ( page 8). • The disc is protected by a PC or the recorder. →...
-
Page 192: Output Sound Conversion Table
Others Output sound conversion table BITSTREAM/ Sound format Disc PCM jack HDMI OUTPUT jack Bitstream Dolby Digital 48 kHz/16 bit 48 kHz/16 bit 48 kHz/20 bit 48 kHz/16 bit 48 kHz/24 bit 48 kHz/16 bit Linear DVD- 96 kHz/16 bit 48 kHz/16 bit video 96 kHz/20 bit... -
Page 193: Error Codes On The Display Window
ER-FAN An irregular stop of the ventilation fan detected. Note • If you find an error code other than listed above, consult your nearest TOSHIBA dealer. • When creating a DVD-Video • When creating a DVD-Video • When recording on DVD-R/RW •... -
Page 194: Recording Duration
Others Recording duration DD1 (192kHz) Sound rate DVD-RAM Picture quality rate Hour Minute Hour Minute • The recording durations listed above are for reference purposes only and are not guaranteed. Recording durations may vary. • The recording durations for DVD-RAM discs listed above are applicable to DVD-RAM discs that have been initialized. Actual recording duration may vary depending on the disc used. -
Page 195: Language Code List
Others Language Code List Table of languages and their abbreviations Abbreviation Language – – – No alternate language CHI (ZH) Chinese DUT (NL) Dutch ENG (EN) English FRE (FR) French GER (DE) German ITA (IT) Italian JPN (JA) Japanese KOR (KO) Korean MAY (MS) Malay... -
Page 196: Specification
Others Specification I Power requirement during operation 33.0W I Power requirement at standby 17.2W (Front panel display: on) 15.1W (Front panel display: off) I Power supply 120V AC, 60 Hz I Mass 5.8kg I External dimension Width 434 x Height 81 x Depth 339mm I Incoming channels TV: 2-69CH, Cable:1-125CH I Antenna input/output terminal... - Page 197 Memo...
- Page 198 Memo...
- Page 199 Memo...