
Related Manuals for Toshiba D-VR3SB


Summary of Contents for Toshiba D-VR3SB
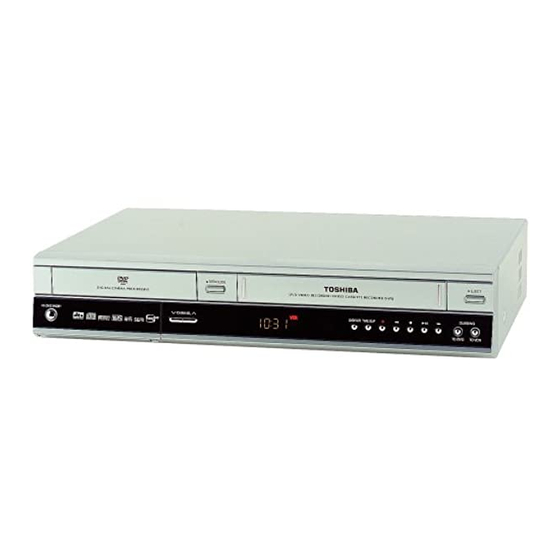
- Page 1 DVD RECORDER-VCR D-VR3SB OWNER’S MANUAL Read this booklet first. ON/STANDBY DUBBING TO DVD TO VCR 2004 Toshiba Corporation...
-
Page 2: Warning
Some DVD video discs are copy protected, and any recordings made from these discs will be distorted. • Toshiba is not liable for any damage caused by fires, natural disaster (such as thunder, earthquake, etc...) acts by third parties, accidents, owner's intentional or unintentional misuse, or uses in other improper condi- tions. -
Page 3: Precaution
Precaution Important Safety Instructions CAUTION : PLEASE READ AND OBSERVE ALL WARNINGS AND INSTRUCTIONS GIVEN IN THIS OWNER’S MANUAL AND THOSE MARKED ON THE UNIT. RETAIN THIS BOOKLET FOR FUTURE REFERENCE. This set has been designed and manufactured to assure personal.safety Improper use can result in electric shock or fire hazard. -
Page 4: Handling Cautions
Handling Cautions • Before connecting other components to this recorder, be sure to turn them all off. • Do not move the recorder while a disc is being played, or the disc may be scratched or broken, and the recorder’s internal parts may be damaged. •... - Page 5 Exemptions • Toshiba is not liable for any damage caused by fires, natural disaster (such as thunder, earthquake, etc.), acts by third parties, accidents, owner's inten- tional or unintentional misuse, or uses in other improper conditions.
- Page 6 • This unit can play back DVD-R discs recorded and finalised with a Toshiba DVD recorder. It may not be able to play some DVD-R discs depending on the disc and the condition of the recording.
- Page 7 DVD-RAM Disc Playback and Recording • DVD-RAM discs come with or without a cartridge. For this product, we recommend DVD-RAM discs that come with cartridges. • Some cartridges are able to eject the disc inside. Even if you are able to eject the disc, always use the disc with the cartridge to ensure correct opera- tion.
-
Page 8: Table Of Contents
Contents Getting Started Getting Started Warning ......2 Precaution ..... . . 3 General Features . - Page 9 Playback Playback *DVD Playback Before Playing ..... 47 Region code (DVD-Video only) ... . . 47 Disc types that can be played .
- Page 10 Videoplus+ Extended ....77 Watching the Images Being Recorded (Time Slip) ......78 Recording From External Devices .
-
Page 11: General Features
General Features The D-VR3 allows you to record and playback high qual- ity digital images on a DVD-RAM/DVD-RW/ DVD-R disc. You can also edit digital images on DVD-RAM/DVD-RW discs. High quality digital audio and video recording and playback Record up to about 12-hours of video with a double side 9.4 GB DVD-RAM disc, and up to about 6-hour of video with a 4.7 GB DVD-RAM disc, depending on the record- ing mode. -
Page 12: Before Reading The User's Manual
2) If a problem occurs, check for Troubleshooting. Copyright ©2004 Toshiba Corporation. All rights reserved; No part or whole of this user’s manual may be reproduced or copied without the prior written permission of Toshiba Corporation. 12 - English How to use the DVD Recorder-VCR Step 1 Select the disc type This unit can record on the following types of discs. - Page 13 Step 3 Recording There are two different recording methods: Direct Recording and Timer Recording. Timer recording is classified as recording type : Once, Daily or Weekly or recording mode : XP (high quality mode), SP (stan- dard quality mode), LP (long recording mode), and EP (extended mode) according to the recording mode.
-
Page 14: Description
Description Front Panel ON/STANDBY INPUT SELECT 1. DVD DECK 2. DVD OPEN/CLOSE BUTTON 3. VCR DECK 4. VCR EJECT BUTTON 5. ON/STANDBY BUTTON 6. INPUT SELECT BUTTON 7. S-VIDEO INPUT JACK 8. VIDEO INPUT JACK 9. AUDIO L.R INPUT JACK 10. -
Page 15: Rear Panel
Rear Panel S-VIDEO OUT JACK AUDIO OUT L,R JACK DIGITAL AUDIO OUT JACK (OPTICAL) DIGITAL AUDIO OUT JACK (COAXIAL) AUDIO/VIDEO JACK AUDIO OUT DIGITAL AUDIO OUT VIDEO OPTICAL COAXIAL AV1 (EURO AV) IN/OUT SCART (EURO-21) SOCKET AV2 (DEC./EXT.) SCART (EURO-21) SOCKET OUT TO TV CONNECTOR AERIAL IN CONNECTOR English - 15... -
Page 16: Tour Of The Remote Control
Tour of the Remote Control CLEAR REC SPEED 1. ON/STANDBY Button 2. NUMBER Button 3. IPC Button 4. VCR Button 5. DVD Button Press this when you use a DVD. 6. TV Control Buttons • VOLUME Button TV volume adjustment •... -
Page 17: Connecting & Setting Up
Connecting & Setting Up • Quick Overview ....17 • Unpacking ..... . . 18 •... -
Page 18: Unpacking
Step 1: Unpacking Accessories Check for the supplied accessories below. • Audio/Video Cable • RF Cable for TV • Remote Control • Batteries for Remote Control (AA Size) • User’s Manual * Dispose of batteries according to local environmental regulations. Do not put them in the household trash. Step 2: Connecting DVD Recorder-VCR to the TV using the RF Cable... -
Page 19: Connecting The Scart Cable
Step 3: Connecting the Scart Cable Method 1 : Connecting DVD Recorder- VCR to the TV using the SCART Cable You can connect your DVD Recorder-VCR to the televi- sion using the SCART cable if the appropriate input is available on the television. You thus: •... -
Page 20: Connecting The Video Cable
1. AV2 IN: By means of 21-pin Scart Cable Plug the SCART Cable with satellite receiver or other equipment into the AV2 (DEC./EXT.) socket on the rear of the DVD Recorder-VCR. After making this connection, select the source by pressing the INPUT SEL. button for the AV2 input sources. -
Page 21: Connecting To An S-Video Input Jack
Method 2 : Connecting to an S-video input jack Connect an S-video cable(not supplied) between the S- VIDEO OUT jack on DVD Recorder-VCR and S-VIDEO IN jack on the TV (or AV amplifier). • You will enjoy high quality images. S-Video separates the picture element into black and white (Y) and color (C) signals to present clearer images than regular video input mode. -
Page 22: Connecting To A Stereo Amplifier With Analog Input Jacks
Method 2 : Connecting to a stereo amplifier with analog input jacks If your stereo amplifier only has audio input jacks (L and R), use the analog audio out jacks. AUDIO OUT DIGITAL AUDIO OUT VIDEO OPTICAL COAXIAL white ANALOG AUDIO IN Front(L)speaker Front(R)speaker 22 - English... -
Page 23: Connecting External Devices
Step 6 : Connecting External Devices This allows you to connect your DVD Recorder-VCR to other external devices and view or record their outputs. • Method 1 : Connecting a extemal devices to the AUX in jacks. • Method 2 : Connecting a Camcorder to the DV IN jack. Manufactured under license from Dolby Laboratories. -
Page 24: English
24 - English Setting the Remote Control Your DVD Recorder-VCR remote control will work with Toshiba televisions and compatible brands. CLEAR REC SPEED To determine whether your television is compatible, follow the instructions below. - Page 25 Controllable TV Codes Brand name Brand code TOSHIBA 0001 0071 0211 0571 AIWA 0921 AKAI 0201 0241 0311 0431 BAIRD 0171 0241 BANG & OLUFSEN 0471 BEKO 0181 BLAUPUNKT 0071 0321 0331 BRIONVEGA 0461 0471 0651 BUSH 0071 0501 0551...
-
Page 26: System Setup
System Setup • On-Screen Menu Navigation ..26 • Plug & Auto Setup ....27 • Setting the Date and Time . -
Page 27: Plug & Auto Setup
Plug & Auto Setup The DVD Recorder-VCR will automatically set itself up when it is plugged into the mains for the first time. TV stations will be stored in memory. The process takes a few minutes. The DVD Recorder-VCR will then be ready for use. -
Page 28: Setting The Date And Time
Setting the Date and Time Your DVD Recorder-VCR contains a 24-hour clock and calendar used to: • Automatically stop programme recording • Preset your DVD Recorder-VCR to record a pro- gramme automatically You must set the date and time • You must set the date and time when you purchase the DVD Recorder-VCR •... -
Page 29: Presetting The Stations Automatically
Presetting the Stations Automatically You do not need to preset the stations if you have already set them automatically (see Plug & Auto Set Up on page 27). Your DVD Recorder-VCR contains a built-in tuner used to receive television broadcasts. You must preset the stations received through the tuner. -
Page 30: Presetting The Stations Manually
Presetting the Stations Manually If you have already set then automatically, you do not need to preset the stations manually. Open “MENU” With the DVD in Stop mode, press the MENU button. Select “Setup” ❷ Using the buttons, move the selection bar ❿... -
Page 31: Clearing A Preset Station
To... Then... Select a Character Press the the required name character is displayed (letters, numbers or “ - ” character) ➛ ❿ Move to the next or Press the previous character respectively. If you.. Then... Wish to store the • Press the station displayed the MFT is selected. -
Page 32: Changing The Preset Manual Setup Table
❷ Press the buttons to select a PR number ❿ as required then press or OK button to select. ❷ Press the button to select Delete. Then press OK button to delete. PR.03 Do you want to delete 'PR.03'? ➛❿ Press the buttons to select Yes, and then press the OK button. -
Page 33: Setting The Vcr Output Channel
❷ Press the buttons, until the required preset TV programme is selected then press button to select. ❷ Press the button to select Swap. To change the programme number assigned to a station press the OK button on the remote con- trol. -
Page 34: Setting Up The Language Features
Setting Up the Language Features If you set the player menu, disc menu, audio and subtitle language in advance, they will come up automatically every time you watch a movie. Audio With the DVD in Stop mode, press the MENU button on the remote control. -
Page 35: Subtitle
Subtitle With the DVD in Stop mode, press the MENU button on the remote control. ❷ Select “Setup” using buttons, then press ❿ or OK button. ❷ buttons, then Select “Language” using press the ❿ or OK button. Language setup menu will be displayed. Programme ❷... -
Page 36: Disc Menu
Disc Menu With the DVD in Stop mode, press the MENU button on the remote control. ❷ Select “Setup” using buttons, then press ❿ or OK button. ❷ buttons, then Select “Language” using press the ❿ or OK button. Language setup menu will be displayed. Programme ❷... -
Page 37: On-Screen Menu
On-Screen Menu With the DVD in Stop mode, press the MENU button on the remote control. ❷ Select “Setup” using buttons, then press ❿ or OK button. ❷ buttons, then Select “Language” using press the ❿ or OK button. Language setup menu will be displayed. Programme ❷... -
Page 38: Setting Up The Audio Options
Setting Up the Audio Options Allow you to setup the Audio device and sound status depending on the audio system in use. With the DVD in Stop mode, press the MENU button on the remote control. ❷ Select “Setup” using buttons, then press ❿... -
Page 39: Setting Up The Display(Video) Options
Setting Up the Display(Video) Options This function allows you to setup the TV screen settings. With the DVD in Stop mode, press the MENU button on the remote control. You can’t use the Setup functions during play- back. ❷ Select “Setup” using buttons, then press ❿... -
Page 40: Setting Up The Parental Control
Setting Up the Parental Control The Parental Control function works in conjunction with DVDs that have been assigned a rating - which helps you control the types of DVDs that your family watches. There are up to 8 rating levels on a disc. With the DVD in Stop mode, press the MENU button on the remote control. -
Page 41: About The Change Password
About the Change Password; Select Change Password using ❿ then press the or OK button. • The ‘Enter the password.’ message will be displayed. Enter the 4-digit password using the 0 to 9 but- tons on the remote control. • The ‘Confirm the password.’ message will be displayed. - Page 42 Select “VCR” ❷ Using the buttons, move the selection bar ❿ to “VCR”, then press or OK to select. NICAM : On Programme AV 1 Output : RGB Select “Tape Length” ❿ Press the button to select the Tape Length. This information is usually printed on the tape box.
-
Page 43: Intelligent Picture Control(Ipc)
Intelligent Picture Control (IPC) The intelligent Picture Control Feature allows you to adjust the sharpness of the image automatically, accord- ing to your own preferences. Open “MENU” With the VCR in play mode, Press the MENU button. Select “Setup” ❷ Using the buttons, move the selection bar ❿... -
Page 44: Selection The Colour Mode
Selection the Colour Mode Before recording or playing back a tape, you can select the required system standard. Otherwise, the system automatically selects the reception standard when you select Automatic. • When playing back a tape, the standard is automatical- ly selected by the DVD Recorder-VCR. -
Page 45: Front Display
Front Display You can set the Front Panel Display to be bright all the time, dim all the time, dim during power off. Open “ MENU” With the DVD in Stop mode, press the MENU button. . Select “Setup” ❷ Using the buttons, move the selection bar ❿... -
Page 46: Nicam
NICAM NICAM programmes are divided into 3 types. NICAM Stereo, NICAM Mono and Bilingual (transmis- sion in another language). NICAM programmes are always accompanied by a standard mono sound broadcast and you can select the desired sound. Open “MENU” With the VCR in play mode, Press the MENU button. -
Page 47: Before Playing
Playback This section introduces basic functions of play- back by disc type. DIGITAL SOUND Dolby Digital Digital Audio STEREO Stereo PAL Colour System in Australia, Newzealand, etc. • Before Playing ....47 •... -
Page 48: Discs That Cannot Be Played
Discs that cannot be played • DVD-Video with a region number other than “2” or “ALL” • 3.9 GB DVD-R Disc for Authoring. • DVD-RAM not recorded following the Video Recording Standard • Unfinalised DVD-R recorded on other equipment. • NTSC discs •... - Page 49 Press the OPEN/CLOSE button. Place a disc gently into the tray with the disc’s label facing up. Press OPEN/CLOSE button to close the disc tray. • Your DVD Recorder-VCR closes the disc tray and plays the disc automatically. • When a recordable media (DVD-RAM, DVD- RW, DVD-R, etc.) is used, Auto Playback can- not be activated without pressing the Play but- ton.
-
Page 50: Using The Search & Skip Functions
Using the Search & Skip Functions Searching through a Chapter or Track During play, press the SEARCH ➛ ➛ or ❿ ❿ button on the remote control. The playback speed will change as follows. DVD-VIDEO ❿ ❿ ❿ ❿ Fast X2 ❿... -
Page 51: About Quick
About QUICK The QUICK functions allows you to easily search for a desired scene by accessing title, chapter, track and time. You can also change the subtitle and audio settings and set some features including Repeat, Angle and Zoom. Press the QUICK button on the remote control during playback. -
Page 52: Repeat Play
Repeat Play Using Repeat Play (For DVD-VIDEO/DVD-RAM/DVD- RW/DVD-R) “Chaper repeat” is only available in DVD-Video. Press the QUICK button. ❷ buttons to select Repeat and use button to select the A-B, Title or Chapter you want to play repeatedly. Press OK button. Repeat play allows you to repeat title, chapter or A-B. -
Page 53: Using The A-B Repeat Function
Using the A-B Repeat Function For DVD-VIDEO/DVD-RAM/ DVD- RW/DVD-R Press the QUICK button during playback. ❷ to select Repeat and use to select A-B. Press OK button. Press the OK button at the point where you want the repeat play to start (A) and then press the OK button at the point where you want the repeat play to Stop (B). -
Page 54: Selecting The Subtitle & Audio Language
If you want to move to a desired time, enter the time in the sequence of hour, minute, and sec- ond using the number buttons and then press the OK button. NUMBER 54 - English Selecting the Subtitle & Audio Language Audio languages and subtitle languages may not work depending on disc type. -
Page 55: Selecting The Audio Language
Selecting the Audio language Press the QUICK button during playback. ❷ to select Audio and use to select the desired audio language. • Audio languages may be different because they are disc-specific. • Some discs allow you to select languages from the disc menu only. -
Page 56: Using Bookmarks
Using Bookmarks Set marks at scenes you want to see again so that you can start playback from the marked position. Setting a book mark Press the MARKER button during playback. Press the OK button when the desired scene appears. •... -
Page 57: Clearing A Bookmark
Clearing a Bookmark Press the MARKER button. CLEAR ➛❿ Press buttons to select a marked scene you want to delete. Press CLEAR button to delete the selected bookmark. Zooming-In Press the QUICK button during playback. ❷ buttons to select Zoom, and then press the OK button. -
Page 58: Check Remaining Time
Check Remaining Time Press DISPLAY button on the remote control. Following information will be displayed. (Current deck status, Current counter, recording speed, remaining time, input channel, current time.) - - : - - : - - 02:08 Thu 01 Jan.2004 Using the Disc and Top Menu Some type of discs contains a dedicated menu system... -
Page 59: Playing Back An Audio Cd (Cdda)
Playing Back an Audio CD (CDDA) Each disc has a variety of menu functions available. Insert an audio CD (CDDA) into the disc tray. • The audio CD menu appears and the tracks (songs) are played back. Quick ❷ Press buttons to select the track (song) to start playback from, and then press the OK button. -
Page 60: Play Option Mode
Play Option Mode Press the QUICK button during playback. Repeat mode will be highlighted. Quick • During Playback, repeat mode will be highlighted. • During Stop, Play option will be highlighted. Select Play Option Mode using the and press the OK button. •... -
Page 61: To Program Tracks
To Program Tracks You can register a maximum 30 tracks in the playlist. During Playback, press the QUICK button. Repeat Mode will be highlighted. Quick Select Play Option using the ➛❿ buttons. Quick Press the OK button. The play option screen will appear. Select Playlist using the ❷buttons and press the OK button. -
Page 62: Photo Cd Playback
Photo CD Playback Insert a photo CD (JPEG) into the disc tray. The screen shown below will appear automati- ❿ II cally. (Press (PLAY/PAUSE) button to switch to slide show mode.) To see the next 6 pictures, press the To see the previous 6 pictures, press the ton. -
Page 63: Playing Back An Mp3 Cd
Playing back an MP3 Insert an MP3 CD into the disc tray. • The MP3 menu is displayed and the tracks (songs) are played back. Quick ❷ Press the buttons to select the folder you want to hear, and then press the OK button. ❷... -
Page 64: Using Pip
Using PIP The PIP function allows you to view a sub screen together with the main screen in DVD mode. You can watch both DVD and TV together. PIP does not work in VCR mode. Note During Playback, press the PIP button. •... -
Page 65: Playing The Vcr
Playing the VCR To play a standard VHS Video tape, videotape, just insert it into the VCR deck and press the PLAY button. You can turn on the Auto Play to enable the VCR deck to play automatically when you insert a videotape that is missing the Record Safety Tab. -
Page 66: Special Vcr Playback Features
Special VCR Playback Features While a videotape is playing, you can enjoy a variety of special playback features, including Still, Frame Advance, Skip, Slow motion, and more. Press the Play button again to resume normal playback. Still ❿ II In Play mode, press (PLAY/PAUSE) to still a single frame. -
Page 67: Variable Search System
Variable Search System Press the QUICK button to display the search screen in the stop mode. When a program is record- ed, the starting point is given an Index mark for easy location. However, the VHS Index Search System (VISS) cannot recognize index marks made by old VCRs. -
Page 68: Recording
DVD-R the DVD Recorder-VCR Recordable Recordable Not recordable Recordable Not recordable Recordable Not recordable Recordable (D-VR3) Not Recordable (Other Toshiba Models) Not recordable Not recordable Not recordable Recordable (D-VR3) Not Recordable (Other Toshiba Models) Not recordable Not recordable... -
Page 69: Recording Formats
Finalise - This closes the DVD-RW/DVD-R so no Note additional recording can be done. Unfinalise - This allows additional recording on a finalised DVD-RW disc. - A DVD-RW disc that has been recorded by DAO in a PC cannot be unfinalised. - A DVD-RW disc that has been recorded in Video Mode of a different maker’s recorder cannot be unfinalised. -
Page 70: Recording The Current Programme You Are Watching
Recording the current Programme you are watching 1. Check the aerial cable is connected. 2. Check the remaining time of disc. DVD-RAM/DVD-RW discs should be formatted in advance before beginning recording. Most new discs are sold unformatted. Make sure to format your unformatted discs before recording. -
Page 71: Making A One Touch Recording(Otr)
Making a One Touch Recording (OTR) One-Touch Recording (OTR) allows you to add record- ing time in 30-minute increments up to 9 hours at the touch of a button. Use the PROG/TRK buttons or number buttons to select the station to record. Start Recording. - Page 72 Press the OK button. • The information concerning the programme is displayed. • When using the Videoplus+ function for the first time with stored stations, the programme number flashes. On the first occasion, you must enter the station number manually by pressing the ❷...
-
Page 73: Modifying Videoplus+ Programming
Modifying Videoplus+ Programming If you wish to correct the programme displayed or modify certain elements, such as the recording speed, refer to following instruction before pressing RETURN button. If you wish to... Select an input source other than the tuner (AV1, AV2 or AUX) Record a programme every day (Monday to Sunday) at the same time Record a programme every week... -
Page 74: Using The Timer Programming Feature
Using the Timer Programming Feature 1. Check the antenna cable is connected. 2. Check the remaining time of the disc. 3. Check the date and time are correct. Make sure the Clock has been set (Setup - Clock Set) before you proceed with a timer recording. Press the VIDEO Plus+ button. -
Page 75: Editing Timer Programming Feature
AUTO : Select when you want to set video quality auto- matically. It depends on the remaining time on the DVD. XP (high quality) : Select when video quality is are impor- tant. (Approx. 1 hour) SP (standard quality) : Select to record in standard quali- ty. -
Page 76: Deleting A Timer Programming
❷ Press the buttons to select “Standard ❿ Timer” and then press the or OK button. Scheduled Record List ❷ Press the buttons to select the number of the timer programming you want to edit, and ❿ then press the or OK button. -
Page 77: Videoplus+ Extended
❷ Press the buttons to select “Delete”, and then press the OK button. • You will be prompted with the delete confirm message such as ‘Do you want to delete ‘No.01’?’. ➛❿ Press the buttons to select Yes, and then press the OK button. -
Page 78: (Time Slip)
Watching the Images Being Recorded (Time Slip) This function allows you to watch the recently recorded images on the PIP screen while a recording is in progress, with a 10 second delay. Press the (REC) button on the remote control. •... -
Page 79: Recording Through A Dv Jack
Recording through a DV jack Follow these directions to record onto a disc the outputs of a camcorder that has a DV output jack. Connect the DV output jack of your camcorder to the DV input jack on the front of your DVD Recorder-VCR using a DV cable. -
Page 80: Special Recording Features
Special Recording Features While a recording is in progress, you can watch a differ- ent Programme, watch a different media, or add record- ing time in 30-minute increments. Watch a Different Channel Press the TV/VCR button on the remote to switch to your TV tuner, then select a different channel on your television. -
Page 81: Copy To Dvd Or Vcr
Copy to DVD or VCR You can copy DVD to VCR or VCR to DVD. Press MENU button and select Copy. DVD-RAM(VR) DVD --> VCR VCR --> DVD Playlist Disc Manager Programme DVD to VCR Select DVD --> VCR to copy DVD to VCR. -
Page 82: Vcr To Dvd
VCR to DVD Select VCR --> DVD to copy VCR to DVD. VCR --> DVD scene will be displayed. • Check the remaining time on the disc. DVD-RAM(VR) DVD --> VCR VCR --> DVD Playlist Disc Manager Programme Press OK button to select the start position. -
Page 83: Editing
Editing • Viewing the Menu Functions for a Disc 83 • Viewing Title List ... . . 85 • Playing a Title List Entry ..86 •... -
Page 84: Jpeg+Mp3
Programme JPEG+MP3 Programme DVD-RAM(VR) Playlist Disc Manager Programme 84 - English DVD-RW(VR) DVD-RW(VR) Playlist Programme Disc Manager Setup Programme DVD-R(V) DVD-R(V) Photo Music Disc Manager Programme Programme Setup Press the MENU button again to hide the menu screen. You can configure the settings on the Note Setup screen using the arrow and OK buttons. -
Page 85: Viewing Title List
Viewing Title List You can playback the recorded titles, edit a title name, edit record list entries and lock or unlock the record list. Insert the recorded disc. Press the MENU button. DVD-RW(VR) Playlist Disc Manager Programme Title List : Title refers to a recorded video stream. -
Page 86: Playing A Title List Entry
Playing a Title List Entry Follow these directions to playback an entry from the Title List. Insert the recorded disc. Press the MENU button. DVD-RW(VR) Playlist Disc Manager Programme 01/JAN/2004 02/JAN/2004 03/JAN/2004 04/JAN/2004 05/JAN/2004 05/JAN/2004 12:00 PR5 05/JAN/2004 06/JAN/2004 12:00 07/JAN/2004 ❷... -
Page 87: Renaming A Title List Entry
Renaming a Title List Entry Follow these directions to rename a title list entry, i.e., to edit the title of a recorded program. Insert the recorded disc. Press the MENU button. ❷ Press the buttons to select Title List, and ❿... -
Page 88: Deleting A Title List Entry
Deleting a Title List Entry Follow these directions to delete an entry from the Title List. Insert the recorded disc. Press the MENU button. ❷ Press the buttons to select Title List, and ❿ then press the or OK button, or press the TITLE LIST button on the remote control. -
Page 89: Locking A Title List Entry
Locking a Title List Entry Follow these directions to lock an entry if you want to protect it from unexpected deletions. Insert the recorded disc. Press the MENU button. ❷ Press the buttons to select Title List, and ❿ then press the or OK button. -
Page 90: Deleting A Section From A Title List Entry
Deleting a Section from a Title List Entry Follow these directions to delete a section from a Title List entry. Insert the recorded disc. Press the MENU button. • You cannot recover a section once it is deleted from Title List. ❷... -
Page 91: Creating A Playlist Entry
Press the OK button at the end point. The image and time at the end point are displayed the end point window. 02/JAN/2004 12:00 PR2 02/JAN/2004 12:00 00:02:08 ❷ Press the buttons to select Delete, and then press the OK button. •... - Page 92 Select the start point of the section from which you want to create a new scene using the play- back related buttons, and then press the button. ❿ II • Playback related buttons: ❿ ❿,➛ ➛ Scene No.001 01/JAN/2004 12:00 ❷...
-
Page 93: Editing A Playlist Entry
Editing a Playlist Entry Follow these directions to playback or edit (rename, edit scene, copy and delete ) the newly creat- ed playlist entries. Insert the recorded disc. Press the MENU button when the disc is stopped. ❷ Press the buttons to select Playlist, and ❿... -
Page 94: Renaming Playlist Entries
Renaming Playlist Entries Follow these directions to rename a playlist entry, i.e., edit the title of a playlist entry. ❷ Press the buttons to select Rename, and then press the OK button. • The Rename screen is displayed. Select the desired characters using the arrow ❷➛❿... -
Page 95: Playing A Desired Scene
❷ Press the button to select Edit Scene, and then press the OK button. • The Edit Scene screen is displayed. Edit Scene Scene No. Playlist No. 1 00:00:26 02 00:00:07 03 00:00:04 00:00:03 05 00:00:11 06 00:00:04 A. Playing a Desired Scene ❷... -
Page 96: (Changing The Position Of A Scene)
Press the OK button at the end point of the scene. 01/JAN/2004 12:00 01/JAN/2004 12:00 ❷ Press the buttons to select Change, and then press the OK button. • The scene you wanted to modify is changed with the selected section. •... -
Page 97: Deleting A Scene From The Playlist
❷ Press the buttons to select Start, and then press the OK button. • The image and time at the start point are displayed on the Start window. 01/JAN/2004 12:00 01/JAN/2004 12:00 Select the end point of the section you want to add as a new scene using the playback related buttons. -
Page 98: Copying A Playlist Entry To The Vcr
Copying a Playlist Entry to the VCR Insert the recorded disc and the tape. Press the MENU button when the disc is stopped. ❷ Press the buttons to select Playlist, and ❿ then press the or OK button. ❷ Press the buttons to select Edit Playlist, ❿... -
Page 99: Disc Manager
❷ Press the buttons to select Delete, and then press the OK button. • You will be prompted with the delete confirma- tion message ‘Do you want to delete?’. Do you want delete? 01/JAN/2004 12:00 ➛❿ Press the buttons to select Yes, and then press the OK button. -
Page 100: Disc Protection
❷ ➛❿ buttons to select Save, and then Press press the OK button. • A disc name is given to the disc. Playlist Disc Finalise Disc Manager Programme You may need to clear cartridge protection or unlock the protect before beginning editing. Note Disc Protection Disc Protection allows you to protect your discs from... -
Page 101: Formatting A Dvd-Ram/Dvd-Rw Disc
Formatting a DVD-RAM/DVD-RW Disc Use these instructions to format a disc. The cartridge write protect tab should be set to the unprotect position. The disc protection should also be cleared. Insert a disc to be formatted. Press the MENU button with the disc stopped. ❷... -
Page 102: Deleting All Title Lists
Delete All Title Lists Follow these instructions to delete all title lists. Insert the recorded disc. Press the MENU button with the disc stopped. ❷ Press the buttons to select Disc Manager, ❿ and then press the or OK the button. Playlist Disc Manager Programme... -
Page 103: Finalising A Disc
Finalising a disc After you record titles onto a DVD-RW/DVD-R disc with your DVD Recorder-VCR, it needs to be finalised before it can be played back on external devices. Insert the recorded disc. Press the MENU button with the disc stopped. ❷... -
Page 104: Unfinalising A Disc (V/Vr Mode)
Unfinalising a disc (V/VR mode) Insert the finalised disc. Press the MENU button with the disc stopped. ❷ Press the buttons to select Disc Manager, ❿ and then press the or OK button. DVD-RW(VR:F) Playlist Disc Unfinalise Disc Manager Programme ❷... -
Page 105: Reference
Reference • Troubleshooting (DVD-VIDEO/DVD- RAM/DVD-RW/DVD-R) ..106 • Troubleshooting ... . . 107 • Problems and Solutions (VCR) ..108 •... -
Page 106: Troubleshooting
Troubleshooting (DVD-VIDEO/DVD-RAM/DVD-RW/DVD-R) If your product malfunctions, go through the check points below before contacting a Toshiba authorized service center, • Check whether the power cord is securely plugged into the power outlet. No power. • Did you press the ON/STANDBY button of your DVD Recorder-VCR. -
Page 107: Troubleshooting
• Read the table of contents and then find and read the sections Other problems describing your problem, and follow the directions given. • Turn the unit off and on. • If your problem still persists, contact your nearest Toshiba service center. English - 107... -
Page 108: Problems And Solutions (Vcr)
Problems and Solutions (VCR) Before contacting a Toshiba authorized service center, perform the following simple checks. Problem No power You cannot insert a video cassette The television program was not recorded Timer recording was unsuccessful No playback picture or the picture... -
Page 109: Specifications
Specifications Power requirements Power consumption General Weight Dimensions Operating temp. Other conditions Video input (Rear) Input Audio input (Rear) Front input RF out Audio (DVD, VCR) Output Audio (DVD Only) Video (DVD, VCR) Tape format Colour system Tuning system Video S/N Resolution Audio S/N Audio frequency characteristics... - Page 110 Printed in Korea BY731672(Rev. 04)