
Related Manuals for TEC EO1-11099


Summary of Contents for TEC EO1-11099
- Page 1 TEC Electronic Cash Register FS-1650-4 SERIES Owner’s Manual Table of Contents S/A Managers Guide M/S Operator's Guide M/S Manager's Guide...
- Page 2 Equipment Regulations.” “Cet appareil numénque de la classe A respecte toutes les exigences du Règlement sur le matériel brouilleur du Canada.” NOTICE WARNING Copyright © 2001 ¶ by TOSHIBA TEC CORPORATION All Rights Reserved 570 Ohito, Ohito-cho, Tagata-gun, Shizuoka-ken, JAPAN...
- Page 3 Do not attempt to effect repairs or modifications to this equipment. If a fault occurs that cannot be rectified using the procedures described in this manual, turn off the power, unplug the machine, then contact your authorized TOSHIBA TEC representative for assistance. Meanings of Each Symbol This symbol indicates warning items (including cautions).
- Page 4 Utilize our maintenance services. After purchasing the machines, contact your authorized TOSHIBA TEC representative for assistance once per year or so to have the inside of the machines cleaned. Otherwise, dust will build up inside the machines and may cause fire or malfunction.
- Page 5 STAND-ALONE LEVEL OPERATOR’S GUIDE – 1 –...
-
Page 6: Table Of Contents
EO1-11113 TABLE OF CONTENTS Page 1. TO OUR CUSTOMERS ... 1 2. UNPACKING ... 2 3. APPEARANCE AND NOMENCLATURE ... 3 4. MODE LOCK AND MODE SELECTOR KEYS ... 4 5. DISPLAY ... 5 6. OUTLINE OF PREPARATION PROCEDURE BEFORE OPERATING THE ECR ... 9 7. -
Page 7: To Our Customers
TOSHIBA TEC representative. • The specifications described in this manual may be modified by TOSHIBA TEC, if necessary. • Be sure to keep this manual for future reference. -
Page 8: Unpacking
2. UNPACKING Paper Roll 45 mm x Ø50 mm (2 pcs.) Mode Key (REG Key, MGR Key, MA Key, S Key; 2 pcs. respectively) Receipt Cover Key (2 pcs.) Stamp lnk (1 pc.) Ribbon Cassette (1 pc.) Journal Reel (1 pc.) Drawer Key (2 pcs.) Owner's Manual (1 pc.) - 2 -... -
Page 9: Appearance And Nomenclature
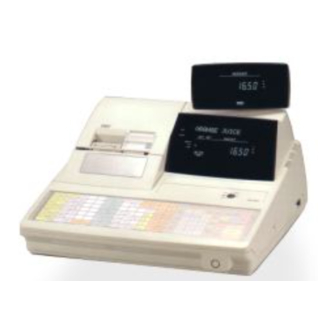
3. APPEARANCE AND NOMENCLATURE Receipt Outlet Drawer • Power Switch ... The power switch is provided at the right-hand side of the cabinet. The AC power is turned on when the switch is pushed to ON, and turned off when the switch is pushed to OFF. -
Page 10: Mode Lock And Mode Selector Keys
4. MODE LOCK AND MODE SELECTOR KEYS 4.1. MODE LOCK Schlüssel 4.2. MODE SELECTOR KEYS REG Key: MGR Key: MA Key: The keys may be inserted or pulled out at the "LOCK" or "REG" position. In the OPERATOR'S GUIDE, functions and operations will be described within the range of the Mode Lock positions of LOCK and REG using the REG key. -
Page 11: Display
DISPLAY The operator display is located at the top of the register just above the keyboard. SLIP DPT RPT IN-LINE IN-LINE SIGN ON BED EIN R OFF BON AUS MENU PRICE CLERK The customer display can be fixed as a rear display or moved to form a remote display. It can be moved up, down, to the right, and to the left, and thus is fully adjustable according to the position of the customer. - Page 12 5.1. UPPER ROW (16-digit dot windows) Alpha/numeric characters are displayed here as messages, sale item descriptors, prompts for the operator, etc. depending on the Mode Lock position and the operation sequence. (1) Mode Indications “LOCK” Mode If the display store message is preprogrammed, the message is displayed. Whether the message scrolls with maximum 64 characters or non-scrolls with maximum 16 characters is a program option.
- Page 13 (3) Error Messages (in any mode except "LOCK") When an error occurs, an error message (programmable) is displayed, with an error buzzer gener- ated (a long tone). Read the Error Message, depress the [C] key to cancel the error status and tone, operate the sequence again after removing the cause of the error.
-
Page 14: Triangular Lamps
5.2. LOWER ROW (10-digit 7-segment Numeric Display) AMOUNT (7 digits): Displays the numeric data, such as amount, quantity, etc. When the amount is negative, the symbol "-" is displayed as well. NOTE: DPT (2 digits): Displays the Department Code of the department item just entered. The department name is also displayed in the Upper Row. -
Page 15: Outline Of Preparation Procedure Before Operating The Ecr
6. OUTLINE OF PREPARATION PROCEDURE BE- FORE OPERATING THE ECR This chapter shows the outline of set-up procedure of the ECR before actually starting the ECR operation. Turn the POWER SWITCH to OFF before connecting the power cord. Remove the cash register from the carton, referring to Chapter "2. -
Page 16: Installing The Receipt Roll
Install the Receipt and Journal rolls (referring to the following section "Installing the Receipt/Journal Roll") . Installing the Receipt/Journal Roll Care must be taken not to injure yourself with the paper cutter. Installing the Receipt Roll WARNING! Turn the Mode Lock to the REG position with power To remove the Receipt Cover, insert the Receipt Cover Key to the Receipt Cover Lock, and then turn it 90˚... - Page 17 There are the following two ways of receipt paper feed procedure. A: Manual installation B: Installation using the [RF] key A: Manual installation Lift the green lever on the receipt side. B: Installation using the [RF] key Place the paper roll in the outer side holder of the two roll holders.
-
Page 18: Installing The Journal Roll
Installing the Journal Roll Follow Steps 1 to 5 for "Installing the Receipt Roll" on the preceding pages, except that the paper roll should be placed inner side holder of the two holders. There are the following two ways of a journal paper feed procedure. A: Manual installation B: Installation using the [JF] key Manual installation... -
Page 19: Setting The Ribbon Cassette
EO1-11113 Setting the Ribbon Cassette Detach the Ribbon Cover. Set the Ribbon Cassette. After setting the Ribbon Cassette, turn the knob of the Ribbon Cassette in the arrow direction several times to remove the slack on the ribbon. Attach the Ribbon Cover. - 13 -... -
Page 20: Cashier Signing Or Cashier Key Operations
CASHIER SIGNING OR CASHIER KEY OPERATIONS The FS-1650 adopts one of the following cashier-identifying operations. • CODE ENTRY METHOD, using the [LOG/RECEIPT] (or [LOG]) key. • CASHIER KEY METHOD, (hardware option), using Cashier Keys. • CASHIER KEY METHOD, using [CLK] keys. 7.1. - Page 21 NOTES: 1. Sign-OFF or Sign-OUT may automatically be performed without operating each key operation on finalizing each transaction including Check (or other non-cash media) Cashing, No-sale Exchange from/to Foreign Currencies, No-sale, Received-on-Account, Paid-Out, Loan, and Pick Up if so set by a program option. When this option is selected, Sign-ON or Sign-IN is always necessary before starting every transaction.
- Page 22 (3) Mode Changes With Signing Operations When Signed-ON or Signed-IN: The Mode Lock position changes are allowed within "LOCK", "REG", "MGR", and " Changing to any other position will be an error. When Signed-OUT: The Mode Lock may be turned to any position. However, cashier reports of the cashier being signed OUT cannot be taken in the "X"...
- Page 23 7.2. CASHIER KEY METHOD (Hardware Option) When the [LOG/RECEIPT] (or [LOG]) key is not installed, the Push-stay Cashier Keys may be pro- vided at the side of the Mode Lock: Push-stay Cashier Locks and Keys Cashier Keys 1 to 4 Each key is assigned to each cashier.
- Page 24 7.3. CASHIER KEY METHOD ([CLK] Keys) When the [LOG/RECEIPT] (or [LOG] key is not installed, [CLK 1] to [CLK 8]; max. 8 keys may be provided on the ECR keyboard.) Sale entries will be possible only when one of the [CLK] keys is depressed (in "REG", "MGR", or " mode).
-
Page 25: Training Mode Start And End
7.4. TRAINING MODE START AND END When you have newly employed cashiers, you may provide some time for them to train their skills of operating the FS-1650. You are to start and end the Training Mode. Once entering the Training Mode, a cashier may operate just as ordinary sale entry operations. - Page 26 -- Training Mode Receipt Format -- Kassenbon bei Beginn des Trainings Training Start (training Sign-ON) Receipt 19-12-1994 MON #3001 * T R A I N I N G BROWN 0079 15:51TM Training Mode Header Trainings-Kopfzeile Kassenbon, der in der Trainings- Betriebsart ausgegeben wurde Receipt issued in Training Mode 19-12-1994 MON #3001...
-
Page 27: Keyboard Layout
KEYBOARD LAYOUT The following is typical keyboard layouts for the FS-1650 series. Since this series is designed to be capable of programming most of the keys to be placed in the desired place on the keyboard, this is merely example. The keyboard of your register should have its own layout acording to the store's requirements. -
Page 28: Functions Of Each Key
FUNCTIONS OF EACH KEY This section briefly describes functions of each key for your quick reference purposes. See the reference pages in Section 10: REGISTERING PROCEDURE AND PRINT FORMAT for detail operation sequences. LOG key. Used in case of Cashier Code Entry method, to declare start or end of normal operation by cashier. - Page 29 Non-add Number Print key. Used to print a non-add number (such as Customer No., Credit Card No., etc.) on the receipt and journal for future reference. No-sale key. Used to open the cash drawer without relating a sale, and also used to display the store message. Amount key.
- Page 30 Percent Discount key. Used to subtract a percent rate from a sale. Item Correct key. Used to remove the last item from the ITEM bill, printing a line through the item on the receipt and CORR journal. Void key. Used to delete an item entered previously (before the last item) in the current transaction.
- Page 31 Media-coupon, Credit 1 to Credit 4 keys. These are additional non-cash media keys that may be installed besides those already described, according to the require- ments of each store. CREDIT CREDIT Card No. key. Used to enter the code number (1 to 12) CARD which classifies the credit card company followed by the sale finalization with the [Chg] key.
- Page 32 Salesperson key. Used to record sales contribution data SALES of each salesperson for report purpose. PERSON Repeat key. Used to repeat a department or PLU item entry. Foreign Currency keys. Used in tendering or exchange with foreign currencies. Scale key. This key is used for various scaled items. To enable to register weight data from the scale, only the Departments programmed with the Scale-Allowed status or SCALE...
- Page 33 Total key. Used to finalize the sales entries and transfer all the balance. TOTAL Tray Total key. Used to obtain the total of an individual TRAY guest tray in a guest party. TOTAL Charge Tip key. Used to enter a tip amount for cashier. CHARGE Tip Paid key.
-
Page 34: Registering Procedure And Print Format
10. REGISTERING PROCEDURE AND PRINT FORMAT Before starting sale entries, read through the following instructions: When opening the cash drawer, be careful not to let the drawer hit any person. TRAINING MODE is available: If you are a beginner in operating this register, ask the store manager for practicing in the TRAIN- ING MODE. - Page 35 Cashier Sign-ON or Cashier Key to ON status: If the [LOG/RECEIPT] (or [LOG]) key is installed, you must sign-ON or sign-IN. (See Section 7.1.) If Cashier Keys or Cashier Locks are installed, you must set your cashier key to the ON status.
-
Page 36: Store Message Display
RECEIPT-ISSUE/NON-ISSUE SELECTION Receipts are issued or not issued according to the “R OFF” lamp illuminated/extinguished status on the Operator Display panel. “R OFF” (Receipt OFF) lamp Status Change Operations ([LOG/RECEIPT] = [RECEIPT]) Mode Lock may be in any position Extinguished Receipt ON Status NOTES: 1. - Page 37 NO-SALE The no-sale transaction is used to open the cash drawer without relating to any sales, such as for giving change, testing the receipt/journal print condition, etc. (must be operated outside a sale) OPERATION [NS] ... The drawer opens and a No-sale receipt is issued. Max.
-
Page 38: Department Entry
DEPARTMENT ENTRY Each department is preprogrammed as the “PRESET” type (with a price programmed) or “OPEN” type (with no price programmed). Perform operation depending on the type selected. OPERATION Open Department Type • | Price | [Open DEPT] • | Open-Dept Code | [DP#] | Price | [AMT] Preset Department Type •... -
Page 39: Repeat Entry
MODIFIER PLU ENTRY Some PLUs can be programmed as “MODIFIER” descriptors (such as “PEPPER”, “RARE”, “MEDIUM” for grilling a steak item, and toppings for dishes, etc.) OPERATION • When entering a Modifier PLU only Same operations as PLU Entry • When entering a Modifier PLU after a PLU which has the compulsory status of Modifier PLU Entry Entry of PLU which has the compulsory status of modifier... - Page 40 Preset PLU Type • | Preset-PLU Code | [PLU] [PLU] (or [RPT]) • [PLU Preset-Code key] [Same key] (or [RPT]) Preset-price Open Repeat • [PR OPEN] (or [OPEN]) | Preset-PLU Code | [PLU] | Price | [AMT] [RPT] • [PR OPEN] (or [OPEN]) | Price | [PLU Preset-Code key] [RPT] NOTES: 1.
-
Page 41: Split Package Pricing
NOTES: 1. Quantity ... Max. 3 integral + 3 decimal digits Price (Unit Price)... Max. 6 digits Product ... Must not exceed 8 digits. 2. When the Quantity is 1-digit integer (1 to 9) followed by a Code-preset Department/PLU key with a price preset, the [@/FOR] key is omissible. - Page 42 (2) PLU Open PLU • | Purchased Q'ty | [@/FOR] NOTE 1 below Preset PLU • | Purchased Q'ty | [@/FOR] NOTE 1 below Preset-Price Open • [PR OPEN] (or [OPEN]) | Purchased Q'ty | [@/FOR] NOTE 1 below NOTES: 1.
-
Page 43: Plu Price Shift Entry
PLU PRICE SHIFT ENTRY This operation is to register the PLU code which is added 1, 2, or 3 to the code of the entered PLU. OPERATION • [PRICE SHIFT 1] • [PRICE SHIFT 2] • [PRICE SHIFT 3] • [PR OPEN] NOTES: 1. - Page 44 SINGLE-ITEM DEPARTMENT or SINGLE-ITEM PLU ENTRY If a department (or PLU) is programmed as Single-item, the department (or PLU) entry sequence will immediately finalizes the sale as cash sale when operated outside a sale. OPERATION Same as DEPARTMENT ENTRY PLU ENTRY QUANTITY EXTENSION SPLIT PACKAGE PRICING SET MENU ENTRY...
-
Page 45: Order Entry, Previous Balance Entry
ORDER ENTRY, PREVIOUS BALANCE ENTRY OPERATION [PB] (for a new order entry) Timing of a slip insertion into the Guest Check Printer 1) Before depressing the [PB] key When selecting the option “Guest Check Print Compulsory for PB or Check Track entry”, the Guest Check Printer begins printing after feeding the preprogrammed line Nos. -
Page 46: Additional Order Entry
ADDITIONAL ORDER ENTRY Omissible; NOTE 2 below | Number of Lines to be fed | [GCP LINE#] menu item entries, if any NOTES: 1. Previous Balance Entry can be executed even when a slip has not been inserted into the Guest Check Printer by a program option. - Page 47 ORDER ENTRY, CHECK TRACK ENTRY (CUSTOMER FILE TYPE) This operation is available only when the check track feature is selected. OPERATION (1) To initiate charge posting for a new customer | Customer File Code | [PICK UP BAL] (Must be one of those already opened in the “SET”...
- Page 48 Charge Posting Operation Sample OPERATION CONTENTS Mr. JAMES HAILY comes and you start charge posting for him. Menu Items: $1.20 Dept. 1 $3.50 Dept. 3 Finalize this sale. To transfer all the balance without payment. Mr. JAMES HAILY now comes to pay all his account balance.
-
Page 49: Returned Merchandise
RETURNED MERCHANDISE OPERATION DEPARTMENT ENTRY PLU ENTRY QUANTITY EXTENSION [RTN MDSE] SPLIT PACKAGE PRICING SET MENU ENTRY SINGLE-ITEM DEPARTMENT/PLU ENTRY BOTTLE RETURN OPERATION | Bottle Return Amount | [BTL RTN] | Quantity | [@/FOR] | Unit Amount | [BTL RTN] max. -
Page 50: Dollar Discount
DOLLAR DISCOUNT OPERATION Dept or PLU item entry (for discount from an individual item) [ST] (for discount from the sale total) NOTES: 1. The discount amount must not exceed the item amount or the subtotal unless the “Credit Balance” option is selected. 2. -
Page 51: Store Coupon
STORE COUPON OPERATION [STR CPN] Follow NOTE: The store coupon amount to be entered must not exceed the sale total unless the “Credit Balance” option is selected. VENDOR COUPON OPERATION ([ST]) NOTE: The coupon amount to be entered must not exceed the sale total unless the “Credit Balance”... -
Page 52: All Void
VOID The VOID operation is used to delete an item already entered before the last item within the current sale. Such items cannot be deleted by the [ITEM CORR] key any longer. OPERATION [VOID] DEPARTMENT ENTRY PLU ENTRY QUANTITY EXTENSION SPLIT PACKAGE PRICING SET MENU ENTRY NOTE:... -
Page 53: Scale Entry
NUMBER-OF-GUESTS ENTRY This operation is used to enter the number of guests of the sale. OPERATION ) | Number of guests | [GUEST No.] Max. 3 digits NOTES: 1. The Number-of-Guests entry is allowed at the start of or any time during a sale if before the sale finalization by media keys. -
Page 54: Listing Capacity Open
(2) Auto Scale With Tare | Tare Table No. | [TARE] 1 to 9 (3) Manual Scale Entry (It may be prohibited by a program option.) | Net Weight | of the item 1 to 99999 (unit: g or 1/100 LB. For example, enter 5 for 0.05LB. (4) Return or Void Manual Scale Entry (It may be prohibited by a program option.) [RTN MDSE] for Return [VOID] for Void... -
Page 55: Taxable Total Read And Subtotal Print
MANUAL TAX ENTRY OPERATION | Irregular Tax Amount to be Added | [TAX] SUBTOTAL (Sale Total Pre-taxed) READ OPERATION [ST] The sale total (pre-taxed) of the items so far entered is displayed (and printed if so programmed), but the sale is not finalized. Additional item entries are allowed, if any. TAXABLE TOTAL (Sale Total With Taxes) READ OPERATION [TXBL TL]... -
Page 56: Tax Calculation And Print
SELECTIVE ITEMIZER (SI) TOTAL READ OPERATION [SI/TL] ([SI1/TL] and/or [SI/2/TL] for Dual-SI machine) The SI total is displayed and printed on the journal (and printed on receipt if so programmed.) NOTE: The fraction process method is fixed to Round OFF. TAX CALCULATION AND PRINT Your register has been programmed with proper tax tables (tax breaks and/or tax rates). -
Page 57: Sale Finalization By Media Keys
FOOD STAMPABLE TOTAL READ, FOOD STAMP TENDERING OPERATION [FSTL TEND] Displays the Food Stampable total..When the Food Stamp tendered amount is less than the sale total, the sale is not finalized with the balance still due displayed. Then it can be finalized with cash or other media total or tendering operations. -
Page 58: Split Tendering
4. When a media is programmed to allow "Total" function, it can also be programmed with the "Drawer Open" or "Not Open" status on operating the key. MULTI-TENDERING Short-tendering repeated multiple times by the same media (allowed only when the media key is programmed to allow short-tendering). -
Page 59: Sale Paid In Foreign Currencies
NOTES: 1. In both MULTI-TENDERING and SPLIT TENDERING operations, the sale is finalized and a receipt is issued on reaching the sale total amount. 2. If a media key is depressed without an amount tender entry and the key is programmed to function as "Total" key, the sale is then finalized on that stage processing the balance at that moment into that media. - Page 60 5. When a tendering by a foreign currency occurs during a short-tendered condition, the [TXBL TL] key will not be mandatory. 6. A sale of negative balance cannot be finalized using any of the foreign currency keys. Domestic Currency Value equivalent to the tendered foreign currency amount NO-SALE EXCHANGE from Foreign Currency to Domestic Currency (must be operated outside a sale) OPERATION...
- Page 61 RECEIVED-ON-ACCOUNT A received-on-account transaction is used to identify money which is in the drawer but not from the daily business. OPERATION | Amount of Payment | [R/A] Repeatable if multiple amounts are received in one receipt sequence. NOTES: 1. The media keys used for this operation must be programmed to allow received-on-account entries.
-
Page 62: Function Key Entry
SALESPERSON ENTRY (Salesperson Sign-ON) OPERATION | Salesperson Code | [SALES PERSON] 1 to 99 Programmable options relating to Salesperson Entries: • Salesperson's name non-print on receipt (print on journal only) • Salesperson Entry compulsory before sale item entries • Salesperson Entry Prohibited during a sale (i.e. al- lowed only one person entry at the starting of a sale but prohibits any other salesperson entry once the sale is started.) When this program is not selected, up to five... -
Page 63: Tip Paid
TIP PAID OPERATION | Cashier Code | [TIP PAID] -- Receipt Print Format -- TIP PAID JONES CASH $1.00 SMITH 0028 14:09TM CHARGE TIP OPERATION Order Entry (or Additional Order Entry) | Tip Amount | [CHARGE TIP] Max. 7 digits NOTES: 1. -
Page 64: Receipt Post-Issue
RECEIPT POST-ISSUE (must be operated outside a sale) OPERATION (A sale is finalized) Programmable options: • Post-issue receipt is available only when the sale has been finalized with the sale has been finalized in Receipt-OFF mode. • Available regardless of Receipt-ON/OFF mode (in this case two receipts may be obtained for one sale.) •... -
Page 65: Tray Total
TRAY TOTAL OPERATION Menu item Entries -- Receipt Print Format -- P B + $0.00 Pork Saute $4.50T ITEM TRAY TL $4.50 -------------------------- Fried Shrimp $6.50T Coke Small-B $0.70T TAX1 $0.43 TAX2 $0.03 ITEM TRAY TL $7.66 -------------------------- TAX1 $0.70 TAX2 $0.03 CASH... -
Page 66: Call No. Entry
CALL NO. ENTRY This operation is used to enter the call No. of order, and to print its No. on the receipt and the journal. OPERATION ) | CALL NO. | [CALL No.] Max. 3 digits NOTES: 1. Call No. entry is allowed any time during a sale. 2. -
Page 67: Validation Print
RECALL ENTRY This operation recalls a order table. OPERATION | Order No. | [RECALL] NOTE: Recall Entry can be canceled. To end the entry, follow the procedure described below. [RECALL] [ITEM CORR] [ALL VOID] VALIDATION PRINT OPERATION After entering the required item through a transaction key or media key. -
Page 68: Endorsement Print
-- Receipt Print Format -- TEC STORE 1343 PEACH DRIVE PHONE : 87-6437 Open 8:00am to 7:00pm Closed : every Wednesday 19-12-1994 MON #3001 Cheese $2.50TF VEGETABLE -1.20TF TXBL TL $1.38 #123456 $0.08 $ 1 . 3 8 ITEM JONES 0221 13:35TM ENDORSEMENT PRINT OPERATION... - Page 69 GUEST CHECK PRINTER (hardware option) OPERATION The TEC Guest Check Printer DRS-207 may be connected to the FS-1650 series ECR as an optional device. The Guest Check Printer will operate printing if a slip is properly inserted, regardless of the Mode Lock position (except that no print will occur in the "SET"...
-
Page 70: When A Power Failure Occurs
WHEN A POWER FAILURE OCCURS ... If a power failure occurs, all sales data stored in the memory are automatically protected by the battery installed in the ECR. The battery is rechargeable and it is recharged when the AC power returns. As the power returns, the register revives to continue the work and displays the last item entered before the power failure. -
Page 71: Journal And Receipt Paper-End Detector
11. JOURNAL AND RECEIPT PAPER-END DETECTOR This detects when either the journal or receipt paper is coming near the end. It is provided in order to prompt the operator to replace the old paper roll with a new one. When the paper roll comes near the end (or the paper has not been set properly), no key operation will be accepted and the AMOUNT portion of the display will keep flickering. -
Page 72: Paper Roll Replacement And Other Maintenance Operations
15. PAPER ROLL REPLACEMENT AND OTHER MAIN- TENANCE OPERATIONS Care must be taken not to injure yourself with the paper cutter. Replacing the Receipt Roll WARNING! To remove the Receipt Cover, insert the Receipt Cover Key to the Receipt Cover Lock, and turn it 90 clockwise. -
Page 73: Replacing The Journal Roll
Replacing the Journal Roll To remove the Receipt Cover, insert the Receipt Cover Key to the Receipt Cover Lock, and turn it 90 clockwise. Depress the [JF] key to wind up enough of the Journal Paper, then cut the paper as shown in the figure. Depress the [JF] key to feed the remaining paper end. -
Page 74: Replacing The Ribbon Cassette
Replacing the Ribbon Cassette When the print data on the receipt and journal becomes too dim, replace the Ribbon Cassette in the following order. Remove the Ribbon Cover. Remove the old ribbon cassette by pulling it in the direction of the arrow mark. Install a new ribbon cassette by inserting it in the direction of the arrow mark. -
Page 75: Replenishing Ink To The Store Name Stamp
Replenishing Ink to the Store Name Stamp To remove the Receipt Cover, insert the Receipt Cover Key to the Receipt Cover Lock, and turn it 90 clockwise. Remove the Store Name Stamp by pulling it in the direction of the arrow mark. Apply only two or three drops. -
Page 76: Manual Drawer Releasing
Manual Drawer Releasing The drawer opens automatically when a transaction has been entered. In the event of a power failure or other trouble, the drawer can be opened manually in the following manner: When opening the cash drawer, be careful not to let the drawer hit any person. Fig. - Page 77 CDC (Cash Drawer Cover; Option) Lock Fig. 4 Locking (Fig.4) Push the Cash Drawer Cover to the back of the drawer. Press the cover lightly, insert the key into the key hole on the cover, and turn it to lock. Unlocking Unlock the cover using the key, and lift the front end.
-
Page 78: Specifications
16. SPECIFICATIONS Size ... 460 mm (width) x 450 mm (depth) x 348 mm (height) Weight ... 16.5 kg Power Required ... AC 117 V – 10%; 60 Hz Power Consumed ... 0.6 A at 117 V Ambient Temprature ... 0 C to 35 C Relative Humidity ... - Page 79 STAND-ALONE LEVEL MANAGER’S GUIDE...
- Page 80 EO1-11113 TABLE OF CONTENTS Page 1. DAILY OPERATION FLOW ... 1 2. MANAGER INTERVENTION ... 2 3. MANAGER’S OWN OPERATIONS IN “MGR” MODE ... 5 4. OPERATIONS IN “ ” MODE ... 7 5. READ (X) AND RESET (Z) REPORT ... 10 6.
-
Page 81: Daily Operation Flow
DAILY OPERATION FLOW The following shows the typical flow of daily operations on the ECR. CASHIER’S OPERATIONS (described in OPERATOR’S GUIDE) Sign-ON (or Cashier Key to ON) No-sale Receipt (to check the print condition, and check the date and time print) LOAN STORE OPEN Sale entries start. -
Page 82: Manager Intervention
MANAGER INTERVENTION 2.1 MANAGER INTERVENTION During daily sale entry operations, the cashier may call for Manager Interventions. The following is the operation flow of a Manager Intervention. During operations, the cashier comes across an item that requires a Manager Intervention. The cashier, already informed of it, may immediately call for a Manager Intervention. - Page 83 - 3 - Reference Chapter 7: VERIFICATION OF PROGRAMMED DATA • KEY STATUS READ As for changing the key status, ask your TOSHIBA TEC repre- sentative. These are program options for each store. Ask your TOSHIBA TEC repre- sentative for information and these status changes.
- Page 84 1) Individual Department High and Low Amount Limits (each PLU is restricted by the Amount Limits of its linked department): Ask your TOSHIBA TEC representative. 2) Departments Common High and Low Amount Limits, and High Amount Limits of Tender Media keys: Chapter 7: VERIFICATION OF PROGRAMMED DATA •...
-
Page 85: Manager's Own Operations In "Mgr" Mode
3. MANAGER’S OWN OPERATIONS IN “MGR” MODE The following are operations possible only in the “MGR” position of the Mode Lock, which are performed by the manager or by a person under the manager’s control. 3.1. PICK UP OPERATION This operation is used when you collect money from the ECR drawer, during the day, for the banking purpose, etc. -
Page 86: Programming Operations
3.2. ENFORCED SIGN-OFF A CASHIER (CODE ENTRY METHOD) Each cashier signs-ON to start operations, signs-OUT for leaving the register for a while, signs-IN when comes back, and signs-OFF to end operations (refer to the OPERATOR’S GUIDE). However, when a cashier once signed-ON and then signed-OUT for taking a break does not come back (or the cashier may have operated a sign-OUT by mistake instead of a sign-OFF), the register cannot be operated. - Page 87 4. OPERATIONS IN “ Instead of using the [RTN MDSE] or [VOID] keys in the “REG” or “MGR” mode for deleting individual items, the “ ” mode automatically processes positive items into negative and negative into positive. To operate, turn the Mode Lock to the “ ”...
- Page 88 (1) Operation in “REG” or “MGR” mode (at the purchase; refer to the OPERATOR’S GUIDE.) | Customer File Code* | [PICK UP BAL] (or [CODE OPEN]) Entries of purchased items*** [TOTAL] … to transfer all balance with no payment **** | Payment Amount | [R/A] (2) Operation in “...
- Page 89 4.3 SCALE ITEM ENTRY IN “ Any scale item entered in the “REG” or “MGR” mode at the time of purchase must be entered manually (Manual Scale Entry but not Auto Scale) in the “ That is, for entering a scale item (once purchased) in the “ on the item (if any) or read the net weight in the scale display panel by placing it on the scale platter, then enter the net weight value, manually in the procedure described as MANUAL SCALE ENTRY operation in the OPERATOR’S GUIDE.
- Page 90 5. READ (X) AND RESET (Z) REPORTS The following table shows the key operation to take each report. The “X” and “Z” reports have exactly the same print content if both are available, except that: 1. The “X” reports allow to read the sales data but not clear memories, while the “Z” reports allow to read the sales data and at the same time all the resettable memories will be cleared when the reports have been issue.
- Page 91 Daily Reports (Continued) REPORT NAME HOURLY RANGE READ AND RESET • Hourly Read • Hourly Reset DEPARTMENT READ AND RESET • Individual Department Read • All Department Read • All Department Reset ALL MEDIA SALES TOTAL AND CASH-IN-DRAWER READ PLU READ AND RESET •...
- Page 92 GT Reports -- to be taken on weekly or monthly basis -- REPORT NAME (The Mode Lock position is the same as the corresponding Daily report. However, always add 200 to the numeric value for the report taking.) FINANCIAL GT READ AND RESET •...
-
Page 93: Combination Reports
Multiple reports can be programmed to be issued is one operation sequence. The following are reports programmable for combinations (max. 5 reports in one table, max. 3 tables). Ask your TOSHIBA TEC representative for information of the contents of your Combination Report Tables or for changes. -
Page 94: General Notes On Report Takings
GENERAL NOTES ON REPORT TAKINGS The cashier signed-OFF or signed-OUT condition is required for taking any X or Z reports in the Code Entry Method. (Otherwise, an error will result when the Mode Lock is turned to the “X” or “Z” position.) However, in case of a standalone system with PC connected, X/Z reports can be taken during sign-ON and sales entries. - Page 95 FINAL READ or RESET (Daily or GT) Mode Lock: Reset Report Format Sample TEC STORE 1343 PEACH DRIVE PHONE : 87-6437 Open 8:00am to 7:00pm Closed : every Wednesday 19-12-1994 MON #3001 Z F I N A N C I A L $346.77 NET GT $309.09...
- Page 96 (Financial Read or Reset) -- Continued -- < < CORR $1.00 VOID $1.00 < ALL VD $8.60 $2.02 < DISC $2.00 S. CPN $1.00 < $3.80 -TAX $0.22 -SALE $5.37 REG- $7.95 < < TRF- $0.03 PB TL $0.00 < <...
- Page 97 CASHIER READ or RESET (Daily or GT) Mode Lock: X for read Reset Report Format Sample TEC STORE 1343 PEACH DRIVE PHONE : 87-6437 Open 8:00am to 7:00pm Closed : every Wednesday 12-19-1994 MON #3001 Z C L E R K 01 JONES $346.77 $300.48...
- Page 98 DAILY SALESPERSON READ OR RESET (all Salespersons) Mode Lock: X for read Enter 5, depress [AT/TL] Z for reset TEC STORE 1343 PEACH DRIVE Reset Report Sample PHONE : 87-6437 Open 8:00am to 7:00pm Closed : every Wednesday 12-19-1994 MON #3001 Z S L S P E R S O N 02 Stacy Person Code, Name...
- Page 99 DEPARTMENT GROUP READ (Daily or GT) (read only) Mode Lock: Enter 8, depress [AT/TL] (for Daily). Enter 208, depress [AT/TL] (for GT). TEC STORE 1343 PEACH DRIVE PHONE : 87-6437 Open 8:00am to 7:00pm Closed : every Wednesday 12-19-1994 MON #3001 X G R O U P Minor Groups: V E &...
- Page 100 DAILY MEDIA SALES AND IN-DRAWER TOTAL READ (read only) Mode Lock: X, enter 9, depress [AT/TL] TEC STORE 1343 PEACH DRIVE PHONE : 87-6437 Open 8:00am to 7:00pm Closed : every Wednesday 12-19-1994 MON #3001 X M E D I A A L L TOTAL 72CU All-media Sales Customer...
- Page 101 DEPARTMENT READ or RESET Individual Department Read (Daily or GT) Operation for this sample report: 1343 PEACH DRIVE PHONE : 87-6437 Model Lock: X Open 8:00am to 7:00pm 11 [#] (for Daily) Closed : every Wednesday 211 [#] (for GT) 12-19-1994 MON #3001 X D P I N D I V VEGETABLE...
- Page 102 All Department Read or Reset (Daily or GT) Mode Lock: TEC STORE 1343 PEACH DRIVE Reset Report Sample PHONE : 87-6437 Open 8:00am to 7:00pm Closed : every Wednesday 19-12-1994 MON #3001 Department Data fl Z D P A L L Dept.
- Page 103 PLU (PLU SALES DATA) READ or RESET Individual PLU Read (Daily or GT) Mode Lock: X TEC STORE 1343 PEACH DRIVE PHONE : 87-6437 Open 8:00am to 7:00pm Closed : every Wednesday OPERATION FOR THIS SAMPLE REPORT: 12-19-1994 MON #3001 X P L U I N D I V 020102 Lemon...
- Page 104 All PLU Read or Reset (Daily or GT) Mode Lock: X or Z TEC STORE 1343 PEACH DRIVE PHONE : 87-6437 Reset Report Sample Open 8:00am to 7:00pm Closed : every Wednesday Prints data in order from lower to larger numbered PLU Code.
- Page 105 DAILY ORDER TABLE READ OR RESET (All Order Tables) (for Drive-through spec. only) Mode Lock: X for read TEC STORE 1343 PEACH DRIVE PHONE : 87-6437 Open 8:00am to 7:00pm Closed : every Wednesday 12-19-1994 MON #3001 Z O R D E R A L L Order Table No.
- Page 106 CUSTOMER FILE READ (for Check Track Memory Type only) All Files (with balance remaining) Read or Reset Mode Lock: X for read TEC STORE 1343 PEACH DRIVE PHONE : 87-6437 Open 8:00am to 7:00pm Closed : every Wednesday 12-19-1994 MON #3001 X C U S T A L L Customer’s Name JAMES HAILY...
- Page 107 PLU GROUP SALES READ or RESET (Daily or GT) Mode Lock: TEC STORE 1343 PEACH DRIVE PHONE : 87-6437 Reset Report Format Sample Open 8:00am to 7:00pm Closed : every Wednesday 19-12-1994 MON #3001 Z P L U G R O U P VEGETABLE PLU Group Name 3.22%...
- Page 108 TOSHIBA TEC representative. However, in need of changing or adding program data, please refer to this chapter. It is also recommended to read the OPERATOR’S GUIDE as well as other chapters of the MANAGER’S GUIDE in order to thoroughly understand the descriptions in this chapter.
-
Page 109: Basic Key Functions And Keyboard Variations In Programming Operations
BASIC KEY FUNCTIONS AND KEYBOARD VARIATIONS IN PROGRAMMING OPERATIONS Basic Key Functions 1. The following are main keys and their functions to be used in programming operations: [X] or [@/FOR] ... Used to enter the program Submode No. The [X] key is usually labeled as [@/ FOR] on the ECR keyboard. -
Page 110: Character Entries
CHARACTER ENTRIES As already stated, there are two method of operations for character settings for names or messages: CHARACTER CODE ENTRY Method and DIRECT CHARACTER ENTRY Method. CHARACTER CODE ENTRY Method This method is to set a character by entering a Character Code and depressing the [#] key. This method is allowed only on the ECR keyboard. -
Page 111: Character Code Entry Method
Character Code Entry Method Character Code Table 1: Standard Characters Column Code Code " & < > ¥ – 31 – á Å é å í Ø ó ø ú Æ • â æ Ä ê Œ Ë î œ Ö... - Page 112 Character Setting Operations: • To set a regular-sized character, entry the COL (column) code and then the ROW code, followed by the [#] key. ex.) To set “%”, enter 205 and depress [#]. To set “kg”, enter 1508, and depress [#]. To set a blank instead of a character, simply depress [#] without a prior code entry, or enter 200 and depress [#].
-
Page 113: Direct Character Entry Method
Direct Character Entry Method Using Flat Keyboard (installed as the ECR Main Keyboard): (Use the special template for this purpose and insert it between the film layers covering the Flat Keyboard. This key layout is applicable to only certain submodes.) ¢... -
Page 114: Character Keys
Using TKB-1 (Programming Keyboard; hardware option) SFT1 II £ SFT2 SFT3 Q Ä WÖ E Ü SFT4 A ä S ö D ü SFTLOCK Z â X ê C ç Umstelltasten (1-4) Shift Keys and und Feststelltaste Shift Lock Key Shift Keys (1 to 4), Shift Lock Key Used to designate the shift of the character keys. - Page 115 Function Keys Except for the [CODE] key, each of the function keys corresponds to the identical key installed on the ECR keyboard as to the function in programming operations. ([CLEAR] = [C],[X] = [@/FOR]) The [CODE] key cannot be used for the FS-1650 series ECRs. Operation Examples To set the Menu Item name “COFFEE”...
- Page 116 Using PK-2 (PLU Keyboard; hardware option) The PK-2 is used to enter a required PLU code by simply depressing the code-preset key on the PK-2 keyboard in the REG or MGR mode. In addition, the PK-2 can be used to enter characters directly during the programming operations that require character settings, such as STORE NAME/MESSAGE AND COMMERCIAL MESSAGE PROGRAMMING, PLU TABLE PROGRAMMING, etc.
-
Page 117: Condition Required For Programming Operations
CONDITION REQUIRED FOR PROGRAMMING OPERATIONS At the top of each programming operation a “CONDITION” is given. Unless the register satisfies condition, the programming operations will not be allowed. There are two types of conditions: “Any time outside a sale” It means that the programming operation is allowed when a sale is finalized before going into any other sale entry. -
Page 118: Store Name/Message And Commercial Message Programming
STORE NAME/MESSAGE AND COMMERCIAL MESSAGE PROGRAMMING (Submode 1) Any time outside a sale CONDITION Mode Lock: SET OPERATION 1 [X] | Line No. | [ST] 1 to 4: Submode No. 5 to 7: Character Entries max. 24 characters/line (See CHARACTER ENTRIES at the beginning of this chapter.) NOTES:... - Page 119 ex.) To program the following draft as the Store Name/Message and Commercial Message (under the option “Store Name by DOT PRINTER”): 1 3 4 3 P E A C H P H O N E O p e n 8 : 0 0 a m C l o s e d : e v e r y OPERATION:...
-
Page 120: Cashier Code And Name Programming
CASHIER CODE AND NAME PROGRAMMING (Submode 2) Programming CONDITION Any time outside a sale Mode Lock: SET OPERATION 2 [X] Submode No. Repeat for another cashier. [AT/TL] NOTES: 1. The following table shows the Cashier Codes that can be entered. (The capacity is determined by the RAM Allocation Setting.) Code Entry Type Cashier... - Page 121 ex.) To program the following cashier data: Cashier Code 1: Name JONES, Status 0 (for Sale Entries) Cashier Code 2: Name SMITH, Status 0 (for Sale Entries) Cashier Code 3: Name MEAL, Status 1 (for Training Entries) Cashier Code 4: Name BROWN, Status 1 (for Training Entries) Mode Lock: SET Enter 2, depress [X].
- Page 122 Deletion After the Daily and GT Cashier’s Resets, (and his/her Sign OFF for Code Entry Type) CONDITION Mode Lock: SET OPERATION 2 [X] [ITEM CORR] Submode No. NOTES: 1. The Cashier Reset Report Count of the deleted cashier will be cleared. 2.
-
Page 123: Plu Table Programming
PLU TABLE PROGRAMMING (Submode 4) This submode can be operated when new PLU items are to be added, PLU program data is to be changed, or PLUs are to be deleted. Programming or Changing To program new PLUs or to change any programmed contents of PLUs except the following case: CONDITION Any time outside a sale To change the linked Department of a PLU with sales data not zero: After PLU Reset... - Page 124 NOTES: 1) The “Address Nos” designation at the top after “4 [X]” can be skipped if not necessary. If entered, the designated Address (es) will automatically be accessed after the PLU Code designation. 2) A maximum of 1300 PLUs are programmable (varies depending on the capacity and allocation of the RAM).
- Page 125 Address No. Status 1 Selection • Enter the Status Codes 2 to 8 whose status must be set to ON side. More than one code may be entered. Enter 0 When none of the statuses should be set to ON. Status Code NOTES:...
- Page 126 Address No. Whole Package Quantity (for Split Package Pricing PLUs) Enter the whole package quantity in max. 2 digits (1 to 99), or enter 0 to cancel the Split Package Pricing status. NOTES: • • When the option “Preset Point for one decimal digit” is selected, this PLU Group No.
- Page 127 ex.) To program the following PLUs: Address Address CODE Linked Dept. PLU Name Code 10101 Tomato 10102 Potato 20101 Orange 20102 Lemon 20105 Apple 30301 Beef 30302 Pork 30303 Mutton 40201 Salmon 40202 40203 Shrimp 50301 Milk-Large Pack 50302 Milk-Small Pack 50303 Nonfat-Milk Pack 50321...
- Page 128 KEY OPERATION: for programming some of the PLUs listed on the preceding page. (Presumed that the following PLUs are newly programmed.) Mode Lock: SET, enter 4, depress [X]. 10101 [PLU] 1 [ST] 1 [#] 2 [ST] Tomato [ST] (Name) 3 [ST] 100 [#] 4 [ST] 4 [#]...
- Page 129 Deletion To delete a PLU with sales data of zero: Any time outside a sale CONDITION To delete a PLU with sales data of not zero: After PLU Reset OPERATION Mode Lock: SET Individual PLU Deletion [ITEM CORR] 4 [X] Repeatable for other PLUs to be deleted.
-
Page 130: Plu Programmed Data Copying
PLU Programmed Data Copying This operation is used to copy the programmed data of a PLU item and to use it in programming an- other PLU item, thus eliminating time in PLU programming operation. To program new PLUs or to change any programmed contents of PLUs: CONDITION Any time outside a sale (except the following case) To change the PLU of the copy-destination with sales data not zero:... -
Page 131: Time Setting Or Adjustment
TIME SETTING OR ADJUSTMENT (Submode 5) Any time outside a sale CONDITION Mode Lock: SET OPERATION 5 [@/FOR] | Hour | (0 to 23) NOTE: If an hour value of more than 23 or a minute value of more than 59 is entered, it will result in an error. The current date will not be changed by setting or adjusting the time. -
Page 132: Amount Limit Setting For Function Keys
AMOUNT LIMIT SETTING FOR FUNCTION KEYS (Submode 8) This submode sets the high amount limit in finalizing transactions by tendering through each media key and also sets the high and low amount limits in entering amount through departments. CONDITION Any time outside a sale OPERATION Mode Lock: SET 8 [@/FOR]... - Page 133 CUSTOMER FILE CODE (CHECK TRACK NO.) AND NAME SETTING (Submode 15) This submode creates files for customers whose sales are to be processed using the check track memory. Any time outside a sale CONDITION Mode Lock: SET OPERATION Repeat for other codes. 15 [X] | Customer File Code | [ST] (Max.
- Page 134 ex.) To program the following Customer File Codes with Customer Names: CODE NAME JAMES HAILY HELEN REED ex.) To delete Customer File Code 104 that has once been programmed: Mode Lock: SET Enter 15, depress [X]. [ITEM CORR] 104 [ST] (Customer File Code) [AT/TL] Mode Lock: SET Enter 15, depress [X]...
- Page 135 SALESPERSON CODE AND NAME PROGRAMMING (Submode 20) By programming Salesperson Codes here, those codes may be used in sales entries. In addition, the name of each salesperson can be programmed in maximum 12 characters. Programming CONDITION Any time outside a sale Mode Lock: SET OPERATION 20 [X]...
- Page 136 Deletion CONDITION After Daily Salesperson Reset Mode Lock: SET OPERATION 20 [X] [ITEM CORR] Repeat for other salespersons to be deleted. NOTE: When a Salesperson Code is deleted in the above operation, no entries using that code will be accepted until the code is again opened in the “Programming” operation already described.
- Page 137 TARE TABLE AND GENERAL UNIT WEIGHT SETTING (Submode 26) In the PLU TABLE PROGRAMMING operation (Submode 4), some of Scale-compulsory PLUs may be set with a Tare Table No. The actual tare weight is set to each Tare Table here. Also, the General Unit Weight is set here so that the Unit Weight may be effective to scale items entered through departments or PLUs without any Individual Unit Weight designation.
- Page 138 PLU PRESET-CODE KEY SETTING (Submode 27) When there are any keys programmed as PLU Preset-code Keys on the ECR Keyboard, and/or when the PLU Keyboard PK-2 (hardware option) is connected to the ECR, a PLU code may be preset to each of those keys in this operation.
- Page 139 NOTES: 1. The Nos 1 through 130 marked on the PK-2 Keyboard are the KEY Nos to be printed on the left side of the program receipt issued in the operation on the preceding page. If each KEY is not set with a PLU Code, the auto-preset PLU Code identical to the initial KEY No.
-
Page 140: Display Message Programming
DISPLAY MESSAGE PROGRAMMING (Submode 31) The “DISPLAY MESSAGE” here means the message to be displayed in the 16-digit dot windows of the Operator Display panel (and Customer Display panel if the 16-digit dot windows are installed as hard- ware option) while the Mode Lock of the terminal is in the “LOCK” position. This display message may be used as information, commercial message, welcoming greeting, etc. - Page 141 ex.) To program the following display message under the "SCROLLING DISPLAY" option: C O U N T E R T H I S C L O S E D A N O T H E R , H A N K Y O U .
-
Page 142: Negative Amount Key Limit Amount Setting
NEGATIVE AMOUNT KEY LIMIT AMOUNT SETTING (Submode 35) This submode sets the limit amount to be entered through each of the negative-amount keys [VND CPN], [STR CPN], [BTL RTN], and [DOLL DISC]. Any time outside a sale CONDITION Mode Lock: SET OPERATION 35 [@/FOR] |Key Code|... -
Page 143: Set Menu Table Programming
SET MENU TABLE PROGRAMMING (Submode 42) This submode creates the set menu tables for PLUs with set menu status programmed in PLU TABLE PROGRAMMING (Submode No. 4). By entering the PLU programmed as a set menu PLU (main menu) in this programming, the sub-menu items are entered automatically. CONDITION Any time outside a sale Mode Lock: SET... -
Page 144: Department Preset Price Setting Or Changing
DEPARTMENT PRESET PRICE SETTING OR CHANGING A price of each department may be set or changed by this operation. Any time outside a sale CONDITION Mode Lock: SET OPERATION Repeatable for other departments. | New Preset Price | Max. 6 digits; 0 to 999999 (result;... -
Page 145: Plu Preset Price Setting Or Changing, Whole Package Quantity Changing
PLU PRESET PRICE SETTING OR CHANGING, WHOLE PACKAGE QUANTITY CHANGING The preset price of each PLU may be set in the PLU TABLE PROGRAMMING (Submode 4) already described. However, in setting or changing the price only but not other programmed data, the following operation will be more convenient. - Page 146 Setting or Changing Preset Price of Split Package Pricing PLU CONDITION Any time outside a sale OPERATION Mode Lock: SET | PLU Code | [PLU] Max. 6 digits Repeatable for other PLUs ex.) To set the following preset price of PLUs: PLU 20105 (Apple) OPERATION Mode Lock: SET...
-
Page 147: And %- Preset Rate Setting
%+ AND %- PRESET RATE SETTING A preset rate may be set on each of the [%+] and [%-] keys, one independent rate for each key. Once a rate is preset, the % key will simply be depressed without a prior rate entry to activate the preset rate. If a rate is entered prior to the depression of the key, the entered rate (manual rate) will be activated instead. -
Page 148: Preset Rate Setting For Selective Itemizers
PRESET RATE SETTING FOR SELECTIVE ITEMIZERS (SI1 and SI2) If any of [ST1/TL] (or [SI/TL]) and [SI2/TL] keys are installed on the keyboard, a preset rate may be programmed on each key. As for the functions and applications of the Selective Itemizers, refer to the description on the next page. - Page 149 Selective Itemizer Functions and Applications The “Selective Itemizer” is a temporary total memory for each sale and is activated separately from the Main Itemizer (i.e. sale total memory). If certain Department or PLU items are programmed with the SI (selective itemizer) “net”...
-
Page 150: Foreign Currency Exchange Rate Setting
FOREIGN CURRENCY EXCHANGE RATE SETTING In this program, the rate of each foreign currencies (corresponding to the [CUR1] to [CUR5] keys) will be set. By setting a rate on each Foreign Currency Key, reading the sale total and tendering in the foreign currency value will be possible for sale finalization. - Page 151 ex.) To set three foreign currency rates: Domestic Currency ... U.S. $ Assigning: [CUR 1] ... French Franc [CUR 2] ... Deutsche Mark [CUR 3] ... Japanese yen Conditions given for Domestic Currency and Foreign Currencies (The rates here are merely examples.) (DOMESTIC) U.S.
-
Page 152: Tax Table Programming
TAX TABLE PROGRAMMING A maximum of four tables can be programmed (Tax 1, Tax 2, Tax 3, Tax 4) in accodance with installa- tion of [TX1/M], [TX2/M], [TX3/M], [TX4/M] keys. After Financial Daily Reset CONDITION Mode Lock: SET OPERATION TYPE 1: TAX 1 FULL BREAKS (COMBINATION OF NON-CYCLIC AND CYCLIC BREAKS) | Max. - Page 153 NOTES: 1. For Tax 2, Tax 3, Tax 4 table programming, follow the same procedure in TYPE1,2, or 3 on the preceding page, using [TX2/M] or [TX3/M] or [TX4/M] instead of [TX1/M]. 2. If multiple tax tables are programmed, the Tax 1 table must be set first, then Tax 2, Tax 3 and Tax 4.
- Page 154 ex. 2) TAX 2 COMBINATION OF NON-CYCLIC BREAKS AND % RATE Tax Table Amount Renge Tax Levied $0.00 to $ 0.09 0¢ $0.10 to $ 0.29 1¢ $0.30 to $0.59 2¢ $0.60 to $0.84 3¢ $0.85 to $1.12 4¢ ... “A” Break 5% is applied to any amount exceeding the “A”...
-
Page 155: Gst Rate Setting
GST RATE SETTING This operation sets the rate of GST (Goods and Service Tax) in CANADA. Any time outside a sale CONDITION Mode Lock: SET OPERATION | GST Rate | 0.01 to 99.99 (%) (Use the [ . ] key if the decimal portion is contained.) To reset the rate once set: Mode Lock: SET Enter 0, depress the [GST/M]... -
Page 156: Store/Register No. Setting
STORE/REGISTER NO. SETTING A maximum of 6 digits may be set as ID No. for the store and/or register. And once set, it will be printed on every receipt and every transaction on journal. Any time outside a sale CONDITION Mode Lock: SET OPERATION | Store/Register No. - Page 157 VERIFICATION OF PROGRAMMED DATA The programmed data entered in the preceding chapter can be read for verification purposes. The print format of each program reading is almost the same as on the program receipt, except that “PX” and a 3-digit number are printed instead of printing “P” and a 2-digit number. CONDITION Any time outside a sale OPERATION...
-
Page 158: Tax Calculation Test
Tax Calculation Test Any time outside a sale CONDITION Mode Lock: X or SET OPERATION Enter any amount. Displays the entered amount. NOTE: The print or non-print status of each calculated tax amount can be programmed. Depress [TXBL TL] Displays the tax amount (Tax 1 + Tax 2 + Tax 3 + Tax 4) is displayed, issuing a receipt such as below. - Page 159 EO1-11113 M/S LEVEL OPERATOR’S GUIDE...
- Page 160 INTRODUCTION ... 1 SYSTEM CONFIGURATION ... 2 HARDWARE DESCRIPTION ... 3 COMMUNICATION SEQUENCE ... 3 HARDWARE COMPOSITION ... 3 OPERATOR DISPLAY INDICATIONS OF MASTER-SATELLITE SYSTEM ... 3 ADDITIONAL FUNCTION KEY AND REGISTERING PROCEDURE ... 5 RTR (Register-to-Register) DECLARATION Key ... 5 TABLE OF CONTENTS EO1-11113 Page...
-
Page 161: Introduction
EO1-11113 INTRODUCTION Making the most of the functions described in Standalone Section, the FS-1650 can be developed into a master-satellite system. By adding the IFU Board for Master-Satellite, a Batch-consolidation system of a maximum of 6 termi- nals can be built. Operational functions on each terminal ECR basically stay the same as on a standalone ECR, except those deleted, changed, or added for this M/S system use which are described later. -
Page 162: System Configuration
SYSTEM CONFIGURATION RS-232C Master Terminal Remote Slip Printer Scanner Scale Satellite Terminal Remote Slip Printer Scanner Scale Batch-consolidation/Scanning System: Max. 16 terminals Remoto Slip Printer: DRS-207 Scanner: Scale: Backup Master Terminal Remote Slip Printer Scanner Scale Satellite Terminal Remote Slip Printer Scanner Scale Master Terminal... -
Page 163: Hardware Description
HARDWARE DESCRIPTION 3.1. COMMUNICATION SEQUENCE RS-485 Line 3.2. HARDWARE COMPOSITION A Master-Satellite System is realized by adding the IFU boards to each standalone ECR. 3.3. OPERATOR DISPLAY INDICATIONS OF MASTER-SATELLITE SYSTEM Display Indications during In-Line Services The followings are displayed in the 16-digit dot windows, 10-digit 7-segment window and IN-LINE Lamp of the Operator Display panel during in-line services. -
Page 164: Error Messages
<Satellite Terminals or Backup Master Terminal> • IN-LINE Lamp 1) Illuminated during “HOLD” condition 2) Extinguished after completing in-line services 3) Blinking during in-line services Error Messages The following table shows the Error Messages to be displayed on in-line terminals, in additions to those displayed on Standalone ECRs. -
Page 165: Additional Function Key And Registering Procedure
ADDITIONAL FUNCTION KEY AND REGISTERING PROCEDURE The following is the key that can be installed on the Master Terminal of an in-line system, in addition to the standalone specifications, and the registering procedure using the key. RTR (Register-to-Register) DECLARATION Key ([RTR]) By depressing the [RTR] key on the Master Terminal, various in-line jobs (DLLs, Consolidated Read/Reset Report takings, etc.) can be performed. - Page 166 EO1-11113 M/S LEVEL MANAGER’S GUIDE...
- Page 167 DAILY OPERATION FLOW ... 1 OPERATIONS BEFORE IN-LINE SERVICE ... 3 READ AND RESET REPORTS ... 6 PROGRAMMING OPERATIONS ... 15 DLL (Down-Line-Loading) OPERATIONS ... 20 DEPARTMENT AND PLU MAINTENANCE ... 22 INQUIRIES ... 26 BACKUP FUNCTION ... 28 MASTER AND BACK UP MASTER ALTERNATION (if Master Terminal becomes down) ...
-
Page 168: Daily Operation Flow
DAILY OPERATION FLOW In a Master-Satellite System, a certain order of jobs on the Master and Satellite terminals are pro- vided. If the necessary jobs are not proceeded in the correct order, sale entries may not be oper- ated or report collections may not be possible. The following chart shows the basic daily operation flow on the Master and Satellite terminals. - Page 169 (MASTER TERMINAL) STORE CLOSE Sign OFF on all the terminals (including the Master Terminal) when all the sale entries for the day are over. In-Line Reset Report Takings on Master Terminal. (Refer to Section 3.2.) The “HOLD” condition of the terminal can not be released for some reason, an “ENFORCED CLEAR OF HOLD CONDITION”...
-
Page 170: Operations Before In-Line Service
2. OPERATIONS BEFORE IN-LINE SERVICE Before entering in-line service operations (In-line Report takings, DLLs, etc.), the following opera- tions are available if necessary. TERMINAL OPEN CHECK This operation sends a dummy text to those terminals set in the TERMINAL CONNECTION TABLE (Submode 69), and prints out the Register Nos. -
Page 171: Terminal Designation
TERMINAL DESIGNATION This operation can be performed before any in-line service operation. When this operation is skipped, no specific terminals are designated, i.e., the in-line service operations will be performed to all the terminals. Any time outside a sale CONDITION OPERATION Mode Lock: RTR Declaration ON Status (i.e., the IN-LINE Lamp should be illuminated) -
Page 172: Terminal Condition Check
TERMINAL CONDITION CHECK This operation checks the condition of the designated terminals, and prints out the status re- sponded from the terminals. Any time outside a sale (operable on Master Terminal) CONDITION Mode Lock: X and IN-LINE Lamp illuminated OPERATION [AT/TL] Master Terminal Receipt Print Open 8:00am to 7:00pm... -
Page 173: Read And Reset Reports
3. READ AND RESET REPORTS 3.1. TERMINAL REPORTS Since most reports are taken as in-line reports on the Master Terminal, some of the reports which are available on the individual standalone ECR basis cannot be taken on Master or Satellite ECRs of the in-line system. - Page 174 3.2. IN-LINE REPORTS 3.2.1. IN-LINE REPORT COMMAND EXECUTIONS Before taking in-line reports, please note the following: 1) In-line Reset Reports (as well as In-line Read Reports) can be taken on the Master Terminal as long as the Satellite Terminals are in the idle state (“Signed OFF” condition is not neces- sarily required;...
- Page 175 OPERATION FLOW OF IN-LINE READ OR RESET REPORTS To be operated on the Master Terminal only Designating All Terminals Report Taking Operation for Each Report (see the following pages). Each Terminal’s Report Data Collection Process Each Terminal's Report Data Collection Process When the option "Individual Terminal Data Report When the option “Individual Terminal Data Issue"...
- Page 176 TABLE OF IN-LINE REPORT OPERATIONS Report Name COMBINATION REPORTS • Combination 1 Read : Daily • Combination 2 Read : Daily • Combination 3 Read : Daily • Combination 1 Reset : Daily • Combination 2 Reset : Daily • Combination 3 Reset : Daily FINANCIAL REPORTS •...
- Page 177 TABLE OF IN-LINE REPORT OPERATIONS (continued) Report Name SALESPERSON REPORTS (Daily only) • All-store All Salesperson Read • All-store All Salesperson Reset CREDIT CARD COMPANY SALES REPORTS • Credit Card Company Sales Read: • Credit Card Company Sales Reset: DEPARTMENT GROUP REPORTS (Read only) •...
- Page 178 TABLE OF IN-LINE REPORT OPERATIONS (continued) Report Name PLU REPORTS • All PLU Read: • All PLU Reset: • Zone PLU Read: • Zone PLU Reset: • Individual PLU Read: • Inactive PLU Read: PLU GROUP REPORTS • PLU Group Read: Daily •...
- Page 179 PROCESS REPORTS AND BASE REPORT DATA The following table shows which process reports are available after which report data collections. Reports Collection Required before Process Report takings (CONSOLIDATION MEMORY CAPTURE: NOTE 1) All Department Read Daily All Department Reset Daily All Department Read GT All Department Reset GT Any of the following PLU reports (NOTE2)
- Page 180 3.2.2. IN-LINE REPORT PRINT FORMAT IN-LINE REPORT TYPE An in-line report can be classified into the following five types. Collects data from each terminal to print a consolidation result: All Salesperson, Credit Card Company Sales, Department Group, Hourly Range, All Department, All/Zone PLU, and PLU Group Reports Collects data from each terminal to print a collection result per terminal: Indiv.
- Page 181 JOURNAL INDICATIONS ON INDIVIDUAL TERMINALS * X 03 15:40TM* * X 03 15:40TM* = Z 03 15:40TM= 3.3. OPERATIONS AFTER IN-LINE REPORT TAKINGS The following operations are available after taking in-line reports. CONSOLIDATED REPORT DATA READ (REPRINT) This operation issues the report data which is remaining in the Consolidation Memory of the Master Terminal.
-
Page 182: Programming Operations
4. PROGRAMMING OPERATIONS The system should be programmed fully by your local TOSHIBA TEC representative at the time of delivery according to the user’s requirements so that daily operations can immediately start. However, some data must be added or changed daily or in a longer period. Since the volume of programming contents for the system is too large, this chapter and the following two chapters are provided as guide lines of the user’s daily programming and maintenance operations. - Page 183 EO1-11113 PROGRAMMING OPERATIONS ADDED FOR IN-LINE TERMINALS TABLE OF PROGRAMMING OPERATIONS AFTER ADDITION (The page No. is the one in this manual) (page) Submode 69: TERMINAL CONNECTION TABLE (added for Master Terminal only) ... 17 Submode 77: TERMINAL ID SETTING ... 18 - 16 -...
- Page 184 TERMINAL CONNECTION TABLE SETTING (Submode 69) This submode is required for in-line services. Enter the In-line ID No. and the Register No. of each terminal (including the Master Terminal) connected to the in-line cable. Any time outside a sale CONDITION Mode Lock: SET and IN-LINE Lamp illuminated OPERATION 69 [@/FOR]...
- Page 185 TERMINAL ID SETTING (Submode 77) This submode is available for in-line terminals (including the master and backup master terminals). It must be operated separately on each terminal since the Terminal ID should vary from terminal to terminal. The data set in this submode is used as the in-line address of the terminal for in-line service operations.
- Page 186 VERIFICATION OF PROGRAMMED DATA RELATED TO IN-LINE SPECIFICATIONS The programmed data related to in-line specifications can be read for verification purposes. A receipt is issued for each operation with the programmed data printed. Anytime outside a sale CONDITION (Sign OFF required under Cashier Signing Method) Mode Lock: X or SET OPERATION (RTR Declaration is unnecessary on the Master Terminal.)
-
Page 187: Dll (Down-Line-Loading) Operations
(Chapter 6). If any other DLLs not introduced in this and next chapters are required, ask your TOSHIBA TEC representative. Please also note that TERMINAL DESIGNATION (see Chapter 2) can be operated prior to a specific DLL operation, to designate Satellite Terminals that receive the DLL. -
Page 188: Print Format Of Dll Operations
Terminals including the Master: Any time outside a sale CONDITION (Sign OFF condition is not necessarily required for the Code Entry Method) Satellite Terminals: Any position if the power is ON OPERATION Master Terminal: X X X Submode No. PRINT FORMAT OF DLL OPERATIONS Master Terminal Receipt TEC STORE 1343 PEACH DRIVE... -
Page 189: Department And Plu Maintenance
EO1-11113 6. DEPARTMENT AND PLU MAINTENANCE In this chapter, adding, changing, or deleting operation related to Department Table and PLU Table program data are described. These are operated on the Master Terminal only. All of these opera- tions are loaded into Satellite Terminals at the same time. TABLE OF DEPARTMENT AND PLU MAINTENANCE OPERATIONS Mode Submode... - Page 190 PLU TABLE ADDITION/CHANGE/DELETION WITH DLL (Submode 63) This submode can be operated only on the Master Terminal in an in-line system. This submode allows additions/changes/deletions of PLUs in the PLU Table File (generated by Submode 4 in the Manager’s Guide for stand-alone level). The data entered in this submode is immediately loaded into Satellite Terminals, item by item.
- Page 191 Deletion The sales data of the required PLUs are zero and all terminals are outside a CONDITION sale, programming, or report taking operations. Mode Lock: SET and IN-LINE Lamp illuminated OPERATION 63 [X] [ITEM CORR] DEPARTMENT PRESET PRICE SETTING OR CHANGING WITH DLL (Submode 72) This submode is used to newly set or change preset prices to required departments, and loads the price data into Satellite Terminals.
- Page 192 PLU PRICE CHANGE WITH DLL (Submode 73) This submode is used to change prices of PLUs and/or the Whole Package Quantity changes of Split Package Pricing PLUs existent in the PLU files, and to immediately load the data into Satellite Terminals. Any time outside a sale for Master or Satellite.
-
Page 193: Inquiries
INQUIRIES This chapter describes various inquiries made from each terminal to the Master Terminal and affect data (sales data updating). 7.1. CASHIER OCCUPY INQUIRIES When the “Floating Cashier” feature is selected and a Cashier Code is entered on a terminal, the terminal inquires the cashier code corresponding to cashier code entered to the Master Terminal. - Page 194 7.3. RKP PRINT DATA TRANSMISSION AND RKP CONDITION CHECK INQUIRIES RKP PRINT DATA TRANSMISSION RKP print data from each terminal is transmitted to the Master Terminal and/or the Backup Master Terminal, and the print outputted from the RKP becomes possible. RKP CONDITION CHECK INQUIRIES Print condition of RKPs connected to the Master Terminal and/or the Backup Master Terminal can be checked by the operation on each terminal.
-
Page 195: Backup Function
BACKUP FUNCTION (ONLY WHEN THE BACKUP MASTER IS CONNECTED) (1) Function • By connecting the backup master terminal (BM), the various files stored in the master terminal (M) can be backed up. • The terminal assigned to ID No. 2 will function as a backup master terminal (BM). By pro- gramming ID No. - Page 196 • Backup data update process: When an error occurs in backup data, the following processing methods can be selected according to the program option setting. (1) Automatic data copy When the version of the center file stored in the master terminal (M) is different from that stored in the backup master terminal (BM), registration jobs are automatically prohibited, the backup data is properly exchanged.
- Page 197 4) Checking Backup Data Version request Version data • The master terminal (M) sends the version request command to the backup master termi- nal (BM) every certain period of time and receives version information about the backup data. • The master terminal (M) checks correspondence between the version information received from the backup master terminal (BM) and the center files (stored in the M).
- Page 198 6) Backup Data Update Process (This is a process required when the backup data stored in the backup master terminal (BM) is not updated properly due to an error.) Backup data Response • The method processing backup error is selected according to the program option setting. Even if the automatic data copy operation is selected, data copy can be performed manu- ally.
-
Page 199: Master And Backup Master Alternation
MASTER AND BACKUP MASTER ALTERNATION The Backup Master Terminal can be changed to be used as the Master Terminal for an accident that the Master Terminal becomes down, etc. And the Master Terminal can be changed to be used as the Backup Master when it comes back from repair, etc. -
Page 200: Error Display
11.1.CAUSE OF ERROR 11.1.1. “IRC CONNECT ERR” Communication with the other station is not possible due to a connection error (cable cut, Master Terminal’s Power-OFF, etc.). Communication was made, but due to a text error, the other station cannot recognize it correctly (except RKP condition check and RKP print data transmission). -
Page 201: Other Operations Relating To In-Line Service
EO1-11113 12. OTHER OPERATIONS RELATING TO IN-LINE SERVICE The followings are other operations relating to in-line service operations. TABLE OF CONTENTS Page TIME OUT ... 35 SUSPENDING ... 36 RETRY ... 36 INCOMPLETE ENDING ... 36 CANCEL ... 37 – 34 –... -
Page 202: Time Out
TIME OUT A Time-Out condition arises when the Master Terminal is making an in-line service operation, such as X/Z report collection, DLL, etc. to the Satellite Terminals. The service timer is provided for servicing each of the Satellite Terminals, thus on exceeding the time limit, a Time-Out condition will occur. -
Page 203: Incomplete Ending
SUSPENDING This is to be operated for the purpose of suspending an in-line service being executed, when any terminals remain unserviced, and of going on to a “RETRY”, “INCOMPLETE ENDING”, or “CAN- CEL” operation as the next step. OPERATION ON MASTER TERMINAL: Depress [ITEM CORR] unit the key-in tone is generated. - Page 204 As part of the print out, the Store/Reg. No. of the terminal and its status will be printed. Status Print Format No nnnnnn ? Store/Register No. CANCEL This can be operated when a SUSPENDING condition arises due to a TIME OUT or a SUSPEND- ING operation.
- Page 206 PRINTED IN JAPAN...