Table of Contents
Advertisement
Available languages
Available languages
Advertisement
Chapters
Table of Contents

Related Manuals for Timex i-Control M805


Summary of Contents for Timex i-Control M805
- Page 1 i-Control Watch ® instruction guide W240 NA 805-095000...
-
Page 2: Table Of Contents
Payment must be made within 30 days of purchase. Name, address, telephone number, purchase date, and 5-digit model number required. You can also mail a check for $5 to: Timex Extended Warranty, P.O. Box 1676, Dept. EF, Little Rock, AR 72203. -
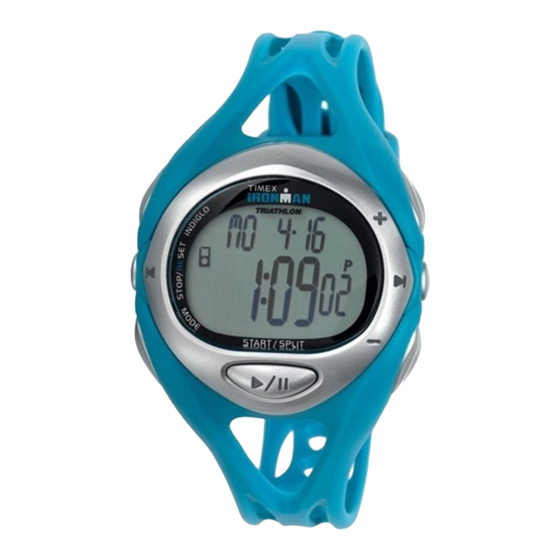
Page 3: Basic Operations
BASIC OPERATIONS INDIGLO BUTTON ® STOP/RESET/SET OR DONE (To save changes and exit setting) MODE OR NEXT (Proceed to next step) When setting, each button has a different function as indicated above. Display indicates when button changes function. IPOD CONTROL iPod®... -
Page 4: Chrono
9. Press DONE to exit. TIPS: • Press and hold START/SPLIT briefly to peek at next Time Zone. Press again quickly to view 3rd time zone. • Press and hold START/SPLIT while next Time Zone is displayed to change to that Time Zone. Watch will beep to confirm change. CHRONO Chrono counts up to 99 laps (100 hours max.) and stores 50 laps. -
Page 5: Interval Timer & Timer
• You cannot view the current lap time if Chrono is running. • Recall data is cleared when Chrono is started from reset. • iPod function is not available in RECALL mode. INTERVAL TIMER & TIMER IPOD FUNCTION IN TIMER & INTERVAL TIMER MODES: p and U functions share the buttons with important TIMER &... -
Page 6: Indiglo® Night-Light/Night-Mode® Feature
4 seconds. Feature will automatically deactivate after 8 hours. BATTERY Timex strongly recommends that a retailer or jeweler replace battery. Battery type is on watch back. If present, push/short internal reset switch after replacing battery. Battery life estimates are based on certain assumptions regarding usage;... - Page 7 This Class [B] digital apparatus complies with Canadian ICES-003. Cet appareil numérique de la classe [B] est conforme à la norme NMB-003 du Canada. DECLARATION OF CONFORMITY Manufacturer: Timex Corporation 555 Christian Road Middlebury, CT USA 06762 declares that the product:...
-
Page 8: Warranty
To obtain warranty service, please return your watch to Timex, one of its affiliates or the Timex retail- er where the watch was purchased, together with a completed original Watch Repair Coupon or, in the U.S. - Page 9 à 5 chiffres. Il est également possible d’envoyer un chèque de 5 $ US par courrier à : Timex Extended Warranty, P.O. Box 1676, Dept. EF, Little Rock, AR 72203. Lire les instructions attentivement pour bien comprendre le fonction- nement de votre montre Timex®.
-
Page 10: Opérations De Base
OPÉRATIONS DE BASE BOUTON INDIGLO ® STOP/SET/RESET OU DONE (Pour sauvegarder les changements et sortir du réglage) MODE OU NEXT (passer à l’étape suivante) Lors du réglage, chaque bouton a une fonction différente comme indiqué ci-dessus. L’affichage indique lorsque le bouton change de fonction. CONTRÔLE DE L’IPOD ICON iPod®... -
Page 11: Chrono
6. Appuyer sur NEXT et + / – pour remettre les secondes à zéro. 7. Continuer de la même façon pour régler le jour de la semaine, le mois, la date, l’année, le format 12 heures (AM/PM) ou 24 heures, la date avec format MM.JJ ou JJ.MM, pour activer ou désactiver le carillon horaire, pour activer ou désactiver le bouton bip. -
Page 12: Rappel
CONSEILS PRATIQUES : • Lorsqu’une séance est terminée dans ce format, le temps total écoulé se poursuit jusqu’à ce que le Chrono soit remis à zéro. • Lors du rappel TOTAL RUN, seule la durée totale de l’activité sera affichée. •... -
Page 13: Alarme
8 heures. PILE Timex recommande fortement de faire changer la pile par un détaillant ou un bijoutier. Le type de pile est indiqué au dos de la montre. S’il est présent, appuyer sur le bouton « internal reset » (remise à... -
Page 14: Étanchéité
ÉTANCHÉITÉ Si la montre est étanche, la profondeur maximale ou le symbole (O) est indiqué. Profondeur d’étanchéité Pression de l’eau sous la surface 30m/98pi 50m/164pi 100m/328pi *livres par pouce carré (abs.) ATTENTION : POUR PRÉSERVER L’ÉTANCHÉITÉ, NE PAS ENFONCER LES BOUTONS SOUS L’EAU. 1. -
Page 15: Garantie
Pour obtenir le service garanti, veuillez retourner la montre à Timex, à une de ses filiales ou au détaillant Timex où la montre a été achetée. Inclure un coupon de réparation original dûment rempli ou, aux É.-U. -
Page 16: Funciones
Indique el nombre, dirección, número de teléfono, fecha de compra y número de modelo (5 dígitos). También puede enviar un cheque de $5 por correo a: Timex Extended Warranty, P.O. Box 1676, Dept. EF, Little Rock, AR 72203. -
Page 17: Operaciones Básicas
OPERACIONES BÁSICAS BOTÓN INDIGLO ® STOP/RESET/SET o DONE (guardar cambios y acabar programación) MODO O SIGUIENTE (proceder al siguiente paso) Como se indicó anteriormente, al programar, cada botón tiene una función diferente. La pantalla muestra el momento en que el botón cambia de función. CONTROL DE IPOD SÍMBOLO de iPod®... -
Page 18: Cronógrafo
7. Siga el mismo procedimiento para programar el día, mes, fecha, año, formato de 12 (AM/PM) o de 24 horas en tiempo militar, formato mes-día (MM.DD) o día-mes (DD.MM), activar o desactivar la señal acústica horaria, activar o desactivar el sonido de pulsación. Si activa el sonido de pulsación, sonará... -
Page 19: Revisión
• Cuando se revisa TOTAL RUN, sólo el tiempo total de actividad se mostrará en la pantalla. • El contador del tiempo transcurrido seguirá marcando hasta que se regrese el cronógrafo a cero. Si se toma un tiempo parcial, la pantalla cambiará... -
Page 20: Alarma
5. Para desactivar la función NIGHT-MODE®, pulse el botón INDIGLO® durante 4 segundos. La función se desactiva automáticamente después de 8 horas. Timex recomienda encarecidamente que un minorista o un joyero cambien la pila. El tipo de pila está indicado en la parte de atrás de la aparece en caja. -
Page 21: Resistencia Al Agua
RESISTENCIA AL AGUA Si su reloj es resistente al agua, se indicarán los metros o aparecerá el símbolo ( Profundidad de Resistencia Presión bajo la superficie al Agua 30 m /98 pies 50 m /164 pies 100 m /328 pies *libras por pulgada cuadrada absoluta ADVERTENCIA: PARA MANTENER LA RESISTENCIA AL AGUA, NO PULSE NINGÚN BOTÓN BAJO EL AGUA. -
Page 22: Garantía
RESPECTO A LOS TÉRMINOS DE LA OFERTA DE GARANTÍA EXTENDIDA) Timex Corporation garantiza su reloj TIMEX® contra defectos de fabricación durante un período de UN AÑO a partir de la fecha de compra original. Timex y sus sucursales en todo el mundo respaldan esta garantía internacional.