Table of Contents
Advertisement
A
P
part
pièce
parte
A
bar mount assembly / montant / montaje de barra
B
arm assembly / bras / brazo
C
top cradle assembly / berceau supérieur / cuna superior
D
bottom cradle assembly / berceau inférieur / cuna inferior
E
under bar bracket / support sous barre / soporte de debajo la barra
F
pivot pin / axe de pivot / eje giratorio
G
slide plate / plaque coulissante / placa deslizante
H
carriage bolt / boulon de carrosserie 22mm / perno de carruaje 22mm
I
round nut / écrou rond / tuerca redonda
J
square nut / écrou carré / tuerca cuadrada
K
bolt M6 x 16 / boulon M6 x 16 / perno M6 x 16
L
hex key / clé hexagonale / llave hexagonal
M
washer / rondelle / arandela
N
knob with bolt / écrou borgne avec vis / perilla con perno
O
lock plug / bouchon / tapón de cierre
P
strap assembly / courroie / ensamblaje de correa
Q
buckle bumper / protège - boucle / tapa de la hebilla
R
ratchet with hook / cliquet avec crochet / trinquete con gancho
S
hook / crochet / gancho
T
attachment strap / courroie d'attache / correa de sujeción
U
1/4" rope / corde 1/4 po / cuerda de 1/4 de pulg. (6mm)
V
bolt M6 x 25 / boulon M6 x 25 / perno M6 x 25
W
pad 6" / tampon de 6 po / almohadilla de 6 pulgadas
X
pad 9" / tampon de 9 po / almohadilla de 9 pulgadas
Y
clear film / film transparent / película transparente
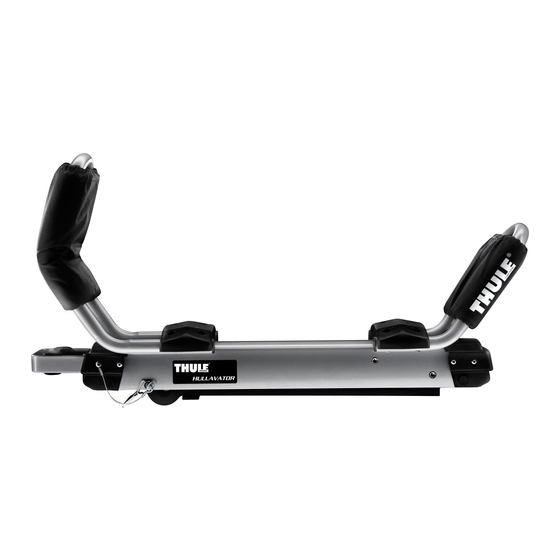
897xt HULLAVATOR™
PARTS INCLUDED • PIÈCES INCLUSES • PIEZAS INCLUIDAS
B
D
Q
R
W
X
E
S
T
description
description
descripcion
K
V
C
L
M
H
Y
F
I
J
G
N
O
U
part number
qty.
numéro de pièce
qté
numero de parte
cant.
753-3524-02
2
753-3569-02
2
753-3521-02
2
753-3522-02
2
853-5860
4
853-5869
2
853-5938-02
2
915-0622-11
4
853-5439
4
853-0107-02
8
919-0616-11
8
853-0930
1
951-0612-11
12
753-0783-02
2
853-3160
2
753-2030-12
2
853-5593
2
853-5464
2
853-5465
2
853-5467
2
853-5466
2
919-0625-11
4
853-5540
2
853-5540-03
2
853-5481
2
Advertisement
Table of Contents

Related Manuals for Thule 897xt HULLAVATOR


Summary of Contents for Thule 897xt HULLAVATOR
- Page 1 897xt HULLAVATOR™ PARTS INCLUDED • PIÈCES INCLUSES • PIEZAS INCLUIDAS part pièce parte bar mount assembly / montant / montaje de barra arm assembly / bras / brazo top cradle assembly / berceau supérieur / cuna superior bottom cradle assembly / berceau inférieur / cuna inferior...
- Page 2 • Load bars must extend equally between 4" and 8" beyond foot. Adjust as necessary. In rare instances, longer load bars then those recommended in the Thule Fit Guide may be required for your vehicle Les barres de toit doivent être déployées uniformément, entre 10 et 20 cm,au delà...
- Page 3 FOR INSTALLATION TO THULE SQUARE AND YAKIMA ROUND LOAD BARS POUR INSTALLATION SUR BARRES DE TOIT THULE CARRÉES OU YAKIMA RONDES PARA INSTALARLOS A BARRAS DE CARGA CUADRADAS DE THULE Y REDONDAS DE YAKIMA • Insert pivot pin through • Place bar mount over load bar so hole in right side of bar pivot pin just clears end of load bar.
- Page 4 • In top slot at end of arm assembly without handle, install slide plate. Dans la fente supérieure à l’extrémité du bras sans poignée, installez la plaque coulissante. Instale la placa deslizante en la ranura superior del extremo del brazo sin asa. •...
- Page 5 ASSEMBLE ARM TO BAR MOUNT MONTAGE DU BRAS SUR LE MONTANT MONTAJE DEL BRAZO EN EL MONTAJE DE BARRA • Remove pivot pin from bar mount. Retirez l’axe de pivot du montant de barre. Saque el eje giratorio del montaje de barra. •...
- Page 6 LOWERING CARRIER / MOUNTING THE KAYAK ABAISSEMENT DU PORTE-KAYAK ET FIXATION DU KAYAK DESCENSO DEL PORTACARGA / MONTAJE DEL KAYAK • If possible, fold side view mirror against vehicle before loading kayak. Si possible, repliez le rétroviseur contre le véhicule avant le chargement du kayak. Si es posible, repliegue el retrovisor contra el vehiculo antes de cargar el kayak.
- Page 7 6 continued / suite / continuación LOWERING CARRIER / MOUNTING THE KAYAK ABAISSEMENT DU PORTE-KAYAK ET FIXATION DU KAYAK DESCENSO DEL PORTACARGAS / MONTAJE DEL KAYAK • Route free end of strap, with logo side up, through the Buckle Bumper as shown. Pull Buckle Bumper over buckle to protect boat and vehicle while strapping down boat.
- Page 8 LIFTING / UNLOADING THE KAYAK LEVAGE / DÉCHARGEMENT DU KAYAK IZAMIENTO / DESCARGA DEL KAYAK • With kayak secure in arms, simultaneously squeeze handle on each arm and begin to lift kayak. Hullavator will begin working and lift kayak for you. Le kayak étant fixé...
- Page 9 • Carefully attach hook to end of rope. Attachez le crochet soigneusement au bout de la corde. Sujete el gancho al extremo de la cuerda cuidadosamente. • Keep rotating the spool until rope exits at the bottom. Continuez à tourner la bobine jusqu`à ce que la corde ressorte.
- Page 10 KAYAK UNLOADING / DÉCHARGEMENT DU KAYAK / CÓMO DESCARGAR EL KAYAK • Remove front and rear tie downs. To release, press lever located above ratchet spool. Retirez les amarres avant et arrière. Pour relâcher, appuyez sur le levier se trouvant au dessus d e la bobine du cliquet. Saque las ataduras delantera y trasera.
- Page 11 El montaje e instalación de nuestro producto son responsabilidad del usuario final y están fuera del control de Thule. Se excluyen los daños a su vehículo, carga, o a cualquier propiedad o persona. • Asegúrese que todas las perillas, pernos, tornillos, correas, y seguros estén firmemente sujetos,...
- Page 12 à l’acheteur l’adresse d’envoi appropriée et des instructions supplé- mentaires. Veuillez noter que l’acheteur sera responsable des frais d’en- voi du produit à THULE et qu’une preuve d’achat sous la forme de l’orig- inal d’une facture ou d’un reçu d’achat et une description détaillée du défaut doivent être inclus dans l’envoi.