
Related Manuals for Stanton C.503


Summary of Contents for Stanton C.503
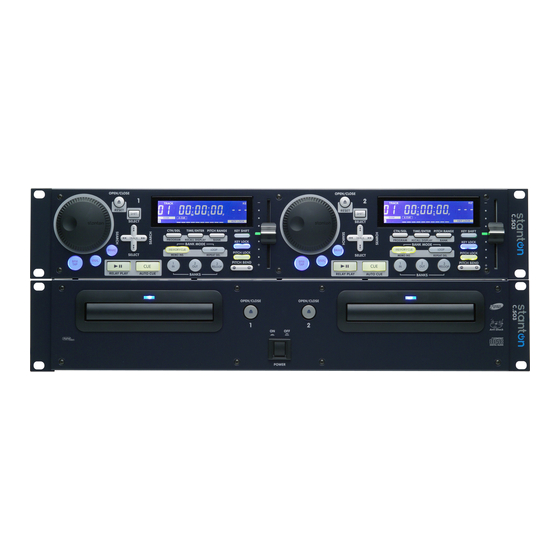
- Page 1 P P r r o o f f e e s s s s i i o o n n a a l l D D u u a a l l C C D D P P l l a a y y e e r r C C .
-
Page 2: Safety Precautions
Congratulations and thank you for purchasing the latest addition to the growing Stanton family of professional DJ gear. Sporting a new attitude and a fresh, modern look, the Stanton C.503 is a dual rackmount CD player with designed to give club and mobile DJs a powerful, yet simple tool to mix, create, and perform their best. - Page 3 1 Read these instructions. 2 Keep these instructions. 3 Heed all warnings. 4 Follow all instructions. 5 Do not use this apparatus near water. 6 Clean only with dry cloth. 7 Do not block any ventilation openings. Install in accordance with the manufacturerÅfs instructions. 8 Do not install near any heat sources such as radiators, heat registers, stoves, or other apparatus (including amplifiers) that produce heat.
-
Page 4: Table Of Contents
TABLE OF CONTENTS 1. Functions and Controls (Layout) 1-1. Main Unit (Front Panel) 1-2. Main Unit (Rear Panel) 1-3. Remote Controller (Front Panel) 1-4. Remote Controller (Bottom Panel) 1-5. LCD 2. Standard Operation 2-1. CUE 2-2. MEMORY/CUE 2-3. Flash Start 2-4. -
Page 5: Functions And Controls (Layout)
1. Disc Trays Insert CDs into these trays, label side upwards. NOTE: The C.503 reads Audio from CDs & CD-Rs. + Audio Only CD-RWs 2. Tray LEDs When power is turned on, these two LEDs will light. 3. OPEN/CLOSE Buttons Open and close the appropriate disc tray. -
Page 6: Remote Controller (Front Panel)
* DO NOT use any cable except the cable supplied with the C.503. * Connect the cable in the way shown on the illustration on the rear panel of the C.503. If you connect the cable in any other way, you may damage the C.503. - Page 7 For more information on SHIFT functions read below and see advanced operation. 13. LCD Displays visual feedback for C.503 functions. 14. SELECT Buttons Use these to perform track searches (next / previous) track. Search from track to track, either forward (up arrow) or back- ward (down arrow) with these buttons.
- Page 8 15. SEARCH Buttons Search within the track selected, either forward >> or backward << with these buttons. When unit is pausing, pressing this button shortly moves the start / cue point in 1 frame steps. This also enters is stutter mode. 16.
- Page 9 enters into the normal playback mode. Pressing and holding the SHIFT Button then pressing this Button toggles the AUTO CUE function on and off. 26. MEMORY/CUE [MEMO/INS] Button Activates the three buttons below (1/IN, 2/OUT, and 3/RELOOP) ready for CUE mode. When these three buttons are set to CUE mode, this button will light green, press again to SET cue for bank 1, 2, or 3.
-
Page 10: Remote Controller (Bottom Panel)
* DO NOT use any cable except the cable supplied with the C.503. * Connect the cable to the C.503 as shown on the illustration on the rear panel. If you connect the cable in any other way, you may damage the C.503. -
Page 11: Cue
2-1. CUE The C.503 will always memorize the last played start point as the main cue point. After play has begun, pressing the CUE button re-locates the audio and plays it from that point. Although very quick, the CUE button is not seamless. -
Page 12: Memory/Cue
3. Press the OUT button while in play or in pause mode. IN, OUT, and RELOOP buttons will all light. If the loop end point is set when the unit is playing, the C.503 starts loop playback seamlessly. If the loop end point is set when the unit is paused, the C.503 goes to the loop start point then pauses. -
Page 13: Looping
2-5. Adjusting the tempo Pitch range The C.503 features +/-4, 8, 16, 32, and 100 of pitch control range. Pressing the PITCH RANGE button changes the pitch control range. The parameter display section of the LCD momentarily shows the selected pitch range. -
Page 14: Bpm/Tap
2-9. BPM / TAP Button The C.503 features a manual BPM calculation. Set the parameter display mode to BPM by Pressing [RECALL DISPLAY] until BPM shows in LCD or just begin tapping the BPM/TAP button. Pressing the BPM/TAP button repeatedly (suggest- ed 8 times or more) enters the song tempo (BPM) in manually. -
Page 15: Track Memory
When VINYL function is on, the Jog wheel works as the search dial. 3-4. Track Memory The C.503 can memorize the various playback settings of current selected tracks. Up to 100 tracks of memory in each of 5 banks (A to E) can be stored. -
Page 16: Fader Start
Default setting is ON. 3-8. Program Play The C.503 features up to 30 tracks of program play function. Program memory itself is maintained even if power is turned off; and if CD is not ejected, the program list will be backed up. -
Page 17: Preset Menu
5. Exit the program edit mode [PROGRAM] by pressing and holding the SHIFT button then pressing the CNT/SGL but- ton. Edit program 1. Enter the program edit mode [PROGRAM] by pressing and holding the SHIFT button then pressing the CNT/SGL but- ton. -
Page 18: Back Up Memory
4. Pressing the TIME/ENTER button confirms the new parameter. 5. Pressing any other button exits the preset operation. 01 t PLAY Timer Play Turns the “Power on play” on and off 02 dIrECt Direct When direct mode is set to on, disc can be ejected when disc is played, and when insert the disc, playback is started automatically. -
Page 19: Specifications
SPECIFICATIONS Disc type: Number of channels: Resolution: Sampling frequency: Analog output: Output impedance: Maximum output level: Digital output: Format: Voltage requirements USA/Canada: UK/Europe: Australia: Power consumption: Peak inrush current: Applicable electromagnetic environment: Dimensions (W x H x D mm) Main unit: Remote control unit: Weight Main unit:... -
Page 20: Error Messages (Troubleshooting)
@ www.StantonDJ.com under “World Distributors”. The C.503 will enter SLEEP mode after 30 min. of inactivity. To conserve electricity and the LCD, the screen will darken and may appear off; however the word SLEEP is partially visible. This is a normal procedure when the unit is not in use, to exit sleep mode simply press any button or the jog wheel. - Page 21 Stanton dealer’s return policy. Stanton assumes no risk and shall be subject to no liability for damages or loss resulting from the specific use or applica- tion made of the merchandise. Stanton’s liability for any claim, whether based on breach of contract, negligence, infringe- ment of any rights of any party, or product liability, and relating to the merchandise shall not exceed the price received by Stanton from your purchase of such merchandise.
- Page 22 CAUTION Changes or modifications to this equipment not express- ly approved by Stanton for compliance could void the user's authority to operate this equipment. This product has been designed and manufactured according to FDA regulations "title 21, CFR, chapter 1, subchapter J, based on the Radiation Control for Health and Safety Act of 1968", and is classified as...