Table of Contents
Advertisement
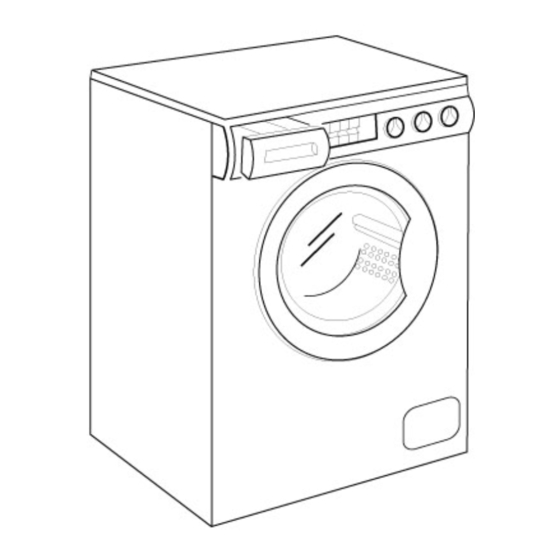
OWNERS MANUAL
When Technology Meets Ecology
CAUTION:
Before operating this appliance
it is recommended that you
read this manual and follow all
Safety Rules and Operating
Instructions.
COMBINATION WASHER & VENTED DRYER
MODEL WD802M
corporate offices
nd
Westland Sales / PO Box 427 / 15650 SE 102
Ave / Clackamas, OR 97015 - USA
warehouses Clackamas, OR & Elkhart, IN / phone 503.655.2563 / fax 503.656.8829
web www.westlandsales.com / www.splendide.com / e-mail splendide@westlandsales.com
Advertisement
Table of Contents

Related Manuals for Splendide WD802M


Summary of Contents for Splendide WD802M
- Page 1 MODEL WD802M corporate offices Westland Sales / PO Box 427 / 15650 SE 102 Ave / Clackamas, OR 97015 - USA warehouses Clackamas, OR & Elkhart, IN / phone 503.655.2563 / fax 503.656.8829 web www.westlandsales.com / www.splendide.com / e-mail splendide@westlandsales.com...
-
Page 2: Table Of Contents
TABLE OF CONTENTS Record Serial & Model Number...…….. Installation...…. Removing Shipping Brackets…... Leveling...….. Grounding...….. Plumbing………………………………... Exhausting...………………….. Important Safety Instructions...….. Recessed, Closet and Alcove Installation. Laundry Preparation... Sorting... Inspection... Pre-Treating... Pre-Washing... Laundry Aids... Washer Features... On-Off Button... Medium/High Spin Button... High/Heat Half/Heat Button... Wash Timer... - Page 3 RISK OF ELECTRIC SHOCK DO NOT OPEN CAUTION: TO REDUCE THE RISK OF ELECTRIC SHOCK. DO NOT REMOVE COVER (OR BACK). NO USER SERVICEABLE PARTS INSIDE. REFER SERVICING TO QUALIFIED SERVICES PERSONNEL. The lightning flash with arrowhead symbol, within an equilateral triangle, is intended to alert the user to the presence of uninsulated "Dangerous Voltage"...
-
Page 4: Removing Shipping Brackets
IMPORTANT In the accessories bag you will also find a spanner that is to be used for removing brackets and leveling washer-dryer feet. REMOVE SHIPPING BRACKETS 1. Remove back panel screws and lift panel clear (Fig. 1, Item. A). 2. Remove fixing screws from the four brackets and cross bearing (Fig. - Page 5 PLUMBING (Water Inlet) The straight end of these hoses should be connected to the supply (Fig. 4). The 90° angled end of these hoses should be connected to the inlet valves on the back of the machine, using one of the washers to make a water tight seal on each connection.
-
Page 6: Exhausting
Sink Drainpipe System: You should carefully position the drain hose to avoid kinks and ensure proper drainage of the water. Use a drain loop or suitable clamp to support drain hose at 25" (62 cm) minimum 34" (86 cm) maximum. The outlet end of the drain hose must be at least 20"... -
Page 7: Recessed, Closet And Alcove Installation
Recessed, Closet And Alcove Installation The Machine may be installed in a recessed area, closet or alcove. The installation spacing is in inches and is the minimum acceptable. Additional spacing should be considered for easy installation, servicing and com- pliance with local codes and ordinances. Closet installation must be exhausted. -
Page 8: Laundry Preparation
LAUNDRY PREPARATION Sorting Clothes should be sorted to separate items which could damage other garments. Sort items into loads according to similar colors, fabrics, garment construction and degrees of soil. • Color - Separate clothes into three groups: whites and pastels medium and bright colors and dark colors. -
Page 9: Washer Features
WASHER FEATURES ON-OFF Button After the clothes have been loaded and the desired water temperature and cycle selected, pressing the ON-OFF button causes the cycle to begin. Medium/High Spin Button When the button is pressed, the spin speed will be reduced from high to low during the regular cycle. - Page 10 Page 8...
-
Page 11: How To Wash
Operating Steps Before using the washer for the first time, wipe the inside and outside with a damp cloth to remove any travel dust that has accumulated and we recommend operating a rinse cycle to rinse out your machine. Be sure the hot and cold water faucets are turned on fully. Make sure that the power cord is plugged in and that the circuit is energized. -
Page 12: Tumble Dry
HOW TO USE YOUR NEW WASHER-DRYER • Load the drum with clothes as previously described. Close the door. • Select a program. See chart below. • Select drying time (and half heat if required). • Select desired spin speed (high spin only occurs in regular wash cycle). -
Page 13: Laundry Aids
Detergent Amount Recommendations • Use only a low sudsing detergent, one or two table- spoons (maximum) of the standard powder detergent or liquid equivalent. • The degree of soil will change detergents amounts. For heavier soiled loads, increase the amount of deter- gent used, for lightly soiled loads decrease the amount of detergent used. - Page 14 Cream, Ice Cream or Milk Sponge stain with cool water or soak stain in cool water for 30 minutes or longer. If stain remains, work a deter- gent into spot then rinse. Bleach if necessary. Deodorants and Antiperspirant Wash or sponge stain thoroughly with warm water and detergent;...
-
Page 15: Care And Cleaning
Cleaning The Exterior As you use the washer, occasionally wipe the cabinet with a damp cloth or sponge; wipe dry with a soft cloth. Do not use polish or any kind on the plastic trim. Some polishes contain agents which may damage plastics. Cleaning The Interior If you live an area where phosphate detergents are banned, it may be necessary to recondition the washer... - Page 16 Wash And Rinse Water Temperatures Are Incorrect • The hot water hose and cold water hose are connected to the wrong faucets. Water Is Entering Washer But Tub Does Not Fill • Standpipe for the drain hose is not the correct height. (Fig.