Table of Contents
Advertisement
Available languages
Available languages
FM/AM
Compact Disc Player
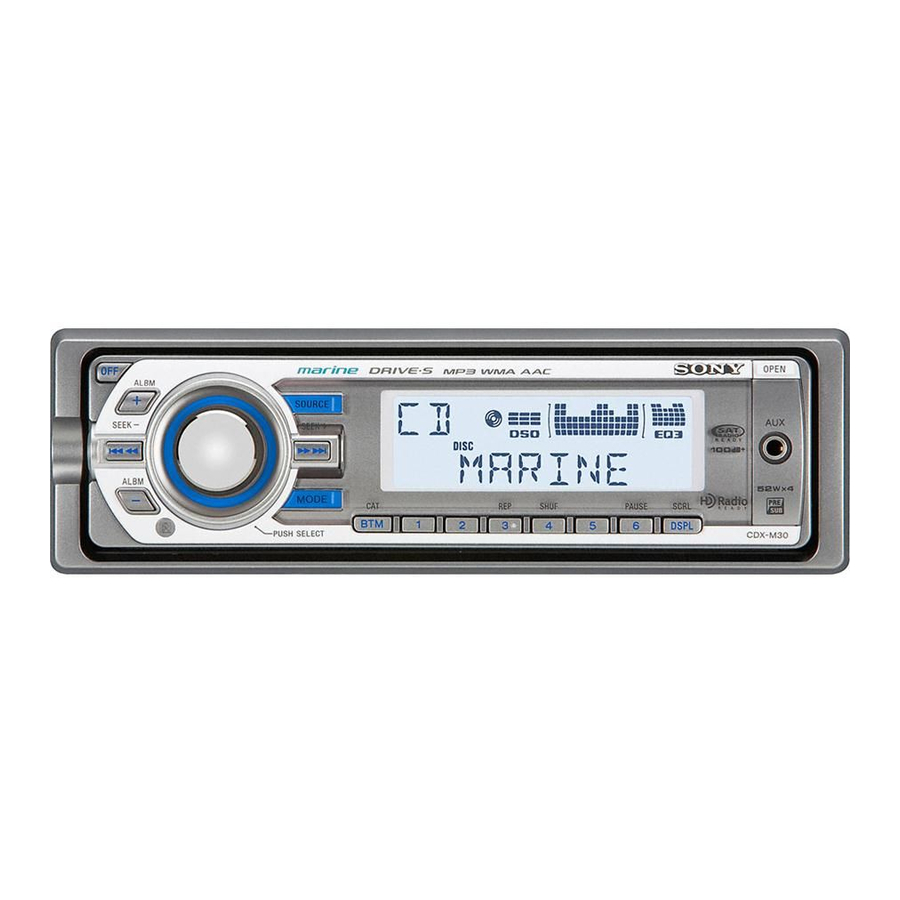
CDX-M50IP/CDX-M30
FM/MW/LW
Compact Disc Player
CDX-MR50IP
Operating Instructions
Mode d'emploi
Manual de instrucciones
Bedienungsanleitung
Gebruiksaanwijzing
Istruzioni per l'uso
Owner's Record
The model and serial numbers are located on the bottom of the unit.
Record these numbers in the spaces provided below.
Refer to these numbers whenever you call upon your Sony dealer regarding this product.
Model No.
To cancel the demonstration (DEMO) display, see page 16.
Pour annuler la démonstration (DEMO), reportez-vous à la page 16.
Para cancelar la pantalla de demostración (DEMO), consulte la página 16.
Zum Deaktivieren der Demo-Anzeige (DEMO) schlagen Sie bitte auf Seite 14 nach.
Om de demonstratie (DEMO) te annuleren, zie pagina 14.
Per annullare la dimostrazione (DEMO), vedere pagina 14.
© 2007 Sony Corporation
Serial No.
3-274-100-13 (1)
US
FR
ES
DE
NL
IT
Advertisement
Chapters
Table of Contents

Related Manuals for Sony SRS M30


Summary of Contents for Sony SRS M30
- Page 1 The model and serial numbers are located on the bottom of the unit. Record these numbers in the spaces provided below. Refer to these numbers whenever you call upon your Sony dealer regarding this product. Model No. To cancel the demonstration (DEMO) display, see page 16.
- Page 2 This label is located on the bottom of the chassis. Notice for the customer in the countries applying EU Directives The manufacturer of this product is Sony Corporation, 1-7-1 Konan, Minato-ku, Tokyo, Japan. The Authorized Representative for EMC and product safety is Sony Deutschland GmbH, Hedelfinger Strasse 61, 70327 Stuttgart, Germany.
- Page 3 (sold separately). Please see your nearest authorized Sony dealer for details on the satellite radio tuner module. “SAT Radio,” “SAT Radio Ready,” the SAT Radio and SAT Radio Ready logos and all related marks are trademarks of Sirius Satellite Radio Inc.
-
Page 5: Table Of Contents
Table of Contents Welcome ! ......6 Getting Started Resetting the unit ......6 Preparing the card remote commander . -
Page 6: Welcome
(analog connection). – CD/MD changers: CD/MD changers can be connected to the Sony BUS at the rear of the unit. Getting Started Resetting the unit Before operating the unit for the first time, or after replacing the boat’s battery or changing the... -
Page 7: Detaching The Front Panel
To display the clock, press (DSPL). Press (DSPL) again to return to the previous display. You can set the clock automatically with the RDS feature (page 13). (CDX-MR50IP) Detaching the front panel You can detach the front panel of this unit to prevent theft. -
Page 8: Location Of Controls And Basic Operations
Location of controls and basic operations Main unit ALBM SEEK ALBM Front panel removed SOURCE SEEK MODE PUSH SELECT qa qs RESET OPEN SHUF PAUSE SCRL DSPL... -
Page 9: Source Button
This section contains instructions on the location of controls and basic operations. For details, see the respective pages. For iPod operation, see “iPod (CDX-M50IP/ MR50IP)” on page 14, or for optional device (CD/MD changer, etc.,) operation, see “Using optional equipment” on page 17. The corresponding buttons on the card remote commander control the same functions as those on the unit. -
Page 10: Card Remote Commander Rm-X151
Card remote commander RM-X151 SOURCE – DSPL – The following buttons on the card remote commander have also different buttons/functions from the unit. Remove the insulation film before use (page 6). qk < (.)/, (>) buttons To control CD/radio/PD* (SEEK) –/+ on the unit. Setup, sound setting, etc., can be operated by <... -
Page 11: Display Items
For details on selecting a CD/MD changer, see page 18. Display items A Source B Track number/Elapsed playing time, Disc/ artist name, Album number*, Album name, Track name, Text information, Clock * Album number is displayed only when the album is changed. -
Page 12: Tuning Automatically
Tuning automatically Select the band, then press (SEEK) –/+ to search for the station. Scanning stops when the unit receives a station. Repeat this procedure until the desired station is received. If you know the frequency of the station you want to listen to, press and hold (SEEK) –/+ to locate the approximate frequency, then press (SEEK) –/+ repeatedly to fine adjust to the desired frequency... -
Page 13: Selecting Pty
Receiving emergency announcements With AF or TA on, the emergency announcements will automatically interrupt the currently selected source. If you adjust the volume level during a traffic announcement, that level will be stored into memory for subsequent traffic announcements, independently from the regular volume level. -
Page 14: Ipod (Cdx-M50Ip/Mr50Ip)
iPod (CDX-M50IP/MR50IP) Playing back iPod By connecting an iPod to the dock connector at the rear of the unit, you can listen on your boat’s speakers, while controlling the iPod from the unit. Notes • When an iPod is connected to the dock connector, operation from the iPod cannot be performed. -
Page 15: Repeat And Shuffle Play
Repeat and shuffle Play During playback, press (3) (REP) or (4) (SHUF) repeatedly until the desired setting appears. Select To play REP TRK track repeatedly. REP ALB album repeatedly. REP ART artist repeatedly. REP PLY playlist repeatedly. SHUF ALB album in random order. SHUF ART artist in random order. -
Page 16: Customizing The Equalizer Curve
Customizing the equalizer curve — EQ3 “CUSTOM” of EQ3 allows you to make your own equalizer settings. Select a source, then press the select button repeatedly to select “EQ3.” Rotate the volume control dial to select “CUSTOM.” Press the select button repeatedly until “LOW,”... -
Page 17: Using Optional Equipment
M.DSPL (Motion Display) To select the Motion Display mode. – “M.DSPL-SA” ( ): to show moving patterns and spectrum analyzer. – “M.DSPL-ON”: to show moving patterns. – “M.DSPL-OFF”: to deactivate the Motion Display. A.SCRL (Auto Scroll) To scroll long displayed item automatically when the disc/album/track is changed. -
Page 18: Cd/Md Changer
CD/MD changer Selecting the changer 1 Press (SOURCE) repeatedly until “CD” or “MD” appears. 2 Press (MODE) repeatedly until the desired changer appears. Unit number Disc number Playback starts. Skipping albums and discs 1 During playback, press (ALBM) +/–. Press (ALBM) To skip album and release (hold for a... -
Page 19: Additional Information
Additional Information Precautions • If your boat has been moored in direct sunlight, allow the unit to cool off before operating it. • Power antenna (aerial) will extend automatically while the unit is operating. Moisture condensation On a rainy day or in a very damp area, moisture condensation may occur inside the lenses and display of the unit. -
Page 20: Playback Order Of Mp3/Wma/Aac
If you have any questions or problems concerning your unit that are not covered in this manual, consult your nearest Sony dealer. Maintenance Replacing the lithium battery of the card remote commander Under normal conditions, the battery will last approximately 1 year. -
Page 21: Removing The Unit
If the fuse blows again after replacement, there may be an internal malfunction. In such a case, consult your nearest Sony dealer. Cleaning the connectors The unit may not function properly if the connectors between the unit and the front panel are not clean. In order to prevent this, detach the front panel (page 7) and clean the connectors with a cotton swab. -
Page 22: Specifications
Specifications AUDIO POWER SPECIFICATIONS POWER OUTPUT AND TOTAL HARMONIC DISTORTION 23.2 watts per channel minimum continuous average power into 4 ohms, 4 channels driven from 20 Hz to 20 kHz with no more than 5% total harmonic distortion. CEA2006 Standard Power Output: 17 Watts RMS ×... -
Page 23: Troubleshooting
• The position of the fader control “FAD” is not set for a 2-speaker system. • The CD changer is incompatible with the disc format (MP3/WMA/AAC). t Play back with a Sony MP3 compatible CD changer, or this unit. No beep sound. • The beep sound is canceled (page 16). -
Page 24: Error Displays/Messages
The sound skips. • Installation is not correct. t Install the unit at an angle of less than 45° in a sturdy part of the boat. • Defective or dirty disc. The operation buttons do not function. The disc will not eject. Press the RESET button (page 6). - Page 25 CD or MD does not appear in the display. If these solutions do not help improve the situation, consult your nearest Sony dealer. If you take the unit to be repaired because of CD playback trouble, bring the disc that was used at the time the problem began.
- Page 26 Avis à l’attention des clients des pays appliquant les directives UE Le fabricant de ce produit est Sony Corporation, 1-7-1 Konan, Minato-ku, Tokyo, Japon. Son représentant autorisé concernant la CEM et la sécurité du produit est Sony Deutschland GmbH, Hedelfinger Strasse 61, 70327 Stuttgart, Allemagne.
- Page 27 (vendu séparément). Consultez votre détaillant agréé Sony le plus proche pour en savoir plus sur le fonctionnement du module tuner radio satellite. « SAT Radio », « SAT Radio Ready », les logos SAT Radio et SAT Radio Ready, ainsi que toutes les marques associées sont des marques de...
- Page 29 Table des matières Félicitations ! ......6 Préparation Réinitialisation de l’appareil ....6 Préparation de la mini-télécommande .
-
Page 30: Félicitations
Félicitations ! Nous vous remercions d’avoir fait l’acquisition de ce lecteur de disques compacts Sony. Vous pouvez profiter de votre navigation grâce aux fonctions ci-dessous. • Lecture de CD Vous pouvez lire des CD-DA (contenant également des informations CD TEXT) et des CD-R/CD-RW (fichiers MP3/WMA/AAC (page 20)). -
Page 31: Retrait De La Façade
Appuyez sur (SEEK) +. L’indication des heures clignote. Tournez la molette de réglage du volume pour régler les heures et les minutes. Appuyez sur (SEEK) –/+ pour déplacer l’indication numérique. Appuyez sur la touche de sélection. La configuration est terminée et l’horloge démarre. -
Page 32: Emplacement Des Commandes Et Opérations De Base
Emplacement des commandes et opérations de base Appareil principal ALBM SEEK ALBM Sans la façade SOURCE SEEK MODE PUSH SELECT qa qs RESET OPEN SHUF PAUSE SCRL DSPL... - Page 33 Cette section contient les instructions relatives à l’emplacement des commandes et aux opérations de base. Pour plus de détails, reportez-vous aux numéros de pages correspondants. Pour plus d’informations sur le fonctionnement de l’iPod reportez-vous à la section « iPod (CDX-M50IP/MR50IP) » à la page 14 ; pour plus d’informations sur le fonctionnement d’appareils en option (changeurs CD/MD, etc.), reportez-vous à...
-
Page 34: Mini-Télécommande Rm-X151
Mini-télécommande RM-X151 SOURCE – DSPL – Les touches suivantes de la mini-télécommande ont également des touches/fonctions différentes de celles de l’appareil. Retirez la feuille isolante avant l’utilisation (page 6). qk Touches < (.)/, (>) Permettent de commander le lecteur CD/la radio/l’iPod* , identiques à... -
Page 35: Rubriques D'affichage
Pour obtenir des informations détaillées sur le raccordement à un changeur CD/MD, reportez- vous à la page 18. Rubriques d’affichage A Source B Numéro de plage/temps de lecture écoulé, nom du disque/l’artiste, numéro d’album*, nom d’album, nom de la plage, informations textuelles, horloge * Le numéro de l’album s’affiche uniquement lorsque l’album est modifié. -
Page 36: Réception Des Stations Mémorisées
Réception des stations mémorisées Sélectionnez la bande, puis appuyez sur une touche numérique ((1) à (6)). Syntonisation automatique Sélectionnez la bande, puis appuyez sur (SEEK) –/+ pour rechercher la station. Le balayage s’interrompt lorsque l’appareil capte une station. Répétez cette procédure jusqu’à... -
Page 37: Sélection De Pty
1 Réglez AF/TA, puis mémorisez la station à l’aide de la fonction BTM ou manuellement. Réception de messages d’urgence Lorsque la fonction AF ou TA est activée, les messages d’urgence interrompent automatiquement la source sélectionnée en cours de diffusion. Conseil Si vous réglez le niveau de volume pendant la diffusion d’un message de radioguidage, ce niveau sera enregistré... -
Page 38: Ipod (Cdx-M50Ip/Mr50Ip)
iPod (CDX-M50IP/MR50IP) Lecture sur un iPod En raccordant un iPod au connecteur dock situé à l’arrière de l’appareil, vous pouvez écouter la musique via les haut-parleurs de votre bateau tout en commandant l’iPod à partir de l’appareil. Remarques • Lorsqu’un iPod est raccordé au connecteur dock, vous ne pouvez effectuer aucune opération à... -
Page 39: Lecture Répétée Et Aléatoire
Lecture répétée et aléatoire En cours de lecture, appuyez plusieurs fois sur (3) (REP) ou (4) (SHUF) jusqu’à ce que le réglage souhaité apparaisse. Sélectionnez Pour lire REP TRK une plage en boucle. REP ALB un album en boucle. REP ART un artiste en boucle. -
Page 40: Personnalisation De La Courbe De L'égaliseur - Eq3
AUX* (Niveau AUX) Pour régler le niveau de volume de chaque appareil auxiliaire raccordé. Ce réglage évite de régler le niveau de volume entre les sources (page 18). Niveau pouvant être réglé : « +18 dB » – « 0 dB » ( ) –... -
Page 41: Utilisation D'un Appareil En Option
DIMMER Pour modifier la luminosité de l’affichage. – « DIMMER-AT » ( ) : pour réduire automatiquement la luminosité de l’affichage lorsque vous allumez les phares. – « DIMMER-OFF » : pour désactiver le régulateur de luminosité. – « DIMMER-ON » : pour réduire la luminosité de l’affichage. -
Page 42: Changeur Cd/Md
Réglage du niveau de volume Avant de commencer la lecture, n’oubliez pas de régler le volume de chaque appareil audio connecté. 1 Baissez le volume de l’appareil. 2 Appuyez plusieurs fois sur (SOURCE) jusqu’à ce que « AUX » s’affiche. «... -
Page 43: Informations Complémentaires
Les commandes suivantes de la télécommande marine requièrent un fonctionnement différent de l’appareil. • Touche(s) VOLUME (VOL) +/– Identiques à la molette de réglage du volume de l’appareil. • Touche(s) GP/ALBM –/+ Identiques à la touche (ALBM) –/+ de l’appareil. •... -
Page 44: Ordre De Lecture Des Fichiers Mp3/Wma/Aac
• Les disques de forme non standard (p. ex. en forme de cœur, de carré ou d’étoile) ne peuvent pas être lus avec cet appareil. Vous risquez d’endommager votre appareil si vous essayez de le faire. N’utilisez pas de tels disques. •... -
Page 45: A Propos Des Fichiers Wma
: http://www.xplodsony.com Si vous avez des questions ou des problèmes concernant cet appareil qui ne sont pas abordés dans ce mode d’emploi, contactez votre revendeur Sony. Entretien Remplacement de la pile au lithium de la mini-télécommande Dans des conditions d’utilisation normales, la pile... -
Page 46: Retrait De L'appareil
Nettoyage des connecteurs L’appareil peut ne pas fonctionner correctement si les connecteurs entre l’appareil et la façade sont souillés. Pour éviter cette situation, enlevez la façade (page 7) et nettoyez les connecteurs à l’aide d’un coton-tige. N’exercez pas une pression trop forte, sinon les connecteurs peuvent être endommagés. - Page 47 Plage de syntonisation : 531 à 1 602 kHz (par incréments de 9 kHz) 531 à 1 710 kHz (par incréments de 10 kHz) Intervalle de syntonisation AM : Commutable 9 kHz/10 kHz Borne d’antenne : Connecteur d’antenne externe Moyenne fréquence : 10,7 MHz/450 kHz Sensibilité...
-
Page 48: Dépannage
• Le changeur CD est incompatible avec le format de disque (MP3/WMA/AAC). t Lecture avec un changeur CD compatible MP3 de Sony, ou cet appareil. Aucun bip n’est émis. • Le bip est désactivé (page 16). • Un amplificateur de puissance en option est raccordé... -
Page 49: Affichage Des Erreurs Et Messages
Réception radio Impossible de capter des stations. Le son comporte des parasites. • Raccordez un câble de commande d’antenne électrique (bleu) ou un câble d’alimentation d’accessoires (rouge) au câble d’alimentation de l’amplificateur d’antenne du bateau (uniquement si votre bateau est équipé d’une antenne intégrée dans la vitre arrière/latérale). - Page 50 OFFSET Il est possible qu’il y ait un problème de fonctionnement. t Vérifiez le raccordement. Si le message d’erreur reste affiché, contactez votre revendeur Sony le plus proche. READ L’appareil lit toutes les informations de plage et d’album sur le disque.
- Page 52 Esta etiqueta está situada en la parte inferior del chasis. Aviso para los clientes de países donde se aplican las directivas de la Unión Europea El fabricante de este producto es Sony Corporation, 1-7-1 Konan, Minato-ku, Tokio, Japón. El representante autorizado para la aplicación...
- Page 53 Solamente CDX-M50IP/M30 El logotipo “HD Radio Ready” indica que este producto controlará un sintonizador HD Radio de Sony (se vende por separado). Para obtener información acerca del funcionamiento del sintonizador HD Radio consulte el manual de instrucciones del sintonizador HD Radio El logo HD Radio Ready es una marca registrada de iBiquity.
- Page 55 Tabla de contenido Bienvenido......6 Procedimientos iniciales Restauración de la unidad ....6 Preparación del mando a distancia de tarjeta.
-
Page 56: Bienvenido
(conexión analógica). – Cambiadores de CD/MD: es posible conectar cambiadores de CD/MD al sistema BUS de Sony situado en la parte posterior de la unidad. Procedimientos iniciales Restauración de la unidad Antes de utilizar la unidad por primera vez, después de reemplazar la batería del barco o de... -
Page 57: Extracción Del Panel Frontal
Pulse (SEEK) +. La indicación de la hora parpadea. Gire el selector de control de volumen para ajustar la hora y los minutos. Para mover la indicación digital, pulse (SEEK) –/+. Pulse el botón de selección. La configuración finaliza y el reloj se inicia. Para mostrar el reloj, pulse (DSPL). -
Page 58: Ubicación De Los Controles Y Operaciones Básicas
Ubicación de los controles y operaciones básicas Unidad principal ALBM SEEK ALBM Panel frontal extraído SOURCE SEEK MODE PUSH SELECT qa qs RESET OPEN SHUF PAUSE SCRL DSPL... - Page 59 Esta sección contiene instrucciones sobre la ubicación de los controles y las operaciones básicas. Para obtener información detallada, consulte las páginas correspondientes. Para obtener información acerca del funcionamiento del iPod, consulte “iPod (CDX-M50IP/MR50IP)” en la página 14. Si desea obtener información acerca de un dispositivo opcional (cambiador de CD/MD, etc.), consulte “Uso de un equipo opcional”...
-
Page 60: Mando A Distancia De Tarjeta Rm-X151
Mando a distancia de tarjeta RM-X151 SOURCE – DSPL – Los botones siguientes del mando a distancia de tarjeta también presentan botones y funciones distintos de los de la unidad. Extraiga la película de aislamiento antes de utilizar el mando a distancia de tarjeta (página 6). -
Page 61: Elementos De La Pantalla
Para obtener más información sobre cómo seleccionar un cambiador de CD/MD, consulte la página 18. Elementos de la pantalla A Fuente B Número de pista/tiempo de reproducción transcurrido; nombre del disco/artista, número de álbum*, nombre del álbum, nombre de la pista, información de texto, reloj * El número de álbum se muestra solamente cuando se cambia de álbum. -
Page 62: Sintonización Automática
Sintonización automática Seleccione la banda y, a continuación, pulse (SEEK) –/+ para buscar la emisora. La búsqueda se detiene cuando la unidad recibe una emisora. Repita este procedimiento hasta recibir la emisora deseada. Sugerencia Si conoce la frecuencia de la emisora que desea escuchar, mantenga pulsado (SEEK) –/+ para localizar la frecuencia aproximada y, a continuación, pulse (SEEK) –/+ varias veces para ajustar la... -
Page 63: Selección De Pty
Recepción de anuncios de emergencia Con las funciones AF o TA activadas, los anuncios de emergencia interrumpirán automáticamente la fuente seleccionada actual. Sugerencia Si ajusta el nivel de volumen durante un anuncio de tráfico, ese nivel se almacenará en la memoria para los siguientes anuncios de tráfico, independientemente del nivel de volumen normal. -
Page 64: Ipod (Cdx-M50Ip/Mr50Ip)
iPod (CDX-M50IP/MR50IP) Reproducción en el iPod Si conecta un iPod al conector de puertos de la parte posterior de la unidad, podrá escucharlo a través de los altavoces del barco, mientras controla el iPod desde la unidad. Notas • Si conecta un iPod al conector de puertos, no podrá utilizar el iPod. -
Page 65: Reproducción Repetida Y Aleatoria
Reproducción repetida y aleatoria Durante la reproducción, pulse (3) (REP) o (4) (SHUF) varias veces hasta que aparezca el ajuste deseado. Seleccione Para reproducir REP TRK pistas de forma repetida. REP ALB álbumes de forma repetida. REP ART artistas de forma repetida. REP PLY listas de reproducción de forma repetida. -
Page 66: Personalización De La Curva De Ecualizador - Eq3
AUX* (nivel AUX) Para ajustar el nivel de volumen para cada equipo auxiliar conectado. Este ajuste elimina la necesidad de ajustar el nivel de volumen entre las fuentes (página 18). Nivel ajustable: “+18 dB” – “0 dB” ( “–8 dB” *1 Solamente CDX-M50IP/MR50IP *2 Si está... -
Page 67: Uso De Un Equipo Opcional
DIMMER Permite cambiar el brillo de la pantalla. – “DIMMER-AT” ( ): para atenuar la pantalla automáticamente cuando las luces se encienden. – “DIMMER-OFF”: para desactivar el atenuador. – “DIMMER-ON”: para atenuar la pantalla. CONTRAST Permite ajustar el contraste de la pantalla. El nivel de contraste se puede ajustar en 7 niveles. -
Page 68: Cambiador De Cd/Md
Ajuste del nivel de volumen Asegúrese de ajustar el volumen de cada dispositivo de audio conectado antes de la reproducción. 1 Baje el volumen de la unidad. 2 Pulse (SOURCE) varias veces hasta que aparezca “AUX”. Aparece “AUX FRONT IN”. 3 Inicie la reproducción del dispositivo de audio portátil a un volumen moderado. -
Page 69: Información Adicional
Modelo RM-X11M VOL +/– GP/ALBM –/+ Los siguientes controles del mando a distancia subacuático requieren una operación diferente a los de la unidad. • Botones VOLUME (VOL) +/– Igual que el selector de control de volumen de la unidad. • Botones GP/ALBM –/+ Funciona como (ALBM) –/+ de la unidad. -
Page 70: Orden De Reproducción De Los Archivos Mp3/Wma/Aac
• No es posible reproducir discos compactos de 8 cm. • Antes de reproducir los discos, límpielos con un paño de limpieza disponible en el mercado. Hágalo desde el centro hacia los bordes. No utilice disolventes como bencina, diluyentes, productos de limpieza disponibles en el mercado ni aerosoles antiestáticos para discos analógicos. -
Page 71: Acerca De Los Archivos Aac
Si desea realizar alguna consulta o solucionar algún problema relativo a la unidad que no se trate en este manual, póngase en contacto con el distribuidor Sony más cercano. Mantenimiento Sustitución de la pila de litio del mando a distancia de tarjeta En condiciones normales, la pila durará... -
Page 72: Extracción De La Unidad
Limpieza de los conectores Es posible que la unidad no funcione correctamente si los conectores entre la unidad y el panel frontal no están limpios. Para evitarlo, extraiga el panel frontal (página 7) y limpie los conectores con un bastoncillo de algodón. No aplique demasiada fuerza. - Page 73 Rango de sintonización: de 531 a 1.602 kHz (a intervalos de 9 kHz) de 530 a 1.710 kHz (a intervalos de 10 kHz) Intervalo de sintonización de AM: 9 kHz/10 kHz intercambiable Terminal de antena: conector de antena externa Frecuencia intermedia: 10,7 MHz/450 kHz Sensibilidad: 30 µV CDX-MR50IP: Rango de sintonización: de 87,5 a 108,0 MHz...
-
Page 74: Solución De Problemas
• El cambiador de CD no es compatible con el formato del disco (MP3/WMA/AAC). t Realice la reproducción con un cambiador de CD compatible con MP3 de Sony o con esta unidad. No se escuchan pitidos. • El sonido de los pitidos está cancelado (página 16). -
Page 75: Mensajes/Indicaciones De Error
Recepción de radio No es posible recibir la emisoras. Hay ruidos que obstaculizan el sonido. • Conecte un cable de control de antena motorizada (azul) o un cable de fuente de alimentación auxiliar (rojo) al cable de fuente de alimentación del amplificador de antena del barco (sólo si el barco dispone de antena integrada en el cristal posterior o lateral). - Page 76 CD o MD, el número de disco del CD o del MD no aparece en pantalla. Si estas soluciones no ayudan a mejorar la situación, póngase en contacto con el distribuidor Sony más cercano. Si entrega la unidad para su reparación a causa de problemas en la reproducción de CD, lleve el disco...
- Page 78 Dieses Etikett befindet sich an der Unterseite des Gehäuses. Hinweis für Kunden in Ländern, in denen EU-Richtlinien gelten Der Hersteller dieses Produkts ist Sony Corporation, 1-7-1 Konan, Minato-ku, Tokio, Japan. Autorisierter Vertreter für EMV und Produktsicherheit ist die Sony Deutschland GmbH, Hedelfinger Strasse 61, 70327 Stuttgart, Deutschland.
- Page 79 Inhalt Willkommen!......4 Vorbereitungen Zurücksetzen des Geräts ....4 Vorbereiten der Kartenfernbedienung .
-
Page 80: Willkommen
Eingangsbuchse an der Vorderseite des Geräts können Sie ein tragbares Audiogerät anschließen (analoge Verbindung). – CD/MD-Wechsler: CD/MD-Wechsler können an den Sony BUS an der Rückseite des Geräts angeschlossen werden. Vorbereitungen Zurücksetzen des Geräts Bevor Sie das Gerät zum ersten Mal benutzen... -
Page 81: Abnehmen Der Frontplatte
Drehen Sie den Lautstärkeregler, um die Stunden und Minuten einzustellen. Drücken Sie (SEEK) –/+, um zur jeweils nächsten Ziffer in der Digitalanzeige zu wechseln. Drücken Sie die Auswahltaste. Der Einstellvorgang ist damit abgeschlossen und die Uhr beginnt zu laufen. Zum Einblenden der Uhrzeit drücken Sie (DSPL). -
Page 82: Lage Und Grundfunktionen Der Teile Und Bedienelemente
Lage und Grundfunktionen der Teile und Bedienelemente Hauptgerät ALBM SEEK ALBM Mit abgenommener Frontplatte SOURCE SEEK MODE PUSH SELECT qa qs RESET OPEN SHUF PAUSE SCRL DSPL... - Page 83 In diesem Abschnitt werden Lage und Grundfunktionen der Teile und Bedienelemente beschrieben. Nähere Erläuterungen finden Sie auf den jeweiligen Seiten. Informationen zum Bedienen eines iPod finden Sie unter „iPod (CDX-M50IP/MR50IP)“ auf Seite 12, Informationen zum Bedienen gesondert erhältlicher Geräte (CD/MD-Wechsler usw.) finden Sie unter „Verwenden gesondert erhältlicher Geräte“...
-
Page 84: Kartenfernbedienung Rm-X151
Kartenfernbedienung RM-X151 SOURCE – DSPL – Die folgenden Tasten auf der Kartenfernbedienung unterscheiden sich außerdem hinsichtlich ihres Namens bzw. ihrer Funktion von denen am Gerät. Ziehen Sie vor dem Gebrauch die Isolierfolie heraus (Seite 4). qk Tasten < (.)/, (>) Beim Steuern von CD-, Radio- und PD* Funktionen entsprechen diese Tasten den Tasten (SEEK) –/+ am Gerät. -
Page 85: Informationen Im Display
Einzelheiten zum Auswählen eines CD/MD- Wechslers finden Sie auf Seite 16. Informationen im Display A Tonquelle B Titelnummer/Verstrichene Spieldauer, CD-/ Interpretenname, Albumnummer*, Albumname, Titelname, Textinformationen, Uhrzeit * Die Albumnummer wird nur beim Wechseln des Albums angezeigt. Zum Wechseln der angezeigten Informationen B drücken Sie (DSPL). -
Page 86: Automatisches Einstellen Von Sendern
Automatisches Einstellen von Sendern Wählen Sie den Frequenzbereich aus und starten Sie mit (SEEK) –/+ die Suche nach dem Sender. Der Suchlauf stoppt, wenn ein Sender empfangen wird. Wiederholen Sie diesen Vorgang, bis das Gerät den gewünschten Sender empfängt. Tipp Wenn Sie die Frequenz des gewünschten Senders kennen, halten Sie (SEEK) –/+ gedrückt, bis die Frequenz in etwa erreicht ist, und drücken Sie... -
Page 87: Auswählen Des Programmtyps (Pty)
Speichern von RDS-Sendern zusammen mit der AF- und TA- Einstellung Sie können zusammen mit den RDS-Sendern die AF/TA-Einstellung speichern. Mit der BTM- Funktion werden nur RDS-Sender mit derselben AF/TA-Einstellung gespeichert. Beim manuellen Speichern von Sendern können Sie RDS- und Nicht-RDS-Sender mit unterschiedlicher AF/TA-Einstellung speichern. -
Page 88: Ipod (Cdx-M50Ip/Mr50Ip)
iPod (CDX-M50IP/MR50IP) Wiedergabe mit einem iPod Wenn Sie einen iPod an den Dock-Anschluss an der Rückseite des Geräts anschließen, können Sie den Ton über die Lautsprecher des Boots wiedergeben lassen und den iPod über dieses Gerät steuern. Hinweise • Solange der iPod an den Dock-Anschluss angeschlossen ist, können Sie den iPod selbst nicht bedienen. -
Page 89: Repeat Und Shuffle Play
Repeat und Shuffle Play Drücken Sie während der Wiedergabe (3) (REP) oder (4) (SHUF) so oft, bis die gewünschte Einstellung im Display erscheint. Einstellung Funktion REP TRK Wiederholtes Wiedergeben eines Titels. REP ALB Wiederholtes Wiedergeben eines Albums. REP ART Wiederholtes Wiedergeben der Titel eines Interpreten. -
Page 90: Individuelles Einstellen Der Equalizer-Kurve
AUX* (AUX-Pegel) Zum Einstellen der Lautstärke der einzelnen angeschlossenen Zusatzgeräte. Wenn Sie die Einstellung hier vornehmen, brauchen Sie die Lautstärke der einzelnen Tonquellen nicht mehr einzustellen (Seite 16). Einstellbereich: „+18 dB“ – „0 dB“ ( „–8 dB“ *1 nur CDX-M50IP/MR50IP *2 Wenn EQ3 eingeschaltet ist. -
Page 91: Verwenden Gesondert Erhältlicher Geräte
DIMMER Zum Wechseln der Helligkeit im Display. – „DIMMER-AT“ ( ): Das Display wird dunkler, wenn Sie die Beleuchtung einschalten. – „DIMMER-OFF“: Der Dimmer wird deaktiviert. – „DIMMER-ON“: Das Display wird dunkler. CONTRAST Zum Einstellen des Kontrasts im Display. Der Kontrast lässt sich in 7 Stufen einstellen. ILLUMI (Beleuchtung) Zum Wechseln der Farbe der Beleuchtung: „ILLUMI-1“... -
Page 92: Cd/Md-Wechsler
Einstellen des Lautstärkepegels Stellen Sie unbedingt vor der Wiedergabe die Lautstärke der einzelnen angeschlossenen Audiogeräte ein. 1 Drehen Sie die Lautstärke an diesem Gerät herunter. 2 Drücken Sie (SOURCE) so oft, bis „AUX“ erscheint. „AUX FRONT IN“ erscheint. 3 Starten Sie die Wiedergabe am tragbaren Audiogerät mit gemäßigter Lautstärke. -
Page 93: Weitere Informationen
RM-X11M VOL +/– GP/ALBM –/+ Bei folgenden Reglern auf der bootstauglichen Fernbedienung müssen Sie anders als mit dem Gerät vorgehen. • Lautstärketaste(n) VOLUME (VOL) +/– Entspricht dem Lautstärkeregler am Gerät. • Taste(n) GP/ALBM –/+ Entsprechen (ALBM) –/+ am Gerät. • Taste MUTING Dämpfen des Tons. -
Page 94: Wiedergabereihenfolge Von Mp3-/Wma-/Aac-Dateien
• CDs mit außergewöhnlichen Formen (z. B. herzförmige, quadratische oder sternförmige CDs) können mit diesem Gerät nicht wiedergegeben werden. Falls Sie es doch versuchen, kann das Gerät beschädigt werden. Verwenden Sie solche CDs nicht. • Single-CDs (8-cm-CDs) können ebenfalls nicht verwendet werden. -
Page 95: Wma-Dateien
Sollten an Ihrem Gerät Probleme auftreten oder sollten Sie Fragen haben, auf die in dieser Anleitung nicht eingegangen wird, wenden Sie sich bitte an Ihren Sony-Händler. Wartung Austauschen der Lithiumbatterie der Kartenfernbedienung Unter normalen Bedingungen hält die Batterie etwa 1 Jahr. -
Page 96: Ausbauen Des Geräts
Stromanschluss und tauschen die Sicherung aus. Brennt die neue Sicherung ebenfalls durch, kann eine interne Fehlfunktion vorliegen. Wenden Sie sich in einem solchen Fall an Ihren Sony-Händler. Reinigen der Anschlüsse Das Gerät funktioniert möglicherweise nicht ordnungsgemäß, wenn die Anschlüsse zwischen dem Gerät und der Frontplatte verschmutzt sind. -
Page 97: Technische Daten
Technische Daten CD-Player Signal-Rauschabstand: 120 dB Frequenzgang: 10 – 20.000 Hz Gleichlaufschwankungen: Unterhalb der Messgrenze Tuner CDX-M50IP/M30: FM (UKW) Empfangsbereich: 87,5 – 108,0 MHz (in Schritten von 50 kHz) 87,5 – 107,9 MHz (in Schritten von 200 kHz) UKW-Empfangsintervall: 50 kHz/200 kHz umschaltbar Antennenanschluss: Anschluss für Außenantenne Zwischenfrequenz: 10,7 MHz/450 kHz... -
Page 98: Störungsbehebung
Lautsprecher-System eingestellt. • Der CD-Wechsler unterstützt das CD-Format (MP3/ WMA/AAC) nicht. t Lassen Sie die CD mit einem MP3-kompatiblen CD-Wechsler von Sony oder mit diesem Gerät wiedergeben. Kein Signalton ertönt. • Der Signalton ist deaktiviert (Seite 14). • Ein gesondert erhältlicher Endverstärker ist angeschlossen und Sie verwenden nicht den integrierten Verstärker. -
Page 99: Fehleranzeigen/Meldungen
Im Display angezeigte Informationen laufen nicht automatisch durch. • Bei CDs mit sehr viel Textinformationen laufen diese im Display möglicherweise nicht durch. • „A.SCRL“ ist auf „OFF“ eingestellt. t Stellen Sie „A.SCRL-ON“ ein (Seite 15). t Halten Sie (DSPL) (SCRL) gedrückt. Tonsprünge treten auf. - Page 100 OFFSET Es liegt möglicherweise eine interne Fehlfunktion vor. t Überprüfen Sie die Verbindungen. Wenn die Fehleranzeige weiterhin im Display angezeigt wird, wenden Sie sich an einen Sony-Händler. READ Das Gerät liest gerade alle Titel- und Albuminformationen von der CD ein.
- Page 102 Dit label bevindt zich aan de onderkant van het apparaat. Kennisgeving voor klanten in de landen waar EU-richtlijnen van toepassing zijn De fabrikant van dit product is Sony Corporation, 1-7-1 Konan, Minato-ku, Tokio, Japan. De geautoriseerde vertegenwoordiger voor EMC en productveiligheid is Sony Deutschland GmbH, Hedelfinger Strasse 61, 70327 Stuttgart, Duitsland.
- Page 103 Inhoudsopgave Welkom! ......4 Aan de slag Het apparaat opnieuw instellen ... . . 4 De kaartafstandsbediening voorbereiden.
-
Page 104: Welkom
Welkom! Dank u voor de aankoop van deze Sony Compact Disc Player. U kunt tijdens het varen genieten van de volgende functies. • CD's afspelen U kunt CD-DA's (ook met CD TEXT) en CD-R's/CD-RW's (MP3-/WMA-/AAC- bestanden (pagina 18)) afspelen. Soorten discs... -
Page 105: Het Voorpaneel Verwijderen
Druk op de selectietoets. Het instellen is voltooid en de klok begint te lopen. Als u de klok wilt weergeven, drukt u op (DSPL). Druk nogmaals op (DSPL) om terug te keren naar het vorige scherm. U kunt de klok automatisch instellen met de RDS- functie (pagina 11). -
Page 106: Bedieningselementen En Algemene Handelingen
Bedieningselementen en algemene handelingen Hoofdeenheid ALBM SEEK ALBM Voorpaneel verwijderd SOURCE SEEK MODE PUSH SELECT qa qs RESET OPEN SHUF PAUSE SCRL DSPL... - Page 107 In dit gedeelte vindt u informatie over de locatie van bedieningselementen en instructies voor algemene handelingen. Bekijk de betreffende pagina's voor meer informatie. Zie "iPod (CDX-M50IP/MR50IP)" op pagina 12 voor de bediening van een iPod. Zie "Optionele apparaten gebruiken" op pagina 15 voor meer informatie over het bedienen van optionele apparaten (CD/MD-wisselaars, enzovoort).
-
Page 108: Kaartafstandsbediening Rm-X151
Kaartafstandsbediening RM-X151 SOURCE – DSPL – De volgende toetsen op de kaartafstandsbediening verschillen van de toetsen op het apparaat of hebben andere functies dan de toetsen op het apparaat. Verwijder het beschermende laagje vóór gebruik (pagina 4). qk < (.)/, (>) toetsen CD/radio/PD* bedienen, heeft dezelfde functie als (SEEK) –/+ op het apparaat. -
Page 109: Displayitems
Zie pagina 15 voor meer informatie over het selecteren van een CD/MD-wisselaar. Displayitems A Bron B Tracknummer/verstreken speelduur, disc-/ artiestennaam, albumnummer*, albumnaam, tracknaam, tekstinformatie, klok * Het albumnummer wordt alleen weergegeven als het album wordt gewijzigd. Als u schermitems B wilt wijzigen, drukt u op (DSPL). -
Page 110: Automatisch Afstemmen
Automatisch afstemmen Selecteer de band en druk op (SEEK) –/+ om de zender te zoeken. Het zoeken stopt zodra een zender wordt ontvangen. Herhaal deze procedure tot de gewenste zender wordt ontvangen. Als u de frequentie kent van de zender die u wilt beluisteren, houdt u (SEEK) –/+ ingedrukt tot de frequentie ongeveer is bereikt en drukt u vervolgens herhaaldelijk op (SEEK) –/+ om nauwkeurig af te... -
Page 111: Pty Selecteren
RDS-zenders met de AF- en TA- instelling opslaan U kunt RDS-zenders vooraf instellen met de AF-/TA-instelling. Als u de BTM-functie gebruikt, worden alleen RDS-zenders met dezelfde AF-/TA-instelling opgeslagen. Als u handmatig vooraf instelt, kunt u zowel RDS- als niet-RDS-zenders instellen met elk hun AF-/TA-instelling. -
Page 112: Ipod (Cdx-M50Ip/Mr50Ip)
iPod (CDX-M50IP/MR50IP) Een iPod afspelen Door een iPod aan te sluiten op de dockconnector aan de achterkant van het apparaat, kunt u het geluid beluisteren via de luidsprekers van de boot, terwijl u de iPod bedient vanaf het apparaat. Opmerkingen •... -
Page 113: Herhaaldelijk En Willekeurig Afspelen
Herhaaldelijk en willekeurig afspelen Druk tijdens het afspelen herhaaldelijk op (3) (REP) of (4) (SHUF) tot de gewenste instelling wordt weergegeven. Selecteer Actie REP TRK Track herhaaldelijk afspelen. REP ALB Album herhaaldelijk afspelen. REP ART Artiest herhaaldelijk afspelen. REP PLY Afspeellijst herhaaldelijk afspelen. -
Page 114: De Equalizercurve Aanpassen - Eq3
De equalizercurve aanpassen — EQ3 Met "CUSTOM" bij EQ3 kunt u zelf equalizerinstellingen opgeven. Selecteer een bron en druk herhaaldelijk op de selectietoets om "EQ3" te selecteren. Draai de volumeknop om "CUSTOM" te selecteren. Druk herhaaldelijk op de selectietoets tot "LOW", "MID" of "HI" wordt weergegeven. -
Page 115: Optionele Apparaten Gebruiken
LOCAL (lokale zoekfunctie) – "LOCAL-ON": om alleen af te stemmen op krachtige zenders. – "LOCAL-OFF" ( ): om af te stemmen met normale ontvangst. MONO* (monostand) Selecteer de mono-ontvangststand als u slechte FM-ontvangst wilt verbeteren. – "MONO-ON": om stereo-uitzendingen in mono te horen. -
Page 116: Maritieme Kaartafstandsbediening Rm-X55M/X11M
Albums en discs overslaan 1 Druk tijdens het afspelen op (ALBM) +/–. Druk op (ALBM) Actie Album en laat los (kort ingedrukt overslaan houden). Albums blijven binnen 2 seconden nadat u deze overslaan hebt losgelaten. Discs overslaan herhaaldelijk. Discs blijven en druk binnen 2 seconden overslaan weer op de toets en houd deze... -
Page 117: Aanvullende Informatie
Aanvullende informatie Voorzorgsmaatregelen • Wanneer uw boot in de volle zon heeft gelegen, moet u eerst het apparaat laten afkoelen voordat u het gebruikt. • Een elektrisch bediende antenne schuift automatisch uit wanneer het apparaat wordt ingeschakeld. Condensvorming Op een regenachtige dag of in een zeer vochtige omgeving kan vocht condenseren op de lenzen en het scherm van het apparaat. -
Page 118: Informatie Over Mp3-Bestanden
Klanten in de Verenigde Staten kunnen op de volgende site meer informatie lezen: http://www.xplodsony.com Met alle vragen of problemen met betrekking tot dit apparaat die niet aan bod komen in deze gebruiksaanwijzing, kunt u terecht bij uw Sony- handelaar. -
Page 119: Onderhoud
Zekering (10 A) Raadpleeg in dat geval de dichtstbijzijnde Sony- handelaar. Aansluitingen schoonmaken De werking van het apparaat kan worden verstoord als de aansluitingen tussen het apparaat en het voorpaneel niet schoon zijn. -
Page 120: Technische Gegevens
Verwijder het apparaat. 1 Plaats beide ontgrendelingssleutels tegelijkertijd en duw hierop tot deze vastklikken. 2 Trek de ontgrendelingssleutels naar u toe om het apparaat los te maken. 3 Schuif het apparaat uit de houder. Technische gegevens CD-speler Signaal/ruis-afstand: 120 dB Frequentiebereik: 10 –... -
Page 121: Problemen Oplossen
• De CD-wisselaar is niet compatibel met de discindeling (MP3/WMA/AAC). t Speel het bestand af met een CD-wisselaar van Sony die compatibel is met MP3 of speel het af met dit apparaat. Geen pieptoon. • De pieptoon is uitgeschakeld (pagina 14). -
Page 122: Foutmeldingen/Berichten
CD's/MD's afspelen De disc kan niet worden geplaatst. • Er zit al een disc in het apparaat. • De disc is met kracht omgekeerd of in de verkeerde richting geplaatst. De disc wordt niet afgespeeld. • Disc defect of vuil. •... - Page 123 CD of MD, wordt het discnummer van de CD of MD niet in het scherm weergegeven. Als deze oplossingen niet helpen, moet u de dichtstbijzijnde Sony-handelaar raadplegen. Als u het apparaat ter reparatie wegbrengt omdat CD's niet goed worden afgespeeld, kunt u beste de disc meenemen waarmee het probleem is begonnen.
- Page 124 Questa etichetta è posta nella parte inferiore esterna. Avviso per i clienti nei Paesi in cui sono in vigore le Direttive UE Il presente apparecchio è un prodotto di Sony Corporation, 1-7-1 Konan, Minato-ku, Tokyo, Giappone. Il Rappresentante Autorizzato per EMC e per la sicurezza del prodotto è...
- Page 125 Indice Congratulazioni! ......4 Operazioni preliminari Azzeramento dell’apparecchio ... . . 4 Preparazione del telecomando a scheda .
-
Page 126: Congratulazioni
Congratulazioni! Complimenti per l’acquisto del presente lettore CD Sony. Durante la navigazione, è possibile utilizzare le funzioni riportate di seguito. • Riproduzione di CD È possibile riprodurre CD-DA (contenenti inoltre CD TEXT), CD-R/CD-RW (file MP3/ WMA/AAC (pagina 18)). Tipo di disco... -
Page 127: Rimozione Del Pannello Anteriore
Ruotare la manopola di controllo del volume per impostare l’ora e i minuti. Per passare da una cifra all’altra dell’indicazione digitale, premere (SEEK) –/+. Premere il tasto di selezione. L’impostazione è completata e l’orologio viene attivato. Per visualizzare l’orologio, premere (DSPL). Premere di nuovo (DSPL) per tornare al display precedente. -
Page 128: Posizione Dei Comandi E Operazioni Di Base
Posizione dei comandi e operazioni di base Unità principale ALBM SEEK ALBM Pannello anteriore rimosso SOURCE SEEK MODE PUSH SELECT qa qs RESET OPEN SHUF PAUSE SCRL DSPL... - Page 129 La presente sezione contiene le istruzioni riguardanti la posizione dei comandi e le operazioni di base. Per ulteriori informazioni, vedere le pagine corrispondenti. Per informazioni sul funzionamento dell’iPod vedere “iPod (CDX-M50IP/MR50IP)” a pagina 12 o dei dispositivi opzionali (cambia CD/MD e così via), vedere “Uso di apparecchi opzionali”...
-
Page 130: Telecomando A Scheda Rm-X151
Telecomando a scheda RM-X151 SOURCE – DSPL – I tasti del telecomando a scheda riportati di seguito corrispondono a tasti/funzioni differenti dell’apparecchio. Prima dell’uso, rimuovere la protezione (pagina 4). qk Tasti < (.)/, (>) Per controllare il CD/la radio/PD* funzione di (SEEK) –/+ sull’apparecchio. È... -
Page 131: Voci Del Display
Per ulteriori informazioni sulla selezione di un cambia CD/MD, vedere pagina 16. Voci del display A Sorgente B Numero di brano/tempo di riproduzione trascorso, titolo del disco/nome dell’artista, numero di album*, nome dell’album, titolo del brano, informazioni di testo, orologio * Il numero dell’album viene visualizzato solo quando si cambia album. -
Page 132: Sintonizzazione Automatica
Sintonizzazione automatica Selezionare la banda, quindi premere (SEEK) –/+ per ricercare la stazione. La ricerca si arresta non appena l’apparecchio riceve una stazione. Ripetere questa procedura fino alla ricezione della stazione desiderata. Suggerimento Se si conosce la frequenza della stazione che si desidera ascoltare, tenere premuto (SEEK) –/+ per individuare la frequenza approssimativa, quindi premere più... -
Page 133: Selezione Del Modo Pty
Memorizzazione di stazioni RDS con impostazione AF e TA È possibile preselezionare le stazioni RDS insieme all’impostazione AF/TA. Se viene utilizzata la funzione BTM, vengono memorizzate solo le stazioni RDS con la stessa impostazione AF/TA. Se si utilizza il modo di preselezione manuale, è possibile preselezionare le stazioni RDS e non RDS con impostazioni AF/TA distinte. -
Page 134: Ipod (Cdx-M50Ip/Mr50Ip)
iPod (CDX-M50IP/MR50IP) Riproduzione tramite un iPod Se si collega un iPod al connettore dock situato sulla parte posteriore dell’apparecchio, è possibile ascoltare la musica tramite i diffusori dell’imbarcazione, controllando l’iPod dall’apparecchio stesso. Note • Se un iPod viene collegato al connettore dock, non è possibile effettuare le operazioni sull’iPod stesso. -
Page 135: Riproduzione Ripetuta E In Ordine
Riproduzione ripetuta e in ordine casuale Durante la riproduzione, premere più volte (3) (REP) o (4) (SHUF) fino a visualizzare l’impostazione desiderata. Selezionare Per riprodurre REP TRK un brano in modo ripetuto. REP ALB un album in modo ripetuto. REP ART un artista in modo ripetuto. -
Page 136: Personalizzazione Della Curva Dell'equalizzatore - Eq3
AUX* (livello AUX) Per regolare il livello del volume di ciascun apparecchio ausiliario collegato. Questa impostazione elimina la necessità di regolare il livello del volume tra sorgenti diverse (pagina 16). Livello regolabile: “+18 dB” – “0 dB” ( “–8 dB” *1 Solo CDX-M50IP/MR50IP *2 Se la funzione EQ3 è... -
Page 137: Uso Di Apparecchi Opzionali
DIMMER Consente di modificare la luminosità del display. – “DIMMER-AT” ( ): per ridurre automaticamente la luminosità del display quando vengono accesi i fari. – “DIMMER-OFF”: per disattivare l’attenuatore di luminosità. – “DIMMER-ON”: per attenuare la luminosità del display. CONTRAST Consente di regolare il contrasto del display. -
Page 138: Cambia Cd/Md
Regolazione del livello del volume Regolare il volume di ogni apparecchio audio collegato prima della riproduzione. 1 Abbassare il volume sull’apparecchio. 2 Premere più volte (SOURCE) fino a visualizzare “AUX”. Viene visualizzato “AUX FRONT IN”. 3 Avviare la riproduzione del dispositivo audio portatile ad un volume moderato. -
Page 139: Informazioni Aggiuntive
RM-X11M VOL +/– GP/ALBM –/+ I comandi riportati di seguito del telecomando per uso in ambiente marino richiedono operazioni diverse da quelle dell’apparecchio. • Tasto/i VOLUME (VOL) +/– Stessa funzione della manopola di controllo del volume dell’apparecchio. • Tasto/i GP/ALBM –/+ Stessa funzione del tasto (ALBM) –/+ sull’apparecchio. -
Page 140: Ordine Di Riproduzione Di File Mp3/Wma/Aac
• Non riprodurre dischi dalla forma irregolare (ad esempio a forma di cuore, quadrato o stella) con questo apparecchio, onde evitare problemi di funzionamento all’apparecchio stesso. Non utilizzare questo genere di dischi. • Non è possibile riprodurre CD da 8 cm. •... -
Page 141: Informazioni Sui File Aac
Web: http://www.xplodsony.com Per eventuali domande o problemi riguardanti l’apparecchio non trattati nel presente manuale, rivolgersi al più vicino rivenditore Sony. Manutenzione Sostituzione della pila al litio del telecomando a scheda In condizioni normali, la pila dura circa 1 anno. (Il ciclo di vita può... -
Page 142: Rimozione Dell'apparecchio
Pulizia dei connettori Se i connettori tra l’apparecchio e il pannello anteriore sono sporchi, l’apparecchio potrebbe non funzionare correttamente. Per evitare questo problema, aprire il pannello anteriore, rimuoverlo (pagina 5), quindi pulire i connettori con un batuffolo di cotone. Non esercitare forza eccessiva. Diversamente, i connettori potrebbero venire danneggiati. - Page 143 Gamma di frequenze: 531 – 1.602 MHz (a 9 kHz) 530 – 1.710 MHz (a 10 kHz) Intervallo di sintonizzazione AM: 9 kHz/10 kHz commutabile Terminale dell’antenna: Connettore dell’antenna esterna Frequenza intermedia: 10,7 MHz/450 kHz Sensibilità: 30 µV CDX-MR50IP: Gamma di frequenze: 87,5 -108,0 MHz Terminale dell’antenna: Connettore dell’antenna esterna Frequenza intermedia: 10,7 MHz/450 kHz...
-
Page 144: Guida Alla Soluzione Dei Problemi
• Il cambia CD non è compatibile con il formato del disco (MP3/WMA/AAC). t Effettuare la riproduzione mediante un cambia CD Sony compatibile con il formato MP3 o mediante il presente apparecchio. Non viene emesso alcun segnale acustico. • Il segnale acustico è disattivato (pagina 14). -
Page 145: Messaggi E Indicazioni Di Errore
Ricezione radiofonica Non è possibile ricevere le stazioni. L’audio è disturbato. • Collegare il cavo di controllo dell’antenna elettrica (blu) o il cavo di alimentazione accessoria (rosso) al cavo di alimentazione di un amplificatore di potenza dell’antenna per imbarcazioni (solo se l’imbarcazione dispone di antenna incorporata sul vetro posteriore/laterale). - Page 146 MD, nel display non viene visualizzato il numero di disco del CD o dell’MD. Se le soluzioni riportate non risolvono il problema, rivolgersi al più vicino rivenditore Sony. Se l’apparecchio viene portato in un centro di assistenza a causa di un problema relativo alla riproduzione di un CD, assicurarsi di portare il disco utilizzato al momento in cui si è...
-
Page 148: Operating Instructions
Sie diese im Fahrzeug aufbewahren möchten. Bitte bewahren Sie den Geräte-Pass an einem sicheren Ort auf. Er kann im Falle eines Diebstahls zur ldentifikation lhres Eigentums dienen. http://www.sony.net/ Sony Corporation Printed in Thailand 1-800-222-7669 http://www.SONY.com Marineaudio Geräte-Pass Dieser Geräte-Pass dient als Eigentumsnachweis für Ihr Marineaudio-Gerät im Falle eines...