Sony Walkman NWZ-A815 Operation Manual
Sony mp3 player operation guide
Hide thumbs
Also See for Walkman NWZ-A815:
- Operation manual (174 pages) ,
- Quick start manual (16 pages) ,
- Specifications (2 pages)
Table of Contents
Advertisement
Advertisement
Table of Contents

Related Manuals for Sony Walkman NWZ-A815


Summary of Contents for Sony Walkman NWZ-A815
- Page 1 Operation Guide NWZ-A815 / A816 / A818 ©2007 Sony Corporation 3-270-663-14 (1)
-
Page 2: About The Manuals
About the Manuals The following manuals are included with the player. Additionally, after installing software from the supplied CD-ROM, you can refer to the help provided within each software. Quick Start Guide explains set up and the basic operations, enabling you to import songs, videos and photos to a computer, to transfer them to the player, and to play them back. - Page 3 Hints You can jump to the indicated page by clicking a page number in the table of contents, in the Home menu list, or in the index. You can jump to the indicated page by clicking a page reference indication (e.g. page 4) on each page. To search for a reference page by keyword, click the “Edit” menu, select the “Search” feature of the Adobe Reader to display the navigation frame, type the keyword into the Search text box, and click “Search. ” Once you jump to another page, you can jump to the previous or next page by clicking the or button located at bottom of the Adobe Reader screen. Operation procedure may differ, depending on your Adobe Reader version. To change the page layout The buttons at the bottom of the Adobe Reader screen enable you to select how pages are displayed. Single Page Pages are displayed one at a time. When you scroll, the display changes to a previous or succeeding page. Continuous Pages are displayed as a continuous roll of pages. When you scroll, the previous or next pages scroll up or down continuously. Continuous - Facing Two pages are displayed side by side with each pair part of a continuous roll of pages. When you scroll, the previous or next pairs of pages scroll up or down continuously.
-
Page 4: Table Of Contents
Table of Contents Supplied Accessories ... 8 Parts and Controls ... 9 Player Controls and Screens ... 11 How to use the 5-way button and screen ...12 Displaying the “Now Playing” Screen ...16 Using the OPTION Button ... 17 Playing Music Searching for Songs (Music Library) Searching for songs by song name ...18... - Page 5 Settings Limiting the Volume ... 67 (AVLS (Volume Limit)) Turning Off the Beep Sound ... 68 Setting a Screensaver Type ... 69 Setting a Screensaver Time ... 70 Adjusting the Brightness of the Screen ... 71 (Brightness) Setting the Current Time ...
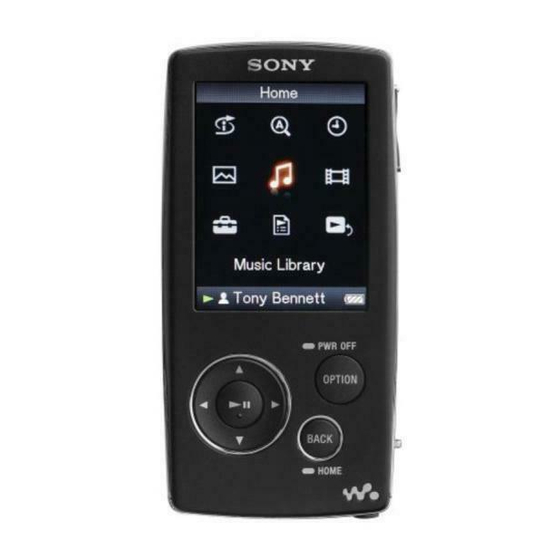
- Page 6 Home Menu List You can display the Home menu by pressing and holding the BACK/HOME button of the player. The Home menu is the starting point of each function, such as playing songs, videos and photos, searching for songs, and changing settings.
- Page 7 Settings Music Settings Play Mode ... 32 Playback Range ... 34 Equalizer ... 37 VPT (Surround) ... 40 DSEE (Sound Enhance) ... 43 Clear Stereo ... 42 Dynamic Normalizer ... 45 Album Display Format ... 35 New Song Pop Up ... 30 Video Settings Zoom Settings ...
-
Page 8: Supplied Accessories
Supplied Accessories Please check the accessories in the package. Headphones (1) Headphone extension cord (1) Earbuds (Size S, L) (1) USB cable* Attachment (1) Use when connecting the player to the optional cradle, etc. CD-ROM* ... -
Page 9: Parts And Controls
Parts and Controls Front 5-way button* Starts playback and enables navigation of the player’s on-screen menus ( page 12). BACK/HOME button* Press to go up one list screen level, or to return to the previous menu. Press and hold the BACK/HOME button to display the Home menu ( ... - Page 10 OPTION/PWR OFF button* Displays the option menu ( page 17). If you press and hold the OPTION/ PWR OFF button, the screen turns off and the player enters the standby mode. If you press any button while the player is in the standby mode, the “Now Playing”...
-
Page 11: Player Controls And Screens
Player Controls and Screens Use the 5-way button and the BACK/HOME button to navigate through screens, play songs, videos, photos, and change the player’s settings. The Home menu appears when you press and hold the BACK/HOME button. The diagram below shows how the screen changes when you press various operation buttons. -
Page 12: How To Use The 5-Way Button And Screen
How to use the 5-way button and screen The 5-way button performs different functions on the list screens, on the thumbnail screens, and on the “Now Playing” screen. * There are tactile dots. Use them to help with button operations. How to use the 5-way button on the list screen Music Buttons... - Page 13 Photo Buttons Description Confirms the item of the list. Press and hold to play back a slide show of photos in the selected item. Moves the cursor up or down. / Press and hold to scroll up or down faster. Displays the previous or next screen of the list.
- Page 14 How to use the 5-way button on the “Now Playing” screen Music Buttons Description Starts song playback. When playback starts, appears on the display, and if the button is pressed again, appears and playback pauses.* This pause and resume feature is available only on the “Now Playing” screen.
- Page 15 Video When you change the display orientation to horizontal, the /// button functions will also be changed. Buttons Description Starts video playback. When playback starts, appears on the display, and if the button is pressed again, appears and playback pauses.* You can play videos only from the “Now Playing”...
-
Page 16: Displaying The "Now Playing" Screen
Displaying the “Now Playing” Screen The “Now Playing” screen displays information about the currently playing contents. Press and hold the BACK/HOME button until the Home menu appears. Press the /// button to select press the Detailed information about the currently playing content file appears. ... -
Page 17: Using The Option Button
Using the OPTION Button You can change various settings of each function when you press the OPTION/ PWR OFF button. The OPTION/PWR OFF button is useful since you can display the setting screen immediately without selecting setting items from the (Settings) menu of the Home menu. -
Page 18: Playing Music
Playing Music Searching for Songs Songs transferred by Windows Explorer, or another transfer capable software can be played back on the player. You can search for songs by title of songs, albums, artist, and genre, etc. Hint To delete songs from the player, use the software you used to transfer the songs, or Windows Explorer. -
Page 19: Searching For Songs By Album
Playing Music Searching for songs by album Press and hold the BACK/HOME button until the Home menu appears. Press the /// button to select press the The list screen appears. Press the /// button to select “Album,” and then press the button to confirm. -
Page 20: Searching For Songs By Artist
Playing Music Searching for songs by artist Press and hold the BACK/HOME button until the Home menu appears. Press the /// button to select press the The list screen appears. Press the /// button to select “Artist,” and then press the button to confirm. -
Page 21: Searching For Songs By Genre
Playing Music Searching for songs by genre Press and hold the BACK/HOME button until the Home menu appears. Press the /// button to select press the The list screen appears. Press the /// button to select “Genre,” and then press the button to confirm. -
Page 22: Searching For Songs By Release Year
Playing Music Searching for songs by release year Press and hold the BACK/HOME button until the Home menu appears. Press the /// button to select press the The list screen appears. Press the /// button to select “Release Year,” and then press button to confirm. -
Page 23: Searching For Songs By Folder
Playing Music Searching for songs by folder When you transfer data to the “MUSIC” folder by dragging and dropping in Windows Explorer, up to the 8th level under the “MUSIC” folder will appear and can be played back. Even if you use another transfer capable software for transferring songs, you can still search for songs by folder. -
Page 24: Searching For Songs By Initial Letter
Playing Music Searching for Songs by Initial Letter You can search for songs by the initial letter of the artist name, album title, or song name. Press and hold the BACK/HOME button until the Home menu appears. Press the /// button to select press the ... -
Page 25: Playing A Playlist
Playing Music Playing a Playlist You can play lists of songs (playlists). Also, you can create playlists using the supplied Windows Media Player 11, or another transfer capable software for creating playlists. However, some playlists may not be recognized by the player, depending on software. -
Page 26: Searching For Songs Based On The Currently Playing Song
Playing Music Searching for Songs Based on the Currently Playing Song You can search for other songs, albums, and artists by the song information of the currently playing song. Press and hold the BACK/HOME button until the Home menu appears. -
Page 27: Playing Songs In Random Order (Intelligent Shuffle)
Playing Music Playing Songs in Random Order The player offers 2 different random modes (also known as shuffle play) . Playing songs released in the same year in random order (Time Machine Shuffle) The player randomly selects a release year and plays all transferred songs of that year in random order. - Page 28 Playing Music Notes The controls of the player cannot be operated while a year is being selected. A shuffle play of all songs begins if none of the songs on the player have a release year assigned to them. ...
-
Page 29: Playing All Songs In Random Order
Playing Music Playing all songs in random order All the songs stored on the player are played in random order. Press and hold the BACK/HOME button until the Home menu appears. Press the /// button to select then press the The screen used to select a shuffle mode appears. -
Page 30: Displaying The Now Playing Screen Each Time The Songs Switch (New Song Pop Up)
Playing Music Displaying the Now Playing Screen Each Time the Songs Switch If you set the screensaver to “Clock” or “Blank” ( page 69) and there is no operation for a while, the screen changes to the clock display or blank screen. However, if you set “New Song Pop Up”... -
Page 31: Displaying The Music Option Menu
Playing Music Displaying the Music Option Menu You can display the Music option menu by pressing the OPTION/PWR OFF button on a list screen (including the thumbnail screen), such as a song list, or on the music “Now Playing” screen. From the Music option menu, various settings of music are available. -
Page 32: Setting The Music
Setting the Music Setting the Play Mode The player offers a variety of play modes, including random play and selected repeat play. Press and hold the BACK/HOME button until the Home menu appears. Press the /// button to select button to confirm. - Page 33 Setting the Music The list of play modes The playback contents differ, depending on the setting of the playback range ( page 34). Play mode type/icon Playback range description Normal/No icon All Range Selected Range Repeat/ All Range Selected Range Shuffle/ All Range...
-
Page 34: Setting The Playback Range
Setting the Music Setting the Playback Range You can set the playback range of songs Press and hold the BACK/HOME button until the Home menu appears. Press the /// button to select button to confirm. Press the /// button to select “Music Settings,” and then press ... -
Page 35: Setting The Album Display Format
Setting the Music Setting the Album Display Format The player offers 3 types of album list format from “Title Only, ” “Title & Cover Art, ” and “Cover Art Only. ” Notes The cover art only appears if the cover art information is included. You can set cover art using the supplied Windows Media Player 11, or another transfer capable software for setting cover art. - Page 36 Setting the Music To return to the previous menu Press the BACK/HOME button. Hint You can also select the album display format on the album list screen. Press the OPTION/PWR OFF button on the album list screen, and select “Album Display Format” from the option menu.
-
Page 37: Setting The Sound Quality (Equalizer)
Setting the Music Setting the Sound Quality You can set the sound quality according to the music genre, etc. Changing the sound quality You can customize the player’s sound quality. Press and hold the BACK/HOME button until the Home menu appears. - Page 38 Setting the Music To return to the previous menu Press the BACK/HOME button. To return to the normal sound quality Select “None” in step Hint You can also set the sound quality from the “Now Playing” screen. Press the OPTION/ PWR OFF button, and select “Equalizer”...
-
Page 39: Customizing Sound Quality (Custom)
Setting the Music Customizing sound quality You can preset the value of CLEAR BASS (bass) and 5 bands Equalizer as “Custom 1” or “Custom 2. ” Press and hold the BACK/HOME button until the Home menu appears. Press the /// button to select button to confirm. -
Page 40: Making The Sound More Vibrant (Vpt (Surround))
Additionally, “Matrix” reproduces a rich acoustic sound field, and “Karaoke” suppresses the vocals. * VPT, which stands for Virtual Phone Technology, is a proprietary sound processing technology developed by Sony. Press and hold the BACK/HOME button until the Home menu appears. - Page 41 Setting the Music Hint You can also set the “VPT (Surround)” setting from the “Now Playing” screen. Press the OPTION/PWR OFF button, and select “VPT (Surround)” from the option menu. Note The “VPT (Surround)” setting is not applied to the sound of the video. List of “VPT (Surround)”...
-
Page 42: Listening With Clear Stereo Sound (Clear Stereo)
Setting the Music Listening with Clear Stereo Sound “Clear Stereo” enables individual left and right digital processing of the sound. Press and hold the BACK/HOME button until the Home menu appears. Press the /// button to select button to confirm. ... -
Page 43: Correcting Sound In The High Range (Dsee (Sound Enhancer))
* DSEE, which stands for Digital Sound Enhancement Engine, is a technology developed by Sony, to enhance the sound quality of compressed audio files by restoring high-range sound removed by the compression process. - Page 44 Setting the Music To return to the previous menu Press the BACK/HOME button. Notes The “DSEE (Sound Enhance)” setting is not applied to the sound of the video. The “DSEE (Sound Enhance)” function is not effective for a song with a file format that is not compressed, or song that is of a high bit rate with no treble loss.
-
Page 45: Adjusting The Volume Level (Dynamic Normalizer)
Setting the Music Adjusting the Volume Level You can reduce the volume level between songs. With this setting, when listening to album songs in the shuffle play mode, the volume level between songs is moderated to minimize the difference in their recording levels. ... -
Page 46: Playing Videos
Playing Videos Playing a Video You can play videos by transferring video files to the player using Windows Explorer, or another transfer capable software. The player offers 2 types of play mode; play back one video file only (one file play) and play back all video files stored on the player continuously (Continuous Playback). - Page 47 Playing Videos On video playback operation To (icon) Find the beginning of the next video ( Find the beginning of the current video ( Go forward slightly ( Go backward slightly ( Go forward quickly over the paused video ( )* Go backward quickly over the paused video ( )* Go forward quickly (...
-
Page 48: Setting The Video Orientation
Playing Videos Setting the Video Orientation You can set the video orientation from among “Vertical, ” “Horizontal (right), ” or “Horizontal (left). ” Press and hold the BACK/HOME button until the Home menu appears. Press the /// button to select button to confirm. - Page 49 Playing Videos Press the /// button to select the desired setting, and then press the Vertical: Displays at 240 × 180 pixels. (Default setting) “Horizontal (right)” or “Horizontal (left)”: Displays at 320 × 240 pixels. The operation of the 5-way button is switched according to the setting of “Video Orientation”...
-
Page 50: Setting The Display Of The Video Screen
Playing Videos Setting the Display of the Video Screen You can display or hide the detailed information of a video, such as its title, playback icon, and elapsed playing time, etc., during playback. Press and hold the BACK/HOME button until the Home menu appears. -
Page 51: Setting The Zoom Function
Playing Videos Setting the Zoom Function You can zoom in the currently playing video. Press and hold the BACK/HOME button until the Home menu appears. Press the /// button to select button to confirm. Press the /// button to select “Video Settings,” and then press button to confirm. - Page 52 Playing Videos Press the /// button to select the desired setting, and then press the Auto: The video image is enlarged/reduced by fully fitting it to the available display area, keeping the aspect ratio. When a 16:9 video image (oblong) is displayed, it appears with the long side of the video image fully fit to the screen, and black bands up and down on the screen.
-
Page 53: Playing Videos Continuously
Playing Videos Playing Videos Continuously You can play back all videos stored on the player continuously. Press and hold the BACK/HOME button until the Home menu appears. Press the /// button to select button to confirm. Press the ///... -
Page 54: Setting The Video List Display Format
Playing Videos Setting the Video List Display Format The player offers 3 display formats. You can set the display format of the video list as “Title Only, ” “Title With Thumbnail*, ” or “Thumbnail Only. ” Press and hold the BACK/HOME button until the Home menu appears. -
Page 55: Playing Only Video Sound
Playing Videos Playing Only Video Sound You can choose options while the player is on hold during the playback of videos, either by playing a video normally or by turning off the screen and listening only to the sound of those videos. Setting this option to “No”... -
Page 56: Displaying The Video Option Menu
Playing Videos Displaying the Video Option Menu You can display the Video option menu by pressing the OPTION/PWR OFF button on a list screen (including the thumbnail screen), such as the video list, or on the video “Now Playing” screen. From the Video option menu, various video settings are available. -
Page 57: Playing Photos
Playing Photos Displaying a Photo You can display photos by transferring photo files to the player using Windows Explorer, or another transfer capable software. You can either display one photo fully on the screen (single display) or play back a number of photos continuously (slide show play) ( ... - Page 58 Playing Photos Hints A playback of songs continues even while you are searching for photos in the photo folder lists, or photo lists or the “Now Playing” screen of the Photo is displayed. You can play back the photos in a selected folder continuously (slide show play) ( page 62).
-
Page 59: Setting The Photo Orientation
Playing Photos Setting the Photo Orientation You can set the photo orientation from among “Vertical, ” “Horizontal (right), ” or “Horizontal (left). ” Press and hold the BACK/HOME button until the Home menu appears. Press the /// button to select button to confirm. - Page 60 Playing Photos Press the /// button to select the desired setting, and then press the “Vertical”: Displays at 240 × 180 pixels. (Default setting) “Horizontal (right)” or “Horizontal (left)”: Displays at 320 × 240 pixels. The operation of the 5-way button is switched according to the setting of “Photo Orientation” ( page 15). Vertical Hint The photo orientation can be set on the “Now Playing” screen of the photo. Press the OPTION/PWR OFF button, and select “Photo Orientation” from the option menu. button to confirm. Horizontal...
-
Page 61: Setting The Display Of The Photo Screen
Playing Photos Setting the Display of the Photo Screen You can display or hide the detailed information of a photo, such as an icon that shows playback status, etc., while playing back a photo. Press and hold the BACK/HOME button until the Home menu appears. -
Page 62: Playing A Slide Show
Playing Photos Playing a Slide Show You can play back photos in a selected folder continuously. Press and hold the BACK/HOME button until the Home menu appears. Press the /// button to select press the button to confirm. The list of photo folders appears. -
Page 63: Setting The Slide Show Play Mode
Playing Photos Setting the Slide Show Play Mode You can play back photos as a slide show repeatedly. Press and hold the BACK/HOME button until the Home menu appears. Press the /// button to select button to confirm. ... -
Page 64: Setting The Interval Of A Slide Show
Playing Photos Setting the Interval of a Slide Show You can set the interval before the next photo is displayed. Press and hold the BACK/HOME button until the Home menu appears. Press the /// button to select button to confirm. ... -
Page 65: Setting The Photo List Display Format
Playing Photos Setting the Photo List Display Format The player offers 3 display formats. You can set the display format of the photo list as “Title Only, ” “Title With Thumbnail*, ” or “Thumbnail Only. ” Press and hold the BACK/HOME button until the Home menu appears. -
Page 66: Displaying The Photo Option Menu
Playing Photos Displaying the Photo Option Menu You can display the Photo option menu by pressing the OPTION/PWR OFF button on a list screen (including the thumbnail screen), such as the photo folder list, or on the photo “Now Playing” screen. From the Photo option menu, various photo settings are available. -
Page 67: Settings
Settings Limiting the Volume You can set “AVLS (Volume Limit)” (Automatic Volume Limiter System) to limit the maximum volume to prevent auditory disturbance or distraction. With “AVLS (Volume Limit), ” you can listen to music at a comfortable volume level. “Off ”... -
Page 68: Turning Off The Beep Sound
Settings Turning Off the Beep Sound You can turn off the beep sounds of the player. “On” is set by default. Press and hold the BACK/HOME button until the Home menu appears. Press the /// button to select button to confirm. -
Page 69: Setting A Screensaver Type
Settings Setting a Screensaver Type You can set the screensaver to either a “Clock” or “Blank” for when there is no operation for a while during song playback. You can also select “None” for no screensaver. Press and hold the BACK/HOME button until the Home menu appears. ... -
Page 70: Setting A Screensaver Time
Settings Setting a Screensaver Time You can set the time for the screensaver to activate from 15, 30, or 60 seconds. Press and hold the BACK/HOME button until the Home menu appears. Press the /// button to select ... -
Page 71: Adjusting The Brightness Of The Screen (Brightness)
Settings Adjusting the Brightness of the Screen (Brightness) You can set the display brightness to one of 5 levels. Press and hold the BACK/HOME button until the Home menu appears. Press the /// button to select button to confirm. ... -
Page 72: Setting The Current Time (Set Date-Time)
Settings Setting the Current Time You can set the current time by adjusting it manually. Press and hold the BACK/HOME button until the Home menu appears. Press the /// button to select the button to confirm. Press the ///... -
Page 73: Clock Display
Settings To return to the previous menu Press the BACK/HOME button. To display the current time Select (Clock Display) on the Home menu. Press the OPTION/PWR OFF button on the “Now Playing” screen of a song and select “Clock Display” from the option menu. ... -
Page 74: Setting The Date Format
Settings Setting the Date Format You can set the date format displayed for the current time ( page 72) as “YYYY/MM/DD, ” “MM/DD/YYYY, ” or “DD/MM/YYYY. ” Press and hold the BACK/HOME button until the Home menu appears. ... -
Page 75: Setting The Time Format
Settings Setting the Time Format You can select the time format displayed for the current time ( page 72) from either a “12-hour” or “24-hour” display. Press and hold the BACK/HOME button until the Home menu appears. Press the ///... -
Page 76: Displaying The Player Information (Unit Information)
Settings Displaying the Player Information (Unit Information) Information such as model name, firmware version, etc., can be displayed. Press and hold the BACK/HOME button until the Home menu appears. Press the /// button to select the button to confirm. ... - Page 77 Settings Available player information Option Model: Firmware: Total songs: Total videos: Total photos: WM-PORT: Description Displays the model name of the player. Displays version information for the player’s firmware. Displays the total number of songs stored on the player. Displays the total number of videos stored on the player. Displays the total number of photos stored on the player.
-
Page 78: Resetting To Factory Settings (Reset All Settings)
Settings Resetting to Factory Settings You can reset the player to the default settings. Resetting the player does not delete data such as audio and photo data. Note This function is only available in the pause mode. Press and hold the BACK/HOME button in the pause mode until the Home menu appears. -
Page 79: Formatting Memory (Format)
Settings Formatting Memory You can format the built-in flash memory of the player. If the memory is formatted, all data and settings will be erased. Be sure to verify the data stored in memory prior to formatting and export any important data to the hard disk of your computer. - Page 80 Settings To cancel the operation and press the button to confirm. You can also Select “No” in step cancel the operation by pressing the BACK/HOME button in step To return to the previous menu Press the BACK/HOME button. Note ...
-
Page 81: Selecting The Display Language
Settings Selecting the Display Language You can select from a variety of languages for the display of menus and messages on the player. Press and hold the BACK/HOME button until the Home menu appears. Press the /// button to select the ... - Page 82 Settings Display language settings Setting Deutsch English Español Français Italiano Português Русский * Japanese display may not be available, depending on the release region of the player. Description Messages and menus are displayed in German. Messages and menus are displayed in English. Messages and menus are displayed in Spanish.
-
Page 83: Useful Facts
Useful Facts Recharging the Player The player’s battery is recharged while the player is connected to a running computer. When you connect the player to your computer, use the supplied USB cable. When the remaining battery indication of the display shows: completed (charging time is approx. -
Page 84: Maximizing Battery Life
Useful Facts Maximizing Battery Life By adjusting the settings or managing the power supply properly, it is possible to save the battery power and use the player for a longer time. Turn off the player manually If you press and hold the OPTION/PWR OFF button, the player enters the standby mode and the screen turns off to save battery power. - Page 85 Useful Facts Adjust data format and bit rate Playing time will vary, as battery charge can be affected by the format and bit rate of songs, videos or photos that are played. For details on charging time and usage time, see page 120, 121. Note ...
-
Page 86: About Data Transferring
Useful Facts About Data Transferring You can directly transfer data by dragging and dropping using Windows Explorer on your computer. Playable data hierarchy has rules. Transfer data properly, see the following illustrations. For details about dragging and dropping, refer to “Quick Start Guide. ” ... - Page 87 Useful Facts For videos (On Windows Explorer) Drag and drop files or folders into the “VIDEO” folder. On the 1st level, the “VIDEO” folder will recognize either a file or a folder. Files on the 2nd level will be recognized. However, folders beyond the 2nd level and files beyond 3rd level will not be recognized.
- Page 88 Useful Facts For photos (On Windows Explorer) Drag and drop files or folders into the “PICTURE” or “DCIM” folder. On the 1st level, the “PICTURE” folder will recognize either a file or a folder. The “DCIM” folder will only recognize a folder. Only files on the 2nd level will be recognized by both “DCIM”...
-
Page 89: What Are Format And Bit Rate
Useful Facts What are Format and Bit Rate? What is audio format? Audio format refers to the method used when importing audio data from the Internet or audio CDs to a computer and saving it as an audio file. Common formats include MP3 and WMA, etc. MP3: MP3 (MPEG-1 Audio Layer3) is a common audio compression technology developed by the MPEG working group of the ISO (International Organization for Standardization). -
Page 90: What Is Video Format
Useful Facts What is video format? Video format refers to the method used when importing video and audio data to a computer and saving it as a video file. Common formats include MPEG-4 and AVC, etc. MPEG-4: MPEG-4 refers to Moving Picture Experts Group phase 4, developed by the MPEG working group of the ISO (International Organization for Standardization). -
Page 91: Storing Data
Useful Facts Storing Data You can store computer data into the built-in flash memory of the player by transferring the data from your computer using Windows Explorer, or another transfer capable software. If the player is connected to the computer, the built- in flash memory appears in Windows Explorer as [WALKMAN.] Notes ... -
Page 92: Upgrading The Player's Firmware
For details about the latest firmware information and how to install it, visit the following web site: For customers in the USA: http://www.sony.com/walkmansupport For customers in Canada: http://www.sony.ca/ElectronicsSupport/ For customers in Europe: http://support.sony-europe.com/DNA ... -
Page 93: Troubleshooting
You may be able to resolve some issues by charging the power. Look for information about the issue on one of the support Web sites. For customers in the USA, visit: http://www.sony.com/walkmansupport For customers in Canada, visit: http://www.sony.ca/ElectronicsSupport/ For customers in Europe, visit: http://support.sony-europe.com/DNA If the approaches listed above fail to resolve the issue, consult your nearest Sony dealer. - Page 94 Troubleshooting Operation Symptom There is no sound. No data is played. Cause/Remedy The volume level is set to zero. Turn the volume up ( page 10). The headphone jack is not connected properly. Connect the headphone jack properly ( page ...
- Page 95 Troubleshooting Operation (continued) Symptom Transferred data is not displayed in its list. When “All Songs” or “Album” is selected, all the songs will appear, but some songs will not appear when “Folder” is selected. Songs are played back within a limited playback range only, such as within one album.
- Page 96 Troubleshooting Operation (continued) Symptom “VPT(Surround)” setting or “Clear Stereo” function is not effective. Cannot see the video, but can hear it. Buttons do not work. Playback does not stop. The player does not work. The remaining battery power is insufficient. Cause/Remedy ...
- Page 97 Troubleshooting Operation (continued) Symptom Transferred data cannot be found. The volume is not loud enough. There is no sound from the right channel of the headphones. Or the right channel sound is heard from both sides of the headphones. Playback has stopped suddenly.
- Page 98 Troubleshooting Operation (continued) Symptom Thumbnails are not displayed. Cover art is not displayed. The player cannot format. The remaining battery is low or insufficient. The player’s power was inadvertently turned off, and then on again. Display Symptom “” appears for a title. “Unknown”...
- Page 99 When usable battery life becomes half the usual time, even after charging the battery fully, the battery should be replaced. Consult your nearest Sony dealer. Copyright-protected contents are played. When copyright-protected contents are played, battery life may be shorter.
- Page 100 Troubleshooting Power (continued) Symptom The player cannot charge the battery. The player turns off automatically. Charging completes very quickly. Connection with a computer Symptom MP3 Conversion Tool does not start up. “Connecting” does not appear when connected to the computer with the supplied USB cable.
- Page 101 Troubleshooting Connection with a computer Symptom The player is not recognized by the computer when it is connected to the computer. Data cannot be transferred to the player from your computer. (continued) Cause/Remedy The USB cable is not connected to a USB port on your computer properly.
- Page 102 Troubleshooting Connection with a computer Symptom Data cannot be transferred to the player from your computer. (continued) (continued) Cause/Remedy There is not enough free space in the built-in flash memory. Transfer any unnecessary data back to your computer to increase free space. ...
- Page 103 Troubleshooting Connection with a computer Symptom Only a small amount of data can be transferred to the player. The player becomes unstable while it is connected to the computer. You cannot delete or rename the folders. (continued) Cause/Remedy There is not enough free space in the built-in flash memory.
- Page 104 Troubleshooting Other Symptom There is no beep sound when the player is operated. The player gets warm. The screen turns on whenever songs change. The date and time have been reset. Cause/Remedy “Beep Settings” is set to “Off. ” ...
-
Page 105: Messages
Troubleshooting Messages Follow the instructions below if a message appears in the display. Message All group numbers have been used. Cannot complete during playback. Please pause playback and then try again. Cannot display folders beyond this level. Place songs in folders up to the eighth level. - Page 106 Troubleshooting Message Cannot play; file is damaged. Please connect to compliant software or device and transfer again. Do not disconnect. Firmware update failed. Library error encountered. Please connect to compliant software or device and transfer again. LOW BATTERY. Please Charge. No items found starting with this letter.
- Page 107 Troubleshooting Message No playlists available. Please connect to compliant software or device and transfer playlists. No songs available for playback. Please connect to compliant software or device and transfer songs. No songs in selected item. No videos available for playback. Please connect to compliant software or device and transfer videos.
-
Page 108: Additional Information
If you have any questions about this product: Visit: www.sony.com/walkmansupport Contact: Sony Customer Information Service Center at 1-(866)-456-7669 Write: Sony Customer Information Service Center 12451 Gateway Blvd., Fort Myers, FL 33913... - Page 109 Notice for the customer in the countries applying EU Directives The manufacturer of this product is Sony Corporation, 1-7-1 Konan, Minato- ku, Tokyo, Japan. The Authorized Representative for EMC and product safety is Sony Deutschland GmbH, Hedelfinger Strasse 61, 70327 Stuttgart, Germany.
-
Page 110: Precautions
Do not touch the rechargeable battery with bare hands if it is leaking. Since battery liquid may remain in the player, consult your nearest Sony dealer if the battery has leaked. If the liquid gets into your eyes, do not rub your eyes as it may lead to blindness. - Page 111 Additional Information On installation Do not put any heavy object on top of the player or apply a strong shock to the player. It may cause a player to malfunction or damage. Never use the player where it will be subjected to extremes of light, temperature, moisture or vibration.
- Page 112 Additional Information On heat build-up Heat may build up in the player while charging if it is used for an extended period of time. On the headphones Road safety Avoid listening with your headphones in situations where hearing must not be impaired.
- Page 113 To clean the earbuds, remove them from the headphones, and hand wash with a mild detergent solution. Dry off sufficiently before use after washing. If you have any questions or problems concerning the player, please consult your nearest Sony dealer. Continued ...
- Page 114 In no event will SONY be liable for any financial damage, or loss of profits, including claims made by third parties, arising out of the use of the software supplied with this player.
- Page 115 The recorded music is limited to private use only. Use of the music beyond this limit requires permission of the copyright holders. Sony is not responsible for incomplete recording/downloading or damaged data due to problems of the player or computer.
-
Page 116: About Copyrights
Additional Information About Copyrights ATRAC is trademark of Sony Corporation. “WALKMAN” and “WALKMAN” logo are registered trademarks of Sony Corporation. Microsoft, Windows, Windows Vista and Windows Media are trademarks or registered trademarks of Microsoft Corporation in the United States and/or other countries. - Page 117 Secure Content from the Internet or from a PC. Microsoft may, in conjunction with such license, also download revocation lists onto your device on behalf of Secure Content Owners. Program ©2007 Sony Corporation Documentation ©2007 Sony Corporation and ® marks are not...
-
Page 118: Specifications
Additional Information Specifications Supported file format Music File format MP3(MPEG1 Layer3) file format, ASF file format, MP4 file format, Wave-Riff file format File extension MP3 (.mp3), WMA (.wma), AAC-LC* Codec AAC-LC* Linear PCM Video File format MP4 file format, “Memory Stick” video format File extension .mp4, .m4v Codec... - Page 119 Additional Information Maximum recordable number of songs and time (Approx.) The approximate times are based on the case in which you transfer or record only 4 minutes songs (not including videos and photos) in the MP3 format. Other playable audio file format song numbers and times may differ from MP3 format.
- Page 120 Additional Information Capacity (User available capacity)* NWZ-A815: 2 GB (Approx. 1.71 GB = 1,840,775,168 bytes) NWZ-A816: 4 GB (Approx. 3.57 GB = 3,840,638,976 bytes) NWZ-A818: 8 GB (Approx. 7.30 GB = 7,840,956,416 bytes) Available storage capacity of the player may vary. A portion of the memory is used for data management functions.
- Page 121 Additional Information Battery life (continuous playback) By setting as follows, a longer battery life can be expected. The time below is approximated when “New Song Pop Up” ( page 30), “Clear Stereo” ( page 42), “DSEE (Sound Enhance)” ( page 43), “Dynamic Normalizer” ( page 45), “Equalizer”...
- Page 122 Additional Information System Requirements Computer IBM PC/AT or compatible computer preinstalled with the following Windows operating systems*: Windows XP Home Edition (Service Pack 2 or later) / Windows XP Professional (Service Pack 2 or later) / Windows XP Media Center Edition (Service Pack 2 or later) / Windows XP Media Center Edition 2004 (Service Pack 2 or later) / Windows XP Media Center Edition 2005 (Service Pack 2 or later) / Windows Vista Home Basic / Windows Vista Home Premium / Windows Vista Business / Windows Vista Ultimate...
-
Page 123: Index
Additional Information Index Symbols 5-way.button... 9,.11 .(Repeat)... 33 .(Shuffle)..33 .(Shuffle&Repeat)..33 .(Repeat.1.song)... 33 .(Heavy)... 38 .(Pop)..38 .(Jazz)..38 .(Unique)..38 .(Custom.1)..38 .(Custom.2)..38 .(Studio)... - Page 124 Additional Information Language..81 Linear.PCM..89,.118 Live... 41 Matrix..41 Messages... 105 Model... 77 MP3...89,.118 MPEG-4..90,.118 Music.Library..6,.18 Normal..33 Now.Playing... 7 Now.Playing.screen..16 On-Hold.Display... 55 OPTION/PWR.OFF.button..10,.17 Option.menu.
- Page 125 Additional Information Video format ... 90 Video Library ... 6, 46 Video List Display Format... 54 Video Orientation ... 48 VOL+/– button ... 10 Volume ... 45 VPT (Surround) ... 40 Windows Explorer ... 86, 91 WM-PORT ... 9, 77 WMA ...89, 118 Zoom ...