Table of Contents
Advertisement
Advertisement
Table of Contents

Related Manuals for Sony 4-166-309-11(1)


Summary of Contents for Sony 4-166-309-11(1)
- Page 1 IC Recorder Operating Instructions ICD-PX820 © 2010 Sony Corporation Getting Started Basic Operations Other Recording Operations Other Playback Operations Editing Messages About the Menu Function Utilizing Your Computer Additional Information Troubleshooting 4-166-309-11(1)
- Page 2 For customers in Europe Disposal of Old Electrical & Electronic Equipment (Applicable in the European Union and other European countries with separate collection systems) This symbol on the product or on its packaging indicates that this product shall not be treated as household waste.
- Page 3 EU directives The manufacturer of this product is Sony Corporation, 1-7-1 Konan Minato-ku Tokyo, 108-0075 Japan. The Authorized Representative for EMC and product safety is Sony Deutschland GmbH, Hedelfinger Strasse 61, 70327 Stuttgart, Germany.
- Page 4 All rights reserved. This manual or the software described herein, in whole or in part, may not be reproduced, translated or reduced to any machine readable form without prior written approval from Sony Corporation. IN NO EVENT SHALL SONY CORPORATION BE LIABLE FOR ANY...
-
Page 5: Table Of Contents
Table of Contents Getting Started Step 1: Checking the Contents of the Package ...7 Index to parts and controls ...8 Step 2: Preparing a Power Source ...9 When to replace the batteries ...10 Step 3: Turning the IC Recorder On ...11 Turning the power on ...11 Turning the power off ...11 Step 4: Setting the Clock ...12... - Page 6 Playing Back a Message at a Desired Time with an Alarm ...41 Playback via Other Devices ...44 Recording with other equipment ...44 Editing Messages Erasing All Messages in a Folder ...45 Moving a Message to a Different Folder ...46 Dividing a Message into Two ...47 Selecting the Display ...49 About the Menu Function Making Settings for the Menu ...51...
-
Page 7: Getting Started
Getting Started Step 1: Checking the Contents of the Package IC Recorder (1) Remove the film on the display window before you use the IC recorder. LR03 (size AAA) alkaline batteries USB connecting cable (1) Application Software, Digital Voice Editor (CD-ROM) Application Software, Dragon ®... -
Page 8: Index To Parts And Controls
Index to parts and controls Front A Built-in microphone B Operation indicator C Display window D DIVIDE button REC/PAUSE button F – (review/fast backward) button (stop) button H Speaker (microphone) jack* J i (headphone) jack K ERASE button L VOL (volume)+*/– button M FOLDER/MENU button (repeat) A-B button PLAY/STOP•ENTER button*... -
Page 9: Step 2: Preparing A Power Source
Step 2: Preparing a Power Source Remove the film on the display window before you use the IC recorder. Slide and lift the battery compartment lid, insert LR03 (size AAA) alkaline batteries with correct polarity, and close the lid. If the battery compartment lid is accidentally detached, attach it as illustrated. -
Page 10: When To Replace The Batteries
When to replace the batteries The battery indicator in the display window shows the battery condition. Battery remain indication : Replace the old batteries with new ones. : “LO BATT” flashes and the IC recorder will stop operation. -
Page 11: Step 3: Turning The Ic Recorder On
Step 3: Turning the IC Recorder On Turning the power on Slide the HOLD switch in the opposite direction from that of the arrow. The IC recorder is turned on, and “ACCESS” flashes. Turning the power off When you are not using the IC recorder, you can prevent the batteries from getting weak quickly by turning the power off. -
Page 12: Step 4: Setting The Clock
Step 4: Setting the Clock N PLAY/ STOP•ENTER FOLDER/MENU – . , > You need to set the clock to use the alarm function or record the date and time. Clock setting display appears when you insert batteries for the first time, or when you insert batteries after the IC recorder has been without batteries for a certain period of time, the year section flashes in the... - Page 13 The menu mode window will be displayed. Press – > + to select “SET DATE,” and then press STOP•ENTER. Press – > + to select “AUTO” or “MANUAL,” and then press PLAY/STOP•ENTER. When you select “AUTO,” the clock is automatically adjusted using the clock in the computer connected to the IC recorder and on which the supplied Digital Voice Editor software is started.
-
Page 14: Preventing Accidental Operation (Hold)
Preventing Accidental Operation (HOLD) Locking the buttons Slide the HOLD switch in the direction of the arrow in the recording or playback mode. “HOLD” will flash indicating that all the functions of the buttons are locked. Unlocking the buttons Slide the HOLD switch in the opposite direction from that of the arrow so that all buttons will be unlocked. -
Page 15: Basic Operations
Basic Operations Recording P Note Before making a recording, exit HOLD mode and turn on the power. Selecting a folder Press to select the folder in which you FOLDER/MENU want to record messages ( There are 5 folders already available when you purchase the IC recorder. -
Page 16: Other Operations
Turn the built-in microphone in the direction of the source to be recorded. To stop recording Press (stop). The IC recorder stops at the beginning of the current recording. Other operations pause recording* release pause and resume recording review the current recording instantly review during recording * 1 hour after you pause recording, recording pause is automatically released and the IC recorder enters... - Page 17 • Before you start recording, we recommend you make a trial recording first, or monitor the recording (page 26). • While recording you can lock all the functions of all the buttons so that you can prevent inadvertent operations by sliding the HOLD switch in the direction of the arrow. P Notes •...
-
Page 18: Listening
Listening P Note Before playback starts, exit HOLD mode and turn on the power. To start playback Press FOLDER/MENU , or Press – + to select the message you want to > play. Press PLAY/STOP•ENTER. Playback will start soon, and the operation indicator will light in green. - Page 19 Press VOL +/– to adjust the volume. To stop playback Press (stop). Other operations Press N PLAY/STOP•ENTER or x (stop). To resume playback stop at the current position (Playback Pause function) from that point, press N PLAY/STOP•ENTER again. go back to the beginning of Press –...
-
Page 20: Erasing
Erasing P Notes • Once a recording has been erased, you cannot retrieve it. • Before erasing a message, exit HOLD mode and turn on the power. • If the message you want to erase is locked in the menu, the message is not erased. Selecting a message and erasing it Select the message you want to erase when the IC recorder is in the stop or playback mode. - Page 21 Press ERASE again. “ERASE” appears in the display window and the selected message will be erased. When a message is erased, the remaining messages will advance and be renumbered so that there will be no space between messages. To cancel erasing Press (stop) before step 3 of “Selecting a message and erasing it.”...
-
Page 22: Other Recording Operations
Other Recording Operations Changing the Recording Settings Selecting the recording mode N PLAY/ STOP•ENTER FOLDER/MENU – . , > You can select the recording mode in the menu when the IC recorder is in the stop mode. Press and hold FOLDER/MENU to enter the menu mode. -
Page 23: Setting The Microphone Sensitivity
Super high-quality monaural recording mode (44.1 kHz/ 192 kbps) You can record with monaural super high-quality sound. High-quality monaural recording mode (44.1 kHz/128 kbps) You can record with monaural high-quality sound. Standard play monaural recording mode (44.1 kHz/48 kbps) You can record with standard quality sound. -
Page 24: Starting To Record Automatically In Response To Sound - The Vor Function
Press – > + to select “SENS,” and then press PLAY/ STOP•ENTER. Press – + to select “ > “ ,” and then press STOP•ENTER. Press (stop) to exit the menu mode. To record a sound far away from the IC recorder or a low sound, such as a recording made in a spacious room. - Page 25 Press and hold FOLDER/MENU to enter the menu mode. The menu mode window will be displayed. Press – + to select “VOR,” > and then press PLAY/ STOP•ENTER. Press – + to select “ON,” and > then press PLAY/STOP•ENTER. The VOR function is set to “OFF” when you purchase the IC recorder.
-
Page 26: Operating During Recording
Operating during Recording Monitoring the recording i (headphone) jack VOL +/– If you connect commercially available headphones to the i (headphone) jack before you start, you can monitor the recording. You can adjust the monitoring volume by pressing VOL +/–, but the recording level is fixed. - Page 27 be recorded as two messages, however recording continues without stopping. Message 1 Message 2 Message is divided. Message 2 and Message 3 are recorded without stopping. You can divide the currently recorded message during recording pause. P Notes • When you divide a message into two, at the point of division, the end of the first message and the beginning of the second message may be interrupted.
-
Page 28: Adding A Recording
Adding a Recording Adding a recording to a previously recorded message z REC/PAUSE N PLAY/ STOP•ENTER FOLDER/MENU – . , > When “REC-OP” in the menu is set to “ADD,” you can add a recording to the message being played back. The added recording will be placed after the current message, and will be counted as a part of the message. - Page 29 Press – + to select “ON,” and > then press PLAY/STOP•ENTER. Press – > + to select “ADD,” and then press PLAY/ STOP•ENTER. Press (stop) to exit the menu mode. When the message to be added is played back, press REC/PAUSE.
-
Page 30: Adding An Overwrite Recording During Playback
Adding an overwrite recording during playback z REC/PAUSE N PLAY/ STOP•ENTER FOLDER/MENU – . , > When “REC-OP” in the menu is set to “OVER,” you can add an overwrite recording after a selected point in a recorded message. The remainder of the message after the selected point is deleted. - Page 31 Press – + to select “ON,” and > then press PLAY/STOP•ENTER. Press– > + to select “OVER,” and then press PLAY/ STOP•ENTER. Press (stop) to exit the menu mode. When the message to be overwritten is played back, press REC/PAUSE. and “OVER”...
-
Page 32: Recording Via Other Devices
Press • Stereo microphone with shirt-clip is supplied with some models in some regions only. (The clip is detachable.) • You can use the Sony ECM-CS10, ECM-CZ10, ECM-DS70P, ECM-DS30P electret condenser microphone (not supplied). , or REC/PAUSE to start recording. -
Page 33: Recording From Other Equipment
Recording sound from a telephone or a cell phone You can use the ECM-TL1 headphone-type electret condenser microphone (not supplied) to record sound from a telephone or a cell phone. For details on how to make the connection, refer to the operating instructions supplied with the ECM-TL1 microphone. - Page 34 (microphone) jack of the IC recorder and adjust the volume level on the piece of equipment connected to the IC recorder. Connect other equipment to the IC recorder when the IC recorder is in the stop mode. Connect the audio output connector (stereo mini-plug) of other equipment to (microphone) jack of the IC recorder using an audio connecting cable...
-
Page 35: Other Playback Operations
Other Playback Operations Changing the Playback Method Convenient playback methods Listening with better sound quality • To listen with the headphones: Connect the supplied or commercially available headphones to the (headphone) jack. The built-in speaker will be automatically disconnected. • To listen from an external speaker: Connect an active or passive speaker (not supplied) to the i (headphone) jack. -
Page 36: Adjusting The Playback Speed - The Dpc Function
rapidly, and normal playback will start at the point you release the button. • If the last message is long and you wish to start playback at a later part of the message, press and hold > to go to the end of the message, and then press is flashing to go back to the desired point. - Page 37 Press – + to select “DPC,” > and then press PLAY/ STOP•ENTER. Press – + to select “ON,” and > then press PLAY/STOP•ENTER. Press – + to adjust the speed > of the playback, and then press PLAY/STOP•ENTER. Every time + is pressed, you can >...
-
Page 38: Changing The Playback Settings
Changing the Playback Settings Playing back all messages in a folder continuously – the continuous play N PLAY/ STOP•ENTER FOLDER/MENU – . , > You can select the continuous play mode with “CONT” in the menu. When you set “CONT” to “ON,” you can play back all messages in a folder continuously. -
Page 39: Making The Human Voice Clearer - The Noise Cut Function
Playing back a specified section repeatedly – A-B Repeat During playback, press to specify the starting point A. “A-B B” flashes. Press (repeat) A-B again to specify the finishing point B. “ ” and “A-B” is displayed and the specified section is played back repeatedly. - Page 40 The menu mode window will be displayed. Press – + to select “N-CUT,” > and then press PLAY/ STOP•ENTER. Press – + to select “ON,” and > then press PLAY/STOP•ENTER. Press (stop) to exit the menu mode. P Notes • The effect of the noise cut function may be different depending on the condition of the recorded voice.
-
Page 41: Playing Back A Message At A Desired Time With An Alarm
Playing Back a Message at a Desired Time with an Alarm N PLAY/ STOP•ENTER FOLDER/MENU – . , > You can sound an alarm and start playback of a selected message at a desired time. You can have the message played back on a specified date, once every week, or at the same time every day. - Page 42 Set the alarm date and time. Press – > “DATE,” a day of the week, or “DAILY,” and then press STOP•ENTER. When you select “DATE”: Set the year, month, day, hour, and minute in sequence, as described in “Step 4: Setting the Clock” on page 12, and then press STOP•ENTER.
- Page 43 automatically at the beginning of that message when the playback ends. To listen to the same message again Press PLAY/STOP•ENTER, and the same message will be played back from the beginning. To stop the alarm playback Press any button other than VOL +/– while the alarm sound is heard.
-
Page 44: Playback Via Other Devices
Playback via Other Devices Recording with other equipment Tape recorder, etc. i (headphone) jack N PLAY/ STOP•ENTER You can record the sound of the IC recorder with other equipment. Before you start recording, we recommend you to make trial recording first. Connect the i (headphone) jack of the IC recorder to the audio input connector (stereo minijack) of other equipment... -
Page 45: Editing Messages
Editing Messages Erasing All Messages in a Folder N PLAY/ STOP•ENTER FOLDER/MENU – . , > P Note If the selected folder contains a protected message, you cannot erase the message. Press FOLDER/MENU to select the folder containing the messages you want to erase when the IC recorder is in the stop mode ( Press and hold FOLDER/MENU to enter... -
Page 46: Moving A Message To A Different Folder
Moving a Message to a Different Folder N PLAY/ STOP•ENTER FOLDER/MENU – . , > You can move the recorded messages to another folder. Select the message you want to move. Press and hold FOLDER/MENU to enter the menu mode when the IC recorder is in the stop or playback mode. -
Page 47: Dividing A Message Into Two
Dividing a Message into Two DIVIDE – . , > You can divide a message during playback, so that the message is divided into two parts and a new message number is added to the newer part of the divided message. By dividing a message, you can easily find the point from which you want to play back when you make a long recording such as at... - Page 48 P Notes • You need a certain amount of free space in the memory to divide a message. • If 99 messages have been recorded in a folder, you cannot divide a message. In that case, reduce the number of messages to 98 or less by erasing unwanted messages or by moving some of the messages to another folder before dividing a message.
-
Page 49: Selecting The Display
Selecting the Display N PLAY/ STOP•ENTER FOLDER/MENU – . , > When the IC recorder is in the recording/ recording pause, stop, or playback modes, you can select elapsed time, remaining time (REMAIN), recorded date (REC DATE), or recorded time (REC TIME) to be displayed in the display window. - Page 50 The display will change as shown below. REC DATE indicator REMAIN indicator Elapsed time, remaining time with the REMAIN indicator, recorded date with the REC DATE indicator*, or recorded time with the REC DATE indicator** * If the clock has not been set, “--Y--M--D” will be displayed.
-
Page 51: About The Menu Function
About the Menu Function Making Settings for the Menu N PLAY/ STOP•ENTER FOLDER/MENU – . , > Press and hold FOLDER/MENU to enter the menu mode. The menu mode window will be displayed. Press – item for which you want to make setting, and then press STOP•ENTER. -
Page 52: Menu Settings
Menu Settings Menu items Settings MODE SHQ, HQ, SP, LP SENS ON, OFF REC-OP ON (ADD, OVER), OFF ON (–50% to +100%), OFF N-CUT ON, OFF EASY-S ON, OFF CONT ON, OFF DISPLAY ELAPSE, REMAIN, REC DATE, REC TIME SET DATE HOUR 12H, 24H BEEP... - Page 53 Menu items Settings (*: Initial setting) MODE Sets the recording mode. SHQ*: Super high-quality monaural recording mode. High-quality monaural recording mode. Standard play monaural recording mode. Long play monaural recording mode. SENS Sets the microphone sensitivity. To record a sound far away from the IC recorder or a low sound, such as a recording made in a spacious room.
- Page 54 Menu items Settings (*: Initial setting) REC-OP Adds a recording to a previously recorded message or adds an overwrite recording during playback. OFF*: Sets the DPC (Digital Pitch Control) function. OFF*: N-CUT Sets the noise cut function. OFF*: You can add a recording or overwrite a recording. ADD*: You can add a recording.
- Page 55 Menu items Settings (*: Initial setting) EASY-S Sets the easy search function. You can go forward for about 10 seconds by pressing > + and go back for about 3 seconds by pressing – . . This function is useful when attempting to locate desired point in a long recording.
- Page 56 Menu items Settings (*: Initial setting) DISPLAY Changes the display mode. ELAPSE*: REMAIN: REC DATE: REC TIME: P Notes • If the remaining recording time is less than 1 minute, the display will change automatically to the remaining time display and the display will flash.
- Page 57 Menu items Settings (*: Initial setting) BEEP Sets whether a beep will be heard or not. ON*: A beep will sound to indicate that an operation has been accepted or an error has occurred. OFF: No beep sound will be heard. P Note The alarm sounds even if you set “BEEP”...
- Page 58 Menu items Settings (*: Initial setting) LOCK Locks the message so that you cannot move it, erase it, add a new message to it, add an overwritten message to it, or divide it. OFF*: MOVE The selected message will be moved to the selected folder Before attempting to move a message, select the message to be moved, and then go to the menu window.
-
Page 59: Utilizing Your Computer
Utilizing Your Computer Using the IC Recorder with Your Computer You can do the following when you connect the IC recorder to your computer using the supplied USB connecting cable. Copying messages from the IC recorder to your computer to save them (page 63) You can copy the messages recorded on the IC recorder to save them. -
Page 60: Connecting The Ic Recorder To Your Computer
Connecting the IC recorder to your computer You can transfer the IC recorder data onto your computer by connecting the IC recorder to the computer. Use the USB connecting cable supplied with the IC recorder to connect the (USB) connector of the IC recorder and the USB port of your computer. -
Page 61: Structure Of Folders And Files
Structure of folders and files If you connect the IC recorder to your computer, you can see the structure of folders and files on the computer screen. “IC_RECORDER” Folder for messages recorded using the IC recorder VOICE P Notes • You can record messages in up to 5 folders , or using the IC recorder. - Page 62 Make sure that the display of the IC recorder turns off. Disconnect the USB connecting cable connected to the IC recorder from the USB port of the computer.
-
Page 63: Copying Messages From The Ic Recorder To Your Computer To Save Them
Copying Messages from the IC Recorder to Your Computer to Save Them You can save messages or folders by copying them from the IC recorder to your computer. Connect the IC recorder to your computer (page 60). Copy messages or folders you want to save to your computer. -
Page 64: Copying Mp3 Files From Your Computer To The Ic Recorder
Copying MP3 Files from Your Computer to the IC Recorder You can copy MP3 files from your computer to the IC recorder by dragging and dropping them, and you can then play them back on the IC recorder. Connect the IC recorder to your computer (page 60). -
Page 65: Using The Supplied Digital Voice Editor Software
Using the Supplied Digital Voice Editor Software What you can do using the Digital Voice Editor software The Digital Voice Editor software allows you to transfer messages that you have recorded using the IC recorder to your computer. You can save them on your computer, play them back, and edit them. - Page 66 messages, etc., on your computer, depending on the format of the file. You can change the order of the messages in the IC recorder using the computer. You can also save messages saved on your computer by converting the voice format to a more appropriate one.
-
Page 67: System Requirements
• For the latest version information and compatibility with your operating system, please access the support home page for the IC recorder: Asian areas: http://www.sony-asia.com/support European areas: http://support.sony-europe.com/DNA Hardware environment: – Computer: IBM PC/AT or compatible ® – CPU: 1 GHz Pentium III processor or ®... -
Page 68: Installing The Software
® more (for Windows XP or Windows 2000) – Hard disk space: 300 MB or more – CD-ROM drive (When creating an audio CD or data CD, a CD-R/RW drive is needed) – Port: USB port – Sound board: Sound cards compatible with any of the supported Microsoft ®... - Page 69 • After installing, the Microsoft DirectX module is also installed depending on the operation system of your computer. This module is not deleted after uninstalling the software. • Be sure to close all running programs before installing the Digital Voice Editor software. •...
- Page 70 private purposes, the file may become unplayable or the Digital Voice Editor may become inoperable. When the dialog box used to select how to save files is displayed When you save files recorded using the IC recorder onto the computer named above, you can select whether you wish to convert them into the MP3 format.
-
Page 71: Referring To The Help Files
The software does not work properly if you just move the software files. Uninstallation does not remove the message files. Referring to the help files For details on each operation, refer to the help files. Help... -
Page 72: Using The Ic Recorder As Usb Memory - Data Storage Function
Using the IC Recorder as USB Memory – Data Storage Function When the IC recorder is connected to your computer using a USB connecting cable, image data or text data on the computer, as well as messages or files recorded using the IC recorder can be temporarily stored in the IC recorder. -
Page 73: Additional Information
Additional Information Using a USB AC Adaptor (not supplied) (USB) connector USB connecting cable (supplied) You can connect the IC recorder to an AC outlet using an AC-U50A USB AC adaptor (not supplied). It is useful when you want to record for a long time. - Page 74 – the IC recorder should not be connected to or disconnected from the USB AC adaptor connected to the AC outlet. – the USB AC adaptor connected to the IC recorder should not be connected to or disconnected from the AC outlet. Doing so may damage the data.
-
Page 75: Precautions
Precautions On power Operate the unit only on 3.0 V or 2.4 V DC. Use two LR03 (size AAA) alkaline batteries or two NH-AAA rechargeable batteries. On safety Do not operate the unit while driving, cycling or operating any motorized vehicle. On handling •... - Page 76 Do not use alcohol, benzine or thinner. If you have any questions or problems concerning your unit, please consult your nearest Sony dealer. Backup recommendations To avoid potential risk of data loss caused by accidental operation or...
-
Page 77: Specifications
Specifications System requirements for your computer To use your computer with the Digital Voice Editor software To use your computer with the Digital Voice Editor software, see “System requirements” on page 67. To use your computer without the Digital Voice Editor software To use your computer with the IC recorder without the Digital Voice Editor software, or to use the IC recorder as a USB mass... -
Page 78: Design And Specifications
• For the latest version information and compatibility with your operating system, please access the support home page for the IC recorder: Asian areas: http://www.sony-asia.com/support European areas: http://support.sony-europe.com/DNA Hardware environment: – Port: USB port – Sound board: Sound cards compatible with any of the supported Microsoft ®... - Page 79 Input/Output • Microphone jack (minijack, stereo) – input for plug in power, minimum input level 0.5 mV, 3 kilohms or lower impedance microphone • Headphone jack (minijack, stereo) – output for 8 ohms - 300 ohms headphones • USB connector –...
-
Page 80: Battery Life
For details on the battery life, see page 80. The maximum recording time varies if you record messages in mixed recording mode. Battery life When using Sony LR03 (SG) (size AAA) alkaline batteries (with continuous use) Recording mode SHQ* Recording Approx. - Page 81 Approx. 25 hr. headphones The battery life is measured in testing using methods proprietary to Sony. The battery life may shorten depending on how you operate the IC recorder. When playing back music through the internal speaker with the volume level set to 27...
-
Page 82: Troubleshooting
Troubleshooting Before taking the IC recorder for repair, check the following sections. Should any problem persist after you have made these checks, consult your nearest Sony dealer. Please note that recorded messages may be erased during service or repair work. - Page 83 Symptom Remedy The operation indicator does • “LED” is set to “OFF.” Display the menu and set “LED” to “ON” not light. “FULL” is displayed and • The memory is full. Erase some of the messages (page 20) or you cannot start recording. “FULL”...
- Page 84 Symptom You cannot divide a message. When recording from other equipment, the input level is too strong or not strong enough. Playback speed is too fast or too slow. “--:--” is displayed. “--Y--M--D” or “--:--” is displayed on the REC DATE display.
- Page 85 Symptom Remedy The battery life is short. • The battery life on page 80 is based on playback with the volume There is no battery power • Even if you do not use the IC recorder, the batteries are consumed remaining after you have left the batteries inserted for long time without using the IC...
- Page 86 Symptom The computer cannot start. Remedy • If you reboot the computer with the unit connected to the computer, the computer may freeze or may not start properly. Disconnect the unit from the computer and reboot the computer again.
- Page 87 Digital Voice Editor Refer to the Help files of the Digital Voice Editor software, too. Symptom Remedy The Digital Voice Editor • The free disk or memory space on the computer is too small. software cannot be installed. • You are trying to install the software into the operating system •...
- Page 88 Symptom Counter or slider moves incorrectly. There is noise. Operation is slow when there are many messages. Display does not work during saving, adding, or deleting of messages. It takes too long to convert a file format. The software ‘hangs’ when the Digital Voice Editor software starts up.
-
Page 89: Error Messages
Error Messages Error message Cause/Remedy LO BATT ( flashes at • Batteries are exhausted. Replace the old batteries with new ones. the same time) ERR FORMAT • The IC recorder cannot be turned on using the computer because FULL ( flashes at the •... - Page 90 Error message PRE SET BACK-D LOCK ( flashes at the same time) NO SUPPORT NO EDIT NO MOVE (folder indicator flashes at the same time) OFF REC-OP NEW (message number flashes at the same time) ERR ACCESS ERR 01 - ERR 06 Cause/Remedy •...
-
Page 91: System Limitations
System Limitations There are some system limitations of the IC recorder. Troubles as mentioned below are not malfunctions of the IC recorder. Symptom Cause/Remedy You cannot record messages • If you record messages in a mixture of SHQ, HQ, SP and LP up to the maximum recording time. -
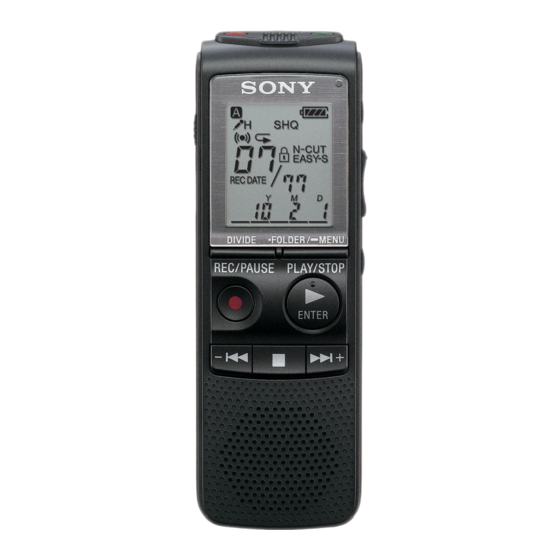
Page 92: Display Window Guide
Display Window Guide A Folder indicator Displays the folder ( ) you have selected. B Microphone sensitivity Displays the microphone sensitivity. (high): To record at a meeting or in a quiet/spacious place. (low): To record for dictation or in a noisy place. C Alarm indicator Appears when the alarm is set for a message. - Page 93 HQ: High-quality monaural recording mode SP: Standard play monaural recording mode LP: Long play monaural recording mode (recording) indicator Appears while the IC recorder is recording. L N-CUT (noise cut) indicator Appears when “N-CUT” is set to “ON” in the menu. M LOCK indicator Appears when “LOCK”...
-
Page 94: Index
Index A-B Repeat ...39 Adding a recording ... 28, 52, 54 Adding an overwrite recording ... 30, 52, 54 Adjusting the volume ... 19, 26 Alarm ...41, 52, 57 Alkaline battery ...9, 80 Battery life ...80 Built-in microphone ...16 Connecting the IC recorder to your computer ...60 Continuous play ...38, 52, 55 Copying messages ...63... - Page 95 Maintenance ...76 Menu ALARM ...52, 57 ALL ERASE ...52, 58 BEEP ...52, 57 CONT ...52, 55 DISPLAY ...52, 56 DPC ...52, 54 EASY-S ...52, 55 FORMAT ...52, 58 HOUR ...52, 56 LED ...52, 57 LOCK ...52, 58 Making settings ...51 Menu settings ...52 MODE ...52, 53 MOVE ...52, 58...
- Page 96 SHQ ... 23, 52, 53, 80, 81 SP ...23, 52, 53, 80, 81 Specifications ...77 System limitations ...91 Troubleshooting ...82 USB AC adaptor ...73 USB Memory ...72 VOR (Voice Operated Recording) ...24, 52, 53...