Table of Contents
Advertisement
Advertisement
Table of Contents

Related Manuals for Bissell GARAGE PRO 18P0 Series


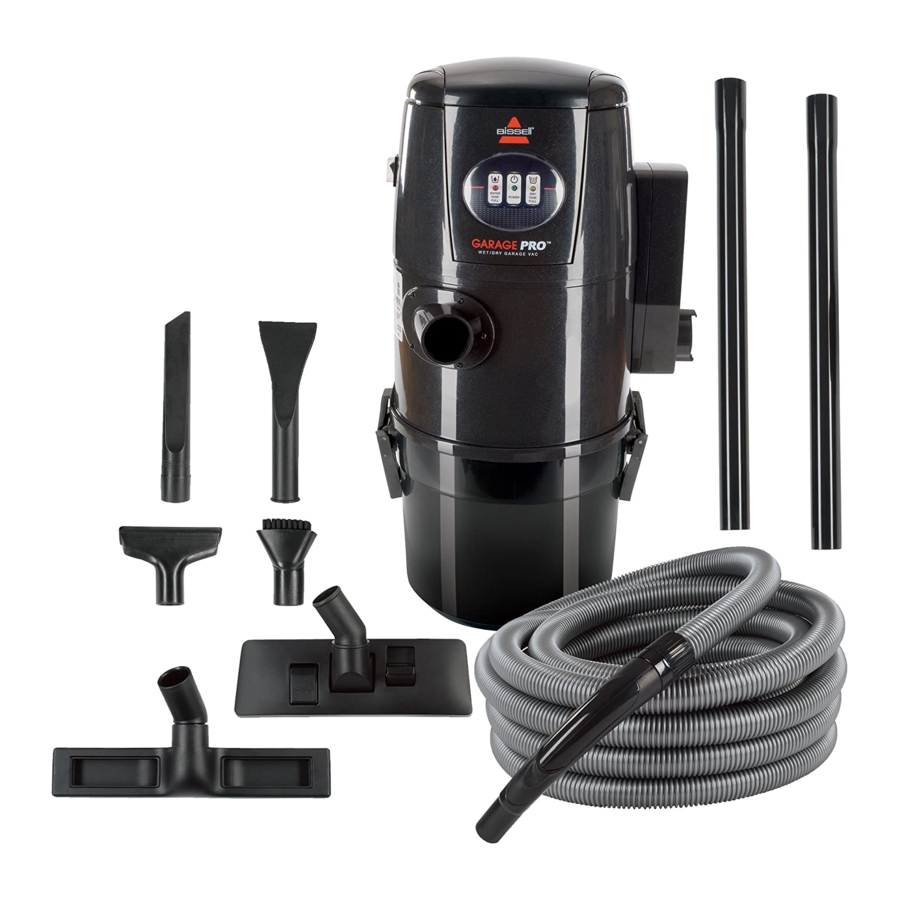
Summary of Contents for Bissell GARAGE PRO 18P0 Series
- Page 1 Garage Pro V A C U U M U S E R ’ S G U I D E 1 8 P 0 S E R I E S 4 3 Z 3 S E R I E S Safety Instructions Product View Assembly Operation...
- Page 2 Your BISSELL Garage Pro™ vacuum is well made, and we back it with a limited two year warranty. We also stand behind it with a knowledgeable, dedicated Consumer Services Department, so, should you ever have a problem, you’ll receive fast, considerate assistance.
-
Page 3: Important Safety Instructions
MPORTANT SAFETY INSTRUCTIONS When using an electrical appliance, basic precautions should be observed, including the following: REaD all InStRUctIonS bEfoRE USInG yoUR GaRaGE PRo VacUUM. Always connect to a polarized outlet (left slot is wider than right). Unplug from outlet when not in use and before conducting maintenance. -
Page 4: Product View
roduct view Muffler w w w . b i s s e l l . c o m ug110-4053_18P0_608.indd 4 Face Plate Power Switch Wet/Dry Hose Inlet Power Cord Slots Dirt Tank Handles Dirt Tank Blower Hose Outlet 8 0 0 . 2 3 7 . 7 6 9 1 6/13/08 12:35:28 PM... -
Page 5: Mounting And Installation
ssembly your unit will require no tools to put together. Remove the dirt tank by pulling up on both handles to unlatch. Lift upper half of unit to remove. Remove all accessories and parts stored in the bottom of the tank prior to use. If the round funnel comes out of dirt tank, set back inside the dirt tank before reas- sembling vacuum. -
Page 6: Operation
ssembly Mounting & installation concrete Wall (fasteners not included) you will need; (4) 3/8” x 2-1/4” concrete sleeve anchors. Drill a 3/8” x 1-3/4” hole with a masonry drill bit. Insert a bolt and anchor sleeve into the hole. Align the bracket over the hole and mark remaining hole locations using the (4) outer holes of the mounting bracket;... -
Page 7: Blower Mode
peration Wet or dry vacuuming mode Attach hose to the wet/dry hose inlet opening (located on the front left side of the unit) by pushing fitted end of hose and turning clockwise until you feel it is secure. Attach extension wand, if desired, to end of hose by pushing it firmly into the hose. -
Page 8: Using The Tools
peration thermal motor protection: an internal thermal protector has been designed into your cleaner to protect it from overheating. When the thermal protector activates, the main vacuum motor will stop operating. If this happens, proceed as follows. Turn the vacuum OFF and unplug from electrical outlet. -
Page 9: Floor Cleaning
peration Floor cleaning (2) Extension wands Use with desired attachment for a longer reach. large area cleaning tool Use on large surfaces for maximum pick up. Multi surface floor tool May be used on both carpet/rugs or hard floor surfaces. for use on carpets, make sure the tab is in the down position soft outer brushes. -
Page 10: Cleaning The Filters
aintenance and care Cleaning the dirt tank Unplug the unit from electrical outlet. Remove the dirt tank by pulling up on both handles to unlatch. Ensure the dirt tank has been emptied. The dirt tank may be washed in warm water. -
Page 11: Maintenance And Care
aintenance and care Cleaning the filters continued Secondary filter The secondary filter is located above the primary filter. To remove the primary filter, see instructions on page 10. To remove the secondary filter, pull filter down and out. Shake filter over trash can to release any loose debris. - Page 12 aintenance and care Clearing clogs continued If the clog is contained near the bottom of the hose (close to where tools are attached), follow these steps: Remove wand or tool. Attach hose to the blower outlet and turn the power on. This should dislodge the clog by blowing out debris.
-
Page 13: Troubleshooting
If you should happen to need assistance during assembly or operation, call 1-800-237-7691. Please do not return this product to the store. for any questions or concerns, bISSEll is happy to be of service. w w w . b i s s e l l . c o m ug110-4053_18P0_608.indd 13... - Page 14 For information about repairs or replacement parts, or questions about your warranty, call: Or visit the BISSELL website - www.bissell.com When contacting BISSELL, have model number of cleaner available. Please record your Model Number: ___________________ Please record your Purchase Date: ___________________ notE: Please keep your original sales receipt.
- Page 15 - BISSELL Garage Pro™ Vacuum you may purchase parts from your retailer, by calling bISSEll consumer Services or by visiting our website. below is a list of common replacement parts. While not all of these parts may have come with your specific model, they are available for purchase if desired.
-
Page 16: Limited Two-Year Warranty
This warranty gives you specific legal rights, and you may also have other rights which may vary from state to state. If you need additional instruction regarding this warranty or have questions regarding what it may cover, please contact BISSELL Consumer Services by E-mail, telephone, or regular mail as described below. limited two year Warranty Subject to the *EXcEPtIonS anD EXclUSIonS identified below, upon receipt of the product BISSELL Homecare, Inc.