Table of Contents
Advertisement
Advertisement
Table of Contents

Related Manuals for Sony 4-113-168-11(2)


Summary of Contents for Sony 4-113-168-11(2)
- Page 2 FOR UNITED STATES CUSTOMERS. NOT APPLICABLE IN CANADA, INCLUDING IN THE PROVINCE OF QUEBEC. POUR LES CONSOMMATEURS AUX ÉTATS-UNIS. NON APPLICABLE AU CANADA, Y COMPRIS LA PROVINCE DE QUÉBEC. For the customers in the United States The following FCC statement applies only to the version of this model manufactured for sale in the USA.
- Page 3 EU directives The manufacturer of this product is Sony Corporation, 1-7-1 Konan, Minato-ku, Tokyo, Japan. The Authorized Representative for EMC and product safety is Sony Deutschland GmbH, Hedelfinger Strasse 61, 70327 Stuttgart, Germany.
-
Page 4: Table Of Contents
Table of Contents Checking the Contents of the Package ... 6 Index to Parts and Controls ... 7 Getting Started Step 1: Preparing a Power Source ...11 Inserting the batteries...11 When replacing the batteries...12 Step 2: Setting the Clock ...14 Continued directly from “Step 1: Preparing a Power Source”... - Page 5 Playback Playing Back Messages ...34 Playing Back All Messages in a Folder Continuously – the Continuous Play ...37 Playing Back a Specified Section Repeatedly – A-B Repeat ...39 Adjusting the Playback Speed – the DPC Function ...40 Recording with Other Equipment ...41 Playing Back a Message at a Desired Time with an Alarm ...43 Editing Messages...
-
Page 6: Checking The Contents Of The Package
Checking the Contents of the Package IC Recorder (1) Remove the film on the display window before you use the IC recorder. LR03 (size AAA) alkaline batteries (2) Stereo headphones* (1) Carrying pouch* (1) Operating Instructions * The stereo headphones and carrying pouch are supplied with some models in some regions only. -
Page 7: Index To Parts And Controls
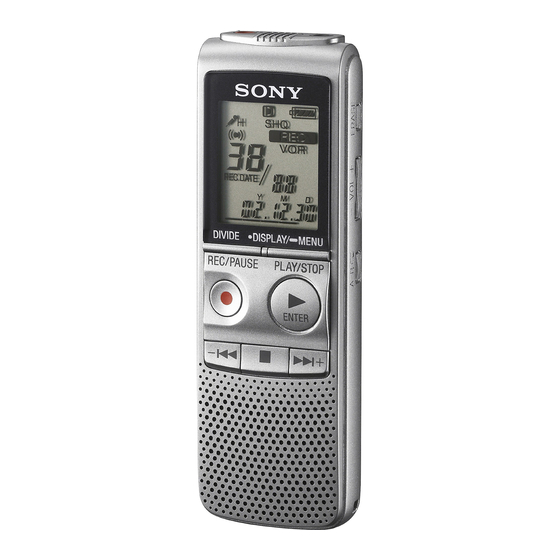
Index to Parts and Controls Refer to the pages indicated in parentheses for details. Front Built-in microphones (18) Operation indicator (14, 18, 34, 61) Display window (8) DIVIDE button (27, 52) REC/PAUSE button (18, 19) –... - Page 8 Rear Battery compartment (11) HOLD switch (17, 53) Display window Folder indicator Displays the folder ( , ) you have selected. Microphone sensitivity Displays the microphone sensitivity. (high): To record at a meeting or in a quiet/spacious place. (low): To record for dictation or in a noisy place.
- Page 9 Selected message number REC DATE (recorded date) indicator The recorded date or time is displayed with the REC DATE indicator. REMAIN indicator When the IC recorder is in the recording mode, the remaining recording time is displayed with the REMAIN indicator, or when the IC recorder is in the playback/stop mode, the remaining time of the...
- Page 10 EASY-S (Easy Search) indicator Appears when the easy search function is set to “ON” in the menu. DPC indicator Appears when the DPC (Digital Pitch Control) function is set to “ON” in the menu. Total number of messages in the folder/DPC setting Elapsed time/ Remaining time/ Recorded date or time indication/...
-
Page 11: Getting Started
Getting Started Step 1: Preparing a Power Source Remove the film on the display window before you use the IC recorder. Inserting the batteries Slide and lift the battery compartment lid. Insert the LR03 (size AAA) alkaline batteries with correct polarity, and close the lid. -
Page 12: When Replacing The Batteries
: Replace the old batteries with new ones. : “LO BATT“ appears and the IC recorder will stop operation. Battery life When using Sony LR03 (SG) (size AAA) alkaline batteries (with continuous use) Recording mode Recording Approx. 30 hr. Approx. 30 hr. - Page 13 Approx. 13 hr. Approx. 13 hr. through speaker Playback Approx. 32 hr. Approx. 32 hr. using the headphones When using Sony NH-AAA rechargeable batteries (with continuous use) Recording mode Recording Approx. 20 hr. Approx. 20 hr. Playback Approx. 10 hr. Approx. 10 hr.
-
Page 14: Step 2: Setting The Clock
Note while accessing The IC recorder is accessing data when “ACCESS” appears in the display window or the operation indicator flashes in orange. While the IC recorder is accessing data, do not remove the batteries. Doing so may damage the data. ... -
Page 15: Continued Directly From "Step 1: Preparing A Power Source
Continued directly from “Step 1: Preparing a Power Source” Press – + to set the year, month, day, hour, and minute in sequence, then press STOP•ENTER. Press (stop) to return to the display of the stop mode. Setting the clock using the menu While the IC recorder is in the stop mode,... -
Page 16: Turning The Ic Recorder On Or Off
Press – + to set the year, month, day, hour, and minute in sequence, then press STOP•ENTER. Press (stop) to return to the display of the stop mode. Tips Press DISPLAY/MENU to return to the previous operation. -
Page 17: Turning The Power Off
Turning the power off Slide the HOLD switch in the direction of the arrow in the stop mode. “HOLD” flashes. The IC recorder turns off within a few seconds. Turning the power on Slide the HOLD switch in the opposite direction from that of the arrow. -
Page 18: Recording
Recording Recording Messages REC/ PAUSE – Select a folder. Press and hold DISPLAY/MENU to enter the menu mode. Press – “FOLDER, ” then press STOP•ENTER. Press – folder you want ( , then press ... - Page 19 Press (stop) to stop recording. The IC recorder stops at the beginning of the current recording. If you do not change the folder after you stop recording, the next time you record you will record in the same folder. Tips ...
-
Page 20: Monitoring The Recording
Monitoring the recording Connect commercially available headphones to the (headphone) jack and monitor the recording. You can adjust the monitoring volume by pressing VOL + or –, but the recording level is fixed. Remaining memory indication During recording, the remaining memory indicator decreases one by one. -
Page 21: Selecting The Recording Mode
Selecting the Recording Mode DISPLAY/ MENU – You can select the recording mode in the menu when the IC recorder is stopped. The recording mode is set to “SHQ” when you purchase the IC recorder. Press and hold DISPLAY/MENU to enter the menu mode. - Page 22 LP : Long play monaural recording mode (11.025 kHz/8 kbps) You can record for a longer time with monaural sound. SP : Standard play monaural recording mode (44.1 kHz/48 kbps) You can record with standard quality sound. HQ : High-quality monaural recording mode (44.1 kHz/128 kbps) You can record with monaural high- quality sound.
-
Page 23: Selecting A Folder
Selecting a Folder DISPLAY/ MENU – Five folders ( , , or been already made for you when you purchase the IC recorder. Select one of these folders in the menu. Press and hold DISPLAY/MENU to enter the menu mode. The menu mode window will be displayed. -
Page 24: Setting The Microphone Sensitivity
Setting the Microphone Sensitivity DISPLAY/ MENU – You can set the microphone sensitivity in the menu when the IC recorder is stopped or is recording. The microphone sensitivity is set to “ when you purchase the IC recorder. Press and hold DISPLAY/MENU to enter the menu mode. -
Page 25: Starting To Record Automatically In Response To Sound - The Vor Function
Starting to Record Automatically in Response to Sound – the VOR Function DISPLAY/ MENU REC/ PAUSE – You can set the VOR (Voice Operated Recording) function to “ON, ” to make the IC recorder start recording when the IC recorder detects sound, and pause when no sound is heard, eliminating recording during soundless periods. -
Page 26: Dividing A Message Into Two During Recording
Press REC/PAUSE. “ ” and “VOR” appear in the display window. The recording starts when the IC recorder detects sound. The recording pauses when no sound is detected and “VOR” and “PAUSE” flash. When the IC recorder detects sound again, the recording starts again. - Page 27 Press DIVIDE during recording. “DIVIDE” flashes and the new message number is added at the point you pressed the button. The message will be recorded as two messages, however recording continues without stopping. Message 1 Message 2 Message is divided. Message 2 and Message 3 are recorded without stopping.
-
Page 28: Recording With An External Microphone Or From Other Equipment
Recording with an External Microphone or from Other Equipment Microphone or other equipment To the (microphone) jack REC/ PAUSE Connect an external microphone or other equipment to the (microphone) jack when the IC recorder is in the stop mode. The built-in microphones are automatically cut off. -
Page 29: Recording Sound From A Telephone Or A Cell Phone
“SHQ, ” and a stereo microphone is used, you can record sound in stereo. Recommended microphones You can use the Sony ECM-CS10, ECM-CZ10, ECM-DS70P, ECM-DS30P electret condenser microphone (not supplied). Recording sound from a telephone or a cell phone... -
Page 30: Adding A Recording To A Previously Recorded Message
Adding a Recording to a Previously Recorded Message DISPLAY/ MENU REC/ PAUSE – When “REC-OP” in the menu is set to “ADD, ” you can add a recording to the message being played back. The added recording will be placed after the current message, and will be counted as a part of the message. - Page 31 Press – + to select “ON,” then press PLAY/STOP•ENTER. Press – + to select “ADD,” then press PLAY/STOP•ENTER. Press (stop) to exit the menu mode. When the message to be added is played back, press REC/PAUSE.
-
Page 32: Adding An Overwrite Recording During
Adding an Overwrite Recording during Playback DISPLAY/ MENU REC/ PAUSE – When “REC-OP” in the menu is set to “OVER, ” you can add an overwrite recording after a selected point in a recorded message. The remainder of the message after the selected point is deleted. - Page 33 Press – + to select “ON,” then press PLAY/STOP•ENTER. Press – + to select “OVER,” then press PLAY/ STOP•ENTER. Press (stop) to exit the menu mode. When the message to be overwritten is played back, press ...
-
Page 34: Playing Back Messages
Playback Playing Back Messages Operation indicator DISPLAY/ MENU – Select a folder. Press and hold DISPLAY/MENU to enter the menu mode. Press – “FOLDER, ” then press STOP•ENTER. Press – folder you want ( , ... - Page 35 Press VOL + or – to adjust the volume. Press (stop) to stop playback. During playback you can lock all the functions of all the buttons so that you can prevent inadvertent operations by sliding the HOLD switch in the direction of the arrow. Listening with better sound quality To listen with the headphones :...
- Page 36 When messages are played back to the end of the last message When you play back or fast play back to the end of the last message, “END” flashes up for 5 seconds and the operation indicator lights up in green.
-
Page 37: Playing Back All Messages In A Folder Continuously - The Continuous Play
Playing back a message repeatedly During playback, press and hold PLAY/STOP•ENTER until “ ” appears. The selected message will be played back repeatedly. To resume normal playback, press PLAY/STOP•ENTER again. Playing Back All Messages in a Folder Continuously – the Continuous Play DISPLAY/ MENU... - Page 38 Press and hold DISPLAY/MENU to enter the menu mode. The menu mode window will be displayed. Press – + to select “CONT,” then press STOP•ENTER. Press – + to select “ON,” then press PLAY/STOP•ENTER. Press mode.
-
Page 39: Playing Back A Specified Section Repeatedly - A-B Repeat
Playing Back a Specified Section Repeatedly – A-B Repeat PLAY/STOP• ENTER During playback, press A-B to specify the starting point A. “A-B B” flashes. Press (repeat) A-B again to specify the finishing point B. “ ” and “A-B” are displayed and the specified section is played back repeatedly. -
Page 40: Adjusting The Playback Speed - The Dpc Function
Adjusting the Playback Speed – the DPC Function DISPLAY/ MENU – When you set “DPC” to “ON, ” you can adjust the playback speed between +100% and –50% of normal speed in the menu. The message is played back in natural tones thanks to the digital processing function. -
Page 41: Recording With Other Equipment
Press – + to adjust the speed of the playback, then press PLAY/STOP•ENTER. You can set the speed by 10% for + setting and by 5% for – setting. Press (stop) to exit the menu mode. To resume normal playback Set “DPC”... - Page 42 To record the sound of the IC recorder with other equipment, connect the (headphone) jack of the IC recorder to the audio input connector (minijack, stereo) of other equipment using an audio connecting cable*. Connect the (headphone) jack of the IC recorder to the audio input connector (stereo minijack) of other equipment using an audio...
-
Page 43: Playing Back A Message At A Desired Time With An Alarm
Playing Back a Message at a Desired Time with an Alarm DISPLAY/ MENU – You can sound an alarm and start playback of a selected message at a desired time. You can have the message played back on a specified date, once every week, or at the same time every day. - Page 44 Press – then press PLAY/STOP•ENTER. Set the alarm date and time. Press – day of the week, or “DAILY, ” then press PLAY/STOP•ENTER. When you select “DATE”: Set the year, month, day, hour, and minute in sequence, as described in “Step 2: Setting the Clock”...
- Page 45 When the set date and time comes At the set time, the alarm will sound for about 10 seconds and the selected message will be played back. (If you have selected “B-ONLY, ” only the alarm will sound.) During playback, “ALARM” will flash in the display window.
- Page 46 Notes When the clock has not been set or no messages are recorded, you cannot set the alarm. The alarm sounds even if you set “BEEP” to “OFF” in the menu (page 60). If you try to set the alarm to play back a ...
-
Page 47: Editing Messages
Editing Messages Erasing Messages You can erase the recorded messages one by one or all messages in a folder at a time. Notes Once a recording has been erased, you cannot retrieve it. If the message you want to erase is locked in ... - Page 48 Press ERASE while you are playing back the message you want to erase, or press and hold ERASE during the stop mode. A beep will sound and the message number and “ERASE” will flash. Press ERASE again. The message is erased and the remaining messages will be renumbered.
-
Page 49: Erasing All Messages In A Folder
Erasing all messages in a folder DISPLAY/ MENU – Select the folder containing the messages you want to erase when the IC recorder is in the stop mode. Press and hold DISPLAY/MENU to enter the menu mode. The menu mode window will be displayed. -
Page 50: Moving A Message To A Different Folder
Moving a Message to a Different Folder DISPLAY/ MENU – You can move the recorded messages to another folder. Select the message you want to move. Press and hold DISPLAY/MENU to enter the menu mode. The menu mode window will be displayed. -
Page 51: Dividing A Message Into Two
Press – + to select the folder that you want to move the message into, then press STOP•ENTER. The message is moved to the last position in the destination folder. When you move a message to another folder, the original message in the previous folder will be deleted. - Page 52 Press DIVIDE while you are playing back the message you want to divide. The current message number and “DIVIDE” flash. Press DIVIDE. A new number is added to the newer part of the divided message, and the message numbers of the following messages will be incremeted by one.
-
Page 53: Preventing Accidental Operation - The Hold Function
To play the divided message Each of the divided messages now has message number. Press – to select the message number, then press PLAY/STOP•ENTER. Preventing Accidental Operation – the HOLD Function To prevent accidental operation, slide the HOLD switch in the direction of arrow in the recording or playback mode. -
Page 54: Selecting The Display
To cancel the HOLD function Slide the HOLD switch in the opposite direction from that of the arrow. Note When the HOLD function is activated during recording, cancel the HOLD function first to stop recording. Even if the HOLD function is activated, you can stop the alarm playback. - Page 55 Press DISPLAY/MENU. Each time you press DISPLAY/MENU, the display will change as shown below. REC DATE indicator REMAIN indicator Elapsed time Remaining time with the REMAIN indicator date with the REC DATE indicator* Recorded time with the REC DATE ...
-
Page 56: Utilizing The Menu Function
Utilizing the Menu Function Making Settings for the Menu DISPLAY/ MENU – Press and hold DISPLAY/MENU to enter the menu mode. The menu mode window will be displayed. Press – menu item for which you want to make setting, then press STOP•ENTER. -
Page 57: Menu Settings
Menu settings Menu items Settings MODE LP, SP, HQ, SHQ SENS ON, OFF LOCK ON, OFF ON (–50% to +100%), OFF EASY-S ON, OFF CONT ON, OFF REC-OP ON (ADD, OVER), OFF SET DATE HOUR 12H, 24H BEEP ON, OFF ON, OFF ALL ERASE MOVE... - Page 58 Menu items Settings (*: Initial setting) MODE Sets the recording mode. Long play monaural recording mode. Standard play monaural recording mode. High-quality monaural recording mode. SHQ*: Super high-quality monaural recording mode. SENS Sets the microphone sensitivity. To record at meeting or in a quiet and/or spacious place. To record dictation, or record in a noisy place.
- Page 59 Menu items Settings (*: Initial setting) Sets the DPC (Digital Pitch Control) function. You can adjust the speed of the playback in a range from +100% to –50, by 10% increments for the + setting and by 5% increments for the – setting. –30%* OFF*: The DPC function is cancelled.
- Page 60 Menu items Settings (*: Initial setting) REC-OP Adds a recording to a previously recorded message or adds an overwrite recording during playback. You can add a recording or overwrite a recording. OFF*: You cannot add a recording or overwrite a recording. SET DATE Sets the clock by setting year, month, day, hour, and minute in sequence.
- Page 61 Menu items Settings (*: Initial setting) Turns the operation indicator on or off during operation. ON*: During recording or playback, the operation indicator lights or flashes. OFF: The operation indicator does not light or flash, even during operation. ALL ERASE All messages in the selected folder will be erased.
-
Page 62: Troubleshooting
Troubleshooting Troubleshooting Before taking the IC recorder for repair, check the following sections. Should any problem persist after you have made these checks, consult your nearest Sony dealer. IC recorder Symptom The IC recorder cannot be turned off. The IC recorder cannot be turned on. - Page 63 Symptom Remedy The operation indicator does not light. “FULL” is displayed and you cannot start recording. “FULL” is displayed and you cannot operate the IC recorder. Recording is interrupted. Noise is heard. ...
- Page 64 Symptom When recording from other equipment, the input level is too strong or not strong enough. Playback speed is too fast or too slow. “--:--” is displayed. “--Y--M--D” or ” --:--” is displayed on the REC DATE display. There are fewer menu items displayed in the menu mode.
-
Page 65: Error Messages
Symptom Remedy It takes a long time for the IC recorder to start. The IC recorder does not operate correctly. Please note that recorded messages may be erased during service or repair work. Error messages Error message Cause/Remedy LO BATT ... - Page 66 Error message PRE SET BACK-D OFF REC-OP ERR ACCESS ERR 01 – ERR 05 Cause/Remedy You set the alarm when you have already set it previously. Check the setting and set the appropriate date and time. You set the alarm when the time has already passed. Check the ...
-
Page 67: System Limitations
System limitations There are some system limitations of the IC recorder. Troubles as mentioned below are not malfunctions of the IC recorder. Symptom Cause/Remedy You cannot record messages up to the maximum recording time. You cannot specify the ... -
Page 68: Additional Information
On maintenance To clean the exterior, use a soft cloth slightly moistened in water. Do not use alcohol, benzine or thinner. If you have any questions or problems concerning your unit, please consult your nearest Sony dealer. -
Page 69: Specifications
Backup recommendations To avoid potential risk of data loss caused by accidental operation or malfunction of the IC recorder, we recommend that you save a backup copy of your recorded messages on a tape recorder or to a computer, etc. Specifications IC recorder section Capacity (User available capacity) - Page 70 Power output 300 mW Input/Output Microphone jack (minijack, stereo) input for plug in power, minimum input level 0.5 mV, 3 kilohms or lower impedance microphone Headphone jack (minijack, stereo) output for 16 - 300 ohms headphones Playback speed control (DPC) +100% to –50% Power requirements...
-
Page 71: Index
Index A-B Repeat ...39 Adjusting the volume ...20, 35 Alarm ...43 Battery ...11 Battery indicator ...12 Battery life ...12 Beep ...60 Built-in microphones ...18 Cue ...35 Dividing a message ...51 DPC (the Digital Pitch Control function) ...40, 59 Easy Search ...35, 59 Editing Messages ...47 Erasing Messages...47 Error Messages ...65... - Page 72 LOCK ...57, 58 Making Settings...56 Menu settings ...57 MODE ...57, 58 MOVE ...57, 61 REC-OP ...57, 60 SENS ...57, 58 SET DATE ...57, 60 VOR ...57, 58 Message number ...9 Microphone sensitivity ...24, 58 Monitoring the recording ...20 Moving a Message ...50, 61 Noise ...68 Pause recording ...19, 26 Playing Back Messages ...34...
- Page 73 Trademark MPEG Layer-3 audio coding technology and patents licensed from Fraunhofer IIS and Thomson. All other trademarks and registered trademarks are trademarks or registered trademarks of their respective holders. Furthermore, “ ™ ” and “ ® ” are not mentioned in each case in this manual.