Table of Contents
Advertisement
4-249-721-12(1)
CD/DVD
Player
Operating Instructions
For customers in the U.S.A
Owner's Record
The model and serial numbers are located at the rear of the unit.
Record the serial number in the space provided below. Refer to them
whenever you call upon your Sony dealer regarding this product.
Model No. DVP-CX985V
Serial No.______________
For Customers in Canada
If this product is not working properly, please call 1-877-602-2008 for
Peace of Mind Warranty Replacement service.
For other product related questions please contact our Customer
Information Service Centre at 1-877-899-7669 or write to us at:
Customer Information Service 115 Gordon Baker Road, Toronto,
Ontario, M2H 3R6
DVP-CX985V
© 2003 Sony Corporation
Advertisement
Table of Contents

Related Manuals for Sony 480p


Summary of Contents for Sony 480p
-
Page 1: Operating Instructions
The model and serial numbers are located at the rear of the unit. Record the serial number in the space provided below. Refer to them whenever you call upon your Sony dealer regarding this product. Model No. DVP-CX985V Serial No.______________... -
Page 2: Warning
CAUTION TO PREVENT ELECTRIC SHOCK, MATCH WIDE BLADE OF PLUG TO WIDE SLOT, FULLY INSERT. Welcome! Thank you for purchasing this Sony CD/DVD Player. Before operating this player, please read this manual thoroughly and retain it for future reference. -
Page 3: Precautions
Wait for 10 seconds, then press ?/1 to turn off the player. The player enters standby mode. Disconnect the AC power cord. If you have any questions or problems concerning your player, please consult your nearest Sony dealer. -
Page 4: Table Of Contents
Table of Contents WARNING ........... . 2 Welcome! . - Page 5 Sound Adjustments ........68 Changing the Sound ......... . . 68 SURROUND Mode Settings .
-
Page 6: About This Manual
About This Manual • Instructions in this manual describe the controls on the remote. You can also use the controls on the player if they have the same or similar names as those on the remote. • “DVD” may be used as a general term for DVD VIDEOs, DVD-Rs, DVD-RWs, DVD+Rs, and DVD+RWs. - Page 7 Example of discs that the player cannot play The player cannot play the following discs: • All CD-ROMs (including PHOTO CDs)/ CD-Rs/CD-RWs other than those recorded in the following formats: –music CD format –video CD format –MP3 format that conforms to ISO9660* Level 1/Level 2, or its extended format, Joliet •...
-
Page 8: Notes About The Discs
Notes About the Discs • To keep the disc clean, handle the disc by its edge. Do not touch the surface. • Do not expose the disc to direct sunlight or heat sources such as hot air ducts, or leave it in a car parked in direct sunlight as the temperature may rise considerably inside the car. -
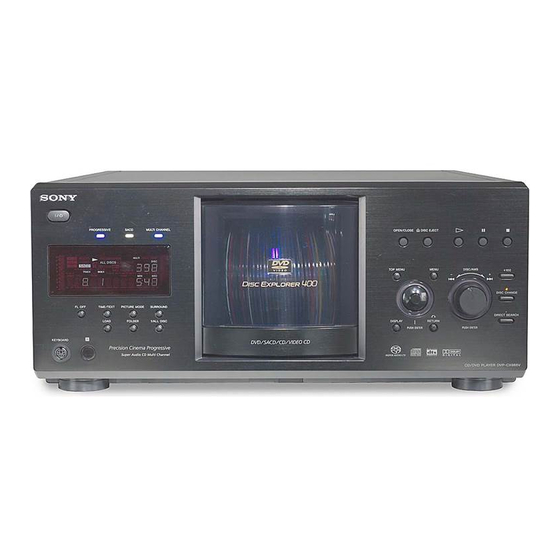
Page 9: Index To Parts And Controls
Index to Parts and Controls For more information, see the pages in parentheses. Front panel A [/1 (on/standby) button (32) B PROGRESSIVE indicator (87) Lights up when the player outputs progressive signals. C SACD (Super Audio CD) indicator Lights up when: —... -
Page 10: Front Panel Display
Front panel display When playing back a DVD VIDEO/DVD-RW Disc type Current title and chapter (65) When playing back a VIDEO CD with Playback Control (PBC) (40) Disc type Playing status Current scene (65) When playing back a CD, Super audio CD, DATA CD (MP3 audio), or VIDEO CD (without PBC) Disc type (“SACD”... - Page 11 To turn off the front panel display Press FL OFF on the player. The front panel display turns off, and the FL OFF indicator on the player lights up. z Hint You can adjust the lighting of the front panel display by setting “DIMMER”...
- Page 12 Rear panel A DIGITAL OUT (COAXIAL) jack (24) (25) (26) B DIGITAL OUT (OPTICAL) jack (24) (25) (26) C 5.1CH OUTPUT jacks (26) D LINE OUT AUDIO L/R 1/2 jacks (23) (24) (25) E LINE OUT VIDEO 1/2 jacks (19) F S VIDEO OUT 1/2 jacks (19) G COMPONENT VIDEO OUT (Y, P ) jacks (19)
- Page 13 Remote A TV/DISC EXPLORER/DVD switch (50)(82) B OPEN/CLOSE button (34) C Number buttons (37) The number 5 button has a tactile dot.* D CLEAR button (44) E SUR (surround) button (69) F PICTURE MODE button (75) G SUBTITLE button (73) H AUDIO button (68) I PICTURE NAVI (picture navigation) button (62)
-
Page 14: Guide To The Control Menu Display
Guide to the Control Menu Display Use the Control Menu to select a function and to view related information. After sliding the TV/ DISC EXPLORER/DVD switch to DVD, press DISPLAY/FILE repeatedly to turn on or change the Control Menu display as follows: Control Menu display 1 Control Menu display 2 (DVD/VIDEO CD/Super Audio CD/CD only) ADVANCED display (DVD only, see page 66) - Page 15 List of Control Menu items Item Item Name, Function, Relevant Disc Type DISC (page 60) Selects the disc to be played. TITLE (page 60)/SCENE (page 60)/TRACK (page 60) Selects the title, scene, or track to be played. CHAPTER (page 60)/INDEX (page 60) Selects the chapter or index to be played.
- Page 16 SETUP (page 85) QUICK Setup Use Quick Setup to choose the desired language of the on-screen display, the aspect ratio of the TV, and the audio output signal, and the size of the speakers you are using. CUSTOM Setup In addition to the Quick Setup setting, you can adjust various other settings. RESET Returns the settings in “SETUP”...
-
Page 17: Hookups
Hookups Hooking Up the Player Follow steps 1 to 6 to hook up and adjust the settings of the player. Notes • Plug cords securely to prevent unwanted noise. • Refer to the instructions supplied with the components to be connected. •... - Page 18 When you have more than one Sony DVD player If the supplied remote interferes with your other Sony DVD player, set the command mode for this player and the supplied remote to one that differs from the other Sony DVD player.
-
Page 19: Step 3: Connecting The Video Cords
Step 3: Connecting the Video Cords Connect this player to your TV monitor, projector, or AV amplifier (receiver) using a video cord. Select one of the patterns A through C, according to the input jack on your TV monitor, projector, or AV amplifier (receiver). In order to view progressive signal pictures with a compatible TV, projector, or monitor, you must use pattern C. - Page 20 In case of 480 progressive scan picture problems, it is recommended that the user switch the connection to the ‘standard definition’ output. If there are questions regarding our TV set compatibility with this model 480p DVD player, please contact our customer service center.
-
Page 21: Step 4: Connecting The Audio Cords
Step 4: Connecting the Audio Cords Refer to the chart below to select the connection that best suits your system. Be sure to also read the instructions for the components you wish to connect. Select a connection Select one of the following connections, Components to be connected •... - Page 22 z Hint If you have an AV amplifier that conforms to the 96 kHz sampling frequency, use connection * Manufactured under license from Dolby Laboratories. “Dolby,” “Pro Logic,” and the double-D symbol are trademarks of Dolby Laboratories. **“DTS” and “DTS Digital Surround” are registered trademarks of Digital Theater Systems, Inc.
- Page 23 Connecting to your TV This connection will use your TV’s speakers for sound. CD/DVD player (white) (red) (yellow)* to LINE OUT AUDIO L/R 1 or 2 l : Signal flow * The yellow plug is used for video signals (page 19). z Hint When connecting to a monaural TV, use a stereo- mono conversion cord (not supplied).
- Page 24 Connecting to a stereo amplifier (receiver) and 2 speakers/Connecting to an MD deck or DAT deck If the stereo amplifier (receiver) has audio input jacks L and R only, use (receiver) has a digital input jack, or when connecting to an MD deck or DAT deck, use In this case, you can also connect the player directly to the MD deck or DAT deck without using your stereo amplifier (receiver).
- Page 25 Connecting to an AV amplifier (receiver) having a Dolby Surround (Pro Logic) decoder and 3 to 6 speakers You can enjoy the Dolby Surround effects only when playing Dolby Surround audio or multi- channel audio (Dolby Digital) discs. If your amplifier (receiver) has L and R audio input jacks only, use (receiver) has a digital input jack, use CD/DVD player Optical digital cord...
- Page 26 Connecting to an AV amplifier (receiver) with 5.1 ch input jacks and/or a digital input jack and 4 to 6 speakers If your AV amplifier (receiver) has 5.1 channel inputs, use If you want to use the Dolby Digital, or DTS decoder function on your AV amplifier (receiver), connect to its digital jack using realistic audio presence in the comfort of your own home.
- Page 27 : Connecting to the 5.1ch input jacks You can enjoy 5.1ch surround sound using the internal Dolby Digital, DTS, or Super Audio CD Multi decoder of this player. (when 6 speakers are connected, set “SURROUND” to “OFF.”) You can also enjoy Dolby Surround (Pro Logic) sound, or surround sounds using various “SURROUND”...
-
Page 28: Step 5: Connecting The Power Cord
Step 5: Connecting the Power Cord Plug the power cords of the player and TV into an AC outlet. Step 6: Quick Setup Follow the steps below to make the minimum number of basic adjustments for using the player. To skip an adjustment, press >. To return to the previous adjustment, press .. Turn on the TV. - Page 29 SCREEN SETUP 4:3 LETTER BOX TV TYPE: SCREEN SAVER: 4:3 LETTER BOX BACKGROUND: 4:3 PAN SCAN COMPONENT OUT: 4:3 OUTPUT: Press X/x to select the setting that matches your TV type. If you have a 4:3 standard TV • 4:3 LETTER BOX or 4:3 PAN SCAN (page 87) If you have a wide-screen TV or a 4:3 standard TV with a wide-screen mode...
-
Page 30: Center Speaker
• DOLBY DIGITAL (only if the amplifier (receiver) has a Dolby Digital decoder) (page 91) Press ENTER. “DTS” is selected. AUDIO SETUP AUDIO ATT: AUDIO DRC: AUDIO FILTER: DOWNMIX: DIGITAL OUT: DOLBY DIGITAL: DTS: 48kHz/96kHz PCM: Press X/x to select the type of DTS signal sent to your amplifier (receiver). - Page 31 Audio connection (pages 23 to 26) • No additional settings are needed. • Set “DOWNMIX” to “DOLBY SURROUND” (page 91). • Set “DOWNMIX” to “DOLBY SURROUND” (page 91). • Set “DIGITAL OUT” to “ON” (page 91). • Set “DISTANCE,” “BALANCE,” and “LEVEL”...
-
Page 32: Playing Discs
Playing Discs Inserting Discs You can insert up to 400 discs into this player. Front cover .–/>+ /ENTER dial Press The player turns on. Press OPEN/CLOSE. The front cover opens. Press DISC CHANGE. The DISC CHANGE indicator lights up. While checking the disc slot number indicated on the front panel display or by the slot, turn the .–/>+/ ENTER dial until you find the disc slot... -
Page 33: Playing Discs
To remove discs A DISC EJECT OPEN/ CLOSE .–/>+/ENTER dial DISC CHANGE Press OPEN/CLOSE. Press DISC CHANGE. While checking the disc slot number indicated on the front panel display or by the slot, turn the .–/>+/ENTER dial until you find the disc you want to remove. - Page 34 Press H. The player starts playing the selected disc. Adjust the volume on the TV or the amplifier (receiver). Depending on the disc, a menu may appear on the TV screen. For DVD VIDEOs, see page 37. For VIDEO CDs, see page 40.
- Page 35 Operation On the player: Skip disc slots To skip 100 disc slots ahead, press +100. Press ENTER to start playback. On the remote: After sliding the TV/ DISC EXPLORER/ DVD switch to DISC EXPLORER or DVD, press DISC SKIP +/– . Stop Press x.
-
Page 36: Resuming Playback From The Point Where You Stopped The Disc (Resume Play)
Resuming Playback From the Point Where You Stopped the Disc Play) The player remembers the point where you stopped the disc, even if you press [/1 and the player enters standby mode. While playing a disc, press x to stop playback. “RESUME”... -
Page 37: Using The Dvd's Menu
Using the DVD’s Menu A DVD is divided into long sections of a picture or a music feature called “titles.” When you play a DVD which contains several titles, you can select the title you want using the TOP MENU/EDIT button. When you play DVDs that allow you to select items such as the language for the subtitles and the language for the sound, select these... -
Page 38: Selecting "Original" Or "Play List" On A Dvd-Rw
Selecting “ORIGINAL” or “PLAY LIST” on a DVD- Some DVD-RWs in VR (Video Recording) mode have two types of titles for playback: originally recorded titles (ORIGINAL) and edited titles created on recordable DVD players (PLAY LIST). You can select the type of titles to be played. -
Page 39: Selecting A Playback Area For A Super Audio Cd
Selecting a Playback Area for a Super Audio SACD MULTI/ Selecting a playback area on a 2 channel + Multi-channel Super Audio CD Some Super Audio CDs consist of a 2 channel playback area and a multi-channel playback area. You can select the playback area you want to listen to. -
Page 40: Playing Video Cds With Pbc Functions (Pbc Playback)
Playing VIDEO CDs With PBC Functions PBC (Playback Control) allows you to play VIDEO CDs interactively by following the menu on the TV screen. Number buttons ./> Start playing a VIDEO CD with PBC functions. A menu appears. Select the item number and track you want using X/x or the number buttons. -
Page 41: Selecting And Playing An Mp3 Audio Track
Selecting and Playing an MP3 Audio Track You can play selected tracks on DATA CDs (CD-ROMs/CD-Rs/CD-RWs) recorded in MP3 (MPEG1 Audio Layer 3) format. C/X/x/c Select a disc (page 34). Press MENU/SORT. The list of MP3 albums recorded on the DATA CD appears. - Page 42 About MP3 audio tracks You can play MP3 audio tracks on CD- ROMs, CD-Rs, or CD-RWs. However, the discs must be recorded according to ISO9660 level 1, level 2, or Joliet format for the player to recognize the tracks. You can also play discs recorded in Multi Session.
-
Page 43: Various Play Mode Functions (Program Play, Shuffle Play, Repeat Play, A-B Repeat Play)
Notes • Depending on the software you use to create the DATA CD, the playback order may differ from the illustration above. • The playback order above may not be applicable if there are more than a total of 999 albums and tracks in the DATA CD. -
Page 44: Creating Your Own Program
Press X/x to select (ONE/ALL DISCS) and press ENTER. The options for “ONE DISC/ALL DISCS” appear. 1 2 ( 2 7 ) 1 8 ( 3 4 ) ALL DISCS ALL DISCS ONE DISC Press X/x to select an item. •... - Page 45 Titles or tracks Disc type recorded on a disc PROGRAM 003 : DVD ALL CLEAR 1. – – – – 2. – – – – 3. – – – – 4. – – – – 5. – – – – 6.
-
Page 46: Playing In Random Order (Shuffle)
z Hint You can set Repeat Play or Shuffle Play for the programmed titles, chapters, or tracks. During Program Play, follow the steps of “Repeat Play” (page 46) or “Shuffle Play” (page 46). Note Program Play will not start if you select One Disc mode and the program does not include anything from the current disc. -
Page 47: Repeat Play
CLEAR REPEAT Press REPEAT during playback. The following display appears. DISC Press REPEAT repeatedly to select the item to be repeated. When playing a DVD VIDEO • DISC: repeats all of the titles on the current disc in One Disc mode, or all of the discs in All Discs mode. - Page 48 1 2 ( 2 7 ) 1 8 ( 3 4 ) Press X/x to select “SET t,” then press ENTER. The “A-B REPEAT” setting display appears. A-B REPEAT Set point A with ENTER During playback, when you find the starting point (point A) of the portion to be played repeatedly, press ENTER.
-
Page 49: Searching For And Managing Discs (Disc Explorer)
Searching for and Managing Discs (Disc Explorer) Displaying the Disc Information You can search for a disc by checking the contents of all the discs loaded in the player on your TV screen. Loading the disc information LOAD Press LOAD when the player is in stop or standby mode. - Page 50 Genre You can select the genre of the disc yourself (page 56). Disc type The disc type, such as DVD, appears automatically. If the slot does not contain a disc, the disc type row is blank.“?” appears when the player has not loaded the disc information in its memory.
- Page 51 Capturing a scene for a jacket picture You can capture your favorite scene in a disc to create a personal jacket picture. A personalized jacket picture will make spotting the disc in the Disc Explorer easier. This function is available only if the disc does not contain a pre-recorded jacket picture.
-
Page 52: Filing Discs In The Folder (File Mode)
Filing Discs in the Folder (File Mode) You can file your discs in four individual folders, “A” to “D.” Even if you file discs from folders “ALL,” “DVD,” or “CD” to folders “A” to “D,” those discs are not deleted from the “ALL,”... - Page 53 Deleting discs from a folder You can delete unnecessary discs from folders “A” to “D.” You cannot delete discs from folders “ALL,” “DVD,” or “CD” unless you remove the disc from the player. Press FOLDER repeatedly to select the folder containing the disc you want to delete.
-
Page 54: Labeling Discs And Folders (Edit Mode)
Labeling Discs and Folders (Edit Mode) You can label the disc with a personal title of 16 characters (Disc Memo) (when DVD/CD text is not recorded on the disc). you can also label the folders “A” to “D” with a title of 3 characters. - Page 55 Repeat steps 3 and 4 to input other characters. When you have entered all of the characters for the Disc Memo or folder name, press TOP MENU/EDIT. The “DISC MEMO INPUT” display or the “FOLDER NAME INPUT” display disappears and the Disc Memo or folder name is stored.
- Page 56 Notes • If the cursor keys do not work correctly and you cannot complete the task using the keyboard, disconnect the keyboard. Then, reconnect it to the player and try again. • If the keyboard is not a USA model, the characters may be input differently from those on the keys.
-
Page 57: Sorting Discs (Sort Mode)
Sorting Discs (Sort Mode) You can sort the discs in the folder by the disc slot number, text information (DVD/Super Audio CD/CD TEXT or Disc Memo) or genre. The text information is sorted alphabetically. C/X/x/c Press FOLDER repeatedly to select the folder you want to sort. - Page 58 Super Car Chase MONACO Skiing the World Highway Touring BRAHMS SYMPHONY4 Music Madness To cancel the sort mode Press RETURN. SORT the Disc Explorer. If you press RETURN again, the Disc Explorer turns off. z Hint The discs in the same genre are sorted by numerial order according to the disc slot number.
-
Page 59: Searching For A Scene
Searching for a Scene Searching for a Particular Point on a Disc (Search, Scan, Slow-motion Play, Freeze Frame) You can quickly locate a particular point on a disc by monitoring the picture or playing back slowly. Note Depending on the DVD/VIDEO CD, you may not be able to do some of the operations described. -
Page 60: Searching For A Title/Chapter/Track/Scene, Etc
Playback direction y SLOW1 SLOW2 Opposite direction (DVD only) y SLOW1 SLOW2 The “SLOW2 y”/“SLOW2 speed is slower than “SLOW1 y”/“SLOW1 .” Playing one frame at a time (Freeze Frame) When the player is in the pause mode, press C to go to the next frame. Press c to go to the preceding frame (DVD only). - Page 61 Select “TIME/TEXT” to search for a starting point by inputting the time code. When playing a VIDEO CD without PBC Playback DISC TRACK INDEX When playing a VIDEO CD with PBC Playback DISC SCENE INDEX When playing a Super Audio CD/CD DISC TRACK INDEX...
-
Page 62: Searching By Scene (Picture Navigation)
• You can search for a chapter (DVD VIDEO/ DVD-RW only) or track (Super Audio CD/CD/ DATA CD only) by pressing the number buttons and ENTER. Notes • You cannot search for a still picture on a DVD- RW in VR mode. •... - Page 63 Press C/X/x/c to select a title, chapter, or track, and press ENTER. Playback starts. To return to normal play Press O RETURN. z Hints • If there are more than 9 titles, chapters, or tracks, V is displayed at the bottom right of the screen. To display the additional titles, chapters, or tracks, select the bottom right scene (located at box 9) and press x.
-
Page 64: Viewing Information About The Disc
Viewing Information About the Disc Checking the Playing Time and Remaining Time You can check the playing time and remaining time of the current title, chapter, or track. Also, you can check the DVD/Super Audio CD/CD text or track name (MP3 audio) recorded on the disc. - Page 65 Checking the information on the front panel display You can view the time information and text on the front panel display as well as on the TV screen. The information on the front panel display changes as follows when you change the time information on your TV screen.
-
Page 66: Checking The Play Information
z Hints • When playing VIDEO CDs with PBC functions, the disc number, scene number and the playing time are displayed. • Long text that does not fit in a single line will scroll across the front panel display. • You can also check the time information and text by pressing the TIME/TEXT button on the player. - Page 67 To close the ADVANCED display Select “OFF” in step 3. To turn off the Control Menu Press DISPLAY/FILE repeatedly until the Control Menu is turned off. Displays of each item By pressing DISPLAY/FILE repeatedly, you can display either “BIT RATE” or “LAYER,” whichever was selected in “ADVANCED.”...
-
Page 68: Sound Adjustments
Sound Adjustments Changing the Sound When playing a DVD recorded in multiple audio formats (PCM, Dolby Digital, or DTS), you can change the audio format. If the DVD is recorded with multilingual tracks, you can also change the language. With CDs, DATA CDs, or VIDEO CDs, you can select the sound from the right or left channel and listen to the sound of the selected channel through both the right and left... -
Page 69: Surround Mode Settings
Current audio format* 1 2 3 1 2 ( 2 7 ) 1 8 ( 3 4 ) 1 : 3 2 : 5 5 1: ENGLISH PROGRAM FORMAT DOLBY DIGITAL 3/2.1 Currently playing program format** * “PCM,” “DTS,” or “DOLBY DIGITAL” is displayed. - Page 70 (L: left, R: right) without using actual rear speakers. TVS was developed by Sony to produce surround sound for home use using just a stereo TV.
- Page 71 NORMAL SURROUND Software with 2 channel audio signals is decoded with the Dolby Surround (Pro Logic) decoder to create surround effects. The rear speakers will emit identical monaural sounds. If you are using a center speaker, the appropriate sounds for the center speaker will be delivered.
- Page 72 L : Front speaker (left) R : Front speaker (right) LS: Rear speaker (left) RS: Rear speaker (right) : Virtual speaker z Hints • You can select “SURROUND” by pressing the SURROUND button on the player. • You can also select “SURROUND” from the Control Menu (page 15).
-
Page 73: Enjoying Movies
Enjoying Movies Changing the Angles If various angles (multi-angles) for a scene are recorded on the DVD VIDEO, “ANGLE” appears in the front panel display. This means that you can change the viewing angle. Press ANGLE during playback. The number of the angle appears on the display. -
Page 74: Adjusting The Picture Quality (Bnr)
To turn off the subtitles Select “OFF” in step 2. z Hint You can also select “SUBTITLE” from the Control Menu (page 15). Note Depending on the DVD VIDEO, you may not be able to change the subtitles even if multilingual subtitles are recorded on it. -
Page 75: Adjusting The Playback Picture (Custom Picture Mode)
Press ENTER. The disc plays with the setting you selected. To cancel the “BNR” setting Select “OFF” in step 3. To turn off the Control Menu Press DISPLAY repeatedly until the Control Menu is turned off. Notes • If the outlines of the images on your screen become blurred, set “BNR”... - Page 76 Press PICTURE MODE repeatedly to select the setting you want. The default setting is underlined. • STANDARD: displays a standard picture. • DYNAMIC 1: produces a bold dynamic picture by increasing the picture contrast and the color intensity. • DYNAMIC 2: produces a more dynamic picture than DYNAMIC 1 by further increasing the picture contrast and the color intensity.
-
Page 77: Enhancing The Playback Picture (Digital Video Enhancer)
Enhancing the Playback Picture (DIGITAL VIDEO ENHANCER) The Digital Video Enhancer (DVE) function makes the picture appear clear and crisp by enhancing the outlines of images on your TV screen. Also, this function can soften the images on the screen. DISPLAY Press DISPLAY twice during playback. -
Page 78: Using Various Additional Functions
Using Various Additional Functions Locking Discs PARENTAL CONTROL, PARENTAL CONTROL) You can set two kinds of playback restrictions for the desired disc. • Custom Parental Control You can set playback restrictions so that the player will not play inappropriate discs. •... - Page 79 Enter or re-enter your 4-digit password using the number buttons, then press ENTER. “Custom parental control is set.” appears and the screen returns to the Control Menu. To turn off the Custom Parental Control function Follow steps 1 to 3 of “Custom Parental Control.”...
- Page 80 Press X/x to select “PLAYER t,” then press ENTER. If you have not entered a password The display for registering a new password appears. PARENTAL CONTROL Enter a new 4-digit password, then press ENTER Enter a 4-digit password using the number buttons, then press ENTER.
-
Page 81: Changing The Password
To play a disc for which Parental Control is Select the disc and press H. The display for entering your password appears. Enter your 4-digit password using the number buttons, then press ENTER. The player starts playback. z Hint If you forget your password, press OPEN/CLOSE to open the front cover and repeat steps 1 to 3 of “Parental Control (limited playback).”... -
Page 82: Controlling Your Tv Or Av Amplifier (Receiver) With The Supplied Remote
If you make a mistake entering your password Press C before you press ENTER and input the correct number. If you make a mistake Press O RETURN. To turn off the display Press DISPLAY/FILE repeatedly until the display is turned off. Controlling Your TV or AV Amplifier (Receiver) With the Supplied Remote... - Page 83 Number buttons Selects the channel of the TV and ENTER WIDE MODE Switches to or from the wide mode of a Sony wide TV TV/VIDEO Switches the TV’s input source between the TV and other input sources The button works even if the...
- Page 84 Technics 97, 98 Yamaha 94, 95, 96 * If you cannot control the volume of your Sony AV amplifier (receiver) with the remote, try entering the code number 91, and change the command mode of your amplifier (receiver) to “COMMAND MODE [AV1]” (not all amplifiers have this option).
-
Page 85: Settings And Adjustments
Settings and Adjustments Using the Setup Display By using the Setup Display, you can make various adjustments to items such as picture and sound. You can also set a language for the subtitles and the Setup Display, among other things. For details on each Setup Display item, see pages 86 to 94. -
Page 86: Setting The Display Or Sound Track Language (Language Setup)
Press X/x to select a setting, then press ENTER. The setting is selected and setup is complete. Example: “16:9” SCREEN SETUP TV TYPE: SCREEN SAVER: BACKGROUND: COMPONENT OUT: 4:3 OUTPUT : To turn off the display Press DISPLAY repeatedly until the display is turned off. -
Page 87: Settings For The Display (Screen Setup)
Settings for the Display (SCREEN SETUP) Choose settings according to the TV to be connected. Select “SCREEN SETUP” in the Setup Display. To use the display, see “Using the Setup Display” on page 85. The default settings are underlined. SCREEN SETUP TV TYPE: SCREEN SAVER: BACKGROUND:... - Page 88 To switch the video signal format If you have selected “PROGRESSIVE” for a TV that does not accept signals in progressive format 480p, or if the software’s video signals are not suited for progressive video signal conversion, view the image in Interlace format.
-
Page 89: Custom Settings (Custom Setup)
Custom Settings SETUP) Use this to make playback related adjustments and other settings. Select “CUSTOM SETUP” in the Setup Display. To use the display, see “Using the Setup Display” (page 85). The default settings are underlined. CUSTOM SETUP CUSTOM SETUP AUTO POWER OFF: AUTO POWER OFF: AUTO PLAY:... -
Page 90: Settings For The Sound (Audio Setup)
Notes • When you set the item to “AUTO,” the language may change. The “TRACK SELECTION” setting has higher priority than the “AUDIO” settings in “LANGUAGE SETUP” (page 86). • If PCM, DTS, and Dolby Digital sound tracks have the same number of channels, the player selects PCM, DTS, and Dolby Digital sound tracks in this order. - Page 91 AUDIO FILTER (except Super Audio CD) Selects a digital filter to reduce noise above 22.05 kHz (Sampling frequency (Fs) of the audio source is 44.1 kHz), 24 kHz (Fs is 48 kHz), or 48 kHz (Fs is above 96 kHz). SHARP Provides a wide frequency range and spatial feeling.
-
Page 92: Settings For The Speakers (Speaker Setup)
• 48kHz/96kHz PCM (DVD VIDEO only) Selects the sampling frequency of the audio signal. 48kHz/16bit The audio signals of DVD VIDEOs are always converted to 48kHz/16bit. 96kHz/24bit All types of signals including 96kHz/24bit are output in their original format. However, if the signal is encrypted for copyright protection purposes, the signal is only output as... - Page 93 • REAR LARGE Normally select this position. (REAR/ Select according to the rear SIDE) speakers position*. SMALL Select this when the sound (REAR/ distorts or the surround effects SIDE) are difficult to hear. Select according to the rear speaker position*. NONE Select this if you do not connect rear speakers.
-
Page 94: Adjusting The Speaker Volume
BALANCE Varies the balance of the left and right speakers. Be sure to set “TEST TONE” to “ON” for easy adjustment. The default adjustments are in parentheses. FRONT Set this between –6 dB [L] and +6 dB [R] (0.5 dB increments). (0 dB) REAR Set this between –6 dB [L] and... -
Page 95: Additional Information
Normally leave the switch in this position when using the COMPONENT VIDEO OUT jacks. , Even if your TV is compatible with progressive format 480p signals, the image may be affected when you set “COMPONENT OUT” to “PROGRESSIVE.” In this case, set “COMPONENT OUT”... - Page 96 The sound only comes from the center speaker. , Depending on the disc, the sound may come from the center speaker only. Operation The remote does not function. , The batteries in the remote are weak. , There are obstacles between the remote and the player.
-
Page 97: Self-Diagnosis Function (When Letters/Numbers Appear In The Display)
, Child Lock is set (page 35). The front cover does not open and “TRAY LOCKED” appears on the front panel display. , Contact your Sony dealer or local authorized Sony service facility. “Data error” appears on the TV screen when playing a DATA CD. -
Page 98: Glossary
Glossary Chapter (page 10, 15, 60) Sections of a picture or a music feature that are smaller than titles. A title is composed of several chapters. Depending on the disc, no chapters may be recorded. Dolby Digital (page 26, 91) Digital audio compression technology developed by Dolby Laboratories. - Page 99 Interlace format (page 87) Interlace format shows every other line of an image as a single “field” and is the standard method for displaying images on television. The even number field shows the even numbered lines of an image, and the odd numbered field shows the odd numbered lines of an image.
- Page 100 You can play the CD layer using a conventional CD player. • 2 channel + Multi-channel Super Audio CD This disc consists of the 2 channel playback area and the multi-channel playback area.
-
Page 101: Specifications
Supplied accessories See page 17. Specifications and design are subject to change without notice. NERGY As an NERGY Corporation has determined that this product meets the NERGY energy efficiency. in.) (width/height/depth) ° is a U.S. registered mark. Partner, Sony guidelines for... -
Page 102: Language Code List
Language Code List For details, see pages 68, 73, 86. The language spellings conform to the ISO 639: 1988 (E/F) standard. Code Language 1027 Afar 1028 Abkhazian 1032 Afrikaans 1039 Amharic 1044 Arabic 1045 Assamese 1051 Aymara 1052 Azerbaijani 1053 Bashkir 1057 Byelorussian 1059 Bulgarian 1060 Bihari... -
Page 103: Index
Index Numerics 16:9 87 4:3 LETTER BOX 87 4:3 OUTPUT 88 4:3 PAN SCAN 87 48kHz/96kHz PCM 92 5.1 Channel Surround 21 A-B REPEAT 47 ADVANCED 66 ALBUM 61 Album 41 ANGLE 73 AUDIO 68 AUDIO ATT 90 AUDIO DRC 90 AUDIO FILTER 91 AUDIO SETUP 90 AUTO PLAY 89... - Page 104 Slow-motion Play 59 SORT 57 SPEAKER SETUP 92 Speakers Hooking up 21 SUBTITLE 73 Super Audio CD 39 SURROUND 69 Sony Corporation Printed in Malaysia TEST TONE 94 TIME/MEMO 15 TIME/TEXT 15 TITLE 15 Title 10 TITLE VIEWER 62 TOP MENU 37...