Sony EXMOR PMW-EX1 Operating Instructions Manual
Solid-state memory camcorder
Hide thumbs
Also See for EXMOR PMW-EX1:
- Service manual (220 pages) ,
- Operating instructions manual (139 pages) ,
- Getting started (9 pages)

Related Manuals for Sony EXMOR PMW-EX1


Summary of Contents for Sony EXMOR PMW-EX1
- Page 1 3-278-905-13(1) 3278905130 Solid-State Memory Camcorder PMW-EX1 Operating Instructions Printed in Japan © 2007 Sony Corporation...
- Page 2 Electromagnetic Environments: E1 (residential), E2 (commercial and light industrial), E3 (urban outdoors), E4 (controlled EMC environment, ex. TV studio) The manufacturer of this product is Sony Corporation, 1-7-1 Konan, Minato-ku, Tokyo, Japan. The Authorized Representative for EMC and product safety is Sony Deutschland GmbH, Hedelfinger Strasse 61, 70327 Stuttgart, Germany.
- Page 3 E1 (résidentiel), E2 (commercial et industrie légère), E3 (urbain extérieur) et E4 (environnement EMC contrôlé, ex. studio de télévision). Le fabricant de ce produit est Sony Corporation, 1-7-1 Konan, Minato-ku, Tokyo, Japon. Le représentant autorisé pour EMC et la sécurité des produits est Sony Deutschland GmbH, Hedelfinger Strasse 61, 70327 Stuttgart, Allemagne.
-
Page 4: Table Of Contents
Reading the CD-ROM Manuals ... 12 System Requirements for Using the Applications ... 13 Software Installation ... 13 Parts Identifications ... 14 Camcorder ... 14 IR Remote Commander (Supplied) ... 18 On-Screen Indications ... 19 Indications in Camera Mode ... 19 Direct Menu Operation ... - Page 5 Recording Basic Operation Procedure ... 34 Selecting the Video Format ... 36 Switching the ND Filters ... 37 Adjusting the White Balance ... 38 Displaying the Markers and Zebra Patterns ... 40 Setting the Gain ... 42 Setting the Electronic Shutter ... 43 Adjusting the Iris ...
- Page 6 Table of Contents Using External Inputs ... 54 Using an External Microphone ... 54 Adjusting the Audio Recording Levels ... 55 Monitoring the Audio ... 55 Outputting the Color Bars and Reference Tone ... 56 Recording Shot Marks ... 56 Rec Review ...
- Page 7 Playback Playing Back Clips ... 78 Clip Operations ... 82 Status Displays Showing the Status Screens ... 89 CAMERA Status Screen ... 90 AUDIO Status Screen ... 91 VIDEO Status Screen ... 92 BUTTON/REMOTE Status Screen ... 92 BATTERY/MEDIA Status Screen ... 93 Menu Configuration and Detailed Settings Overview of the Setup Menus ...
- Page 8 Connecting External Monitors ... 110 Operating Clips With a Computer ... 111 Connecting an External Device (i.LINK Connection) ... 114 Recording the Camcorder Picture on an External Device ... 114 Nonlinear Editing ... 114 Recording External Input Signals ... 115 Important Notes on Operation ...
-
Page 9: Overview
Overview Package Configuration Make sure you have following items supplied with your camcorder. The number in parentheses indicates the number of that item supplied. Lens hood with lens cap (1) It is attached to the camcorder at the factory. If you attach an optional wide-conversion lens, remove the lens hood. -
Page 10: Features
Multiple-format recording The PMW-EX1 camcorder offers a wide array of recording formats for multiple content creation applications. The scanning mode is switchable among 1920 × 1080, 1280 × 720, and 1440 ×... - Page 11 Sony, XDCAM, XDCAM EX, SxS, i.LINK, Exmor, CineAlta, and Remote Commander are trademarks of Sony Corporation. HDV is a trademark of Sony Corporation and Victor Company of Japan, Limited. All other trademarks are the property of their respective owners.
-
Page 12: Using The Cd-Rom
XDCAM EX web sites For information on XDCAM EX, visit the following web sites: United States http://www.sony.com/xdcamex Canada http://www.sony.ca/xdcamex Europe, Middle East, Africa, and Russia http://www.sonybiz.net/xdcamex Latin America http://www.sonypro-latin.com/xdcamex Australia www.sony.com.au/xdcamex Asia (except Korea, China, and Japan) http://pro.sony.com.hk Korea http://bp.sony.co.kr/xdcamex China http://pro.sony.com.cn/minisite/XDCAMEX... -
Page 13: System Requirements For Using The Applications
“Preparations” above. Note If you have lost or damaged the CD-ROM, you can purchase a new one to replace it. Contact your Sony service representative. System Requirements for Using the Applications The following operating conditions are recommended for using the software recorded on... -
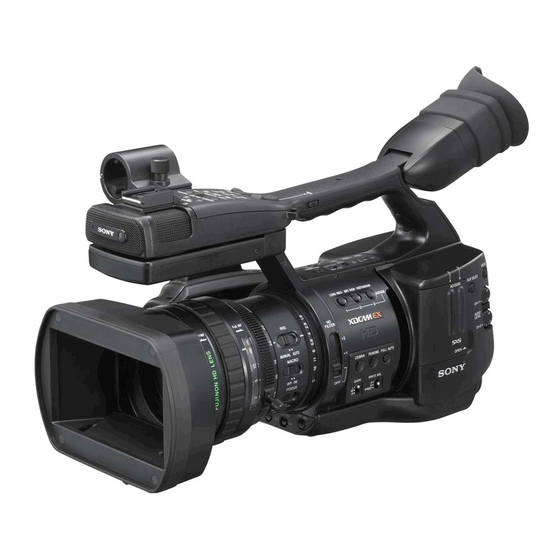
Page 14: Parts Identifications
Hood fixing screw To reattach the hood, align the marks on the hood with those on the camcorder, turn it in the opposite direction from that when you removed it, then tighten the fixing screw. Operation panel on the... - Page 15 B A T T E R R E L E A S S D I O Inside the cover COMPONENT A/V OUT Viewfinder (page 26) Eyecup (page 26) Eyepiece focusing knob (page 26) Headphone jack (stereo mini jack) (page 55, page 81) i.LINK (HDV) connector (4-pin, S400 conforming to IEEE1394) (page 114) Hooks for the shoulder strap (left and...
- Page 16 Operation panel on the handle MONITOR VOL THUMBNAIL SEL/SET CANCEL F REV PLAY/PAUSE F FWD PREV STOP NEXT START/STOP HOLD MONITOR VOL (volume) buttons (page 55, page 81) THUMBNAIL button (page 79) PLAY/PAUSE button (page 79) F REV (fast reverse) button (page 80) PREV (previous) button (page 80) STOP button (page 81) On-handle ZOOM button (page 46)
- Page 17 PUSH AF (momentary auto focus) button (page 49) Side operation panel LENS INFO BRT DISP HISTOGRAM ASSIGN FILTER ZEBRA PEAKING FULL AUTO GAIN WHITE BAL PRST ND filter select switch (page 37) ASSIGN (assignable)1/2/3 buttons (page PEAKING button (page 49) FULL AUTO button and indicator (page ZEBRA button (page 41) WHITE BAL (white balance memory)
-
Page 18: Ir Remote Commander (Supplied)
Tripod receptacle Note Check that the size of the hole matches the screw of the tripod. If they do not match, the camcorder cannot be attached to the tripod securely. Backup battery holder (page 120) Parts Identifications IR Remote Commander (Supplied) -
Page 19: On-Screen Indications
On-Screen Indications Indications in Camera Mode When this unit is in Camera mode (mode for recording), pressing the DISPLAY/BATT INFO button displays the statuses and settings of this unit on the LCD monitor/viewfinder screen. When you press the DISPLAY/BATT INFO button again, these indications are canceled. -
Page 20: Direct Menu Operation
Time data indication [M] (page 53) Media remaining indication [M] (page 33) Zoom position indication [M] (page 46) TLCS mode indication [M][D] (page 101) Backlight mode STD STD Standard mode Spotlight mode Steady Shot indication [M][D] (page 51) Focus mode indication [M] ( [D] only in MF mode) (page 48) White balance mode and color temperature indications [M][D] (page 38) - Page 21 The Direct menu of the selected items appears. Example: Direct menu for TLCS mode selection TLCS TLCS TLCS 7 On ∗ 1 1.5 2 3 4 5 7 10 15 20 30 ATW 4300K PPOFF ND1 ++ F1.9 18dB SHT:1/200 Tilt the joystick or rotate the jog dial to select the setting then press the joystick or the jog dial.
-
Page 22: Preparations
Using a Battery Pack Mount a BP-U30 or BP-U60 Lithium-ion battery pack. One BP-U30 is supplied with this camcorder. Notes • Before use, charge the battery pack with the supplied BC-U1 Battery Charger. -
Page 23: Using Ac Power (Dc In Power)
“Battery Alarm” (page 108) of the OTHERS menu. Using AC Power (DC IN Power) You can connect an AC power source to this camcorder by using the supplied BC-U1 Battery Charger for BP-U30/U60 as an AC adaptor, as shown below: STATUS... -
Page 24: Turning Power On
SxS memory cards. Setting the Clock Setting the Clock S&Q REC When you turn the camcorder on for the first time after purchasing or replacing the backup battery (page 120), the Initial Setting display appears on the LCD monitor/viewfinder screen. -
Page 25: Adjusting The Lcd Monitor And Viewfinder
DC IN connection), the Initial Setting display will be displayed when you turn the camcorder on at the next opportunity. • While the Initial Setting display is shown, no other operation except turning the power off is permitted until you finish the setting for this display. -
Page 26: Adjusting The Viewfinder
Adjusting the color, contrast, and brightness These adjustments can be made using the LCD/ VF SET menu. Press the MENU button to set the camcorder to Menu mode and select (LCD/VF SET menu) then “LCD” from the menu. Adjusting the LCD Monitor and Viewfinder... - Page 27 Eyepiece focusing knob OF F SE T SE L/ ZE BR ME NU AC CE PE AK SLO T SE LEC FU LL AU TO GA IN CH -1 CH -1 WH ITE BA L AU DI AU DIO SE LE LE VE PR ST CH -2...
-
Page 28: Adjusting The Grip
Activating/deactivating the remote control function can be achieved using the Setup menu or an assignable button. To activate using the menu Press the MENU button to set the camcorder to Menu mode, select and set “IR Remote” to “On.” OTHERS... - Page 29 If pressing the remote control buttons produces absolutely no effect on the camcorder, replace the battery then check the operation again. Replacing the battery in the IR Remote...
-
Page 30: Handling Sxs Memory Cards
Operations are not guaranteed with memory cards other than SxS PRO. These cards comply with the ExpressCard standard. • SxS and SxS PRO are trademarks of Sony Corporation. • The ExpressCard word mark and logo are owned by Personal Computer Memory Card International Association (PCMCIA) and are licensed to Sony Corporation. -
Page 31: Inserting/Removing An Sxs Memory Card
Write-protect switch Note Do not operate the write-protect switch of an SxS memory card while it is set in the camcorder. Temporarily remove the card from the camcorder before changing the switch setting. Inserting/Removing an SxS Memory Card SLOT SELECT button... -
Page 32: Switching Between Sxs Memory Cards
• When you turn the camcorder on by setting the power switch to MEDIA (Media mode), a display to show that an SxS memory card is being confirmed appears on the LCD monitor/ EVF screen. -
Page 33: Checking The Remaining Time Available For Recording
Copy necessary clips to another SxS memory card, using the copy function (page 85) of the camcorder or the XDCAM EX Clip Browsing Software (page 113). Format the problem SxS memory card, using the format function of this camcorder. -
Page 34: Basic Operation Procedure
When using the remote commander, activate the remote control mode (page 28). Note When you hold the camcorder by the grip, support it from underneath with your left hand. Recording (Full Auto mode) Press the FULL AUTO button so that the button indicator lights. - Page 35 “Setting the Electronic Shutter” on page 43 “Adjusting the White Balance” on page 38 Note AF (Auto Focus) is not activated by setting the camcorder to Full Auto mode. For information of automatic focus adjustment, see page 50. Press the REC START/STOP button.
-
Page 36: Selecting The Video Format
The selectable formats depend on whether “Country” (page 109) of the OTHERS menu is set to “NTSC Area” or “PAL Area.” The video formats set on this camcorder cover the recording bit rate (HQ/SP), recording picture size (effective resolution), recording frame rate, and recording scan system (i/P). -
Page 37: Changing The Format
50 Progressive HQ 1280 × 720 HQ 720/25P 25 Progressive Changing the Format Press the MENU button to set the camcorder to Menu mode, display the OTHERS menu with , and set “Video Format.” OTHERS Bat te r y INFO... -
Page 38: Adjusting The White Balance
B: ATW or Memory B mode A: Memory A mode PRST: Preset mode • Setting the camcorder to Full Auto mode (page 34) forcibly activates ATW mode. • Assigning the ATW on/off function to an assignable button permits you to independently activate/deactivate ATW when Full Auto mode is off. -
Page 39: Executing Auto White Balance
An error message is displayed on the screen for approximately three seconds. If the error message is displayed, try auto white- balance adjustment again. If the error message continues to be displayed after several attempts, consult your Sony service representative. Adjusting the White Balance... -
Page 40: Displaying The Markers And Zebra Patterns
This does not affect recording signals. Displaying the Markers Use “Marker” of the LCD/VF SET menu. Press the MENU button to set the camcorder to Menu mode, display the LCD/VF SET menu with , and select “Marker” from the menu. -
Page 41: Displaying The Zebra Patterns
Using “Zebra” of the LCD/VF SET menu, you can change the zebra pattern to be displayed. Press the MENU button to set the camcorder to Menu mode, display the LCD/VF SET menu with , and select “Zebra” from the menu. -
Page 42: Setting The Gain
These values can be changed in the range of –3 dB to +18 dB, using the CAMERA SET menu. Setting the Gain To change Press the MENU button to set the camcorder to Menu mode, display the CAMERA SET menu with menu. -
Page 43: Setting The Electronic Shutter
Setting the fixed shutter with the CAMERA SET menu The shutter mode and shutter speed can be set with the CAMERA SET menu. Press the MENU button to set the camcorder to Menu mode, display the CAMERA SET menu with , and select “Shutter.”... -
Page 44: Shooting In Ex Slow Shutter Mode
Auto Shutter and Shutter OFF. • The Direct menu cannot be selected when the camcorder is in Full Auto mode (page 34) or when the EX Slow Shutter mode is set to “On.” Setting the Electronic Shutter For details on the Direct menu, see “Direct Menu Operation”... -
Page 45: Adjusting The Iris
CH -2 OP EN Recording in Auto Iris Mode When the camcorder is in Full Auto mode (page 34), Auto Iris mode is forcibly turned on. When Full Auto mode is off, you can turn it on by setting the IRIS switch to AUTO. -
Page 46: Adjusting The Zoom
STBY A: 25min B: 50min Switching the Zoom Mode Switching between Manual mode and Servo mode is performed with the ZOOM switch located on the bottom of the camcorder. Adjusting the Zoom BA TT ER Y RE LE AS E... - Page 47 Zoom speed switch ZOOM button Power zoom lever BA TT RE LE ER Y AS E SD I OU A/V OU ZOOM MANU SERVO ZOOM switch: SERVO To adjust with the power zoom lever on the grip Press the W (wide) side for a wider angle or the T (telephoto) side for a closer angle.
-
Page 48: Adjusting The Focus
LCD monitor/EVF screen. Adjusting in Full MF Mode Pull the focus ring rearward (toward the camcorder body) to set the camcorder to Full MF mode. Focus can only be adjusted with the focus ring manually. Note The focus instantly moves to the range index position when you pull the focus ring rearward. -
Page 49: Adjusting In Mf Mode
Adjusting in MF Mode Slide the focus ring forward (toward the lens hood) and set the FOCUS switch to MANU to set the camcorder to MF mode. In this mode, you can activate Auto Focus only when required. OPEN FULL AUTO... -
Page 50: Adjusting In Af Mode
Operation” on page 20. Adjusting in AF Mode Slide the focus ring forward (toward the lens hood) and set the FOCUS switch to AUTO to set the camcorder to AF mode. In this mode, focus is always adjusted automatically. AF/MF Full MF... -
Page 51: Eliminating Picture Blurring (Steady Shot)
“Wide Conversion” (page 101) of the CAMERA SET menu to “On.” Note If the camcorder is fixed to a tripod for stable condition, deactivate the Steady Shot function. Reducing Flickers To reduce flickers, try either of the following two... -
Page 52: Setting The Time Data
Regen mode The timecode advances during recording only. When you insert another memory card, the camcorder starts next recording so that the timecode continues to the last recorded timecode on the card. Clock mode The current clock time is recorded for the timecode. -
Page 53: Setting The User Bits
Video Frame TC Format formats setting HQ1080/60i 00 to 29 DF/NDF switchable SP 1080/60i (Fixed to DF in Clock HQ1080/30P mode) HQ 1080/50i 00 to 24 Fixed to NDF SP 1080/50i HQ 1080/25P HQ 1080/24P 00 to 23 Fixed to NDF HQ 720/24P SP 1080/24P 00 to 29 DF/NDF switchable... -
Page 54: Recording Audio Signals
Recording Audio Signals Two channels (CH-1/CH-2) of audio can be recorded (Linear PCM recording) in synchronization with video recording. You can use the built-in stereo microphones (omni-directional electret condenser microphones) or 2-channel external audio inputs to the AUDIO IN connectors by switching with the AUDIO IN switches. -
Page 55: Adjusting The Audio Recording Levels
to AUDIO IN External microphone Cable clamp Set the corresponding AUDIO IN switch (CH-1 or CH-2) to EXT. Set the corresponding LINE/MIC/+48V switch (CH-1 or CH-2) according to the connected microphone. MIC: For a microphone that requires no power supply +48V: For a microphone that requires +48V power supply (such as the ECM-673) Adjusting the Audio Recording... -
Page 56: Outputting The Color Bars And Reference Tone
For the Shot Mark Screen, see “Displaying the SHOT MARK Screen” on page 86. The camcorder permits you to record two types of shot marks: shot mark 1 and shot mark 2. Shot marks can be recorded as needed during recording or can be added after recording while checking the playback pictures. -
Page 57: Rec Review
• During Rec Review playback, only the STOP button is valid. When the STOP button is pressed, Rec Review is canceled, and the camcorder returns to STBY (recording standby) status. • If the video format is changed after recording, Rec Review cannot be performed. -
Page 58: Interval Recording
Number of frames for one recording session (Number of Frames) It is recommended to fix the camcorder to a tripod or equivalent and use the IR Remote Commander to start/stop recording rather than pressing the REC START/STOP button of the camcorder. -
Page 59: Performing Interval Recording
I n t e r v a l Time Frame Rec Number of Frames Set “Setting” to “On.” The camcorder enters Interval Recording mode. When the special recording mode indication on the screen is active, “Interval Rec” flashes on the screen. -
Page 60: Frame Recording
The specified number of frames are recorded intermittently when you press the REC START/ STOP button. It is recommended to fix the camcorder to a tripod or equivalent and use the IR Remote Commander to start/stop recording rather than pressing the REC START/STOP button of the camcorder. -
Page 61: Slow & Quick Motion Recording
Stopping Frame Recording Set “Setting” of “Frame Rec” of the CAMERA SET menu to “Off.” Recording stops and Frame Rec mode is canceled. Note It automatically returns to “Off” when you set the power switch to OFF, while the “Number of Frames”... -
Page 62: Recording In Slow & Quick Motion Mode
Frame Rec 00:00 S&Q Mot i on Rec Review Set “Setting” to “On.” The camcorder enters Slow & Quick Motion mode. When the special recording mode indication on the screen is active, “S&Q Motion” is displayed on the screen. Select the frame rate for recording with “Frame Rate.”... -
Page 63: Freeze Mix: Image Alignment
For details, see “Changing Functions of the Assignable Buttons” on page 57. Superimposing a Freeze Mix image Stop recording to set the camcorder to STBY (recording standby) status. Press the REC REVIEW button to review the recorded images, or press the ASSIGN button to which you assigned “Freeze Mix.”... -
Page 64: Shot Transition
A button and B button You can register a Shot to each of the buttons. MODE button and indicator When you press this button, the camcorder enters Shot Transition operation mode, and the indicator of the button lights. The shot transition operation area is displayed on the screen. -
Page 65: Preparatory Settings
When adjustments are required, set the mode to Store. Preparatory Settings Before you start recording using the Shot Transition function, make the necessary settings with the CAMERA SET menu in advance. The conditions you set are indicated in the shot transition information area on the screen when you set the shot-transition operation mode to “Execute.”... -
Page 66: Recording With A Shot Transition
When “Rec Link” is “Shot-A” or “Shot- B,” the camcorder automatically performs the shot transition to the camera settings registered to Shot A or Shot B, respectively. You need not press the button. - Page 67 When “Rec Link” is “Off,” press the B button when you wish to start the shot transition. When “Rec Link” is “Shot-B,” the camcorder automatically performs the shot transition to the camera settings registered for Shot B. It is not necessary to press the B button.
-
Page 68: Fader Function
Set the duration (1/2/3/5/10 sec.) of fade-out. Exit the menu. • If you set “Fade In” to “On” with the menu, the camcorder enters Fade-in standby status when you exit the menu. • When the Fader indication on the screen is active, the initial status (“White Fader”... -
Page 69: Starting Recording With A Fade In
Set “Fade In” and “Fade Out” to “Off” with the menu. Or press the ASSIGN button again. Note The Fade In/Fade Out settings automatically return to “Off” when you turn off the camcorder, while the Type and Time settings set with the menu are maintained. Fader Function... -
Page 70: Picture Profiles
E X T PROFILE PICTURE PROFILE button Set the power switch to CAMERA to turn the camcorder on in Camera mode. Press the PICTURE PROFILE button. The PICTURE PROFILE menu is displayed. Operating the jog dial or the joystick, select “SEL” from the PICTURE PROFILE menu then select the picture profile number (PP1 to PP6) to operate. -
Page 71: Copying The Settings Of A Picture Profile
PP6: SceneF The camcorder is adjusted to the picture quality specified by the selected Profile. (If you select “OFF,” the camcorder will be fixed at the standard picture quality, and no picture adjustment is allowed.) Press the PICTURE PROFILE button to exit the menu. -
Page 72: Picture Profile Items
Picture Profile Items The values when “Off” is selected at “SEL” of the PICTURE PROFILE menu are shown in bold face (example: Standard PICTURE PROFILE SET Items Subitems and setting values Contents Profile Name Profile name Changing the picture profile name Matrix Setting... - Page 73 PICTURE PROFILE SET Items Subitems and setting values Contents White Offset White On / Off Setting the white balance offset and the color temperature of the preset white Offset<A> –99 to +99 (±0) Offset<B> –99 to +99 (±0) Offset<ATW> –99 to +99 (±0) Preset White 2100 to 10000 (3200) Detail...
- Page 74 PICTURE PROFILE SET Items Subitems and setting values Contents Skin Tone Detail Setting Adjusting the details to be applied to the areas of a specific color phase Level Area Detection Area Indication Saturation Phase Width Knee Setting Adjusting the knee level Auto Knee Point Slope...
- Page 75 PICTURE PROFILE SET Items Subitems and setting values Contents Gamma Level –99 to +99 (±0) Adjusting the gamma compensation level and Select selecting the gamma curve STD1 / STD2 / STD3 / STD4 / CINE1 / CINE2 / CINE3 / CINE4 Black –99 to +99 (±0)
-
Page 76: Deleting Clips
Deleting Clips In Camera mode, the Last Clip DEL function for deleting the last recorded clip and the All Clips DEL function for deleting all clips from a memory card are available. In Media mode, you can specify the clip to be deleted. -
Page 77: Storing/Retrieving The Setting Data
Retrieving the Setup File When you retrieve the stored setup file, the camcorder settings are changed according to the file. Insert the memory card on which you stored the setup file into a card slot. -
Page 78: Playing Back Clips
Playback Playing Back Clips Turning the camcorder on with the power switch set to MEDIA sets it to Media mode, and the clips recorded on the SxS memory card are displayed as thumbnails on the screen. (If no clips are recorded on the card, a no-clip message is displayed.) -
Page 79: Playback
Playback starts from the beginning of the selected clip. The clips after the selected clips are played back in sequence. When playback of the last clip ends, the camcorder enters PAUSE (still picture) mode at the last frame of the last clip. MONITOR VOL Joystick THUMBNAIL... - Page 80 The playback is restarted by pressing the button again. Switching to high-speed playback The camcorder permits you to play clips at 4 times or 15 times normal speed in the forward or reverse direction. Audio is muffled in high-speed playback.
- Page 81 Cueing up To return to the top of the current clip Press the PREV button. • When you press the button in normal or fast- forward playback, the top of the current clip is cued up then playback begins. • When you press the button in fast-reverse playback or in Pause mode, the top of the current clip is cued up, then the still picture is displayed.
-
Page 82: Clip Operations
Clip Operations In Media mode, you can operate the clips or confirm and change the subsidiary data for clips using the Clip Operation menus. Clip Operation Menus Thumbnail screen (page 83) CANCEL DISP CLIP INFO OK MARK ADD OK MARK DEL COPY CLIP DELETE CLIP SHOT MARK... -
Page 83: Basic Operations Of The Clip Operation Menus
Basic Operations of the Clip Operation Menus Displaying a Clip Operation menu Press the joystick or the jog dial. The Clip Operation menu for the current display pops up. Selecting a Clip Operation menu item Turn the jog dial or tilt the joystick to select a menu item then press the jog dial or the joystick. -
Page 84: Displaying The Detailed Information Of A Clip
Displaying the Detailed Information of a Clip When you select “DISP CLIP INFO” from a Clip Operation menu, the CLIP INFO screen appears. 120min PREV CLI P Image of the current clip Image of the previous clip Press the PREV button to switch to the CLIP INFO screen of the previous clip. -
Page 85: Copying A Clip
Select “OK MARK DEL” from the Clip Operation menu. The information screen for the selected clip appears, and a confirmation message is displayed below the index frame image. To delete, select “Execute” then press the jog dial or the joystick. The OK mark is deleted from the selected clip. -
Page 86: Displaying The Shot Mark Screen
Pause the playback or select a clip on the thumbnail screen then press the joystick or the jog dial. The corresponding Clip Operation menu pops up. Select “EXPAND CLIP” from the Clip Operation menu. The EXPAND CLIP screen appears for the clip in Pause mode or that you selected on the thumbnail screen. -
Page 87: Adding/Deleting Shot Marks
SHOT MARK2: To display thumbnails only of the frames marked with shot mark 2 SHOT MARK screen example 120min SHOT MARK 01 : 10 : 20 : 00 01 : 10 : 30 : 00 01 : 10 : 40 : 00 01 : 11 : 00 : 00 01 : 11 : 10 : 00 - - -... -
Page 88: Changing The Index Frame
The information screen for the selected frame appears and a confirmation message is displayed below the image. Select “Execute.” Changing the Index Frame You can change the index frame of a clip to another frame you selected on the EXPAND CLIP screen (page 85) or the SHOT MARK screen (page 86). -
Page 89: Status Displays
Status Displays Showing the Status Screens This camcorder provides status screens of five kinds in Camera mode and four kinds in Media mode, permitting you to check the various settings and statuses of this unit. The status screens can also be displayed on an external monitor. -
Page 90: Camera Status Screen
CAMERA Status Screen The settings and statuses related to image shooting are displayed. The CAMERA status screen is obtained only in Camera mode. It is not displayed in Media mode. CAMERA Whi t e Bal B : 12 Gain L : 0dB A : 4700K PRST: 3200K Handle Zoom Speed H: 70... -
Page 91: Audio Status Screen
AUDIO Status Screen Information regarding audio signals is displayed. The display configuration varies between Camera mode and Media mode. In Camera Mode AUDIO CH-1 CH-2 oo -40 0 OVER Wi nd F i l t er CH-1 : On AGC Li nk: L i nked CH-2: On EXT-1 CH-1... -
Page 92: Video Status Screen
VIDEO Status Screen The information on video formats and settings for the COMPONENT OUT, SDI OUT, A/V OUT, i.LINK connectors is displayed. VIDEO V i deo Format : 1080/60i Rec Mode : HQ YPbPr /SDI Out : 1080/60i V i deo Out : Off Down Conver ter : Squeeze... -
Page 93: Battery/Media Status Screen
BATTERY/MEDIA Status Screen The information on the battery pack and SxS memory cards is displayed. BATTERY/ MED I A Ba t t ery 100% Charge Count Media A 20min Media B 50min Protected 100% Battery: Battery charge remaining The remaining charge level of the mounted battery pack is displayed. -
Page 94: Menu Configuration And Detailed Settings
Menu Configuration and Detailed Settings Overview of the Setup Menus This camcorder permits you to make various settings for recording and playback with Setup menus on the LCD monitor/EVF screen. The Setup menus can also be displayed on an external monitor. -
Page 95: Basic Menu Operations
OTHERS All Reset Camera Data Time Zone Clock Set Language Assign Button Tally Hours Meter IR Remote Battery Alarm Battery INFO Direct Menu i.LINK I/O Trigger Mode Country Video Format Clip Format Media Basic Menu Operations This section covers basic operations for setting the Setup menu items. - Page 96 : O f f Color Bar Type : Mul t i Menu item selection area Note When the camcorder is in EXPAND FOCUS mode (page 48), the Setup menus cannot be operated. Press the EXPAND FOCUS button to release the mode.
- Page 97 Example CAMERA SET Return Gain Setup Shu t t e r EX Slow Shut t e r Shot Tr ans i t ion 00:00 MF Ass i s t : O f f Color Bar Type : Mul t i O f f Choices For the item that has subitems, turn the...
-
Page 98: Setup Menu List
Setup Menu List The functions and available settings of menus are listed below. The default settings set at the factory are shown in bold face (example: CAMERA SET Menu CAMERA SET Menu items Subitems and setting values Contents Gain Setup –3 / 0 / 3 / 6 / 9 /12 /18 dB Assigning gain levels to the three... - Page 99 CAMERA SET Menu items Subitems and setting values Contents Shot Trans Time 2 to 15 sec (4 sec) Transition Setting the Trans Speed operating 1 to 10 (5) conditions of Shot Time / Speed Transition Time / Speed Trans Curve Linear / Soft Trans / Soft Stop Start Timer Off / 5 sec / 10 sec / 20 sec...
- Page 100 CAMERA SET Menu items Subitems and setting values Contents Interval Rec Setting On / Off Setting the Interval Recording Interval Time function 1 to 10/15/20/30/40/50 sec 1 to 10/15/20/30/40/50 min 1 to 4/6/12/24 hour Number of Frames 1 / 3 / 6 / 9 or 2 / 6 /12 (720/60P, 720/50P) Frame Rec Setting...
- Page 101 CAMERA SET Menu items Subitems and setting values Contents TLCS Level +1.0 / +0.5 / ±0 / –0.5 / –1.0 Setting the Total Level Control System (auto adjustment system of gain, iris and shutter) Mode Backlight / Standard / Spotlight Speed –99 to +99 (+50) On / Off...
-
Page 102: Audio Set Menu
CAMERA SET Menu items Subitems and setting values Contents Steady Shot On / Off Setting the image stabilizer AUDIO SET Menu AUDIO SET Menu items Subitems and setting values Contents Audio Input TRIM CH-1 –8 dBu to –65 dBu (–41 dBu) Setting for audio inputs TRIM CH-2... -
Page 103: Video Set Menu
VIDEO SET Menu VIDEO SET Menu items Setting values YPbPr/SDI Out HD / SD/ Off Select Setting the component/SDI outputs YPbPr/SDI Out On / Off Display Setting the character information for the component/SDI outputs Video Out On / Off Display Setting the character information for the... -
Page 104: Lcd/Vf Set Menu
LCD/VF SET Menu LCD/VF SET Menu items Subitems and setting values Contents Color –99 to +99 (±0) Adjusting the LCD monitor Contrast –99 to +99 (±0) Brightness –99 to +99 (±0) Backlight High / Low Setting the viewfinder Mode Color / B&W Contrast –99 to +99 (±0) Brightness... - Page 105 LCD/VF SET Menu items Subitems and setting values Contents Display On/Off Video Level Warnings On / Off Selecting the items to be displayed on Brightness Display the LCD monitor/ On / Off EVF screen Histogram On / Off Lens Info Meter / Feet / Off Zoom Position Number / Bar / Off...
-
Page 106: Tc/Ub Set Menu
Set the timecode format. DF: Drop frame NDF: Non drop frame Select “Execute” to reset the camcorder to the factory status. Select “Execute” to store the setting values in an SxS memory card. Select “Execute” to retrieve the setting values from an SxS memory card. - Page 107 OTHERS Menu items Subitems and setting values Contents Clock Set Date/Time Setting the built-in 12H/24H clock 12H / 24H Date Mode YYMMDD / MMDDYY / DDMMYY Language English / Chinese / Japanese Selecting the language for messages Assign Button <1> Off / Marker / Last Clip DEL / Assigning ATW / Rec Review / Rec /...
- Page 108 IR Remote Commander. Note The setting automatically returns to “Off” when the camcorder is turned off. Set the battery level at which the Low BATT warning is generated (in steps of 5%). Set the battery level at which the BATT Empty warning is generated.
- Page 109 External: To activate recording start/stop operations only for the external recording device connected via the i.LINK connector. Select the color system for the area where you will use the camcorder. Note The default setting is different among the sales areas. United States and Canada: NTSC...
-
Page 110: Connecting External Devices
Connecting External Devices Connecting External Monitors To display recording/playback pictures on an external monitor, select the output signal and use an appropriate cable for the monitor to be connected. SE L/S CA NC CA ME OF F ME DI CH -1 AU TO PIC TU PR OF... -
Page 111: Operating Clips With A Computer
VIDEO SET menu to “On.” Operating Clips With a Computer The clips recorded on SxS memory cards with this camcorder can be controlled on a computer or edited using the optional nonlinear editing software. For these purposes, the clips on an SxS memory... - Page 112 To connect with a USB cable When you connect the camcorder or the SBAC- US10 SxS Memory Card USB Reader/Writer (optional) using the supplied USB cable, the memory card in the slot is acknowledged as an extended drive by the computer.
- Page 113 Using a nonlinear editing system For a nonlinear editing system, optional editing software that corresponds to the recording formats used with this camcorder is required. Store the clips to be edited on the HDD of your computer in advance, using the supplied XDCAM EX Clip Browsing Software.
-
Page 114: Connecting An External Device (I.link Connection)
Recording the Camcorder Picture on an External Device When you set the camcorder to Camera mode, the picture being shot with this camcorder is output as an HDV stream via the i.LINK(HDV) connector. It can be recorded on a connected HDV recorder in synchronization with the REC START/STOP operation on this camcorder. -
Page 115: Recording External Input Signals
—The video format of input signal does not match that specified on the camcorder. —A copy-protected stream is being fed in. • If the input to the camcorder becomes no signal during recording, the tally lamps and the i.LINK zREC status indication on the LCD... -
Page 116: Appendixes
Viewfinder release lever In the event of operating problems If you should experience problems with the unit, contact your Sony dealer. Use and storage locations Store in a level, ventilated place. Avoid using or storing the unit in the following places: •... - Page 117 effective pixel rates of 99.99% or higher. However, very rarely, one or more pixels may be permanently dark or permanently lit in white, red, blue, or green. This phenomenon is not a malfunction. Such pixels have no effect on the recorded data, and the unit may be used with confidence even if they are present.
-
Page 118: Formats And Limitations Of Outputs
Formats and Limitations of Outputs Video Formats and Output Formats The format of output signals from the COMPONENT OUT connector and the SDI OUT connector varies according to the recording/ playback video formats and the kind of the output signal (the setting of “YPbPr/SDI Out Select” of the VIDEO SET menu). -
Page 119: Limitations Of Outputs
No signal is fed from the SDI OUT connector. Limitations of Outputs The outputs from the camcorder are limited by the VIDEO SET menu settings as follows. These limitations are common to Camera mode and Media mode. Menu settings i.LINK I/O... -
Page 120: Backup Battery
Backup Battery This camcorder uses a backup battery to retain various setting data. A lithium battery (CR2032) for backup is mounted in the camcorder at the factory. The backup battery retains the date, time, and timecode in Free Run mode even when no operating power is being supplied. -
Page 121: Troubleshooting
Troubleshooting Operating Power Symptoms Cause The camcorder does not No battery pack is mounted and no power on when you set power is supplied to the DC IN the power switch either to connector. CAMERA or MEDIA. The battery pack is completely exhausted. -
Page 122: External Devices
External Devices Symptoms Cause The equipment connected It sometimes takes time for the to the camcorder via an connected equipment to recognize i.LINK connection does the operation. not react as expected, for example, no picture appears on its screen. Troubleshooting Remedy Wait for about 15 seconds. -
Page 123: Error/Warning Indications
Rapidly The camcorder may be defective. flashing Turn off the power and consult Sony service personnel. (If power cannot be turned off by setting the power switch to OFF, remove both the battery pack and the DC IN source.) Tally... - Page 124 A partitioned memory card or one that contains recorded clips exceeding the number permitted with this camcorder is loaded. This card cannot be used with this camcorder. Remove it and load a compatible card. An error occurred with the memory card. The card requires restoration.
-
Page 125: About I.link
IEEE 1394 proposed by Sony, is a trademark supported by many companies worldwide. IEEE 1394 is an international standard defined by IEEE, the Institute of Electrical and Electronics Engineers, Inc. -
Page 126: Mpeg-2 Video Patent Portfolio License
MPEG-2 Video Patent Portfolio License PMW-EX1 ANY USE OF THIS PRODUCT OTHER THAN CONSUMER PERSONAL USE IN ANY MANNER THAT COMPLIES WITH THE MPEG-2 STANDARD FOR ENCODING VIDEO INFORMATION FOR PACKAGED MEDIA IS EXPRESSLY PROHIBITED WITHOUT A LICENSE UNDER APPLICABLE PATENTS IN THE MPEG-2 PATENT PORTFOLIO, WHICH LICENSE IS AVAILABLE FROM MPEG LA, L.L.C., 250 STEELE STREET, SUITE 300, DENVER,... -
Page 127: Patent Portfolio License
VC-1 Patent Portfolio License XDCAM EX Clip Browsing Software THIS PRODUCT IS LICENSED UNDER THE VC-1 PATENT PORTFOLIO LICENSE FOR THE PERSONAL AND NON-COMMERCIAL USE OF A CONSUMER TO (i) ENCODE VIDEO IN COMPLIANCE WITH THE VC-1 STANDARD ("VC-1 VIDEO") AND/OR (ii) DECODE VC-1 VIDEO THAT WAS ENCODED BY A CONSUMER ENGAGED IN... -
Page 128: Camera Block
With the BP-U60 Approx. 4 hours With the BP-U30 Approx. 2 hours Mass Camcorder: 2.4 kg (5 lb 5 oz) With the supplied lens hood, eyecup, BP-U30 battery pack and one SxS memory card: 2.8 kg (6 lb 3 oz) Dimensions See page 130. -
Page 129: Displays
Built-in speaker Monaural Output: 250 mW Displays LCD monitor Screen size 8.8 cm diagonal (3.5-inch) Aspect ratio 16:9 Picture size 640 (H) × 3 (RGB) × 480 (V) delta sequence Transmission Hybrid (semi-transmissive) type Viewfinder Screen size 1.4 cm diagonal (0.54-inch) Aspect ratio 16:9 Picture elements... - Page 130 STORAGE SYSTEMS OR ANY OTHER MEDIA OR STORAGE SYSTEMS TO RECORD CONTENT OF ANY TYPE. • Always verify that the unit is operating properly before use. SONY WILL NOT BE LIABLE FOR DAMAGES OF ANY KIND INCLUDING, BUT NOT LIMITED TO, COMPENSATION OR REIMBURSEMENT...
-
Page 131: Index
Index A/V OUT connector AC adaptor AC power source ACCESS lamps Accessory shoe add shot marks AF mode AGC mode All Clips DEL 77, 106 All Reset Angle mode Area Detection Aspect Marker Aspect Select 57, 107 Assign Button assignable buttons 38, 58 ATW Speed Audio... - Page 132 delete a clip DELETE CLIP delete shot marks Detail diopter compensation Direct Menu 20, 38, 42, 45, 50, 51, 62, Direct menu DISP CLIP INFO Display On/Off DISPLAY/BATT INFO button divide a clip DIVIDE CLIP Down Converter EJECT buttons electronic shutter Electronic Viewfinder Entering a character string Error Indications...
- Page 133 Knee Language 58, 76 Last Clip DEL 26, 104 LCD B.LIGHT + and – buttons LCD B.LIGHT switch LCD monitor LCD/VF SET Menu lens cap Lens hood LENS INFO Lens Info LENS REMOTE connector LINE/MIC/+48V switches Low Key SAT Macro mode MACRO switch Manual Focus Manual Iris mode...
- Page 134 Shockless White SHOT MARK SHOT MARK screen SHOT MARK1 Shot Mark1 SHOT MARK1 ADD SHOT MARK1 DEL SHOT MARK2 Shot Mark2 SHOT MARK2 ADD SHOT MARK2 DEL 56, 81 shot marks 64, 99 Shot Transition 43, 98 Shutter SHUTTER switch Skin Tone Detail SLOT SELECT button Slow &...