BenQ Mainstream MP620p User Manual
Mainstream series digital projector
Hide thumbs
Also See for Mainstream MP620p:
- Comparison chart (1 page) ,
- Product specifications (1 page) ,
- User manual (55 pages)
Table of Contents
Advertisement
Quick Links
Advertisement
Table of Contents

Related Manuals for BenQ Mainstream MP620p


Summary of Contents for BenQ Mainstream MP620p
- Page 1 MP620p Digital Projector Mainstream Series User's Manual Welcome...
- Page 2 Copyright Copyright 2006 by BenQ Corporation. All rights reserved. No part of this publication may be reproduced, transmitted, transcribed, stored in a retrieval system or translated into any language or computer language, in any form or by any means, electronic, mechanical, magnetic, optical, chemical, manual or otherwise, without the prior written permission of BenQ Corporation.
-
Page 3: Table Of Contents
Table of contents Important safety instructions ... 1 Introduction ... 5 Projector features ... 5 Shipping contents... 6 Optional accessories ... 6 Projector exterior view ... 7 Front / upper side ... 7 Rear side ... 7 Lower side ... 7 Controls and functions ... - Page 4 Calculation of lamp hour ... 37 Warning message ... 37 Replacing the lamp ... 38 Temperature information ... 40 Indicators ... 41 Safety instructions for ceiling mounting of your BenQ projector... 43 Troubleshooting... 44 Specifications... 45 Projector specifications ...45 Timing chart...46 Supported timing for PC input ...
- Page 5 Limited Warranty ... 48 Regulation Statements ... 49 FCC statement ... 49 EEC statement ... 49 MIC statement ... 49 WEEE directive ... 49 Table of contents...
- Page 6 <Memo> Table of contents...
-
Page 7: Important Safety Instructions
Important safety instructions Your BenQ projector is designed and tested to meet the latest standards for safety of information technology equipment. However, to ensure safe use of this product, it is important that you follow the instructions mentioned in this manual and marked on the product. - Page 8 Safety Instructions The lamp becomes extremely hot during operation. Allow the projector to cool for approximately 45 minutes prior to removing the lamp assembly for replacement. Do not operate lamps beyond the rated lamp life. Excessive operation of lamps beyond the rated life could cause them to break on rare occasions.
- Page 9 Safety Instructions (Continued) Do not place this projector in any of the following environments. - Space that is poorly ventilated or confined. Allow at least 50 cm clearance from walls and free flow of air around the projector. - Locations where temperatures may become excessively high, such as the inside of a car with all windows rolled up.
- Page 10 Liquids spilled into the projector may cause it to fail. If the projector does become wet, disconnect it from the power supply’s wall socket and call BenQ to have the projector serviced. Important safety instructions This product is capable of displaying inverted images for ceiling mount installation.
-
Page 11: Introduction
Introduction Projector features The projector integrates high-performance optical engine projection and a user-friendly design to deliver high reliability and ease of use. The projector offers the following features: • Selectable password protected function • Compact and portable unit • High quality manual zoom lens •... -
Page 12: Shipping Contents
Shipping contents The projector is shipped with the cables required for connection to a PC and to video equipment. Carefully unpack and verify that you have all of the items shown below. If any of these items are missing, please contact your place of purchase. The supplied accessories will be suitable for your region, and may differ from those illustrated. -
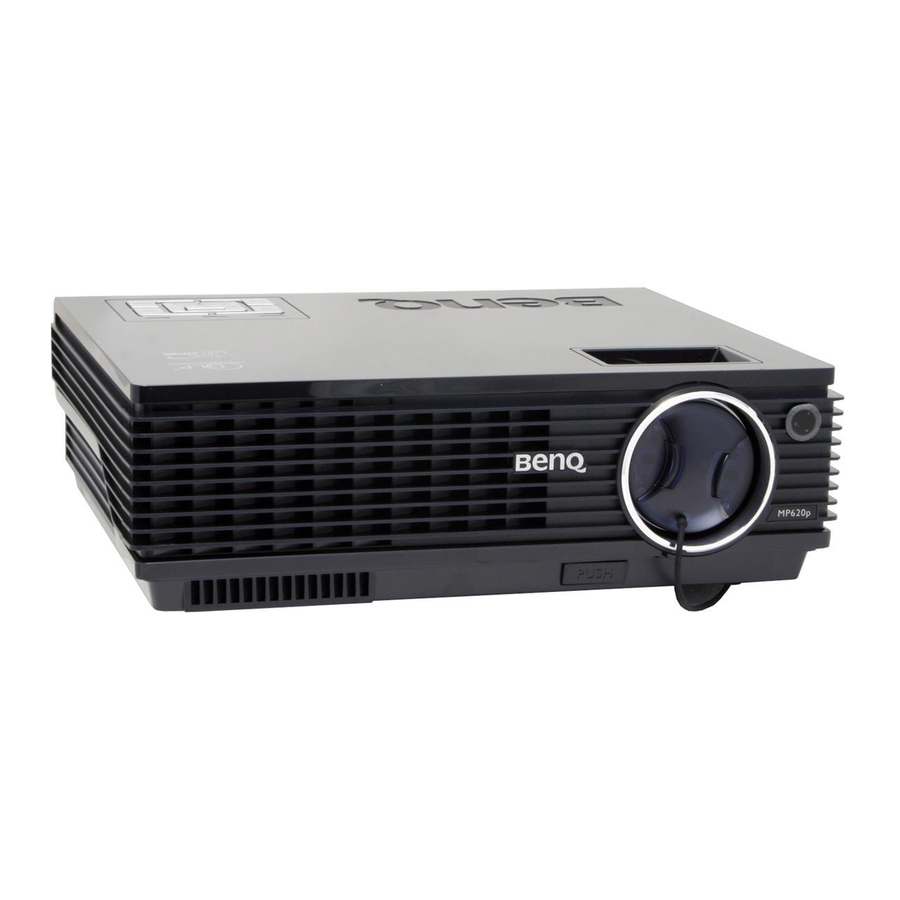
Page 13: Projector Exterior View
Projector exterior view Front / upper side Rear side Refer to "Connection" on page 15 equipment. 11 12 Rear adjuster foot AC power cord inlet Kensington anti-theft lock slot IR remote sensor RS232 control port USB socket Lower side External control panel (See "External control panel"... -
Page 14: Controls And Functions
Controls and functions External control panel Power (Refer to mation.) Turns the projector on or off. Blank (Refer to "Hiding the image" on page 25 Used to hide the screen image. You can press any key on the control panel to bring the image back. -
Page 15: Remote Control
Exits and saves the menu settings. When the on-screen menu is activated, the #9 to #12 buttons are used as directional arrows to select the desired menu items and to make adjustments. Focus ring (Refer to "Fine-tuning the image size and clarity" on page 23 information.) Adjusts the focus of the projected image. -
Page 16: Remote Control Effective Range
Page Up and Down (Refer to information.) You can operate your display software program (on a connected PC) which responds to page up/down commands (like Microsoft PowerPoint) by pressing Auto (Refer to "Auto-adjusting the image" on page 23 Automatically determines the best picture settings for the displayed image. Source (Refer to "Switching input signal"... -
Page 17: Positioning Your Projector
Select this location with the projector suspended upside-down from the ceiling behind the screen. Note that a special rear projection screen and the BenQ Projector Ceiling Mounting Kit are required for this installation location. in the Advance > Mirror menu after you turn the projector on. -
Page 18: Obtaining A Preferred Projected Image Size
BenQ has provided a table of 4:3-aspect-ratio screen sizes to assist you in determining the ideal location for your projector. There are two dimensions to consider, the perpendicular horizontal distance from the centre of the screen (projection distance), and the vertical offset height of the projector from the horizontal edge of the screen (offset). -
Page 19: How To Determine The Position Of The Projector For A Given Screen Size
How to determine the position of the projector for a given screen size Select your screen size. Refer to the table and find the closest match to your screen size in the left columns labelled 'Screen Diameter' Using this value, look across this row to the right to find the corresponding average distance from screen value in the column labelled 'Average'. - Page 20 Maximum zoom 4:3 Screen Diagonal Feet Inches 1219 1500 1524 1829 2000 2134 2438 2500 2743 3000 3048 3500 3658 4000 4572 5000 5486 6000 7620 There is 3% tolerance among these numbers due to optical component variations. Positioning your projector Minimum zoom Offset Projection distance...
-
Page 21: Connection
Connection When connecting a signal source to the projector, be sure to: Turn all equipment off before making any connections. Use the correct signal cables for each source. Ensure the cables are firmly inserted. In the connections shown below, some cables may not be included with the projector (see "Shipping contents"... -
Page 22: Connecting A Monitor
• A Mac adapter (an optional accessory) is needed if you are connecting legacy version Macintosh computers. • Many laptops do not turn on their external video ports when connected to a projector. Usually a key combo like FN + F3 or CRT/LCD key turns the external display on/off. Locate a function key labeled CRT/LCD or a function key with a monitor symbol on the laptop. -
Page 23: Connecting Video Source Devices
Connecting Video source devices You can connect your projector to various Video source devices that provide any one of the following output sockets: • Component Video • S-Video • Video (composite) You need only connect the projector to a Video source device using just one of the above connecting methods, however each provides a different level of video quality. -
Page 24: Connecting A Component Video Source Device
Connecting a Component Video source device Examine your Video source device to determine if it has a set of unused Component Video output sockets available: • If so, you can continue with this procedure. • If not, you will need to reassess which method you can use to connect to the device. To connect the projector to a Component Video source device: Take the (optional accessory) Component Video to VGA (D-Sub) adaptor cable and connect the end with 3 RCA type connectors to the Component Video output sockets... -
Page 25: Connecting An S-Video Source Device
Connecting an S-Video source device Examine your Video source device to determine if it has an unused S-Video output socket available: • If so, you can continue with this procedure. • If not, you will need to reassess which method you can use to connect to the device. To connect the projector to an S-Video source device: Take the (optional accessory) S-Video cable and connect one end to the S-Video output socket of the Video source device. -
Page 26: Connecting A Composite Video Source Device
Connecting a composite Video source device Examine your Video source device to determine if it has a set of unused composite Video output sockets available: • If so, you can continue with this procedure. • If not, you will need to reassess which method you can use to connect to the device. To connect the projector to an composite Video source device: Take the (optional accessory) Video cable and connect one end to the composite Video output socket of the Video source device. -
Page 27: Operation
The start up procedure takes about 30 seconds after pressing Power. In the later stage of start up, a default BenQ logo is projected. If you are prompted for a password, press the arrow buttons to select the four password digits, then press Auto. -
Page 28: If You Forget The Password
Press and hold Right4 for 5 seconds. The projector will display a coded number on the screen. Seek help from the local BenQ service center to decode the number. You may be required to provide proof of purchase documentation to verify that you are an authorized user of the projector. -
Page 29: Adjusting The Height
4. Check the new password. i. Pressing Auto completes the procedure. ii. Press Up 5 to try again. iii. Press Down 6 to cancel the set-up and return to the on-screen menu. Adjusting the height The projector is equipped with 1 quick-release adjuster foot and 1 rear adjuster foot. These adjusters change the image height and projection angle. -
Page 30: Correcting Keystone
Correcting keystone Keystoning refers to the situation where the projected image is noticeably wider at either the top or bottom. It occurs when the projector is not perpendicular to the screen. To correct this, besides adjusting the height of the projector, you will need to manually correct it following ONE of these steps. -
Page 31: Selecting An Application Mode
Selecting an application mode The projector is preset with several predefined application modes so that you can choose one to suit your operating environment and input source picture type. To select a operation mode that suits your need, press Mode. The picture modes available for different types of signals are shown below. -
Page 32: Remote Paging Operations
Remote paging operations You can operate your display software program (on a connected PC) which responds to page up/down commands (like Microsoft PowerPoint) by Page Up and Page Down on the remote control pressing "Connecting a computer" on page 15 Connect the projector to your PC or notebook with a USB cable prior to using this function. -
Page 33: Menu Operation
Menu operation Menu system Please note that the on-screen display (OSD) menus vary according to the signal type selected. Functions available when receiving different signal types... Sub-Menu Application Mode Keystone Color Temp Brightness Contrast Picture Auto Resize Aspect Ratio H Position V Position Phase Pro-Picture... -
Page 34: Using The Menus
Using the menus The projector is equipped with on-screen display (OSD) menus for making various adjustments and settings. There are 17 different menu languages. (Refer to page more details.) The following example describes the adjustment of the keystone. Press 6 Menu on the projector or Menu on the remote control to turn the on- screen menu on. -
Page 35: Picture Menu
1. Picture menu Some picture adjustments are available only when certain input sources are in use. Unavailable adjustments are not shown on the screen. FUNCTION (default setting DESCRIPTION / value) Pre-defined application modes are provided so you can optimize your projector image set-up to suit your program type. -
Page 36: Input Source
There are four color temperature* settings available. Color Temp (depends on the selected Application *About color temperatures: mode) There are many different shades that are considered to be “white” for various purposes. One of the common methods of representing white color is known as the “color temperature”. -
Page 37: Pro-Picture Menu
2. Pro-Picture menu Some picture adjustments are available only when certain input sources are in use. Unavailable adjustments are not shown on the screen. FUNCTION (default DESCRIPTION setting / value) Automatically resizes the input signal pixel resolution to the native resolution of the projector. -
Page 38: Setting Menu
3. Setting menu FUNCTION (default setting DESCRIPTION / value) Toggles projector audio between on and off. Mute (off) Adjusts audio volume level. Volume (5) Sets the length of time the OSD will remain active after your last button OSD Time press. -
Page 39: Advance Menu
Use Left 3/ Right 4on the projector or remote control to select your (English) desired language. Allows you to select which logo screen will display during projector start- Splash up. Three modes are available: Default (BenQ logo), black screen or blue Screen screen. (BenQ logo) for more information. - Page 40 A mode for operation in areas like high altitude or high temperature. We recommend you use the High Altitude Mode when your environment is higher than 3000 feet above sea level, or is hotter than 40 the projector will be used for extended periods of time (>10 hours) without shutdown.
-
Page 41: Information Menu
5. Information menu This menu shows you the current operating status of the projector. Some picture adjustments are available only when certain input sources are in use. Unavailable adjustments are not shown on the screen. FUNCTION DESCRIPTION Shows the current signal source. Source Shows the native resolution of the input signal. -
Page 42: Maintenance
Maintenance Care of the projector Your projector needs little maintenance. The only thing you need to do on a regular basis is to keep the lens clean. Never remove any parts of the projector except the lamp. Contact your dealer if other parts need replacing. -
Page 43: Lamp Information
Lamp information Calculation of lamp hour When the projector is in operation, the duration (by hours) of lamp usage is automatically calculated by the built-in timer. The method of calculating the equivalent lamp hour is as follows: Total (equivalent) lamp hour = 3/4 (hours used in Economic mode) + 1 (hours used in "Economic Mode (off)"... -
Page 44: Replacing The Lamp
Replacing the lamp • To reduce the risk of electrical shock, always turn the projector off and disconnect the power cord before changing the lamp. • To reduce the risk of severe burns, allow the projector to cool for at least 45 minutes before replacing the lamp. - Page 45 Disconnect the lamp connector from the projector. Loosen the screw that secures the lamp. Pull the lamp from the projector. • Pulling it too quickly may cause the lamp to break and scatter broken glass in the projector. • Do not place the lamp in locations where water might splash on it, children can reach it, or near flammable materials.
-
Page 46: Temperature Information
Tighten the screw that secures the lamp. • Loose screw may cause a bad connection, which could result in malfunction. • Do not over tighten the screw. Replace the lamp cover on the projector. Tighten the screw that secures the lamp cover. •... -
Page 47: Indicators
Indicators Illustration Blank - : Light OFF • • : Light flashing • : Light ON Light Power Temp Lamp Power events Light Power Temp Lamp Lamp events • : Orange light • R : Red light • G : Green light Status &... - Page 48 Light Power Temp Lamp Thermal events Maintenance Status & Description The projector has shutdown automatically. If you try to re-start the projector, it will shutdown again. Please contact your dealer for assistance.
-
Page 49: Safety Instructions For Ceiling Mounting Of Your Benq Projector
Safety instructions for ceiling mounting of your BenQ projector We want you to have a pleasant experience using your BenQ projector, so we need to bring this safety matter to your attention to prevent damage to person and property. If you intend to mount your projector on the ceiling, we strongly recommend that you use a proper fitting BenQ projector ceiling mount kit and that you ensure it is securely and safely installed. -
Page 50: Troubleshooting
Troubleshooting THE PROJECTOR DOES NOT TURN ON. Cause There is no power from the power cable. Attempting to turn the projector on again during the cooling process. NO PICTURE Cause The video source is not turned on or connected correctly. The projector is not correctly connected to the input source device. -
Page 51: Specifications
USB mouse connector Speaker Environmental Requirements Operating temperature Operating relative humidity Operating altitude Digital Projector MP620p 1024 x 768 XGA 1-CHIP DMD F=2.6 to 2.77, f= 20.4 to 23.5 mm 200W lamp AC100–240V, 1.5A–3.2A, 50/60 Hz (Automatic) 285W (Max) 284 mm (W) x 94 mm (H) x 231 mm (D) 6 lbs (2.724 Kg) -
Page 52: Timing Chart
Timing chart Supported timing for PC input Horizontal Resolution Frequency (kHz) 640 x 400 31.47 31.469 37.861 640 x 480 37.500 43.269 37.879 48.077 800 x 600 46.875 53.674 48.363 56.476 1024 x 768 60.023 68.667 1280 x 1024 63.981 Supported timing for Component-YP Signal Format 480i(525i)@60Hz... -
Page 53: Dimensions
Dimensions Unit: mm Specifications... -
Page 54: Warranty
Proof of purchase date will be required with any warranty claim. In the event this prod- uct is found to be defective within the warranty period, BenQ’s only obligation and your exclusive remedy shall be replacement of any defective parts (labor included). To obtain warranty service, immediately notify the dealer from which you purchased the product of any defects. -
Page 55: Regulation Statements
Regulation Statements FCC statement CLASS B: This equipment generates, uses and can radiate radio frequency energy and, if not installed and used in accordance with the instructions, may cause harmful inter- ference to radio communications. However, there is no guarantee that interference will not occur in a particular installation.