Siemens Gigaset A58H User Manual
Hide thumbs
Also See for Gigaset A58H:
- Mode d'emploi (41 pages) ,
- Manual (45 pages) ,
- Instructions manual (36 pages)
Table of Contents
Advertisement
Gigaset Communications GmbH
Frankenstr. 2a, D-46395 Bocholt
Manufactured by Gigaset Communications GmbH
under trademark license of Siemens AG.
As of 1 Oct. 2011 Gigaset products bearing the
trademark 'Siemens' will exclusively use the trademark 'Gigaset' .
© Gigaset Communications GmbH 2010
All rights reserved. Subject to availability.
www.gigaset.com
A58
A 5 8
GIGASET. INSPIRING CONVERSATION.*
*GIGASET. Pour des conversations inspirées.
H
H
Advertisement
Table of Contents

Related Manuals for Siemens Gigaset A58H


Summary of Contents for Siemens Gigaset A58H
- Page 1 Manufactured by Gigaset Communications GmbH under trademark license of Siemens AG. As of 1 Oct. 2011 Gigaset products bearing the trademark 'Siemens' will exclusively use the trademark 'Gigaset' . © Gigaset Communications GmbH 2010 All rights reserved. Subject to availability.
-
Page 2: The Handset At A Glance
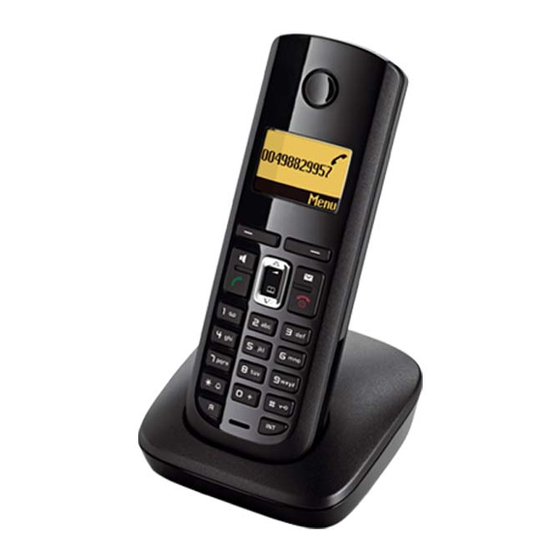
The handset at a glance ¢ The handset at a glance 1 Display in idle status (example) ¢ 2 Charge status of the batteries ( page 9) ¢ 3 Display keys ( page 16) 4 Message key ( page 23) Access to calls and message lists;... -
Page 3: Table Of Contents
Contents Contents The handset at a glance ..........1 Safety precautions . - Page 4 Contents Service (Customer Care) ......... . . 27 Questions and answers .
-
Page 5: Safety Precautions
Safety precautions Safety precautions Warning Read the safety precautions and the user guide before use. Explain their contents and the potential hazards associated with using the telephone to your children. Only use the mains adapter supplied, as indicated on the underside of the charger. ¢... -
Page 6: First Steps
First steps First steps Check the package contents one Gigaset A58H handset, one charging cradle, one mains adapter, two batteries, one battery cover, one user guide. Setting up the charging cradle The charging cradle is designed to be operated in enclosed, dry areas at temperatures ranging from +5 °C to +45 °C. -
Page 7: Connecting The Charging Cradle
First steps Please note: Never expose the telephone to the influence of heat sources, direct sunlight or other electrical devices. Protect your Gigaset from moisture, dust, corrosive liquids and vapours. Connecting the charging cradle ¤ Connect the flat plug of the mains adapter 1. -
Page 8: Setting Up The Handset For Use
First steps Setting up the handset for use The display is protected by a plastic film. Please remove the pro- tective film! Inserting the batteries and closing the battery cover Warning ¢ Use only the rechargeable batteries ( page 31) recommended by Gigaset Communications GmbH. - Page 9 First steps Registering the handset to the base station Before you can use the phone, you must first register the handset to the base sta- tion. The actual registration procedure will depend on the type of base station. Automatically register the A58H handset to the Gigaset A580/A585 base station ¤...
- Page 10 First steps The following is displayed after successful automatic or manual handset registration: the strength of the reception signal between base Ð station and handset: – good to poor: Ð i Ñ Ò – no reception: | flashes Þ Menu battery charge status: –...
- Page 11 First steps Initial charging and discharging of the batteries The correct charge level can only be displayed if the batteries are first fully charged and discharged. ¤ Place the handset in the base station or charg- ing cradle for ten hours. ¤...
- Page 12 First steps Setting the date and time Set the date and time so that the correct date and time can be assigned to incoming calls, and so that the alarm can be used. Þ Menu ¤ §Menu§ Press the key below the display screen to open the main menu.
- Page 13 First steps ¤ The active line is marked [...]. Enter Date: Enter day, month and year as an [01.10.2008] 8-digit number via the handset, e.g. Q Q2QQN Ç for 01/10/2008. If you want to correct an entry, press the top or bottom of the control key to toggle between fields.
- Page 14 First steps Display in idle status Once the phone is registered and the time set, Ð the idle display is shown as in this example Your phone is now ready for use. Þ 01.10.08 07:15 Menu Please note The range icon is only displayed in idle status if Eco Mode+ is deactivated (depending on the base station, see your phone's user guide).
-
Page 15: What Would You Like To Do Next
First steps What would you like to do next? Now you have successfully started your Gigaset you will probably want to adapt it to your personal requirements. Use the following guide to quickly locate the most important subjects. If you are unfamiliar with menu-driven devices such as other Gigaset telephones ¢... -
Page 16: Using The Phone
Using the phone Using the phone Control key In the following description the side of the control key you need to press for each operation is indicated accordingly, e.g. t for "press the top of the control key". The control key has a number of different functions: When the handset is in idle status Open the directory. -
Page 17: Display Keys
Using the phone Display keys The function of the display keys changes depending on the particular operating sit- uation. Example: Ç Current display key functions are shown in the bottom display line. Display keys Important display keys: Menu Open a context-dependent menu. Confirm selection. -
Page 18: Activating/Deactivating The Handset
Using the phone Submenus The functions in the submenus are displayed as lists. To access a function: ¤ Scroll to the function with the control key q and press §OK§ ¤ ¢ Enter the corresponding digit combination ( page 19). Briefly press the end call key a once to return to the previous menu level/cancel the operation. -
Page 19: Illustration Of Operating Steps In The User Guide
Using the phone Illustration of operating steps in the user guide The operating steps are shown in abbreviated form. Example: The illustration: ‰ ¢ ¢ ¢ §Menu§ Settings Handset Auto Answer ( = on) means: Þ Menu ¤ §Menu§ Press the display key to open the main menu. -
Page 20: Menu Tree
Menu tree Menu tree Instead of scrolling to locate a menu function, you can select a function more quickly by open- ing the menu and keying in a digit combination (or shortcut). M 2 2 for "Set ringer volume". §Menu§ Example: §Menu§... -
Page 21: Making Calls
Making calls §Menu§ Making calls To deactivate the ringer, press the dis- play key and select Silent. You can take the call as long as it is displayed on the screen. Making an external call Handsfree talking External calls are calls using the public tele- In handsfree mode, instead of holding the phone network. -
Page 22: Making Internal Calls
Using the directory and lists Making internal calls Saving the first number in the directory ¢ Internal calls to other handsets registered on Dir. empty New Entry? the same base station are free. §OK§ Enter the number and press Calling other handsets §OK§... - Page 23 Using the directory and lists Managing directory entries Sending the directory to another ¢ q (Select entry) handset Preconditions: Editing an entry ¢ The sending and receiving handsets must §Menu§ Edit Entry both be registered to the same base sta- Edit the number if required, and tion.
-
Page 24: Last Number Redial List
ECO DECT Using a number from the directory Opening lists with the message key In some operating situations you can open the directory to copy a number, for example. Your handset must be in the idle status. An advisory tone sounds as soon as a new message arrives in a list. -
Page 25: Setting The Alarm Clock
Setting the alarm clock Setting the alarm clock Changing date and time To change the time, open the input field Precondition: The date and time have ¢ with: ¢ ¢ already been set ( page 11). §Menu§ Settings Date/Time Activating/deactivating the alarm Enter Date: clock Enter the day, month and year in... -
Page 26: Activating/Deactivating Auto Answer
Handset settings Activating/deactivating auto Changing ringer answer Volume: Five volume levels (1–5; e.g. volume 3 = ˆ When this function is activated, when a call ) and "crescendo" ring (6; volume ‡ arrives you can simply lift the handset out of increases with each ring = the charging cradle without having to press the talk key c. -
Page 27: Advisory Tones
Handset settings Activating/deactivating the ringer Activating/deactivating advisory tones You can turn off the ringer on your handset ¢ ¢ §Menu§ before you take a call or while the phone is in Settings Audio Settings ¢ idle status. You can take a call so long as it is Advisory Tones §OK§... -
Page 28: Service (Customer Care)
Service (Customer Care) Service (Customer Care) Questions and answers If you have any questions about using your We offer you support that is fast and tailored phone, visit us at to your specific needs! www.gigaset.com/customercare at any Our Online Support on the Internet can be time. -
Page 29: Authorisation
Guarantee Certificate Guarantee is issued by: Gigaset Commu- nications UK Limited, Faraday House, Sir (United Kingdom) William Siemens Square, Frimley, Cam- berley, Surrey, GU16 8QD. Without prejudice to any claim the user (cus- Any other claims resulting out of or in... -
Page 30: Guarantee Certificate (Ireland)
This Guarantee shall be invalid if the munications UK Limited, Faraday House, device defect is attributable to improper Sir William Siemens Square, Frimley, Cam- care or use and/or failure to comply with berley, Surrey, GU16 8QD. information contained in the user manu- Any other claims resulting out of or in als. -
Page 31: Environment
Environment Environment Ecological energy consumption ¢ The use of ECO DECT ( page 23) saves energy and is an active contribution towards Our environmental mission protecting the environment. statement Disposal We at Gigaset Communications GmbH carry social responsibility and are actively Batteries should not be disposed of in gen- engaged in the interests of a better world. -
Page 32: Appendix
Appendix Appendix We recommend the following battery types, because these are the only ones that guar- antee the specified operating times, full functionality and long service life: Caring for your telephone GP 700 mAh Yuasa Phone 700 mAh Wipe the charger and handset with a damp Yuasa Phone 800 mAh cloth (do not use solvent or a microfiber Yuasa AAA 800... -
Page 33: Writing And Editing Text
Appendix Writing and editing text Setting upper/lower case or digits Press the hash key # briefly to switch from The following rules apply when writing text: "Abc" mode to "123" and from "123" to "abc" Use t s to move the cursor to the left or and from "abc"... -
Page 34: Accessories
Accessories Accessories Ordering Gigaset products You can order Gigaset products from your specialist retailer. Only use original accessories. This will avoid possible health risks and damage to property, and also ensure that all the relevant regulations are complied with. Mounting the charging cradle to the wall 21 mm approx. -
Page 35: Index
Index Index Deactivating ..... . advisory tones ..... call acceptance . - Page 36 Index ..... . . Handset Key 1 (fast access) ....
- Page 37 Index ......Number Talk key ....copying from directory .