Table of Contents
Advertisement
Advertisement
Table of Contents

Related Manuals for Siemens Gigaset C450


Summary of Contents for Siemens Gigaset C450
- Page 1 Siemens Aktiengesellschaft, issued by Siemens Communications Haidenauplatz 1 D-81667 Munich Gigaset C450 © Siemens AG 2005 All rights reserved. Subject to availability. Rights of modification reserved. Siemens Aktiengesellschaft www.siemens.com/gigaset...
-
Page 2: The Handset At A Glance
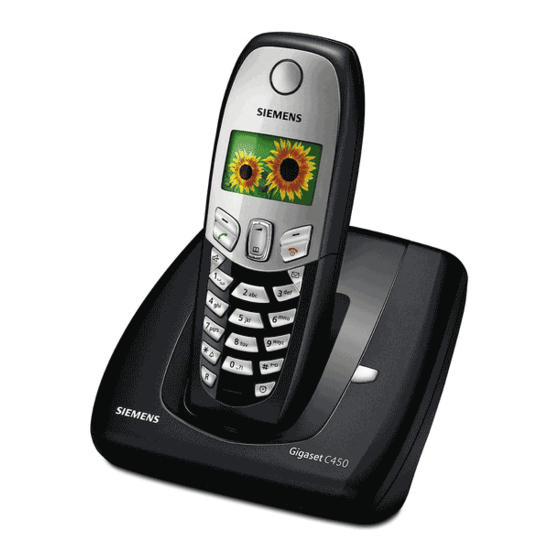
The handset at a glance ¨ 11.11.05 §§§§§§INT§§§§§ Base station at a glance 1 Paging key 1 Display in idle status 2 Battery charge level e V U e V U 3 Control key (page 10) 4 Display keys (page 10) 5 End call key, On/Off key End call, cancel function, go back one menu level (press briefly), back to idle status (press and hold),... -
Page 3: Table Of Contents
Gigaset C450 – more than just a telephone ..4 First Steps ..... . 4 Pack contents . -
Page 4: Safety Precautions
Read the safety precautions and the user guide before use. Explain their contents to your children, and the potential hazards associated with using the telephone. Only use the mains adapter supplied, as indicated on the underside of the base station. -
Page 5: Gigaset C450 - More Than Just A Telephone
Gigaset C450 – more than just a telephone Gigaset C450 – more than just a telephone Your phone not only enables you to send and receive text messages over the fixed network and store up to 100 telephone numbers (page 12) – it can do a whole lot more: You can programme the keys of your phone with important phone numbers. - Page 6 Placing the handset in the base station and registering Important: the handset must not already be registered to a base station. Registering the handset to the Gigaset C450 base station occurs automatically. ¤ Place the handset in the charging cradle of the base unit with its display facing for- ward.
-
Page 7: Belt Clip And Headset
First Steps The batteries may warm up as they are charging. This is not dangerous. After a time the charge capacity of the bat- teries will decrease for technical reasons. Note: You will find explanations for the symbols and typo- graphical conventions used in this user guide in the appendix, page 25. -
Page 8: Menu Tree
Menu tree There are two ways to select a function: Using number combinations ("shortcut") ¤ To open the main menu, press ¤ Enter the number combination that is in front of the function in the menu tree. ¤ 4 2 2 Example: for "Set handset language". - Page 9 Settings Date/Time Handset Base Voice Mail Set Key 1 4-2-1 Display 4-2-2 Language 4-2-3 Auto Answer 4-2-4 Register Handset 4-2-5 Reset Handset 4-3-2 System PIN 4-3-3 Base Reset 4-3-4 Listening in 4-3-5 Preselection 5-1-1 Network Mailbox 4-2-1-1 Screensaver 4-2-1-2 Colour Scheme 4-2-1-3 Contrast 4-2-1-4 Backlight 4-3-5-1 Preselection Number...
-
Page 10: Making Calls
Making calls Making an external call External calls are calls using the public tele- phone network. Enter the number and press the talk key. Press and hold the talk key then enter the number. You can cancel the dialling operation with the end call key Notes: –... -
Page 11: Operating The Handset
Operating the handset Switching the handset on/off Press the end call key long. You will hear the confirmation tone. Activating/deactivating the keypad lock Press and hold the hash key. You will hear the confirmation tone. The icon Ø appears in the display when the keypad lock is activated. -
Page 12: Menu Guidance
Menu guidance Your telephone's functions are accessed using a menu that has a number of levels. Main menu (first menu level) ¤ To open the main menu, press handset in idle status. Accessing a function ¤ Scroll to the function with the control key and press §OK§... -
Page 13: Using The Directory And Lists
Using the directory and lists The options are: Directory Last number redial list SMS list Calls list You can save 100 entries in the directory. You can create a personalised directory for your own individual handset. However you can send the list or individual entries to other handsets (page 12). -
Page 14: Last Number Redial List
Please remember: Entries with identical numbers are not over- written in the receiving handset. The transfer is cancelled if the phone rings or if the memory of the receiving handset is full. Adding a displayed number to the directory You can copy to the directory any numbers that appear in a list, e.g. -
Page 15: Making Cost-Effective Calls
Status of entry In the calls list Call: new missed call. Call: entry already read. Call recv.: call taken. Entry number 01/02 means e.g.: first of a total of two entries. Number or name of caller You can add the number of the caller to the directory (page 13). -
Page 16: Sms (Text Messages)
SMS (text messages) Your unit is supplied ready for you to send text messages immediately. Requirements: Calling Line Identification (CLIP, page 9) is enabled for your phone connection. Your network provider supports SMS in the fixed network (information on this can be obtained from your network provider). -
Page 17: Receiving An Sms
Reading or deleting individual SMS messages ¤ Open the draft message list. Select SMS. Read SMS §Menu§ Select and press §OK§ message. Scroll in the SMS using Delete Entry §Menu§ Select and press §OK§ message. Writing/editing an SMS You are reading an SMS in the draft message list. -
Page 18: Setting Sms Centre
Send Forward the text of an SMS to another recip- ient (page 15). Adding a number to the directory Adding the sender's number You are reading an SMS in the incoming mes- sage list. Press the display key. §Menu§ Continue see page 13. Note: You can create a special directory for text messages within your main directory by putting a star (*) before... - Page 19 Self-help with errors The following table lists error situations and possible causes and provides notes on trouble- shooting. You cannot send messages. 1. You have not requested the CLIP service (Calling Line Identification Presentation, page 9). ¥ Ask your service provider to enable this serv- ice.
-
Page 20: Using The Network Mailbox
Registering handsets You can register up to four handsets on your base station. Automatic registration Gigaset C45 to Gigaset C450, see page 5. Manual registration Gigaset C45 to Gigaset C450 You must activate manual registration of the handset at both the handset and the base sta- tion. -
Page 21: Locating A Handset ("Paging")
Locating a handset ("Paging") You can locate your handset using the base sta- tion. ¤ Press the registration/paging key on the base station (page 1) briefly. ¤ All handsets will ring at the same time ("pag- ing"), even if the ringers are switched off. Ending paging ÷... -
Page 22: Handset Settings
Handset settings Your handset is preconfigured, but you can change these settings to suit your individual requirements. Changing the display language You can view the display texts in different lan- guages. ¢ ¢ ¢ Settings Handset §Menu§ The current language is indicated by Select a language and press Press and hold (idle status). -
Page 23: Activating/Deactivating Suppression Of The First Ringtone
Setting ringer melody Set different ringer melodies for external calls, internal calls and the alarm clock. ¢ ¢ Audio Settings Ringer Melody §Menu§ External Calls Internal Calls Alarm Clock Select and press §OK§ ‰ Select melody ( §OK§ Press and hold (idle status). Activating/deactivating the ringer You can turn off the ringer on your handset before you take a call or while the phone is in... -
Page 24: Restoring The Handset Default Settings
When the alarm clock rings… Alarm repeat after 5 minutes Press the display key or any key. §Snooze§ If you press three times the alarm clock §Snooze§ switches off for 24 hours. Switching off the alarm clock for 24 hours Press the display key. -
Page 25: Setting Pauses
Setting pauses Changing pause after line seizure You can set the length of the pause inserted between pressing the talk key the phone number. 4 I O 1 O §Menu§ Enter digit for the pause length (1 = 1 sec.; 2 = 3 sec.; 3 = 7 sec.) and press §OK§... -
Page 26: Appendix
When it has fully dried out, you will normally be able to use itagain. Questions and answers If you have any questions about using your phone, visit us anytime at www.siemens.com/ gigasetcustomercare. The table below contains a list of common problems and possible solu- tions. -
Page 27: Service (Customer Care)
You can get assistance easily when you have technical questions or questions about how to use your device by using our online support service on the Internet at: www.siemens.com/customercare This site can be accessed at any time wherever you are. It will give you 24/7 support for all our prod- ucts. -
Page 28: Authorisation
This device is intended for analogue phone lines in your network. Country-specific requirements have been taken into consideration. We, Siemens AG, declare that this device meets the essential requirements and other relevant regulations laid down in Directive 1999/5/EC. A copy of the 1999/5/EC Declaration of Conformity is available at this Internet address: http://www.siemens.com/... -
Page 29: Writing And Editing A Text Message
Writing and editing a text message The following rules apply when writing a text message: The cursor is controlled with Characters are added to the left of the cur- sor. Press the hash key briefly to switch from "Abc" mode to "123", from "123" to "abc", and from "abc"... -
Page 30: Accessories
All accessories and batteries are available from your mobile phone retailer. Or you can order direct online via the Online Shop: www.siemens.com/shop. The Online Shop also has the latest product information. Only use original accessories. This will avoid possible health risks and damage, and... -
Page 31: Index
Calls list ....Cancelling(operation) ....Care of the telephone Changing PIN Changing system PIN Characters deleting . - Page 32 ....End call key ..... . Ending, call .
- Page 33 ..... . On/Off key Operation (preparing to use the phone) ..Order of entries in directory PABX operating base station on PABX...