Table of Contents
Advertisement
Quick Links
Advertisement
Table of Contents

Related Manuals for Sherwood RX-773


Summary of Contents for Sherwood RX-773
-
Page 2: Read This Before Operating Your Unit
Introduction READ THIS BEFORE OPERATING YOUR UNIT CAUTION : TO REDUCE THE RISK OF ELECTRIC SHOCK, DO NOT REMOVE COVER (OR BACK). NO USER- SERVICEABLE PARTS INSIDE. REFER SERVICING TO QUALIFIED SERVICE PERSONNEL. WARNING : TO REDUCE THE RISK OF FIRE OR ELECTRIC SHOCK, DO NOT EXPOSE THIS APPLIANCE TO RAIN OR MOISTURE. Caution regarding installation Note : For heat dispersal, do not install this unit in a confined space such as a bookcase or similar enclosure. -
Page 3: Table Of Contents
CONTENTS Introduction • READ THIS BEFORE OPERATING YOUR UNIT ... 2 System Connections ... 4 Front Panel Controls ... 8 Universal Remote Controls ... 10 • OPERATING COMPONENTS WITH REMOTE CONTROL ... 12 • REMOTE CONTROL OPERATION RANGE ... 12 •... -
Page 4: System Connections
System Connections • Please be certain that this unit is unplugged from the AC outlet before making any connections. • Be sure to observe the color coding when connecting audio, video and speaker cords. • Make connections firmly and correctly. If not, it can cause loss of sound, noise or damage to the receiver. CONNECTING ANTENNAS •... - Page 5 CONNECTING AUDIO COMPONENTS • The AUX jacks may also be connected to an additional component. • The DVD jacks may be connected to AUDIO OUT jacks of video components such as DVD player, TV, etc. • The TAPE IN/OUT jacks can be connected to audio recording equipment such as a tape deck, an MD recorder, etc. ■Note : Do not connect the turntable with MC type cartridge directly.
- Page 6 For more information on future upgrades and external control, visit the Sherwood web site at www.sherwoodamerica.com or contact your dealer. • Do not disconnect the connection cable while updating the operating software, etc.
- Page 7 CONNECTING MULTI-ROOM SYSTEM KIT • The multi-room system kit(sold separately ) is essential for operation from a remote location . For information on the multi-room system kit, contact the Xantech corporation at 1-800-843-5465 or www.xantech.com. • IR IN jack allows you to control this receiver from another room with the remote control unit. •...
-
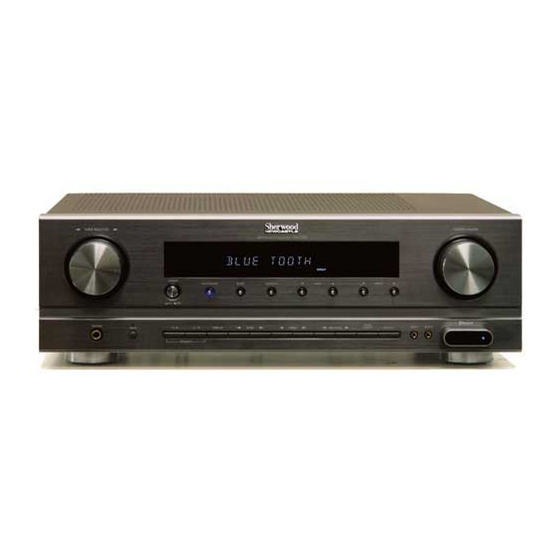
Page 8: Front Panel Controls
Front Panel Controls 1. POWER switch 2. POWER ON/STANDBY button/indicator 3. INPUT SELECTOR knob 4. BAND button 5. MASTER VOLUME knob 6. HEADPHONE jack 7. MUTE button/indicator 8. SPEAKER A/B, C/D SELECTOR buttons 9. TUNING UP/DOWN(▲/▼) buttons 10. PRESET UP/DOWN(▲/▼) buttons 11. - Page 9 ■Bluetooth IN CONNECTOR • If the Bluetooth IN connector is connected to Sherwood Audio Receiver BT- R7(sold separately) with Bluetooth wireless technology, you can enjoy music wirelessly with a music player featuring Bluetooth wireless technology such as MP3 player, mobile phone, etc..
-
Page 10: Universal Remote Controls
Universal Remote Controls This universal remote control can operate not only this receiver but also most popular brands of audio and video components such as CD players, tape decks, TVs, cable boxes, VCRs, DVD players, satellite receivers, etc. • To operate 7 components other than this receiver , you should enter the setup code for each component. (For details, refer to “USING FUNCTIONS OF REMOTE CONTROL”... - Page 11 ■FUNCTION TABLE of the NUMBERED BUTTONS. ■Notes : • Some functions for each component may not be available or may work differently. • Depending on other kinds of components that are available for each DEVICE button, some functions may not be available or may work differently, too.
-
Page 12: Operating Components With Remote Control
OPERATING COMPONENTS WITH REMOTE CONTROL Enter the setup code for each component other than this receiver. For details, refer to “Entering a setup code” on page 13. Turn on the component you want to operate. Press the DEVICE button on the remote control corresponding to the component you wish to operate. -
Page 13: Using Functions Of Remote Control
"DVD" for Sherwood DVD player, "AUX" for Sherwood tape deck and "TV" for Sherwood TV respectively as its factory setup code. So, you don’t need to enter its code for each Sherwood component except in such a case that its code does not work. - Page 14 Using a punch-through function This remote control may be programmed to operate either the AUDIO volume punch-through or the TV volume and/or TV channel punch-through in conjunction with any of the eight components controlled by this remote control. For example, since this receiver will likely be used as the sound system while watching TV, you may want to adjust this receiver’s volume although this remote control is set to control the TV.
- Page 15 Programming a macro function • The macro function enables you to program a series of button operations(up to 10) on this remote control into a single button. • You can store up to three separate macro command sequences into “M1”, “M2” and “M3” buttons. Press and hold down both "ENTER/MEMORY"...
-
Page 16: Operations
Operations LISTENING TO A PROGRAM SOURCE Before operation • Push the POWER switch. In the standby mode, turn the power on. Switch the desired speakers on. • Each time the SPEAKER C/D SELECTOR button on the front panel is pressed, the speakers are switched on or off as follows: →... - Page 17 Select the desired input source. • Each time the INPUT SELECTOR knob is rotated, the input source is changed as follows: TUNER PHONO AUX 2 (Frequency display) BT-IN TAPE Operate the selected component for playback. Adjust the volume to a comfortable listening level. To mute the sound.
- Page 18 Adjusting the tone (bass and treble) Adjust the tone as desired. ■When adjusting the bass ■When adjusting the treble • Each time the buttons are pressed, the tone (BASS and TRBL) can be adjusted within the range of -10~+10 dB. ■Notes : •...
-
Page 19: Listening To Radio Broadcasts
LISTENING TO RADIO BROADCASTS Auto tuning Select the tuner and then the desired band. • Each time this button is pressed, the tuner is automatically selected and the band is changed as follows ; → FM STereo → FM MONO → AM ("ST"... - Page 20 Manual presetting • You can store up to 30 preferred stations in the memory. Tune in the desired station with auto or manual tuning. Select the desired preset number (1~30) and press the (ENTER/)MEMORY button. • The station has now been stored in the memory. •...
-
Page 21: Listening To Rds Broadcasts(Fm Only)
RDS Tuner(Regional Option for some countries in Europe, etc.) LISTENING TO RDS BROADCASTS (FM ONLY) RDS(Radio Data System) is a method for sending information signals together with the transmitter signals. Your tuner is capable of translating these signals and putting the information on the display. These codes contain the following informations. Program Service name(PS), A list of Program Types(PTY), Traffic Announcement(TA), Clock Time(CT), Radio Text(RT). - Page 22 PTY search • Use this function to automatically search and receive the stations broadcasting the desired program type. In the FM mode, select the PTY search mode.. While displaying "PTY SRCH", select the desired program type. • Each time these buttons are pressed, one of 29 different types of programs is selected.
-
Page 23: Recording
RECORDING • The volume, tone(bass, treble) and balance settings have no effect on the recording signals. • When you select tuner, BT-IN, CD, DVD, AUX, AUX 1, AUX 2 or PHONO as a recording source, recording can be made on the TAPE. -
Page 24: Room2 Playback
ROOM2 PLAYBACK • This function allows enjoying one source in the main room and playing another in a different room at the same time. • Even when this receiver enters the standby mode, in such a case that "R2" is dimly lit, meaning only the ROOM2 circuitry operates, the ROOM2 source can be played independently. - Page 25 Start play on the component related to the ROOM2 source. Adjust the ROOM2 volume to a comfortable listening level. To mute the sound. • While the mute function for ROOM2 is operating, "R2" is flickering. • To resume the previous sound level, press this button again.
-
Page 26: Troubleshooting Guide
Troubleshooting Guide If a fault occurs, run through the table below before taking your receiver for repair. If the fault persists, attempt to solve it by switching the receiver off and on again. If this fails to resolve the situation, consult with your dealer. -
Page 27: Specifications
Specifications ■ AMPLIFIER SECTION • Power output, 8Ω, THD 0.7 %, 20 Hz~20 kHz, only a pair of speakers driven • Total harmonic distortion, 8Ω, @ -3dB, 20 Hz~20 kHz • Intermodulation distortion 60 Hz : 7 kHz= 4 : 1 SMPTE, 8Ω, 100 W •... -
Page 28: Setup Code Table
Setup Code Table ADMIRAL AKAI ALBA ALBIRAL ALCATEL AMSTRAD ANAM ARC EN CIEL ARISTONA ARTHUR MARTIN ATLANTIC AUDIOSONIC AUSIND AUTOVOX BAIRD BASICLINE BAUR BEKO BLAUPUNKT BRANDT BRION VEGA BRUNS BUSH CENTURY CIHAN CLARIVOX CONDOR CONTEC CONTINENTAL EDITION CROSLEY CROWN CTC CLATRONIC DAEWOO DECCA DEGRAAF... - Page 29 INNO HIT INTERFUNK IRRADIO KAISUI KARCHER KENDO KENNEDY KORTING KRIESLER LENOIR LOEWE OPTA LOGIK LUMA LUXOR MAGNADYNE MAGNAFON MARANTZ MATSUI McMICHAEL MEMOREX METZ MINERVA MISTRAL MITSUBISHI MIVAR MULTITECH MURPHY MAONIS NATIONAL NECKERMANN NIKKAI NOBLEX NOBLIKO NOGAMATIC NOKIA NORDMENDE OCEANIC ONCEAS OPTONICA ORION OSAKI...
- Page 30 SAMBERS SAMPO SAMSUNG SANYO SCHAUB LORENZ SCHNEIDER SELECO SHARP Sherwood SIAREM SICATEL SIEMENS SIERA SILVER SINGER SINUDYNE SONOKO SONY STERN TANDBERG TANDY TASHIKO TATUNG TELEAVIA TELEFUNKEN TELETECH TELEVIDEON TENSAI THOMSON THORN- FERGUSON TOCOM TOSHIBA TRANS CONTINENTS TRIUMPH UHER ULTRA VOX...
- Page 31 FUNAI GENERAL GOLDSTAR GOODMANS GRAETZ GRANADA GRUNDIG HANSEATIC HARMAN- KARDON HIFIVOX HINARI HITACHI IMPERIAL INGELEN INGERSOL JENSEN KENWOOD KRIESLER KUBA LLOYD LOEWE OPTA LOGIK LUXOR MAGNADYNE MAGNASONIC MAGNAVOX MARANTZ MATUI MEMOREX METZ MINERVA MINOLTA MITSUBISHI MULTITECH MURPHY NAONIS NATIONAL NECKERMANN NOGAMATIC NOKIA NORDMENDE...
- Page 32 URANYA VECTOR VICTOR VIDITAL WESTING HOUSE WARDS YAMAHA ZANUSSI ZENDER ZOPPAS DENON MAGNAVOX MITSUBISHI ONKYO PANASONIC PHILIPS PIONEER PROSCAN SAMSUNG SHERWOOD SONY THOMSON TOSHIBA VIETA YAMAHA ZENITH Allegro Archer Bell&Howell Century Citizen Comtronics Contec Easten Emerson Everquest Focus Garrard Gemini...
- Page 33 Stargate Starquest TV86 Teleview Tocom Toshiba Tusa Unika United Artists Universal Viewstar Zenith Zentek ALBA AMSTRAD ARCON ARISTONA ASTRA BLAUPUNKT BUSH CH.MASTER CITY COM DYNASAT ECHOSTAR EMME ESSE FAIT FERGUSON FINLUX FRACARRO GOLDSTAR GRAETZ GROTHUSEN GRUNDIG HINARI HIRSCHMANN HITACHI INGELEN ITT-NOKIA JERROLD KATHREIN...
- Page 34 ADCOM AIWA AKAI AUDIO ARC EN CIEL DENON FISHER KENWOOD MARANTZ MONDIAL NAKAMICHI NIKKO ONKYI PANASONIC PHILPS PIONEER REALISTIC SANSUI SHARP SHERWOOD SONY TEAC TECHNICS VICTOR YAMAHA AUX-TAPE/MD SHERWOOD AUX-LD DAEWOO DENON GOLDSTAR KENWOOD MAGNAVOX OPTIMUS PANASONIC PHILIPS POINNEER REALISTIC...