Table of Contents
Advertisement
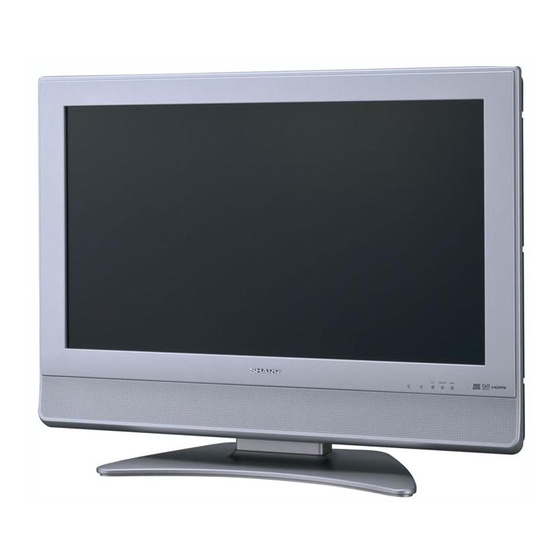
LC - 26SA1E
LC - 26SV1E
LC - 32SA1E
LC - 32SV1E
LCD COLOUR TELEVISION
LCD-FARBFERNSEHGERÄT
TÉLÉVISION COULEUR À ÉCRAN
À CRISTAUX LIQUIDES (LCD)
TELEVISORE A COLORI LCD
LCD-KLEURENTELEVISIE
TELEVISIÓN EN COLOR LCD
OPERATION MANUAL
BEDIENUNGSANLEITUNG
MODE D'EMPLOI
MANUALE DI ISTRUZIONI
GEBRUIKSAANWIJZING
MANUAL DE MANEJO
Advertisement
Table of Contents

Related Manuals for Sharp LC-32SV1E


Summary of Contents for Sharp LC-32SV1E
- Page 1 LC - 26SA1E LC - 26SV1E LC - 32SA1E LC - 32SV1E LCD COLOUR TELEVISION LCD-FARBFERNSEHGERÄT TÉLÉVISION COULEUR À ÉCRAN À CRISTAUX LIQUIDES (LCD) TELEVISORE A COLORI LCD LCD-KLEURENTELEVISIE TELEVISIÓN EN COLOR LCD OPERATION MANUAL BEDIENUNGSANLEITUNG MODE D’EMPLOI MANUALE DI ISTRUZIONI GEBRUIKSAANWIJZING MANUAL DE MANEJO...
- Page 2 The mains lead of this product is fitted with a non-rewireable (moulded) plug incorporating a 13A fuse. Should the fuse need to be replaced, a BSI or ASTA approved BS 1362 fuse marked as above, which is also indicated on the pin face of the plug, must be used. Always refit the fuse cover after replacing the fuse.
-
Page 3: Table Of Contents
OPERATION MANUAL Dear SHARP customer Thank you for your purchase of the SHARP LCD colour TV product. To ensure safety and many years of trouble- free operation of your product, please read the Important Safety Precautions carefully before using this product. -
Page 4: Important Safety Precautions
Important Safety Precautions • Cleaning—Unplug the AC cord from the AC outlet before cleaning the product. Use a damp cloth to clean the product. Do not use liquid cleaners or aerosol cleaners. • Water and moisture—Do not use the product near water, such as bathtub, washbasin, kitchen sink, laundry tub, swimming pool and in a wet basement. -
Page 5: Quick Guide
Setting the TV on the wall • This TV should be mounted on the wall only with the wall mount bracket available from SHARP. (See page 23.) The use of other wall mount brackets may result in an unstable installation and may cause serious injuries. -
Page 6: Inserting The Batteries
Quick guide Inserting the batteries Before using the TV for the first time, insert two “AA” size batteries (supplied). When the batteries become depleted and the remote control unit fails to operate, replace the batteries with new “AA” size batteries. Hold in the tab on the battery cover and pull the cover towards the direction of the arrow. -
Page 7: Remote Control Unit
Quick guide Remote control unit B (Standby/On) Enter standby mode or turn on the power. (See page 7.) 0–9 Set the channel in TV mode. Set the page in Teletext mode. A (Flashback) Press to return to the previous image in normal viewing mode. f (WIDE MODE) Select the wide mode. -
Page 8: Tv (Front View)
Quick guide TV (Front view) Remote control sensor OPC sensor TV (Rear view) P (s/r) (Programme [channel] buttons) i (l/k) (Volume buttons) Antenna input terminal RS-232C terminal EXT 5 (HDMI/AUDIO) terminals EXT 4 terminals EXT 1 (RGB) terminal EXT 2 (RGB) terminal OUTPUT (Audio) terminals For LC-26SA1E, EXT 3 terminals... -
Page 9: Turning On The Power
Quick guide Turning on the power Press a on the TV. • The B indicator on the TV changes from red to green. Standby mode Press B on the remote control unit. • The TV enters standby mode and the image on the screen disappears. -
Page 10: Using External Equipment
Using external equipment Setting the input source To view external source images, select the input source using b on the remote control unit or TV. NOTE • The cables marked with * are commercially available items. Connecting a VCR You can use the EXT 1 or 2 terminals when connecting a VCR and other audiovisual equipment. -
Page 11: Connecting A Decoder
Using external equipment Connecting a decoder You can use the EXT 1 terminal when connecting a decoder and other audiovisual equipment. EXT 1 SCART cable* NOTE • In cases when the decoder needs to receive signal from the TV, make sure to set “Decoder” to “EXT1” in the Programme Setup “Manual Adjust”... -
Page 12: Menu Operations
Menu operations Menu operation buttons Use the following buttons on the remote control unit to operate the menu. MENU: Press to open or close the menu screen. Press to select a desired item on the screen a/b/c/d: or adjust a selected item. Press to go to the next step or complete the setting. -
Page 13: Common Operations
Menu operations Common operations Menu Operation: A 1 Press MENU and the MENU screen displays. 2 Press c/d to select the desired menu. 3 Press a/b to select the desired menu item, and then press OK (Example: AV Mode, OPC, etc). •... -
Page 14: Picture Menu
Menu operations TitleB Picture menu MENU [ Picture ] Picture Audio AV Mode Backlight [+6] –8 Contrast [+30] Brightness –30 Colour –30 Tint –30 Sharpness –10 Advanced Reset AV Mode Menu Operation: A (page 11) AV Mode gives you five viewing options to choose from to best match the system environment, which can vary due to factors like room-brightness, type of programme watched or the type of image input from external... -
Page 15: Colour Temp
Menu operations Colour Temp. Adjust the colour temperature to give the best white image. Item High: White with bluish tone Mid-High: Intermediate tone between High and Middle Middle: Natural tone Mid-Low: Intermediate tone between Middle and Low Low: White with reddish tone Black For easier viewing, change the viewing depth by selecting a level for automatically adjusting the dark... -
Page 16: Power Control Menu
Menu operations Power Control menu MENU [ Power Control ] Audio Power Control No Signal Off No Operation Off No Signal Off Menu Operation: A (page 11) When set to “Enable” the TV will automatically enter the standby mode if there is no signal input for 15 minutes. -
Page 17: Manual Adjust
Menu operations Manual Adjust You can set some channel items manually. [ Setup ... Programme Setup ] MENU Fine [179.25] Colour sys. [AUTO] Sound sys. [B/G] 179.25 Label [SAT.1] Skip [Off] Decoder [Off] Lock [Off] Press MENU and the MENU screen displays. Press c/d to select “Setup”. -
Page 18: Child Lock
Menu operations Child Lock Allow you to use a PIN to protect certain settings from being accidentally changed. Changing the PIN Press MENU and the MENU screen displays. Press c/d to select “Setup”. Press a/b to select “Child Lock”, and then press Change PIN Reset New PIN... -
Page 19: Position
Menu operations Position Menu Operation: C (Page 11) For adjusting a picture’s horizontal and vertical position. Item H-Pos.: Centres the image by moving it to the left or right. V-Pos.: Centres the image by moving it up or down. NOTE •... -
Page 20: Dnr (Digital Noise Reduction)
Menu operations DNR (Digital Noise Reduction) Menu Operation: A (page 11) Produce a clearer image. (Off, High, Low) HDMI Setup HDMI (High-Definition Multimedia Interface) terminal selection. To watch an HDMI equipment image, select “EXT5” from “INPUT SOURCE” menu using b on the remote control unit or TV. -
Page 21: Useful Features
Useful features WIDE MODE You can select the picture size. Selectable picture size varies with the type of signal received. Item (for SD (Standard) signal) Normal: For 4:3 “standard” pictures. A side bar appears on each side. Zoom 14:9: For 14:9 letterbox pictures. A thin side bar appears on each side, and you may see bars on the top and bottom with some programmes. -
Page 22: Still Image
Useful features Still image You can freeze a motion picture on the screen. Press 3. Press 3 again to exit still image. NOTE • When this function is not available, “No still image display available.” will display. • The still image automatically goes out after 30 minutes. Teletext function What is Teletext? Teletext broadcasts pages of information and... -
Page 23: Appendix
Appendix Troubleshooting Problem • No power. • Unit cannot be operated. • Remote control unit does not operate. • Picture is cut off. • Strange colour, light colour, or dark, or colour misalignment. • Power is suddenly turned off. • No picture. •... -
Page 24: Rs-232C Port Specifications
Appendix RS-232C port specifications PC Control of the TV When a program is set, the TV can be controlled from the PC using the RS-232C terminal. The input signal (PC/video) can be selected, the volume can be adjusted and various other adjustments and settings can be made, enabling automatic programmed playing. -
Page 25: Specifications
Weight Operating temperature • As a part of policy of continuous improvement, SHARP reserves the right to make design and specification changes for product improvement without prior notice. The performance specification figures indicated are nominal values of production units. There may be some deviations from these values in individual units. -
Page 26: End Of Life Disposal
If the product is used for business purposes and you want to discard it: Please contact your SHARP dealer who will inform you about the take-back of the product. You might be charged for the costs arising from take-back and recycling. Small products (and small amounts) might be taken back by your local collection facilities. - Page 27 LC-26SA1E / LC-26SV1E / LC-32SA1E / LC-32SV1E (577.4) / [700.0] (577,4) / [700,0] LC-26SA1E / LC-26SV1E 100.0 / 100,0 522.2 522,2 (672.2) / [806.0] (672,2) / [806,0] LC-32SA1E / LC-32SV1E ( ) : LC-26SA1E LC-26SV1E [ ] : LC-32SA1E LC-32SV1E...
- Page 28 Printed on environmentally friendly paper Auf ökologischem Papier gedruckt Imprimé sur papier écologique Stampato su carta ecologica Afgedrukt op ecologisch papier Impreso en papel ecológico Printed in Hungary Gedruckt in Ungarn Imprimé en Hongrie Stampato in Ungheria Gedrukt in Hongarije Impreso en Hungría TINS-C612WJZZ 06P08-HU-NG...