Scientific Atlanta Explorer 8300HDC Connecting Manual
Scientific atlanta owner manual digital video recorder 8300hdc
Hide thumbs
Also See for Explorer 8300HDC:
- Connecting manual (19 pages) ,
- User manual (86 pages) ,
- Connecting (2 pages)
Table of Contents
Advertisement
Quick Links
- 1 Identify Your 8300Hdc
- 2 What's on the Front Panel
- 3 What's on the Back Panel
- 4 Connecting the 8300Hdc
- 5 View and Record Television Programming
- 6 Connecting the 8300Hdc to an Hdtv with an Hdmi Connector
- 7 Connecting the 8300Hdc to an External Sata Hard Disk Drive (Optional)
- 8 Index
- Download this manual
See also:
User Manual
Advertisement
Table of Contents

Related Manuals for Scientific Atlanta Explorer 8300HDC


Summary of Contents for Scientific Atlanta Explorer 8300HDC
- Page 1 Connecting the ® Explorer 8300HDC Digital Video Recorder...
- Page 2 Notice for CATV Installers CATV Installers Notice If you are a CATV installer, read the information in the box below. U.S. Patents U.S. Patents List A patent notice is affixed to this product. In addition, the product may also be covered by one or more of the following patents: 4,498,169;...
-
Page 3: Table Of Contents
Component Input (PrPbY/V) ... 15 Connecting the 8300HDC to a Stereo VCR and HDTV (optional) ... 16 Connecting the 8300HDC to an External SATA Hard Disk Drive (optional) ... 17 Connecting the 8300HDC to an HDTV with a 1394 Connector ... 19 Connecting the 8300HDC in HD Mode to an SDTV with Component Input (PrPbY/V) ... -
Page 4: Important Safety Instructions
IMPORTANT SAFETY INSTRUCTIONS Heed Warnings Adhere to all warnings on the product and in the operating instructions. Read, Retain, and Follow These Instructions Read all of the instructions before you operate this product. Follow all operating instructions that accompany this product. Retain the instructions for future use. - Page 5 IMPORTANT SAFETY INSTRUCTIONS, Protecting This Product From Foreign Objects and Water or Moisture Damage WARNING: Avoid electric shock and fire hazard! Never push objects through the openings in this product. Foreign objects can cause electrical shorts that can result in electric shock or fire. Do not expose this product to rain or moisture.
-
Page 6: Welcome
Identify Your 8300HDC To find the serial number for your 8300HDC, look on the back for a label that is similar to the example shown here. The serial number begins with “SA“ and is located in the lower left corner of the bar code. -
Page 7: What's In The Carton
Component Video Cables (PrPbY/V) Additional Equipment You Might Need You might need some of the cables and adapters shown below for connecting the DVR to your home entertainment devices. See the connection information beginning on page 12 of this guide for more information. -
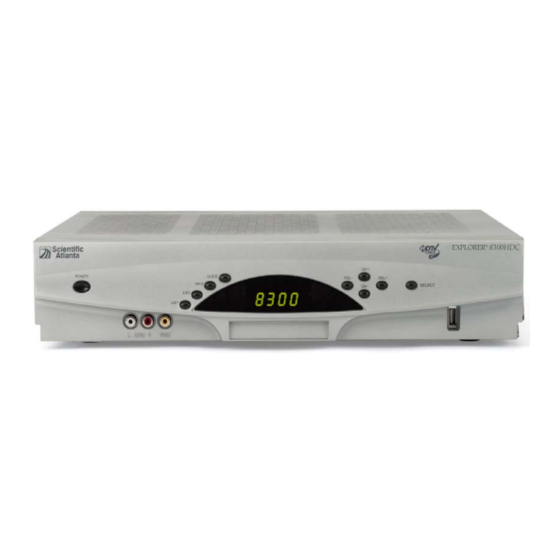
Page 8: What's On The Front Panel
11 Select Provides access to your on-screen selection 12 USB Port Connects to external equipment, such as a keyboard or mouse (reserved for future use, may not be available on all 8300HDC models) CH + VOL - VOL + CH - EXPLORER ®... -
Page 9: What's On The Back Panel
3 PrPbY/V Connect the 8300HDC (in HD mode) to the component video input (YPrPb) on the HDTV. When the 8300HDC is configured for SD mode, the Y/V portion of the component video output connects to the composite video input of an SDTV. See Connections for an HDTV and... -
Page 10: Connecting The 8300Hdc
• Make sure the 8300HDC is Off and the TV is On. • On the front panel of the 8300HDC, press GUIDE and INFO at the same time. • Follow the on-screen instructions to choose HD or SD mode and wide screen (16:9) or standard screen (4:3) depending upon your TV type. -
Page 11: Connections For An Hdtv And Vcr
Connections for an HDTV and VCR To use the 8300HDC with an HDTV, you must make one of the following connections to view the HD content. In addition, you can make connections to a digital or analog VCR to archive recordings to a VCR tape. -
Page 12: Connections For A Standard-Definition Tv And Vcr
Connections for a Standard-Definition TV and VCR When using the 8300HDC with an SDTV, you must make one of the following connections to view content. Some SDTVs may not have all these connections. In addition, you can make connections to a VCR to archive recordings to a VCR tape. Refer to your TV and VCR user guides and the cabling diagrams in this guide for more detailed information. -
Page 13: View And Record Television Programming
Another When two of your favorite programs are scheduled at the same time, you can record one program on the built-in DVR while watching the other. Use the DVR keys on the remote control to record programs or to play back recorded programs. -
Page 14: Performance Tips
• Verify that your HDTV is in HD mode. If necessary, run the HD Setup Wizard to select HD mode. • If the 8300HDC is plugged into a wall switch, verify that the switch is in the ON position. • Verify that all cables are properly connected. -
Page 15: Frequently Asked Questions About Hdtv
A CableCard is a multi-stream card that allows the set-top box to decrypt subscription digital channels. The card fits into the CableCard slot on the back of the 8300HDC (see page 3 for the location of the slot). You can obtain a CableCard from your cable service provider. -
Page 16: Picture Formats
• The screen resolution (1080i, 480p, and so forth) is sometimes referred to as the scan rate. The terms are interchangeable. • You can stretch and zoom the displayed picture using the built-in capability of the 8300HDC by pressing the # key on the remote control. Refer to your DVR user’s guide for more information on this feature. -
Page 17: Connecting The 8300Hdc To An Hdtv With An Hdmi Connector
2-channel stereo audio configuration instead of Dolby Digital, which it carries over to the other digital audio outputs of the 8300HDC. This prevents your home theater system or Dolby Digital decoder from providing the full Dolby Digital surround-sound effect. -
Page 18: Connecting The 8300Hdc To An Hdtv With A Dvi Connector
The HDC DVR is not compatible with devices that do not support HDCP. You must use either the YPrPb or 1394 connection (which uses Digital Transmission Content Protection, or DTCP) to connect the DVR to these devices. • Also refer to the Important Note Regarding the HDMI Interface on the 8300HDC on page 12. -
Page 19: Connecting The 8300Hdc To An Hdtv With Component Input (Prpby/V)
Connecting the 8300HDC to an HDTV with Component Input (PrPbY/V) WARNING: Electric shock hazard! Unplug all electronic devices before connecting or disconnecting any device cables to the 8300HDC. Required cables: • 1 set component video cables (PrPbY/V) • 1 audio Left/Right cable... -
Page 20: Connecting The 8300Hdc To A Home Theater System With Component Input (Prpby/V)
Connecting the 8300HDC to a Home Theater System with Component Input (PrPbY/V) Required cables: • 3 sets component video cables (PrPbY/V) • 2 coaxial digital audio cables WARNING: Electric shock hazard! Unplug all electronic devices before connecting or disconnecting any device cables to the 8300HDC. -
Page 21: Connecting The 8300Hdc To A Stereo Vcr And Hdtv (Optional)
Connecting the 8300HDC to a Stereo VCR and HDTV (optional) WARNING: Electric shock hazard! Unplug all electronic devices before connecting or disconnecting any device cables to the 8300HDC. Required cables: • 1 RF coaxial cable • 2 sets composite A/V cables... -
Page 22: Connecting The 8300Hdc To An External Sata Hard Disk Drive (Optional)
• If it is a new drive or one used on another device, you are asked to format it. • If the drive is formatted and will work with this 8300HDC, you get a confirmation that the drive is working. - Page 23 • The 8300HDC automatically stores complete programs using the following space available logic: - If the external SATA drive has more space available, the SATA drive stores the next recording. - If the internal hard drive on the 8300HDC has more space available, the internal hard drive stores the next recording.
-
Page 24: Connecting The 8300Hdc To An Hdtv With A 1394 Connector
Connecting the 8300HDC to an HDTV with a 1394 Connector Required cables: • 1 6-pin to 4-pin 1394 cable (Consult your TV user’s guides for more detailed information) • 1 set composite A/V cables Important: When you connect the DVR-DVD to your... -
Page 25: Compliance Information
Trademarks Scientific Atlanta, the Scientific Atlanta logo, and Explorer are registered trademarks of Scientific- Atlanta, Inc. 8300HDC is a trademark of Scientific- Atlanta, Inc. Dolby is a registered trademark of Dolby Laboratories. HDMI, the HDMI logo, and High- Definition Multimedia Interface are trademarks or registered trademarks of HDMI Licensing LLC. -
Page 26: Index
Connectors See also Front panel; Back panel required for HDTV required for SDTV 6, 7 Connecting the 8300HDC to other devices; Explorer eClub HDTV with 1394 connector HDTV with component input (PrPbY/V) HDTV with DVI connector HDTV with HDMI connector... - Page 27 Index, continued Multi-stream CableCARD 2, 4, 10 Performance tips. See Troubleshooting. Picture Doesn’t display Formats No color Picture-in-picture. See PIP Ports. See Connectors Product information. See Explorer eClub Programming, viewing Progressive scan rate PrPbY/V connector 4, 6, 7 HDTV connection 14 home theater connection SDTV connection Record programs...
- Page 28 © 2006 by Scientific-Atlanta, Inc. All rights reserved. Product and service availability subject to change without notice. Scientific Atlanta, A Cisco Company, 5030 Sugarloaf Parkway, Box 465447, Lawrenceville, GA 30044 www.scientificatlanta.com March 2006 Printed in USA 4013171 Rev A...