Table of Contents
Advertisement
Advertisement
Chapters
Table of Contents
Troubleshooting

Related Manuals for Samsung SCX-6x22


Summary of Contents for Samsung SCX-6x22
- Page 2 © 2006 Samsung Electronics Co., Ltd. All rights reserved. This manual is provided for information purposes only. All information included herein is subject to change without notice. Samsung Electronics is not responsible for any direct or indirect damages, arising from or related to use of this manual.
- Page 3 SAMSUNG WORLD WIDE ONTACT If you have any comments or questions regarding Samsung products, contact the Samsung customer care center. Country Customer Care Center ARGENTINE 0800-333-3733 AUSTRALIA 1300 362 603 BELGIUM 02 201 2418 BRAZIL 0800-124-421 CANADA 1-800-SAMSUNG (7267864) CHILE...
-
Page 4: Table Of Contents
Restoring the network configuration ... 3.3 Printing a network configuration page ... 3.3 4. Software overview Supplied software ... 4.1 Printer driver features ... 4.2 System requirements ... 4.2 5. Loading originals and print media Loading originals ... 5.1 Selecting print media ... 5.2 Loading paper ... - Page 5 7. Basic printing Printing a document ... 7.1 Canceling a print job ... 7.1 8. Scanning Scanning basics ... 8.1 Scanning to an application using a local connection ... 8.1 Scanning using a network connection ... 8.2 Changing the settings for each scan job ... 8.5 Changing the default scan settings ...
- Page 6 Clearing paper jams ... 14.2 Understanding display messages ... 14.6 Toner cartridge-related messages ... 14.10 Solving other problems ... 14.11 15. Specifications General specifications ... 15.1 Printer specifications ... 15.1 Scanner and copier specifications ... 15.2 Facsimile specifications ... 15.2 Index...
-
Page 7: Laser Safety Statement
19 SAVE THESE INSTRUCTIONS. Laser Safety Statement The printer is certified in the U.S. to conform to the requirements of DHHS 21 CFR, chapter 1 Subchapter J for Class I(1) laser products, and elsewhere is certified as a Class I laser product conforming to the requirements of IEC 825. -
Page 8: Power Saver
Power Saver This printer contains advanced energy conservation technology that reduces power consumption when it is not in active use. When the printer does not receive data for an extended period of time, power consumption is automatically lowered. Recycling Please recycle or dispose of the packaging material for this product in an environmentally responsible manner. - Page 9 Directive 1999/5/EC. The product has been designed to work with the national PSTNs and compatible PBXs of the European countries: In the event of problems, you should contact the Euro QA Lab of Samsung Electronics Co., Ltd. in the first instance.
-
Page 11: Introduction
Introduction Thank you for purchasing this Samsung multifunctional product. Your machine provides printing, copying, scanning, and faxing functions. This chapter includes: • Special features • Printer overview • Understanding the Status LED • Finding more information • Selecting a location... -
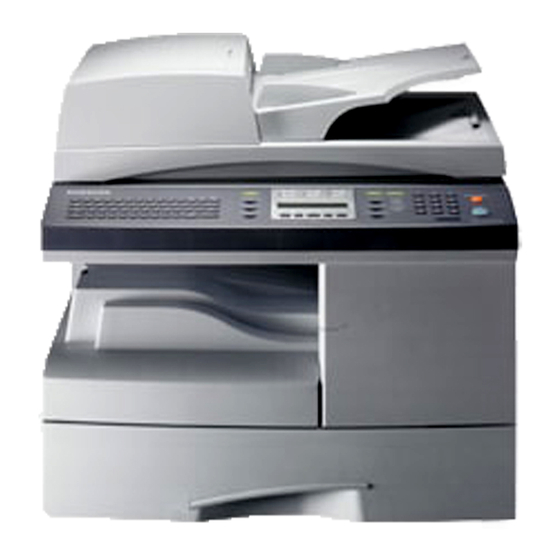
Page 12: Printer Overview
Printer overview These are the main components of your machine: Front view * The figure above shows an SCX-6322DN with all available accessories. ADF (Automatic scanner lid Document Feeder) document width guides tray 1 document input tray optional tray 2... -
Page 13: Control Panel Overview
Control panel overview Keyboard: Used to enter characters. Used to store frequently dialed fax number and dial them with a touch of the buttons. (See page 2.3.) Address Book: Allows you to store frequently used fax numbers in memory or search for stored fax numbers or email addresses. Also allows you to print an Address Book/Phone Book list. -
Page 14: Understanding The Status Led
To access a printer driver help screen, click Help from the printer properties dialog box. Samsung website If you have Internet access, you can get help, support, printer drivers, manuals, and order information from the Samsung website, www.samsungprinter.com. <Introduction>... -
Page 15: Selecting A Location
Selecting a location Select a level, stable place with adequate space for air circulation. Allow extra space for opening covers and trays. The area should be well-ventilated and away from direct sunlight or sources of heat, cold, and humidity. Do not set the machine close to the edge of your desk or table. -
Page 16: System Setup
System setup This chapter gives you an overview of menus available on your machine and step-by-step instructions for setting up the machine’s systems. This chapter includes: • Menu overview • Changing the display language • Setting the date and time •... -
Page 17: Changing The Display Language
Changing the display language To change the language that appears on the control panel, follow these steps: Press Menu until System Setup appears on the bottom line of the display and press OK. Press OK when Machine Setup appears. Press the Scroll buttons until Language appears and press OK. Press the Scroll buttons until the language you want appears and press OK. -
Page 18: Setting Sounds
Setting sounds You can control the following sounds: • Key Sound: Turns the key sound on or off. With this option set to On a tone sounds each time a key is pressed. • Alarm Sound: Turns the alarm sound on or off. With this option set to an alarm tone sounds when an error occurs or fax communication ends. -
Page 19: Entering Characters Using The Number Keypad
Entering characters using the number keypad As you perform various tasks, you may need to enter names and numbers. For example, when you set up your machine, you enter your name or your company’s name, and the fax number. Entering alphanumeric characters When you are prompted to enter a letter, locate the button labeled with the character you want. -
Page 20: Using The Save Modes
To turn this mode on or off, press Toner Save. Note When PC-printing, you can also turn on or off Toner Save mode in the printer properties. See the Software Section. Power Save mode Power Save mode allows your machine to reduce power consumption when it is not in actual use. - Page 21 Press the Scroll buttons until Auto Continue appears and press Press the Scroll buttons until the binding option you want appears. • On: automatically prints after set time passes, when the paper size mismatches the tray paper size. • Off: waits until you press Start on the control panel, when the paper size mismatches the tray paper size.
-
Page 22: Network Setup
Ethernet cable, you can share the machine with other network users. You need to set up the network protocols on the machine to use it as your network printer. Protocols can be set up by the following two methods: Via network administration programs You can configure your machine’s print server settings and manage the... -
Page 23: Configuring Ethertalk
Static addressing To enter a TCP/IP address from your machine’s control panel, take the following steps: Press Menu until Admin Setup appears on the bottom line of the display and press OK. Press the Scroll buttons until Network Setup appears and press Press OK when TCP/IP appears. -
Page 24: Setting Ethernet Speed
Setting Ethernet speed You can select the communication speed for Ethernet connections. Press Menu until Admin Setup appears on the bottom line of the display and press OK. Press the Scroll buttons until Network Setup appears and press Press the Scroll buttons until Ethernet Speed appears and press Press the Scroll buttons until the speed you want appears and press OK. -
Page 25: Software Overview
Printer driver features • System requirements Supplied software You must install the printer and scanner software using the supplied CDs after you have set up your machine and connected it to your computer. Each CD provides you with the following software: Contents... -
Page 26: Printer Driver Features
• Paper source selection • Paper size, orientation and media type • Number of copies In addition, you can use various special printing features. The following table shows a general overview of features supported by your printer drivers: PCL 6 Feature... - Page 27 Linux Item Requirements Operating system • Red Hat 8.0 ~ 9.0 • Fedora Core 1 ~ 3 • Mandrake 9.2 ~ 10.1 • SuSE 8.2 ~ 9.2 Pentium IV 1 GHz or higher 256 MB or higher Free disk spacepage 1 GB or higher Software •...
-
Page 28: Loading Originals And Print Media
Loading originals and print media This chapter introduces you to how to load originals and print media into your machine. This chapter includes: • Loading originals • Selecting print media • Loading paper • Setting the paper size and type Note SCX-6322DN has the DADF function which can let you scan on both sides of the original media at once. -
Page 29: Selecting Print Media
This may be the result of improper handling, unacceptable temperature and humidity levels, or other variables over which Samsung has no control. • Before purchasing large quantities of print media, ensure that it meets the requirements specified in this user’s guide. - Page 30 Supported print media types and sizes Type Size Plain paper Letter Legal Folio Oficio JIS B5 Executive Envelope Envelope B5 Envelope Monarch Envelope COM-10 Envelope DL Envelope C5 Envelope C6 Transparency Letter, A4 Labels Letter, Legal, Folio, A4, JIS B5, Executive, A5 Card stock Letter, Legal, Folio,...
-
Page 31: Media Sizes Supported In Each Mode
Media sizes supported in each mode Mode Size Copy mode Letter, A4, Legal, Folio, Oficio, Executive, ISO B5, A5 Single side All sizes supported by printing the machine Duplex printing Letter, A4, Legal, Folio, Oficio Fax mode Letter, A4, Legal 1. -
Page 32: Loading Paper
180 °C for 0.1 second. • Letterhead ink must be non-flammable and should not adversely affect printer rollers. • Forms and letterhead should be sealed in a moisture-proof wrapping to prevent changes during storage. - Page 33 Notes • If you experience problems with paper feed, place one sheet at a time in the multi-purpose tray. • You can load previously printed paper. The printed side should be facing up with an uncurled edge at the front. If you experience problems with paper feed, turn the paper around.
- Page 34 See page 5.8 for copying and faxing or the Software Section for PC-printing. Note The settings made from the printer driver override the settings on the control panel. After printing, fold the multi-purpose tray extension and close the multi-purpose tray.
-
Page 35: Setting The Paper Size And Type
Tips on using the multi-purpose tray • Load only one size of print media at a time in the multi-purpose tray. • To prevent paper jams, do not add paper when there is still paper in the multi-purpose tray. This also applies to other types of print media. •... -
Page 36: Copying
Copying This chapter gives you step-by-step instructions for copying documents. This chapter includes: • Selecting the paper tray • Copying • Changing the settings for each copy • Changing the default copy settings • Using special copy features • Copying on both sides of paper •... -
Page 37: Changing The Default Copy Settings
Reduced or enlarged copy By using the Reduce/Enlarge button, you can reduce or enlarge the size of a copied image from 25% to 400% when you copy original documents from the scanner glass, or from 25% to 100% from the ADF. To select from the predefined copy sizes: Press Reduce/Enlarge. -
Page 38: Id Card Copying
Press OK or Start to begin copying. Note You cannot adjust the copy size using the Reduce/Enlarge button for making a 2- or 4- up copy. ID card copying Your machine can print 2-sided originals on one sheet of A4-, Letter-, Legal-, Folio-, Executive-, Oficio, B5- or A5-sized paper. -
Page 39: Clone Copying
Clone copying Your machine can print multiple image copies from the original document on a single page. The number of images is automatically determined by the original image and paper size. This copy feature is available only when you place originals on the scanner glass. -
Page 40: Margin Shift
Margin Shift The Margin Shift feature allows you to create a binding edge for the document. The image can be adjusted up or down on the page and/or shifted to the right or left. Press Copy. Place a single original face down on the scanner glass. - Page 41 Covers The machine automatically adds covers to your copied set using stock taken from a different tray than the copies. Press Copy. Place a single original face down on the scanner glass. For details about loading an original, see page 5.1. Press Menu until Copy Feature appears on the bottom line of the display and press OK.
-
Page 42: Copying On Both Sides Of Paper
Copying on both sides of paper By using the Duplex button on your machine, you can set the machine to print copies on both sides of paper. Press Duplex. Load originals face up in the ADF. Press the Scroll buttons until the binding option you want appears. •... -
Page 43: Basic Printing
Click the Windows Start menu. For Windows 98/NT 4.0/2000/Me, select Settings and then Printers. For Windows XP, select Printers and Faxes. Double-click the Samsung SCX-6x22 Series icon. From the Document menu, select Cancel Printing (Windows 98/ Me) or Cancel (Windows NT 4.0/2000/XP). Note You can also access this window by simply double-clicking the printer icon at the bottom right corner of the Windows desktop. -
Page 44: Scanning
For details, please refer to the application user's guide. protocol: You can scan <Scanning> connection Note You can add more TWAIN-compliant software for scanning, such as Adobe Photoshop Deluxe, or Adobe Photoshop, from the Printer Settings Utility. See the Software Section. -
Page 45: Scanning Using A Network Connection
Note You can change the scanner properties of your machine and the scan settings from the Samsung Network Scan Manager window. Click Properties and set the options in each tab. Registering authorized users To use scanning to Email, FTP, or SMB, you need to register authorized users using SyncThru™... - Page 46 Press the Scroll buttons until NetScan appears on the bottom line of the display and press OK. Enter the ID you have set in the Samsung Network Scan Manager window and press OK. Enter the PIN you have set in the Samsung Network Scan Manager window and press OK.
-
Page 47: Scanning To Email
Setting network scan timeout If the Network Scan program on your computer does not send a refresh request and does not scan a job within a specified timeout period, your machine cancels the scan job. You can change this timeout setting as needed. -
Page 48: Changing The Settings For Each Scan Job
Scanning to an SMB server You can scan an image and then send it to an SMB server. You need to set up parameters for access to SMB servers from SyncThru™ Web Service. See page 8.3. Before scanning, you can set the scan options for your scan job. See page 8.5. -
Page 49: Configuring Group Email Numbers
Configuring group email numbers Enter your machine’s IP address as the URL in a browser and click Go to access the web site of your machine. Click Machine Settings, E-mail Setup and Group Address Book. Click Add. Select a group number and enter the group name you want. Select speed email numbers that will be included in the group. -
Page 50: Scan On Both Sides Of Paper (Scx-6322Dn Only)
Printing Address Book You can check your Address Book settings by printing a list. Press Address Book until Print appears on the bottom line of the display. Press OK. A list showing your one-touch dial settings, and the speed/group email entries print out. Scan on both sides of paper (SCX-6322DN only) By using the Duplex button on your machine, you can set the machine to scan on both sides of paper. -
Page 51: Faxing
Faxing This chapter gives you information about using your machine as a fax machine. This chapter includes: Sending a fax • Setting the fax header • Adjusting the document settings • Sending a fax automatically • Sending a fax manually •... -
Page 52: Sending A Fax Automatically
Standard Originals with normal sized characters. Fine Originals containing small characters or thin lines or originals printed using a dot-matrix printer. Super Fine Originals containing extremely fine detail. Super Fine mode is enabled only if the machine with which you are communicating also supports the Super Fine resolution. -
Page 53: Confirming A Transmission
Confirming a transmission When the last page of your original has been sent successfully, the machine beeps and returns to Standby mode. When something goes wrong while sending your fax, an error message appears on the display. For a list of error messages and their meanings, see page 1.4. -
Page 54: Receiving Automatically In Fax Mode
Press OK to save your selection. Press Stop/Clear to return to Standby mode. Notes • When the memory is full, the printer can no longer receive any incoming fax. Secure free memory to resume by removing data stored in the memory. -
Page 55: Receiving In Secure Receiving Mode
Call your fax number from another telephone. It is not necessary to place the call from a fax machine. When your machine begins to ring, do not answer the call. The machine requires several rings to learn the pattern. When the machine completes learning, the display shows Completed DRPD Setup. -
Page 56: Printing Received Faxes On Both Sides Of Paper
Printing received faxes on both sides of paper You can set the machine to print received faxes on both sides of paper. Press Fax. Press Menu until Fax Setup appears on the bottom line of the display and press OK. Press the Scroll buttons to select Receiving and press OK. -
Page 57: Sending A Delayed Fax
Sending a delayed fax You can set your machine to send a fax at a later time when you will not be present. Press Fax. Load originals face up into the ADF, or place a single original face down on the scanner glass. For details about loading an original, see page 5.1. -
Page 58: Polling
Enter the job name you want and press OK. The original is scanned into memory before transmission. The display shows memory capacity and the number of pages being stored in memory. If an original is placed on the scanner glass, select Yes to add another page. -
Page 59: Mail Box
Press Menu until Admin Setup appears on the bottom line of the display and press OK. Press the Scroll buttons until Forward appears and press OK. Press OK when Fax appears. Press the Scroll buttons until Send Forward appears and press Press the Scroll buttons to select On and press OK. - Page 60 Creating a Mailbox Press Menu until Admin Setup appears on the bottom line of the display and press OK. Press the Scroll buttons until Mailbox Setup appears and press Press the Scroll buttons until Create displays on the bottom line and then press OK.
-
Page 61: Fax Setup
Fax setup This chapter gives you information on setting up your machine for receiving and sending faxes. This chapter includes: • Changing the fax setup options • Changing the default document settings • Printing sent fax report automatically • Setting up Phone Book Changing the fax setup options Your machine provides you with various user-selectable options for setting up the fax system. -
Page 62: Changing The Default Document Settings
Option Description Auto When receiving a fax containing pages as long as Reduction or longer than the paper loaded in the paper tray, the machine can reduce the size of the original to fit the size of the paper loaded in the machine. Turn on this feature if you want to automatically reduce an incoming page. - Page 63 Speed dial numbers You can store up to 240 frequently-used fax numbers in speed dial numbers. Forty (01-40) speed dial numbers are automatically stored as same numbers of one-touch dial numbers. Registering a speed dial number Press Fax. Press Address Book until New&Edit appears on the bottom line of the display and press OK.
- Page 64 Enter the speed dial number you want to add or delete and press If you entered a new speed dial number, Add? appears. If you enter a speed dial number stored in the group, Delete? appears. Press OK to add or delete the number. Press OK when Yes appears to add or delete more numbers and repeat from step 4.
-
Page 65: E-Mail Setup
E-mail setup The E-mail function on your machine allows you to send your documents as an e-mail message without going to a PC. The document is sent to the recipient's e-mail box as an attachment. This chapter includes: • Setting Up Your E-mail System •... -
Page 66: Setting Up E-Mail Options
Setting Up E-mail Options The system administrator customizes the e-mail system according to the operating environment. Press Menu until Admin Setup appears on the bottom line of the display and press OK. Press the Scroll buttons until Email Setup appears and press OK. Press the Scroll buttons until the option you want to set displays on the bottom line. -
Page 67: Ordering Supplies And Accessories
Optional tray Cabinet Part number SCX-6320D8 To order Samsung-authorized supplies or accessories, contact your local Part number Samsung dealer or the retailer where you purchased your machine, or visit www.samsungprinter.com SCX-6320R2 information on calling for technical support. 12.1 <Ordering supplies and accesso-... -
Page 68: Maintenance
Maintenance This chapter provides information for maintaining your machine and the toner cartridge. This chapter includes: • Printing reports • Clearing memory • Cleaning your machine • Maintaining the toner cartridge • Maintenance Parts • Managing your machine from the website •... -
Page 69: Cleaning Your Machine
Press the Scroll buttons until the item you want to clear appears. Options Description All Settings Clears all of the data stored in memory and resets all of your settings to the factory default. Fax Setup Restores all of the fax options to the factory default. -
Page 70: Maintaining The Toner Cartridge
Wipe the underside of the scanner lid and white sheet until it is clean and dry. Close the scanner lid. sMaintaining the toner cartridge Toner cartridge storage To get the most from the toner cartridge, keep the following guidelines in mind: •... -
Page 71: Replacing The Toner Cartridge
Pull the toner cartridge out. Thoroughly roll the cartridge 5 or 6 times to distribute the toner evenly inside the cartridge. Note If toner gets on your clothing, wipe it off with a dry cloth and wash clothing in cold water. Hot water sets toner into fabric. Caution Do not touch the green underside of the toner cartridge. -
Page 72: Replacing The Drum Cartridge
Turn the cartridge locking lever upwards to release the toner cartridge. Pull the toner cartridge out. Remove the new toner cartridge from its bag. Thoroughly roll the cartridge 5 or 6 times to distribute the toner evenly inside the cartridge. Thoroughly roll the cartridge to assure maximum copies per cartridge. - Page 73 Open the front cover. Turn the cartridge locking lever upwards to release the toner cartridge. Pull the toner cartridge out. Note The toner cartridge must be removed to replace the drum cartridge. Pull the used drum cartridge out. Note Help the environment by recycling your used drum cartridge.
-
Page 74: Cleaning The Drum
Reinstall the toner cartridge, and then lock the lever. Close the front cover, then the side cover. Note If you do not reset the counter, Drum Warning may appear before the current drum cartridge’s time is up. Cleaning the drum If there are streaks or spots on your print, the drum cartridge may require cleaning. -
Page 75: Maintenance Parts
If you have connected your machine to a network and set up TCP/IP network parameters correctly, you can manage the machine via Samsung’s SyncThru™ Web Service, an embedded web server. Use SyncThru™ Web Service to: • View the machine’s device information and check its current status. -
Page 76: Checking The Machine's Serial Number
Checking the machine’s serial number When you call for service or register as a user on the Samsung website, the machine’s serial number may be required. You can check the serial number by taking the following steps: Press Menu until Admin Setup appears on the bottom line of the display and press OK. -
Page 77: Change Password
Managing the Department Codes Press Menu until Admin Setup appears on the bottom line of the display and press OK. Press the Scroll buttons until Department Codes appears and press OK. Press the Scroll buttons until Management appears and press OK. The following options are available: - Department Mode: allows you to enable or disable the department code feature. -
Page 78: Troubleshooting
Troubleshooting This chapter gives helpful information for what to do if you encounter an error. This chapter includes: • Clearing document jams • Clearing paper jams • Understanding display messages • Toner cartridge-related messages • Solving other problems Clearing document jams When an original jams while passing through the ADF, [Document Jam] appears on the display. -
Page 79: Clearing Paper Jams
Close the document input tray. Then place the documents back into the DADF. Roller misfeed Open the scanner lid. Seize the misfed paper, and remove the paper from the feed area by carefully pulling it to the right using both hands. Close the scanner lid. -
Page 80: In The Optional Tray 2
Pull the release lever to open the side cover. Note Do not touch the shiny drum cartridge surface. Scratches or smudges will result in poor copy quality. Carefully remove the misfed paper in the direction shown. Close the cover and insert the paper Tray. Lower the rear part of the Tray to align the rear edge with the corresponding slot of the machine, then insert it completely. -
Page 81: In The Fuser Area Or Around The Toner Cartridge
In the multi-purpose tray If the paper is not feeding properly, pull the paper out of the machine. Open and close the front cover to resume printing. In the fuser area or around the toner cartridge Note The fuser area is hot. Take care when removing paper from the machine. - Page 82 Open the front cover. Pull down on the fuser lever. This will release pressure on the paper. Turn the Jam Remove Lever in the direction of the arrow to move the paper to the exit area, then gently pull the paper out through the exit area.
-
Page 83: Understanding Display Messages
In the duplex unit area If the duplex unit is not inserted correctly, paper jam may occur. Make sure that the duplex unit is inserted correctly. Press the release lever to open the side cover. Remove the jammed paper. Close the side cover. Tips for avoiding paper jams By selecting the correct media types, most paper jams can be avoided. - Page 84 Message Meaning Duplex Jam Paper has jammed Open/Close Door during duplex printing. File Access Login to the network Denied server was successful. However, access to the file on the network server was denied. File Name Exist The file name you have entered already exists.
- Page 85 Unlock the scanner is locked and press Stop/ Clear. The LSU (Laser Please wait a few Scanning Unit) in minutes. your printer is checking some problems detected. The engine in your Please wait a few machine is checking minutes. some problems detected.
- Page 86 Adjunst the machine setting to the tray paper size of the printer properties. (See page 5.8.) Or change the tray paper size under the Paper tab within the printer properites. Load paper in the optional tray 2. See page 5.5. 14.9 <Troubleshooting>...
-
Page 87: Toner Cartridge-Related Messages
You can keep printing but the quality cannot be guaranteed, and the product support is no longer provided. You can select either Stop or Continue. If you do not select any, the printer will work as Stop is selected. If you select Stop, you cannot print until the genuine cartridge is installed. -
Page 88: Solving Other Problems
Solving other problems The following chart lists some conditions that may occur and the recommended solutions. Follow the suggested solutions until the problem is corrected. If the problem persists, please call for service. Paper feeding problems Condition Suggested solutions Paper is jammed Clear the paper jam. -
Page 89: Printing Problems
From the Start menu, choose Settings and then Printers. Right-click the Samsung SCX-6x22 Series PCL 6 machine icon, choose Properties, click the Details tab, and then choose the Spool Settings button. Select the desired spool setting. -
Page 90: Printing Quality Problems
Adjust the print resolution and turn the toner save mode off. See the help screen of the printer driver and page 2.5, respectively. • A combination of faded or smeared defects may indicate that the toner cartridge needs cleaning. - Page 91 Suggested solutions Vertical lines If black vertical streaks appear on the page: • The drum inside the printer has probably been scratched. Remove the drum cartridge and install a new one. See page 13.5. If white vertical streaks appear on the page: •...
-
Page 92: Copying Problems
• Turn over the stack of paper in the tray. Also try rotating the paper 180° in the tray. An unknown image You printer is probably being used at an repetitively appears altitude of 2,500 m(8,200 ft)or above. The high... -
Page 93: Scanning Problems
Set your computer to the ECP printer mode through BIOS setting. It will help to increase the speed. For details about how to set BIOS, refer to your computer user’s guide. -
Page 94: Network Scan Problems
To view the Help file, you need to have Internet the Help file. Explorer 4 service pack 2 or above. I cannot use the Check your operating system. Supporting Samsung operating systems are Windows 98/Me/NT 4.0/ Network Scan 2000/XP. Manager... -
Page 95: Common Windows Problems
Windows error messages. Common PostScript problems The following situations are PS language specific and may occur when several printer languages are being used. Note To receive a printed or screen-displayed message when PostScript errors occur, open the Print Options window and click the desired selection next to the PostScript errors section. -
Page 96: Common Linux Problems
Common Linux problems Problem Possible Cause and Solution The machine does not • Check if the printer driver is installed in print your system. Open Unified Driver configurator and switch to the Printers tab in Printers configuration window to look at the list of available printers. Make sure that your machine is displayed on the list. -
Page 97: Common Macintosh Problems
Make sure if it is connected properly if I/O error is reported while scanning. • Check if the port is not busy. Since functional components of MFP (printer and scanner) share the same I/O interface (port), the situation of simultaneous access of different “consumer”... -
Page 98: Specifications
Specifications This chapter includes: • General specifications • Printer specifications • Scanner and copier specifications • Facsimile specifications General specifications Item Description • SCX-6322DN: Up to 50 sheets (75 g/m bond) • SCX-6122FN: Up to 40 sheets (75 g/m bond) ADF document size •... -
Page 99: Scanner And Copier Specifications
Scanner and copier specifications Item Description Compatibility TWAIN standard / WIA standard Scanning method ADF/DADF and Flat-bed Color CCD (Charge Coupled Device) module Resolution Optical: 600 x 600 dpi (mono and color) Enhanced: 4,800 x 4,800 dpi Effective scanning Scanner glass: 356 mm length ADF: 356 mm Effective scanning... -
Page 100: Index
NDEX Numerics 2/4-up, special copy 6.2 accessories order information 12.1 Address Book group dial numbers 10.3 one-touch dial numbers 10.3 speed dial numbers 10.3 Address Book, use 8.5 ADF 1.2 ADF, load 5.1 alarm sound 2.3 Ans/Fax mode, receiving mode 9.4 background image, erase 6.4 book copy, special copy 6.4 booklet, special copy 6.4... - Page 101 2.3 special copy features 6.2 special print media, guidelines 5.4 specifications facsimile 15.2 general 15.1 paper 5.3 printer 15.1 scanner and copier 15.2 speed dial numbers, set 10.3 Status LED 1.4 supplies checking life 13.8 order information 12.1 system requirements Macintosh 4.3...
-
Page 102: Software Section
Samsung Printer Software section... - Page 103 OFTWARE SECTION ONTENTS NSTALLING Chapter 1: Installing Printer Software ... 4 Installing Software for Local Printing ... 4 Installing Software for Network Printing ... 7 Reinstalling Printer Software ... 10 Removing Printer Software ... 11 ASIC Chapter 2: Printing a Document ... 12 Printing to a file (PRN) ...
- Page 104 Using Onscreen Help File ... 26 Changing the Smart Panel Program Settings ... 26 CANNING Chapter 7: Scanning Using Samsung SmarThru Office ... 27 Using Samsung SmarThru Office ... 27 Uninstalling Samsung SmarThru Office ... 29 Using Onscreen Help File ... 29 Scanning Process with TWAIN-enabled Software ...
- Page 105 Using the Image Manager ... 36 SING RINTER WITH A Chapter 9: Installing Software for Macintosh ... 38 Setting Up the Printer ... 39 For a Network-connected Macintosh ... 39 For a USB-connected Macintosh ... 39 Printing ... 40 Printing a Document ... 40 Changing Printer Settings ...
-
Page 106: Installing Printer Software In Windows
Installing Software for Local Printing A local printer is a printer directly attached to your computer using the printer cable supplied with your printer, such as a USB or parallel cable. If your printer is attached to a network, skip this step and go to “Installing Software for Network Printing”... -
Page 107: Custom Installation
If the test page prints out correctly, click Yes. If not, click No to reprint it. To register yourself as a user of Samsung Printers in order to receive information from Samsung, select the checkbox and click Finish. You are now sent to the Samsung web site. - Page 108 • After connecting the printer, click Next. • If you don’t want to connect the printer at this time, click Next, and No on the following screen. Then the installation will start and a test page will not be printed at the end of the installation.
-
Page 109: Installing Software For Network Printing
To register yourself as a user of Samsung Printers in order to receive information from Samsung, select the checkbox and click Finish. You are now sent to the Samsung web site. Otherwise, just click Finish. Installing Software for Network Printing When you connect your printer to a network, you must first configure the TCP/IP settings for the printer. - Page 110 Select the printer you want to install from the list and then click Next. • If you do not see your printer on the list, click Update to refresh the list, or select Add TCP/IP Port to add your printer to the network. To add the printer to the network, enter the port name and the IP address for the printer.
- Page 111 Select the printer you want to install from the list and then click Next. • If you do not see your printer on the list, click Update to refresh the list, or select Add TCP/IP Port to add your printer to the network. To add the printer to the network, enter the port name and the IP address for the printer.
-
Page 112: Reinstalling Printer Software
Select the printer you want to install from the list and then click Next. • If you do not see your printer on the list, click Update to refresh the list, or select Add TCP/IP Port to add your printer to the network. To add the printer to the network, enter the port name and the IP address for the printer. -
Page 113: Removing Printer Software
Removing Printer Software Start Windows. From the Start menu select Programs or All Programs → your printer driver name → Maintenance. Select Remove and click Next. You will see a component list so that you can remove any item individually. -
Page 114: Basic Printing
Please refer to the OS Compatibility section of Printer Specifications in your Printer User’s Guide. • If you need to know the exact name of your printer, you can check the supplied CD-ROM. The following procedure describes the general steps required for printing from various Windows applications. -
Page 115: Printer Settings
Printer Settings You can use the printer properties window, which allows you to access all of the printer options you need when using your printer. When the printer properties are displayed, you can review and change the settings needed for your print job. -
Page 116: Paper Tab
Cotton: 20 lb to 24 lb (75~90 g/m2) cotton paper such as Gilbert 25 % and Gilbert 100 %. Plain Paper: Normal plain paper. Select this type if your printer is monochrome and printing on the 16 lb (60 g/m2) cotton paper. -
Page 117: Graphics Tab
• On: Select this option to allow the printer to use less toner on each page. • Off: If you don’t need to save toner when printing a document, select this option. -
Page 118: Extras Tab
Because downloading fonts takes time, selecting this option can speed up your printing time. When using Printer fonts, the printer will try to match the fonts used in your document to those stored in its memory. If,... -
Page 119: Using A Favorite Setting
To use a saved setting, select the item from the Favorites drop down list. The printer is now set to print according to the Favorites setting you selected. To delete a Favorites item, select it from the list and click Delete. -
Page 120: Advanced Printing
User’s Guide may differ depending on the printer in use. However the composition of the printer properties window is similar. • If you need to know the exact name of your printer, you can check the supplied CD-ROM. This chapter includes: •... -
Page 121: Printing Posters
Printing Booklets This printer feature allows you to print your document on both sides of the paper and arranges the pages so that the paper can be folded in half after printing to produce a booklet. -
Page 122: Printing On Both Sides Of Paper
Click OK and print the document. : If your printer does not have a duplex unit, you should complete the printing job manually. The printer prints every other page of the document first. After printing the first side of your job, the Printing Tip window appears. -
Page 123: Using Watermarks
“DRAFT” or “CONFIDENTIAL” printed diagonally across the first page or all pages of a document. There are several predefined watermarks that come with the printer, and they can be modified, or you can add new ones to the list. Using an Existing Watermark To change the print settings from your software application, access printer properties. -
Page 124: Using Overlays
Regards WORLD BEST print a letter with your company’s letterhead, you do not need to load preprinted letterhead paper in the printer. You need only tell the printer to print the letterhead overlay on your document. Creating a New Page Overlay To use a page overlay, you must create a new page overlay containing your logo or image. -
Page 125: Using Windows Postscript Driver
CD-ROM to print a document. PPDs, in combination with the PostScript driver, access printer features and allow the computer to communicate with the printer. An installation program for the PPDs is provided on the supplied software CD-ROM. This chapter includes:... -
Page 126: Sharing The Printer Locally
Please refer to the OS Compatibility section of Printer Specifications in your Printer User’s Guide. • If you need to know the exact name of your printer, you can check the supplied CD-ROM. Setting Up a Host Computer Start Windows. -
Page 127: Using Smart Panel
Programs or All Programs → your printer driver name → Smart Panel. OTES • If you have already installed more than one Samsung printer, first select the printer model you want in order to use the corresponding Smart Panel. Right-click (in Windows or Linux) or click (in Mac OS X) the Smart Panel icon and select your printer name. -
Page 128: Opening The Troubleshooting Guide
Driver Setting (Only for Windows) You can use the printer properties window, which allows you to access all of the printer options you need for using your printer. For details, See “Printer Settings” on page 13. Opening the Troubleshooting Guide Using the troubleshooting guide, you can view solutions for error status problems. -
Page 129: Scanning
Then you can fax or e-mail the files, display them on your web site or use them to create projects that you can print using Samsung SmarThru software or the WIA driver. This chapter includes: •... - Page 130 •Working area - SmarThru Desktop: Created within the standard Windows folder My Documents. - Sort on Disk: Files of the folders which are not indexed will not be displayed in the Sort on Disk section. Sort type are Date, File Types, Latest Used. To add a folder for indexing, press Edit menu →...
-
Page 131: Uninstalling Samsung Smarthru Office
Uninstalling Samsung SmarThru Office : Before beginning uninstallation, ensure that all applications are closed on your computer. From the Start menu, select Programs. Select SmarThru Office, and then select Uninstall SmarThru Office. When your computer asks you to confirm, read the statement and click OK. -
Page 132: Using Your Printer In Linux
• Configuring Printer Properties • Printing a Document • Scanning a Document Getting Started The supplied CD-ROM provides you with Samsung’s Unified Linux Driver package for using your machine with a Linux computer. Samsung’s Unified Linux Driver package contains printer and scanner drivers, providing the ability to print documents and scan images. -
Page 133: Uninstalling The Unified Linux Driver
When the installation is complete, click Finish. The installation program has added the Unified Driver Configurator desktop icon and Samsung Unified Driver group to the system menu for your convenience. If you have any difficulties, consult the onscreen help that is... -
Page 134: Using The Unified Driver Configurator
Printers configuration has the two tabs: Printers and Classes. Printers Tab You can see the current system’s printer configuration by clicking on the printer icon button on the left side of the Unified Driver Configurator window. Switches to Printer configuration. -
Page 135: Scanners Configuration
• Add Class... : Allows you to add a new printer class. • Remove Class : Removes the selected printer class. Scanners Configuration In this window, you can monitor the activity of scanner devices, view a list of installed Samsung MFP devices, change device properties, and scan images. Switches to Scanners configuration. -
Page 136: Configuring Printer Properties
•Classes: shows the class that your printer is in. Click Add to Class to add your printer to a specific class or click Remove from Class to remove the printer from the selected class. -
Page 137: Printing Files
To abort the current job, click Cancel. Printing Files You can print many different types of files on the Samsung machine device using the standard CUPS way - directly from the command line interface. The CUPS lpr utility allows you do that. -
Page 138: Using The Image Manager
Click Delete. The setting is deleted from the list Using the Image Manager The Image Manager application provides you with menu commands and tools to edit your scanned image. Using Your Printer in Linux Use these tools to edit the image. - Page 139 Allows you to adjust the brightness or contrast of the image, or to invert the image. Shows the properties of the image. For further details about the Image Manager application, refer to the onscreen help. Using Your Printer in Linux...
-
Page 140: Using Your Printer With A Macintosh
Double-click the Samsung MFP on your Macintosh desktop. Double-click the MAC_Installer folder. Double-click the MAC_Printer folder. For Mac OS 10.3 or higher, double-click the Samsung MFP Installer OSX icon. Click Continue. Click Install. After the installation is finished, click Quit. -
Page 141: Setting Up The Printer
SEC000xxxxxxxxx from the printer box, where the xxxxxxxxx varies depending on your machine. Click Add. If Auto Select does not work properly, select Samsung in Printer Model and your printer name in Model Name. Your machine appears on the Printer List and is set as the default printer. -
Page 142: Printing
• You can check your printer name in the supplied CD- ROM. Printing a Document When you print with a Macintosh, you need to check the printer software setting in each application you use. Follow these steps to print from a Macintosh. -
Page 143: Printing Multiple Pages On One Sheet Of Paper
Normal and Text Enhance. Fit to Page This printer feature allows you to scale your print job to any selected paper size regardless of the digital document size. This can be useful when you want to check fine details on a small document. -
Page 144: Duplex Printing
Select the Layout. ▲ Mac OS 10.3 Select a binding orientation from Two Sided Printing option. Click Print and the printer prints on both sides of the paper. If you have selected duplex printing and AUTION then try to print multiple copies of a document, the printer may not print the document in the way you want. - Page 145 30 printer properties 34 printing 34 scanning 35 Macintosh driver install 38 printing 40 scanning 42 setting up the printer 39 MFP driver, install Linux 30 n-up printing Macintosh 41 Windows 18 orientation, print 35 Windows 13 overlay...
- Page 146 scanning Linux 35 SmarThru 27 TWAIN 29 WIA driver 29 scanning from Macintosh 42 setting darkness 15 favorites 17 image mode 15 resolution Macintosh 41 Windows 15 toner save 15 true-type option 15 software install Macintosh 38 Windows 4 reinstall Windows 10 system requirements Macintosh 38...
- Page 147 Rev. 1.04...