Samsung YP-P2 User Manual
Hide thumbs
Also See for YP-P2:
- User manual (128 pages) ,
- Manual (109 pages) ,
- Service manual (59 pages)

Related Manuals for Samsung YP-P2


Summary of Contents for Samsung YP-P2
-
Page 1: Mp3 Player
YP-P MP3 Player user manual imagine the possibilities Thank you for purchasing this Samsung product. To receive more complete service, please register your product at www.samsung.com/global/register... - Page 2 ACOUSTIC WONDER Vivid color and images are delivered on the wide LCD screen. Your new MP3 player has built-in DNSe™ (Digital Natural Sound engine), Samsung’s WHERE FORM MEETS FUNCTION unique sound technology created to deliver richer, deeper sound for an unbelievable Sure, it’s sleek and good-looking.
-
Page 3: Safety Information
safety information What the icons and signs in this user manual mean : Means that death or serious personal injury is a risk. WARNING Means that there is a potential risk for personal injury or material damage. CAUTION To reduce the risk of fi re, explosion, electric shock, or personal injury when using your MP3 Player, follow these basic safety precautions: CAUTION... - Page 4 Do not get the product wet or drop it in water. If the product gets wet, do not switch it on because you could get an electric shock. Instead, contact CAUTION a Samsung Customer Service Center at 1-800 SAMSUNG. Do not use the earphones while you are driving a bicycle, automobile or motorcycle.
- Page 5 Prevent any foreign particles or dust from entering into the product. Do not place the product near magnetic objects. Be sure to backup important data. Samsung is not responsible for data loss. Use only accessories provided by or approved by Samsung.
- Page 6 SAFETY INFORMATION This device complies with part 15 of the FCC Rules. Operation is subject to the following two conditions: (1) This device may not cause harmful interference, and (2) This device must accept any interference received, including interference that may cause undesired operation. Caution: Any changes or modifi...
- Page 7 SAFETY INFORMATION (Continued) Declaration of Conformity We, Samsung Electronics Co.,Ltd., declares under its sole responsibility that the product, Trade name Samsung & Model name YP-P2, has been tested according to the part 15 of the FCC Rules. Party responsible for Product Compliance Samsung Electronics America QA Lab.
-
Page 8: Table Of Contents
Language Settings Time Settings System Settings Resetting the system SAMSUNG MEDIA STUDIO PC requirements Installing Samsung Media Studio Transferring fi les to the player with Samsung Media Studio WATCHING A VIDEO Pausing To move to a specifi c frame To play the previous video fi le To play the next video fi... - Page 9 Playing from the beginning of the current track Playing the previous track Playing the next track Searching within a track Creating a playlist using Samsung Media Studio Creating a playlist. Adding music fi les to a playlist you’ve created Transferring a playlist to your player...
- Page 10 contents USING THE DATACAST Registering a channel Creating a new channel group Transferring a datacast from <Media Studio> Viewing Datacasts ENJOYING THE Reading text Using the text menu PRIME PACK Setting the alarm Viewing the calendar Viewing the world clock USING THE PC Requirements Installing Best Buy Digital Music Store...
- Page 11 USING BLUETOOTH What is bluetooth? Using a bluetooth stereo headset 100 Using the bluetooth menu 101 Bluetooth settings UPGRADING FIRMWARE 103 Upgrading fi rmware TROUBLESHOOTING 105 Troubleshooting APPENDIX 108 Menu tree 109 Product specifi cations 111 License 112 Warranty the basics _ 11...
-
Page 12: The Basics
WHAT’S INCLUDED Your new mp3 player comes with these accessories. If you’re missing any of these items, contact Samsung Customer Service at 1-800-SAMSUNG (1-800-726-7864). Player Earphones USB Cable Installation CD Easy Holder Black : AH39-00899A AH46-00050C AH97-02397A AH30-00087E... -
Page 13: Your Mp3 Player
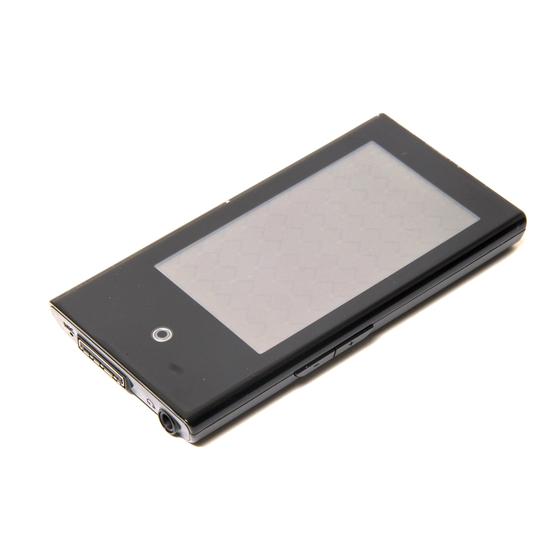
YOUR MP3 PLAYER Easy holder hook Tying the easy holder strap Touch screen Up volume button Press to increase the volume Down volume button Press to reduce the volume Reset hole If a player malfunction occurs, Power LED press the reset hole with a pointed object The Power LED is lit in red while to re-initialize the... - Page 14 YOUR MP3 PLAYER (Continued) Hold switch Push in the direction of the arrow to lock the button functions. Earphone connection jack Earphones Labeled “L” for the left earpiece and “R” for the right earpiece. Also serves as an antenna for FM Radio in the MP3 player.
-
Page 15: Screen Displays
SCREEN DISPLAYS Video Video Track 1 Bluetooth/Lock/Alarm Play/Pause, Search Indicator Indicator Battery Status Video Mode Indicator Current Time Play Status Bar Current /Total Play Time Back Icon File Name Menu Icon Play/Pause, Search Icon The screen pictures are for illustration purposes only. The actual screen may differ. - Page 16 SCREEN DISPLAYS (Continued) Music Bluetooth/Lock/Alarm Indicator Current Time Battery Status Current track playing / Songs 1/52 Total number of tracks Audio Track 1 Indicator Music Play Screen Play Status Bar Current /Total Play Time Play/Pause, Search Icon DNSe Icon Play/Pause, Search Indicator Music Mode Indicator Parent Menu Indicator Music Title...
- Page 17 SCREEN DISPLAYS (Continued) Picture Bluetooth/Lock/Alarm Indicator Current Time Battery Status Current fi le / Picture image 1 8/17 Total number of fi les Indicator Next Image Icon Zoom Icon Music Play Status Picture Mode Indicator File Name Previous Image Icon Back Icon [Picture View Screen] Menu Icon...
- Page 18 SCREEN DISPLAYS (Continued) FM Radio Bluetooth/Lock/Alarm Indicator Current Time Battery Status Manual/Preset Indicator FM Radio Preset Number Icon Radio Mode Indicator Current Frequency(MHz) Indicator Frequency location Indicator Back Icon Menu Icon 18 _ the basics...
-
Page 19: Using The Touch Screen
USING THE TOUCH SCREEN Tap on touch screen with your thumb or fi ngertip. incorrect correct incorrect Do not use force when touching the touch screen, as it may cause damage to the screen. NOTE To avoid damage to the touch screen, do not use any object other than your thumb or fi... - Page 20 USING THE TOUCH SCREEN (Continued) You can tap on the screen in four directions – up, down, left and right, according to the function. ex) Play status bar for music How To 1 Tap on and hold the play status bar on the screen and move your thumb or fi...
- Page 21 USING THE TOUCH SCREEN (Continued) ex) Zoomed image How To 3 Tap on and hold the screen and slide your thumb or fi ngers in the desired direction before releasing it as in the fi gure below. In zoom mode, move your thumb or fi ngers in the desired direction. The picture moves and appears in that direction.
- Page 22 USING THE TOUCH SCREEN (Continued) ex) Play the previous/next video fi le How To 4 Slide your thumb or fi ngers to the left or right. Left : Moves to the next fi le (depending on the the horizontal stroke setting. See page 47).
-
Page 23: Charging The Battery
CHARGING THE BATTERY Charge it before using the player for the fi rst time and when you haven’t used it for a long time. The battery for your mp3 player will fully charge in about 4 and a half hours, although total charging time varies depending on your PC environment. -
Page 24: Caring For The Battery
CARING FOR THE BATTERY Your battery will last longer if you follow these simple guidelines for caring for and storing it. • Recharge and store the battery within the temperature range of 40°F~95°F (5°C~35°C ). • Do not overcharge (longer than 12 hours). Excessive charging or discharging may shorten the battery’s life. -
Page 25: Controlling The Volume
PLAYING A VIDEO FILE Load video fi les onto your new mp3 player using Samsung Media Studio. Learn more about Media Studio on page 40. 1. Tap the icon on the main menu screen. Video Track 1 The video list appears. -
Page 26: Disabling The Buttons
DISABLING THE BUTTONS The hold function disables all the other buttons and icons on the mp3 player, so that if you accidentally bump one-while working out, for example-your music won’t be interrupted. 1. Push the switch in the direction of the Video Track 1 arrow. -
Page 27: Changing The Settings And
CHANGING THE SETTINGS AND PREFERENCES Your mp3 player comes with settings and preferences that were set up at the factory, but you can change these pre-set values to truly customize your player. Tap the [ ] icon to move to the previous screen. Press and briefl... - Page 28 CHANGING THE SETTINGS AND PREFERENCES (Continued) Using the Cosmos Menu How To 1 Position your thumb or fi ngers on the touch screen and slide upward or downward. Tap on the icon of the desired main menu. <Cosmos> menu How To 2 Position your thumb or fi...
- Page 29 CHANGING THE SETTINGS AND PREFERENCES (Continued) Using the Matrix Menu Tap on the icon of the desired main menu. <Matrix> menu Using the My Skin Menu Position your thumb or fi ngers on the touch screen and scroll and release left or right by moving your fi ngertip. Tap on the icon of the desired main menu.
-
Page 30: Sound Settings
CHANGING THE SETTINGS AND PREFERENCES (Continued) Sound Settings You can set the master EQ, beep sound, volume limit. 1. Tap the icon on the main menu screen. Settings The <Settings> menu appears. Menu Style 2. Select <Sound> and tap on it. Sound The <Sound>... -
Page 31: Display Settings
CHANGING THE SETTINGS AND PREFERENCES (Continued) Display Settings Change the display off time and brightness of your screen. 1. Tap the icon on the main menu screen. Settings The <Settings> menu appears. Menu Style 2. Select <Display> and tap on it. Sound The <Display>... -
Page 32: Language Settings
CHANGING THE SETTINGS AND PREFERENCES (Continued) Language Settings The menus on your new mp3 player can be set to appear in any one of multiple languages. You can change your preference language easily. 1. Tap the icon on the main menu screen. Settings The <Settings>... - Page 33 CHANGING THE SETTINGS AND PREFERENCES (Continued) Language Setting Options Menu : Set the menu language. Tap the [ ] icon to move to the previous/ next page. Select from <English>, < >, <Français>, <Deutsch>, <Italiano>, < >, < >, < >, <Español>, <...
-
Page 34: Time Settings
CHANGING THE SETTINGS AND PREFERENCES (Continued) Time Settings Setting the time allows you to use the date/time set, date type and even time zone. 1. Tap the icon on the main menu screen. Settings The <Settings> menu appears. Menu Style 2. -
Page 35: System Settings
CHANGING THE SETTINGS AND PREFERENCES (Continued) System Settings Choose the sleep timer, start mode, auto power off, default setting that’s right for you. 1. Tap the icon on the main menu screen. Settings The <Settings> menu appears. Menu Style 2. Select <System> and tap on it. Sound The <System>... - Page 36 CHANGING THE SETTINGS AND PREFERENCES (Continued) System Setting Options Sleep : Turns off power automatically after the preset time. Select either <Off>, <15min>, <30min>, <60min>, <90min>, or <120min>. Start Mode : You can set the start screen displayed when you turn on the player.
-
Page 37: Resetting The System
RESETTING THE SYSTEM If your mp3 player won’t turn on, won’t play music, or isn’t recognized by your computer when you connect it, you may have to reset the system. Press the Reset hole at the rear of the player with a pointed object such as a safety clip. -
Page 38: Samsung Media Studio
Samsung Media Studio is the easy-to-use software application that helps you organize your fi les on your PC. With your fi les already sorted and organized in Media Studio, you can quickly transfer them to your mp3 without searching your entire hard drive for the right fi le. -
Page 39: Installing Samsung Media Studio
Otherwise, <Media Studio> will not be installed. To fi nd the administrator account, CAUTION please refer to your PC’s user manual. 1. Insert the Installation CD provided with the player into the CD-ROM drive. 2. Select <SAMSUNG Media Studio>. 3. Click <Install now>. samsung media studio _ 39... -
Page 40: Transferring Files To The Player With Samsung Media Studio
CDDB is a registered trademark of Gracenote. The Gracenote logo and logotype, the Gracenote CDDB logo and logotype, and the “Powered by Gracenote CDDB” logo are trademarks of Gracenote. Music Recognition Service and MRS are service marks of Gracenote. 40 _ samsung media studio... - Page 41 <Media Studio> Screen. 6. Select the fi le to transfer from the list on the left side. 7. Click the icon. The fi le you selected is transferred to the player. [YP-P2 [MTP]] Portable [YP-P2[MTP]] samsung media studio _ 41...
- Page 42 If you connect the USB cable to the PC in the Low Battery condition, the player will be charged for several minutes before connecting to the PC. Samsung Media Studio has a thorough Help function. If you can’t fi nd the answer to your question about Media Studio, click <MENU>...
-
Page 43: Watching A Video
watching a video Before you start - Transfer video fi les to the player using <Media Studio>. See page 40. Connect the earphones, then turn on the player, and check the battery. Tap the [ ] icon to move to the previous screen. Press and briefl... -
Page 44: To Move To A Specific Frame
TO MOVE TO A SPECIFIC FRAME How To 1 1. In horizontal view, press and briefl y Video Track 1 hold the [ ] icon during playback . This enables you to move backwards or forwards in the current video fi le. 2. -
Page 45: To Play The Previous Video File
TO PLAY THE PREVIOUS VIDEO FILE How To 1 Tap the [ ] icon within 3 seconds after Video Track 1 the current video started playing. Tap the [ ] icon twice 3 seconds after the current video started playing How To 2 Slide your thumb or fi... -
Page 46: Using The Video Menu
USING THE VIDEO MENU To set a bookmark Once you bookmark a specifi c scene that you want to see again, you can enjoy it at any time you want. 1. Tap the [ ] icon at the scene you want during video playback. -
Page 47: Playback Screen
What is DNSe? Digital Natural Sound Engine (DNSe) is a sound effect function for MP3 players NOTE developed by Samsung. It provides various sound settings to enhance the type of music you’re listening to. To set the horizontal stroke You can fast forward through a fi le at various intervals when you touch the screen to the left or right. -
Page 48: To Select The Screen Size
USING THE VIDEO MENU (Continued) To select the screen size You can select the display size of the video playback. 1. Tap the [ ] icon on the video playback screen. Bookma Actual The <Video> menu appears. DNSe Standard 2. Tap <Screen Size>. Horizon Full The <Screen Size>... - Page 49 USING THE VIDEO MENU (Continued) Before you start - Use only a Bluetooth-certifi ed stereo headset. Check if to make sure your Bluetooth stereo headset has been registered. <Connect to Headset> appears when there is a registered headset. For more information, refer to <Using a Bluetooth Stereo Headset>.
-
Page 50: Listening By Category
listening to music Before you start - Connect the earphones, then turn on the player, and check the battery. Tap the [ ] icon to move to the previous screen. Press and briefl y hold the [ ] icon to move to the main menu screen. NOTE LISTENING BY CATEGORY Music... - Page 51 LISTENING BY CATEGORY (Continued) Music List File information including the artist name, album name, music title and genre will be displayed according to the ID3 Tag information on the appropriate music fi le. A fi le without an ID3 Tag is displayed as [Unknown]. Now Playing : Plays a recently played fi...
-
Page 52: Pausing
PAUSING 1. Tap the [ ] icon or press the button while the music is playing. The music playback will be paused. 2. Tap the [ ] icon or press the button again. The music will play from the point where it stopped. PLAYING FROM THE BEGINNING OF THE CURRENT TRACK 1. -
Page 53: Playing The Next Track
PLAYING THE NEXT TRACK How To 1 Songs 2/52 Tap the [ ] icon. Audio Track 2 How To 2 Slide your thumb or fi ngers to the left. The next track will start playing. How To 2 SEARCHING WITHIN A TRACK How To 1 Songs 1/52... -
Page 54: Creating A Playlist Using Samsung
CREATING A PLAYLIST USING SAMSUNG MEDIA STUDIO With <Media Studio>, you can create your own collection, or playlist, of audio fi les. Before you start - Connect the player to your PC. Media Studio must be installed on your PC. -
Page 55: Adding Music Fi Les To A Playlist You've
CREATING A PLAYLIST USING SAMSUNG MEDIA STUDIO (Continued) Adding music fi les to a Playlist you’ve created [YP-P2 [MTP]] 1. Click <My PC> on the top of <Media Studio>. The <My PC> window appears. 2. Click <Playlists> in the right corner of the window. -
Page 56: Transferring A Playlist To Your Player Using Media Studio
CREATING A PLAYLIST USING SAMSUNG MEDIA STUDIO (Continued) Transferring a Playlist to your player using Media Studio [YP-P2 [MTP]] Portable [YP-P2[MTP]] 1. Click <Playlists> on the top of <Media Studio>. The <Playlists> window appears. 2. Select a playlist in the <Playlists> section. -
Page 57: Creating A Playlist On Your Mp3 Player
CREATING A PLAYLIST ON YOUR MP3 PLAYER If you’ve already downloaded fi les to your mp3 player, you can create a “Favorites” playlist without Media Studio or your PC. 1. Tap the icon on the main menu screen. Music 2. Select <Music> and tap on it. Song 1 The music fi... -
Page 58: Playing A Playlist
PLAYING A PLAYLIST 1. Tap the icon on the main menu screen. Playlists The music list appears. Playlist 1 2. Select <Playlists> and tap on it. Playlist 2 The Playlist(s) will appear. Playlist 3 Playlist 4 3. Select a desired playlist and tap on it. Playlist 5 The music fi... -
Page 59: Deleting A File From The Playlist
DELETING A FILE FROM THE PLAYLIST 1. Tap the icon on the main menu screen. Playlist 1 The music list appears. Song 1 2. Select <Playlists> and tap on it. Song 4 The Playlist(s) will appear. Song 6 Song 8 3. -
Page 60: Using The Music Menu
USING THE MUSIC MENU The Music menu allows you manage all facets of listening - from repeating tracks and albums to choosing the background on the screen as you listen. To set the sound effect You can enjoy clearer sound. Songs 2/52 1. - Page 61 NOTE What is DNSe? Digital Natural Sound Engine (DNSe) is a sound effect function for MP3 players developed by Samsung. It provides various sound settings to enhance the type of music you’re listening to. listening to music _ 61...
- Page 62 USING THE MUSIC MENU (Continued) To set the Digital Natural Sound engine (DNSe) (Continued) <3D&Bass> Sets 3D sound effect and bass enhancement. User 1 Tap the [ ] icon of <User>. The <User> screen appears. 2. Tap <3D&Bass>. The <3D&Bass> setting screen appears. 3.
-
Page 63: To Set The Play Mode
USING THE MUSIC MENU (Continued) To set the play mode Select playback mode such as repeat settings. 1. Tap the [ ] icon on the music play screen. Songs 2/52 The <Music> menu appears. Sound Effect 2. Tap <Play Mode>. DNSe The <Play Mode>... -
Page 64: To Select The Music Play Screen
USING THE MUSIC MENU (Continued) To select the music play screen Choose a background image from those provided, or choose an image of your own to be displayed as you listen to music. 1. Tap the [ ] icon on the music play screen. Songs 2/52 The <Music>... - Page 65 USING THE MUSIC MENU (Continued) To add to alarm sound You can add your favorite music fi le to the alarm sound list, so it can be heard the next time the alarm goes off. See page 85 to set the alarm. 1.
- Page 66 USING THE MUSIC MENU (Continued) Before you start - Use only the Bluetooth-certifi ed stereo headset. Check if your Bluetooth stereo headset has been registered. <Connect to Headset> appears when there is a registered headset. For more information, refer to <Using a Bluetooth Stereo Headset>. See page 97. To connect a Bluetooth stereo headset You can connect directly to the registered Bluetooth Songs...
-
Page 67: Viewing Pictures
viewing pictures Before you start - Connect the earphones, then turn on the player, and check the battery. Tap the [ ] icon to move to the previous screen. Press and briefl y hold the [ ] icon to move to the main menu screen. NOTE 1. -
Page 68: Using The Picture Menu
USING THE PICTURE MENU To watch a slideshow How To 1 Tap the [ ] icon on the preview screen. The [ ] icon on the screen appears on the screen, and the slideshow will start. How To 2 1. Tap the [ ] icon on the picture view screen. -
Page 69: To Select A Picture As A Background Image
USING THE PICTURE MENU (Continued) To stop the slideshow Tap on the screen in the slideshow mode. This will stop the slideshow. To select a picture as a background image You can set a desired picture to the background image for the screen. 1. -
Page 70: To Select The Picture View Mode
USING THE PICTURE MENU (Continued) To select the picture view mode 1. Tap the [ ] icon on the picture view screen. The <Picture> menu appears. 2. Tap <View Mode>. The <View Mode> menu appears. 3. Tap on a desired mode. Select from <Auto>... -
Page 71: Listening To Fm Radio
listening to FM radio Before you start - Connect the earphones, then turn on the player, and check the battery. Tap the [ ] icon to move to the previous screen. Press and briefl y hold the [ ] icon to move to the main menu screen. NOTE Tap the icon on the main menu screen. -
Page 72: To Search For Fm Stations
TO SEARCH FOR FM STATIONS 1. Press and briefl y hold the [ ] icon and then release in Manual mode. FM Radio <Searching> appears on the screen. The search will stop at the frequency nearest from the point the Searching button is released. -
Page 73: Using The Fm Radio Menu
USING THE FM RADIO MENU To switch to Preset Mode Select this mode if you want to search through your saved FM presets one preset at a time. FM Radio 1. Tap the [ ] icon in Manual mode. The <FM Radio> menu appears 2. -
Page 74: To Store Stations In The Preset Memory
USING THE FM RADIO MENU (Continued) To store stations in the preset memory You can store up to 30 stations in your MP3 player’s memory and return to them with the press of just one number. Have the MP3 player choose only the stations you want using the manual process, or fi... -
Page 75: To Cancel Auto Preset
USING THE FM RADIO MENU (Continued) To store stations in the preset memory (Continued) Automatic – automatically store all the stations the player receives 1. Tap the [ ] icon on the FM Radio screen. FM Radio The <FM Radio> menu appears. 2. -
Page 76: To Delete A Preset
USING THE FM RADIO MENU (Continued) To delete a preset Follow the steps below to delete frequencies while listening to FM Radio. 1. Tap the [ ] icon in Preset mode. FM Radio The <FM Radio> menu appears 2. Tap <Delete from Preset>. The preset frequency list appears. - Page 77 USING THE FM RADIO MENU (Continued) To set the FM sensitivity To receive more or fewer FM radio frequencies, adjust the <FM Sensitivity>. 1. Tap the [ ] icon on the FM Radio screen. FM Radio The <FM Radio> menu appears 2.
-
Page 78: Registering A Channel
using the datacast Using <Media Studio>, you can transfer blog information and fi les registered on RSS to the player for your entertainment. What is RSS? RSS stands for Rich Site Summary or Really Simple Syndication. It is a xml-based data NOTE transmission system used to deliver information on frequently updated web sites such as news and blogs to users in a more convenient and easier way. -
Page 79: Creating A New Channel Group
1. <Media Studio> will automatically start when the player is connected to your PC. [YP-P2[MTP]] If the program does not start automatically, Portable [YP-P2[MTP]] double click the <Media Studio> icon on the desktop. 2. Click <Datacasts> on the top of <Media Studio>. -
Page 80: Viewing Datacasts
VIEWING DATACASTS You can view channel posts added to <Datacasts>. Before you start - Transfer a desired channel post to the player using <Media Studio>. See page 79. Tap the [ ] icon to move to the previous screen. Press and briefl y hold the [ ] icon to move to the main menu screen. -
Page 81: Enjoying The Prime Pack
enjoying the prime pack Prime Pack enables you to enjoy various functions such as reading text, the alarm setting and viewing the calendar or world clock. READING TEXT Whether it’s a novel, the manuscript of a new story, or your research paper, your mp3 player allows you to read it…... -
Page 82: Using The Text Menu
USING THE TEXT MENU To move to previous/next page How To 1 Texts 1 Tap the [ , ] icon on the bottom of the touch screen. 7.0% My doggy likes to disco dance. He boogies every night. How To 2 He dances in his doghouse Slide your thumb or fi... -
Page 83: Text Viewer
USING THE TEXT MENU (Continued) To move to/remove the bookmark 1. Tap the [ ] icon on the text view screen. Texts 1 7.0% The <Bookmark> menu appears. My doggy likes to disco dance. 2. Tap <Go to Bookmark> or <Delete Bookmark>. He boogies every night. - Page 84 USING THE TEXT MENU (Continued) To change the font size You can change the font size of the text. 1. Tap the [ ] icon on the text view screen. Font Size The <Text> menu appears. 2. Tap <Font Size>. My doggy likes to disco dance.
-
Page 85: Setting The Alarm
SETTING THE ALARM This player has an alarm which can be set to go off at a scheduled time. Before you start - First, you should set the clock for the current time. See page 34. 1. Tap the icon on the main menu screen. Prime Pack The <Prime Pack>... - Page 86 SETTING THE ALARM (Continued) 8. Tap on the third item repeatedly to select the alarm sound. Alarm You can select from <Alarm Sound 1> to Once <Alarm Sound 3> or music fi les added as alarm sound. See page 65. 12 : 40 AM 9.
-
Page 87: To Edit The Alarm Setting
SETTING THE ALARM (Continued) To edit the alarm setting 1. In the Alarm screen, select an alarm setting to Alarm change and tap on it. The alarm setting screen appears. Once 2. Follow the same steps as the new alarm setting 12 : 40 AM above to edit the setting. -
Page 88: Viewing The Calendar
VIEWING THE CALENDAR You can check the calendar. Before you start - First, you should set the clock for the current time. See page 34. 1. Tap the icon on the main menu screen. Prime Pack The <Prime Pack> list appears. Texts 2. -
Page 89: Viewing The World Clock
VIEWING THE WORLD CLOCK You can check the location and date/time of major world cities based on their respective time zone. Before you start - First, you should set the clock for the current time. See page 34. Set the time zone you want in the <Settings> <Time>... - Page 90 using the rhapsody channel You are about to install Best Buy Digital Music Store, the premier music jukebox service. Best Buy Digital Music Store is a fully featured music jukebox that also gives you access to award-winning music subscription services. Best Buy Digital Music Store puts the world of music at your fi...
- Page 91 TO TRANSFER RHAPSODY CHANNELS TO YOUR PLAYER You can transfer Rhapsody Channels from Digital Music Store to your player. Before you start - Digital Music Store must be installed on your PC. See page 90. To transfer Rhapsody Channels from the Channel Guide 1.
- Page 92 TO RATE TRACKS ON YOUR PLAYER You can rate any track on your player, including Rhapsody Channel tracks. Tap the [ ] icon to move to the previous screen. Press and briefl y hold the [ ] icon to move to the main menu screen. NOTE 1.
-
Page 93: To Add Rhapsody Channel Tracks To
TO ADD RHAPSODY CHANNEL TRACKS TO THE LIBRARY Tracks downloaded from a Rhapsody Channel should be set to <Add to Library> so that music libraries such as Artists, Albums, Songs, Genres, etc are properly added. If not set so, the tracks are displayed only in the Rhapsody Channel. - Page 94 TO SELECT RHAPSODY CHANNEL TRACKS FOR FUTURE PURCHASE You can select and easily purchase a desired track on your player by simply connecting to the PC. 1. Tap the icon on the main menu screen. Blues 2/52 The Rhapsody Channel list appears. Music Play Screen 2.
-
Page 95: To Check Your Rhapsody Account
TO CHECK YOUR RHAPSODY ACCOUNT INFORMATION You can check your Rhapsody account status and days remaining to renew your track licenses. System 1. Tap the icon on the main menu screen. Sleep The <Settings> menu appears. Start Mode 2. Select <System> and tap on it. Auto Power Off Defalut Set The <System>... -
Page 96: Using Bluetooth
using bluetooth Tap the [ ] icon to move to the previous screen. Press and briefl y hold the [ ] icon to move to the main menu screen. NOTE WHAT IS BLUETOOTH? Bluetooth is an industry specifi cation that describes how Bluetooth-compliant stereo headsets, mobile phones, and external devices can easily interconnect with each other using a short wireless connection. -
Page 97: Using A Bluetooth Stereo Headset
USING A BLUETOOTH STEREO HEADSET You can use a Bluetooth stereo headset to let you enjoy music with high quality stereo sound, all without wires! Before you start - Ensure that the Bluetooth device to connect is ready for pairing. (refer to the device’s user manual) To register the Bluetooth Stereo Headset (you only need to register it once) - Page 98 USING A BLUETOOTH STEREO HEADSET (Continued) To register the Bluetooth Stereo Headset (continued) 6. Tap on the name of headset you want to register. The password input window appears if the password for the headset is other than 0000. Refer to the headset’s manual for the password. The registration of the headset is completed.
-
Page 99: To Connect The Registered Bluetooth Stereo Headset
USING A BLUETOOTH STEREO HEADSET (Continued) To connect the registered Bluetooth stereo headset 1. Tap the icon on the main menu screen. Stereo Headset 2. Tap <Stereo Headset> SBH100 3. Tap on the stereo headset to connect. When the connection is successfully done, you will see the [ ] icon. -
Page 100: Using The Bluetooth Menu
USING THE BLUETOOTH MENU To disconnect the Bluetooth Device 1. Tap the icon on the main menu screen. Bluetooth 2. Tap the [ ] icon. Stereo Headset Bluetooth Mode The <Bluetooth> menu appears. Bluetooth Settings 3. Tap <Disconnect> The Disconnection confi rmation window appears. 4. -
Page 101: Bluetooth Settings
BLUETOOTH SETTINGS Before you start - Set <Bluetooth Mode> to <On>. 1. Tap the icon on the main menu screen. Bluetooth 2. Select <Bluetooth Settings> and tap on it. Stereo Headset Bluetooth Mode The <Bluetooth Settings> menu appears. Bluetooth Settings 3. -
Page 102: To Delete A Bluetooth Device
BLUETOOTH SETTINGS (Continued) To delete a bluetooth device 1. Select <Delete Device> and tap on it. Bluetooth Settings You will see the list of the registered devices. Search Timeout 2. Select a device to remove and tap the [ Delete Device My Device lnfo. - Page 103 fi rmware Future upgrades may be available for this player to enhance performance and compatibility. 1. Connect to http://www.samsung.com, select [SUPPORT] [DOWNLOAD CENTER] and then select your player. 2. When the player page appears, select [Firmware] below the model name to download the latest fi...
- Page 104 6. Locate and click on the Desktop icon in Windows Explorer (left column). The contents of the Desktop will appear in the right column. 7. (Windows Media Player 10) Locate and select the Firmware update fi les (right column) and drag-and-drop it into the folder of [P2] [Data].
-
Page 105: Troubleshooting
If you have a problem with your new mp3 player, check for a solution in this list. If the problem persists, contact Samsung Customer Service at 1-800-SAMSUNG (1-800-726-7864). PROBLEM SOLUTION • Power will not turn on if the battery is completely drained. - Page 106 PROBLEM SOLUTION • The battery life can vary depending on the sound mode and display setting. Battery life differs from • Battery life may be shortened when the player is left the manual. for extended periods in low or high temperatures. •...
- Page 107 fi les/data but also to the product. You have to be extra cautious as Samsung is not responsible for data loss. • Check if the fi le is in Variable Bit Rate (VBR) format.
-
Page 108: Menu Tree
appendix MENU TREE Here’s a quick look at how the menus and functions are organized on your new mp3 player. Menu Select Screen Prime Rhapsody Videos Music Pictures Datacasts Bluetooth Settings Radio Pack Channel Stereo Texts Menu Style Headset Bluetooth File Browser Sound Mode... -
Page 109: Product Specifications
PRODUCT SPECIFICATIONS YP-P2 Model Name DC 5.0V / 500mA Rating 830 mAh / DC 3.7V Built-in Battery Power AUDIO : MPEG1/2/2.5 Layer3(8kbps~320kbps, 8kHz~48kHz) WMA(8kbps~320kbps, 8kHz~48kHz) VIDEO : SVI (Video: MPEG4, Audio: MP3 (44.1kHz 16bit Stereo, 128kbps), Resolution: 480x272, Frame Rate: 30fps) File Compatibility WMV9 (Video: WMV9 Simple Profi... - Page 110 FM Frequency 87.5~108.0MHz FM T.H.D 0.8% FM Radio FM Signal to FM Useable 59 dB Noise Ratio Sensitiivity Wireless System Emission Type 2.4mW RF Power 2402MHz ~ 2480MHz Transmit Frequency 2402MHz ~ 2480MHz Receive Frequency 79 ch No. of channels -10°C~ +50°C (14 ~ 122°F) Temperature GFSK...
- Page 111 LICENSE The product unit accompanying this user manual is licensed under certain intellectual property rights of certain third parties. In particular, this product is licensed under the following US patents : 5,991,715, 5,740,317, 4,972,484, 5,214,678, 5,323,396, 5,539,829, 5,606,618, 5,530,655, 5,777,992, 6,289,308, 5,610,985, 5,481,643, 5,544,247, 5,960,037, 6,023,490, 5,878,080, and under US Published Patent Application No.
- Page 112 WARRANTY Samsung warrants this product as free of defects in material, design and workmanship for a period of twelve (12) months from the original date of purchase. If during the period of warranty this product proves defective under normal use and service, you should return the product to the retailer from whom it was originally purchased.
- Page 113 WARRANTY (Continued) 2. Samsung’s obligations are to the repair of the defective part, and at its discretion, replacement of the product (service exchange unit). 3. Warranty repairs must be carried out by an Authorized Samsung Dealer/ Service Center. No reimbursement will be made for repairs carried out by non Samsung Centers, and warranty coverage will not be valid for any repairs or damage caused by such repairs.
- Page 114 - Failure of the product arising from incorrect installation or use not consistent with technical or safety standardsin current force, or failure to comply with productmanual instructions. - Accidents, Acts of God or any cause beyond the control of Samsung caused by lightning, water, fi re, public disturbances and improper ventilation.
- Page 115 OR CONSEQUENTIAL DAMAGES CAUSED BY THE USE, MISUSE OR INABILITY TO USE THIS PRODUCT, REGARDLESS OF THE LEGAL THEORY ON WHICH THE CLAIM IS BASED, AND EVEN IF SAMSUNG HAS BEEN ADVISED OF THE POSSIBILITY OF SUCH DAMAGES. NOR SHALL RECOVERY OF ANY KIND AGAINST SAMSUNG BE GREATER IN AMOUNT THAN THE PURCHASE PRICE OF THE PRODUCT SOLD BY SAMSUNG AND CAUSING THE ALLEGED DAMAGE.
- Page 116 OR INJURY TO PURCHASER AND PURCHASER’S PROPERTY AND TO OTHERS AND THEIR PROPERTY ARISING OUT OF THE USE, MISUSE OR INABILITY TO USE THIS PRODUCT SOLD BY SAMSUNG NOT CAUSED DIRECTLY BY THE NEGLIGENCE OF SAMSUNG. THIS LIMITED WARRANTY SHALL NOT EXTEND TO ANYONE OTHER THAN THE ORIGINAL PURCHASER OF THIS PRODUCT, IS NONTRANSFERABLE AND STATES YOUR EXCLUSIVE REMEDY.
- Page 117 QUESTIONS OR COMMENTS? COUNTRY CALL OR VISIT US ONLINE AT WRITE Samsung Electronics America, Inc. 800-SAMSUNG www.samsung.com/us IN THE US 105 Challenger Road (800-726-7864) Ridgefi eld Park, NJ 07660-0511 REV. 0.0...