
Related Manuals for Samsung YP-T8


Summary of Contents for Samsung YP-T8
- Page 1 Samsung Electronics America, Inc. 400 Valley Road, Suite 201 Mount Arlington, NJ 07856 1-800-SAMSUNG (1-800-726-7864) www.samsung.com AH68-01775L...
-
Page 2: Features
Built-in Rechargeable Li-Ion Battery The built-in rechargeable lithium battery provides up to 20 hours of music. ✽ Time may vary depending on usage pattern. Upgradable You can upgrade the built-in programs when available. Please check our home page (www.samsung.com) for upgrades. Features... -
Page 3: Table Of Contents
G Deleting Files in an External Device..48 G Transferring Files from the Player to an ...49 ...49 G Deleting Files in the Player... G YP-T8 USB HOST Compafible... Setting the Advanced Functions...72 Selecting the Play mode...73 ...53 G Play Mode... Setting Sound Effect...74 G DNSe ... -
Page 4: Safety Instructions
Safety Instructions Please read and understand all the instructions to avoid injury to yourself and damage to the device Do not expose to extreme temperatures (above 95°F or below 23°F). Do not expose to moisture. Do not let any foreign matter spill into the device. -
Page 5: Battery Charger Safety
Battery Charger Safety CAUTION Opening the case may result in electric shock. The uninsulated parts inside the charger may cause electric shock. Please do not open the charger case for your safety. Read the user manual to prevent problems while using the charger. ✍... -
Page 6: Components
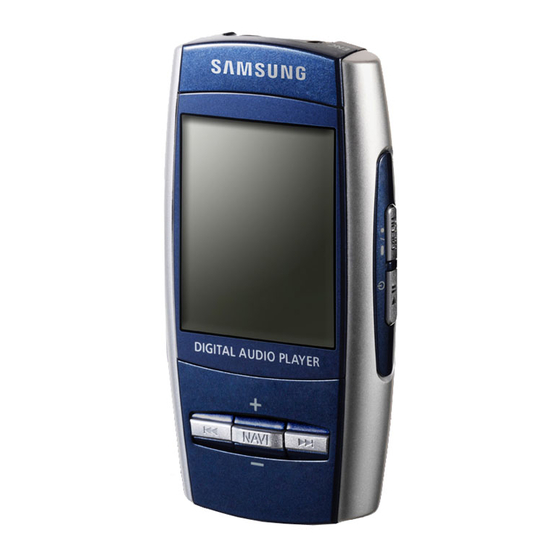
Components Earphones Neck Strap Line-In Cable AH30-00069D AH61-02031A,B AH39-00488B Player Carrying Case Charger Installation CD AH61-02033A AH39-00732A AH80-00105E Model YP-T8V YP-T8X Built-in memory 256MB 512MB G The capacity of the useable built-in memory is less than indicated as the internal firmware uses a part of the memory as well. -
Page 7: Display
Location of Controls Display EQ/DNSe Indicator Play/Stop/Pause Indicator Play Mode Indicator Artist display Album display Track display Elapsed Track Time NAVI Visual For Windows 98SE or ME, install the USB driver prior to connecting the player to PC. Windows 2000 and XP do not require any driver installation. ❑... -
Page 8: Usb Cable
You may not see the display screen during installation. Go to the device manager to check that installation has been successfully completed. Upon installation of the USB driver "Samsung YP-T8 USB Device" will appear in the [Device Manager]. -
Page 9: Manual Installation Of The Usb Driver
How to check if USB driver is properly installed How to check if USB driver is properly installed Windows 98SE/ME: Control Panel ¡ System ¡ Device Manager ¡ Disk Drives ¡ Samsung YP-T8 Windows 2000/XP: Control Panel ¡ System ¡ Hardware ¡ Device Manager ¡ Disk Drives ¡... -
Page 10: Usb Driver
Manual Installation of the USB Driver Follow the instructions below to install the USB driver manually. USB driver location [CD-ROM]\Win98USB\Drivers Using the Player as a Removable Disk When the MP3 player is connected to your PC, the PC will see it as a removable disc. Music and other files can then be dragged and dropped into the removable disc for playback on the MP3 player. -
Page 11: G Disconnecting The Usb Cable
Media Studio is the program that enables you to download music files to the player, and play back music files on your PC. Insert the Installation CD into CD-ROM drive. Select [Install Samsung Media Studio]. Select language. ✍ - Log into your PC as an administrator (Main User) and install the supplied software (Media / Multimedia Studio) for Windows 2000 and XP. -
Page 12: Using Media Studio
Installing Media Studio Follow the instruction in the window to complete the installation. G Samsung Media Studio icon will be created on the desktop. Using Media Studio G Click Media Studio icon from the Desktop. Downloading Music Files Connect the player to PC. -
Page 13: Sending Playlist
Using Media Studio When music files appear, select the file(s) you want to transfer, and then press the [Transfer] button. G The selected file(s) are transferred to the player. ✍ - Refer to [Help] for more detailed information. Using Media Studio Sending Playlist Connect the player to PC. -
Page 14: Formatting The Player
Using Media Studio Drag & drop the desired files into the created Playlist. Press the [Transmit] button in the Playlist window after selecting the Playlist. G Files within the Playlist are transferred to the player. Press the MENU button briefly in the MUSIC mode and select [Playlist] to view the transmitted Playlist. -
Page 15: Ripping Tracks From An Audio Cd
Using Media Studio Ripping Tracks from an Audio CD Insert your CD including tracks to rip into the CD-ROM drive of your PC. Press the [Search Audio CD] button on the lower part of the screen. G The tracks on the CD are displayed. Select tracks to be ripped and press the [Rip a CD] G The selected file is converted into an MP3 file. -
Page 16: Deleting Files
Using Media Studio Deleting Files Connect the player to the computer. Press the [Delete] button at the bottom of the connection windows after selecting required files or folders from the device connection windows. Press the [Confirm] button when an Confirm Deletion screen appears. G A selected folder or file is deleted. -
Page 17: Installing Multimedia Studio
Installing Multimedia Studio Installing Multimedia Studio G Multimedia Studio is a program that supports image editing, video playback and format conversion, and multimedia album creation. Insert the Installation CD into CD-ROM drive. Follow the instructions in the window to complete the installation. The picture shown below appears. -
Page 18: Using Multimedia Studio
Using Multimedia Studio G Run Multimedia Studio from the Desktop. Editing Images Select the folder containing images to edit from the directory window at the upper left-hand section of Multimedia Studio. G The saved files will be displayed in the file list window on the right. -
Page 19: Sending Videos
Using Multimedia Studio Set the size and path of the image at the [Resize images] window and then click the [OK] button. G The image will be sent to the selected device. G The transferred picture can be viewed at [Photo/Video] ¡ [Photo]. G The optimal image size for viewing on the unit is 160 x 128. -
Page 20: Capturing Video
Using Multimedia Studio G The Multimedia Studio software allows you to capture a still frame from a video file and save it as a picture, then transfer it to the YP-T8. Capturing Video Press the [Capture] button at the top of the Multimedia Studio menu. -
Page 21: To View Help On Multimedia Studio
Using Multimedia Studio Press the [Capture] button and then press the the image you want to capture appears. G The selected image will be captured. Press the [Save] button. G Save This captured image: saves the currently selected image. G Save All captured images: saves all captured images. Select the directory to save to from the [Save As] window and press the [Save] button. -
Page 22: Playing Music
Playing Music Make sure the player is fully charged and the earphones are connected. Turning Power On and Off Power On : Press the button to turn on the power. Power Off : Press and hold the button to turn off the power. Playing Music Press the button. -
Page 23: Loop Repeating
Loop Repeating Starting Point ↔ While playing music files, press the A B button briefly at the beginning of the loop you want to set. G A↔ appears in the display. Ending Point ↔ Press the A B button briefly again to set the end of the loop. -
Page 24: Recording Mp3S
Recording MP3s Connect the Audio OUT port (or Line OUT) on the external audio source to the ENC port on the device with the Line cable. G Press the play button on the external device to play the music to record. Press and hold the button to start MP3 recording. -
Page 25: Navi Button Mode
Setting Main Functions in Music Mode Play Mode Press the MENU button briefly in music mode. Move to [Play Mode] and press the NAVI button. Move to the play mode you want and press the NAVI button. Bookmark Bookmark Bookmark A ¢∏¢∫... -
Page 26: G Playlist
Setting Main Functions in Music Mode Move to the mode you want and press the NAVI button. G Visual : Whenever pressing and holding the NAVI button in music mode, the Effect screen changes as follows: Effect screen 1,2,3 ¡ EQ screen G Play Mode: Whenever pressing and holding the NAVI button in music mode, the play mode changes as follows: Normal ¡... -
Page 27: Using Navigation
Using Navigation G You can easily search for files or switch modes using the Navigation function. Press the NAVI button to enter Navigation mode or press and hold the MENU button to move to Menu and then select Navigation in Menu. Select the file or folder that you want to play. -
Page 28: Listening To Fm Radio
Listening to FM Radio Switching to FM Radio Mode Press and hold the “MENU” button. Select FM Radio from Menu and then press the NAVI button. Search for a Frequency G Manual Search: Press the buttons to change the frequency up or down. G Automatic Search: Press and hold the buttons to automatically search for receiving frequencies. -
Page 29: Delete Preset
Setting Main Functions in FM Mode Delete Preset Press and hold the NAVI button in the FM mode. G Move to the preset mode. Move to [Delete Preset] and press the NAVI button. After moving to the preset number you want to delete, press the NAVI button. -
Page 30: Viewing A Text
Viewing a Text G Text Viewer allows you to read text files that were created on your PC. Text files must have a .txt extension to be viewed by Text Viewer. G You can select an text file to view while listening to the music. Press and hold the MENU button to move to menu and select Text. -
Page 31: Viewing An Image
Viewing an Image You can select an image file to view while listening to the music. Press and hold the MENU button to move to menu and select FM Radio Photo. G The Photo screen appears. Press the NAVI button briefly to move to the image selection screen. -
Page 32: Playing A Game
Playing a Game G Press and hold the MENU button to move to menu. G Use to move to the game you want to play and press the NAVI button. Hurdle Game Time Limit Character Stamina [How to Play] G Hurdle is a game where people have to jump over a number of obstacles while running and go to the finish line. -
Page 33: G Pipe Plus
Playing a Game Pipe Plus Volume Control Exit Start Load Game Score [How to Play] G Pipe Plus is a game where a pipe is rotated to connect waterways from left to right. G If the waterways are connected and the water is completely full, you are moved to the next stage. -
Page 34: Using Usb Host
Using USB Host Connecting an External Device Connect the player to the USB host adapter. Use the external device's USB cable to connect the external device and the USB host adapter. G Turn on the External Device's Power. External USB Device ✍... -
Page 35: G Transferring Files From An External Device To The Player
Using USB Host Deleting Files in an External Device Move to the file you want to delete from the screen of the external device and press the NAVI button. : To move up and down. : To move to a subfolder. When a popup window appears, move to [Delete] and then press the NAVI button. - Page 36 Device Mode NAVI NAVI Using USB Host YP-T8 USB HOST Compatible G The following is a list of cameras and MP3 players(Samsung) that are compatible with YP-T8 USB Host function. G This list may change with firmware upgrade. Device Model Number...
-
Page 37: Setting The Advanced Functions
Setting the Advanced Functions Press and hold the MENU button to move to menu and select Settings. Game Host Settings Music NAvigation In Settings, move to the function you want and press the NAVI button to select. G Press the button to move to the previous menu. -
Page 38: Setting Sound Effect
Setting Sound Effect Press and hold the MENU button to move to menu and select [Settings] DNSe G Use to move to the sound mode you want and press the NAVI button. G 3D-User ¡ ¡ ¡ ¡ ¡ 3D-Studio 3D-Stage 3D-Club Normal... -
Page 39: G User Eq Set
Setting Sound Effect Press and hold the MENU button to move to menu and select [Settings] User EQ Set G You can adjust the EQ to your preference in the User EQ Set. G Press the button to move left or right and press to adjust a level. -
Page 40: Record Settings
Record Settings Press and hold the MENU button to move to menu and select [Settings] Bit Rate G Use to select the recording bit rate you want and press the NAVI button. G When recording music into an MP3 file, you can select one of the following bit rates: 32kbps, 64kbps, 96kbps, 128kbps, 160kbps, and 192kbps. -
Page 41: Display Settings
Display Settings Press and hold the MENU button to move to menu and select [Settings] Scroll Speed G Use to set the scroll speed and press the NAVI button. G Normal: Track title moves at a normal speed. G Fast: Track title moves faster than normal speed. Text Viewer Color G Use to set the text viewer color and press the... -
Page 42: Language Setting
Language Setting Press and hold the MENU button to move to menu and select [Settings] Language to select the desired language to display menu and text . G Korean ¡ ¡ ¡ ¡ ¡ English French German Italian Japanese ¡ ¡... -
Page 43: G Resume
System Settings Resume [Music] G Use to move to [On] or [Off] and press the NAVI button. Music G Off : Playback will resume from the beginnng of Text the file/track that was playing when Video stopped. G On : Playback will resume from the point it was previously stopped. -
Page 44: Viewing System Information
[Files] G Select Files to check the saved files. ¡ [About]. Connect to http://www.samsung.com, select [SUPPORT] ¡ [DOWNLOAD CENTER] and then select your product. When the product page appears, select [Firmware] below the model name to download the latest firmware. -
Page 45: Menu Table
To Upgrade Firmware Select the uncompressed files and drag-and-drop it into [Removable Disk] After disconnecting USB Cable, turn off the player. Connect the charger to the player. G The firmware will be upgraded. G When upgrading is complete, the player will be turned on automatically. ∏fi¥∫»≠∏È... -
Page 46: Troubleshooting
Troubleshooting The software doesn’t work G Refer to the System Requirements. The player does not work and the LCD displays nothing. G Reset the player by pressing the RESET Hole using a pointed object such as a safety clip. G Check the battery charge status of the player. G Make sure the Hold switch is in the off position. -
Page 47: Specifications
Specifications YP-T8 Model YP-T8 V(256MB) / YP-T8 X(512MB) / YP-T8 Z(1GB) / Built-in Memory capacity YP-T8Q(2GB) Built-in Rechargeable Battery Capacity 850mAh Voltage 3.7V (Li-Ion) Dimensions/Weight 1.75” X 3.26” X 0.61”/1.94 oz Case Plastic Maximum File Transfer Data Rate 120Mbps Noise Ratio... -
Page 48: Safety Information
Address: 416, Maetan-3Dong, Paldal-Gu, Suwon City, Kyungki-Do, Korea 442-742 declares under its sole responsibility that the Party Responsible for Product Compliance product Trade Name: Samsung Electronics Co., Ltd Samsung Electronics America Model Number: YP-T8 QA Lab. has been tested according to the 3351 Michelson Dr. -
Page 49: Warranty
Samsung reserves the right to refuse warranty ser- from whom it was originally purchased. The lia- vice if this information has been removed or... - Page 50 THEORY ON WHICH THE CLAIM IS BASED, AND tial damages, so the above limitations or EVEN IF SAMSUNG HAS BEEN ADVISED OF THE exclusions may not apply to you. This war- POSSIBILITY OF SUCH DAMAGES. NOR SHALL...