Table of Contents
Advertisement
Advertisement
Table of Contents

Related Manuals for Farberware FCM12SS Millenium


Summary of Contents for Farberware FCM12SS Millenium
- Page 1 USE & CARE INSTRUCTIONS PROGRAMMABLE COFFEEMAKER FCM12SS...
-
Page 2: Important Safeguards
IMPORTANT SAFEGUARDS When using electrical appliances, basic safety precautions should always be followed, including the following: 1. Read all instructions. 2. Do not touch hot surfaces. Use handles or knobs. 3. To protect against electric shock, do not place cord, plugs, or appliance in water or other liquid. -
Page 3: Additional Important Safeguards
ADDITIONAL IMPORTANT SAFEGUARDS WARNING: This appliance generates heat and escaping steam during use. Proper precautions must be taken to prevent the risk of burns, fires, or other injury to persons or damage to property. 1. All users of this appliance must read and understand this Instruction Manual before operating or cleaning this appliance. -
Page 4: Polarized Plug
REMOVE THE BOTTOM COVER. NO USER-SERVICEABLE PARTS INSIDE. REPAIR SHOULD BE DONE BY AUTHORIZED SERVICE PERSONNEL ONLY. COFFEE YIELD This 12 Cup Coffeemaker yields 12 (5-oz.) cups. NOTE: A 5 oz. cup is the American industry standard and is used by most coffeemaker manufacturers. -
Page 5: Getting To Know Your
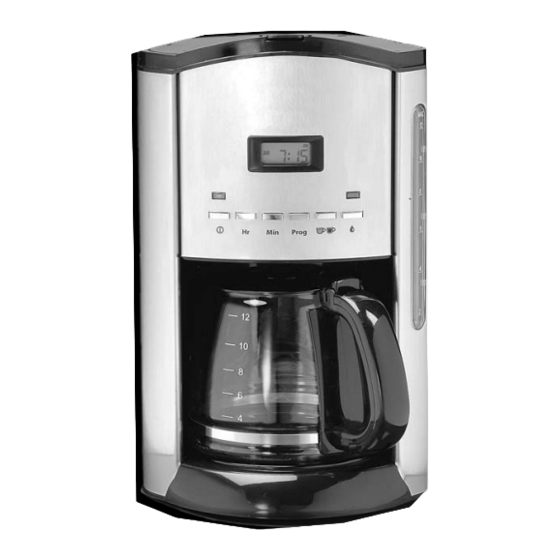
GETTING TO KNOW YOUR PROGRAMMABLE COFFEEMAKER PRODUCT MAY VARY SLIGHTLY FROM ILLUSTRATIONS FIGURE 1 1. Filter Basket Handles 2. Removable Filter Basket (P/N 31146B) 3. Auto Pause & Pour Feature 4. Carafe Lid (P/N 31147B) 5. Carafe Handle 6. Carafe (P/N 31148B) FARBERWARE 7. -
Page 6: Control Panel
Button when the brewing cycle is complete. The Red ON Light, above the ON/OFF Button, will illuminate when the Coffeemaker is ON. The Green AUTO Light, above the DRIP Button, will illuminate when the Coffeemaker has been programmed. - Page 7 Carafe of freshly-brewed coffee warm for up to 2 hours. The non- stick Warming Plate, Auto Pause & Pour and LED Power Indicator Light are some of the features that make this Coffeemaker a must in every kitchen. BEFORE BREWING COFFEE...
-
Page 8: Brewing Instructions
BREWING INSTRUCTIONS 1. Place the Coffeemaker on a flat, level surface. Plug the unit into a 120V, AC electrical outlet. 2. Open the Lid by using the lip located on top of the Coffeemaker. (See Figure 1.) 3. Place a #4 cone-shaped paper filter into the Removable Filter Basket. -
Page 9: Auto Shut Off
NOTE: Unplugging the unit will reset the clock to 12:00. PRESETTING THE BREWING CYCLE (AUTO BREW) To preset your Coffeemaker to begin brewing at a later time, first follow steps 1 through 6 in the BREWING INSTRUCTIONS section. Check to make sure that the clock is set to the correct time. -
Page 10: Hints For Great Tasting Coffee
2. After daily use, the Removable Filter Basket, Carafe and Carafe Lid should be washed in warm, soapy water. 3. If necessary, wipe the outside of the Coffeemaker with a soft, damp cloth and wipe dry. Do not use abrasive cleansers, scouring pads or steel wool. - Page 11 Carafe. After dripping has stopped, discard contents in Carafe. 6. After allowing the Coffeemaker to cool for 10 minutes, rinse it out by brewing a Carafe full of cold water. Make sure to insert a fresh filter into the Removable Filter Basket before brewing.
-
Page 12: Limited One-Year Warranty
LIMITED ONE-YEAR WARRANTY Warranty Coverage: This product is warranted to be free from defects in materials or workmanship for a period of one (1) year from the original purchase date. This product warranty is extended only to the original consumer purchaser of the product and is not transferable.