Table of Contents
Advertisement
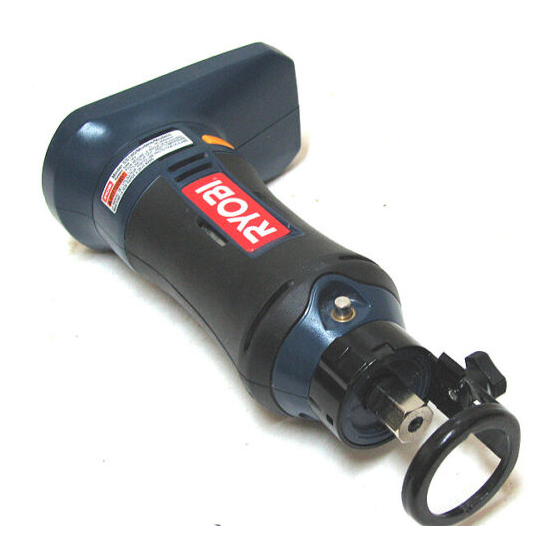
THANK YOU FOR BUYING A RYOBI SPEED SAW.
Your new Speed Saw has been engineered and manufactured to Ryobi's high standard for dependability, ease of
operation, and operator safety. Properly cared for, it will give you years of rugged, trouble-free performance.
CAUTION: Carefully read through this entire operator's manual before using your new Speed Saw.
Pay close attention to the Rules for Safe Operation, Warnings, and Cautions. If you use your Speed Saw properly
and only for what it is intended, you will enjoy years of safe, reliable service.
Thank you again for buying Ryobi tools.
SAVE THIS MANUAL FOR FUTURE REFERENCE
OPERATOR'S MANUAL
SPEED SAW™
SS180
Advertisement
Table of Contents

Summary of Contents for Ryobi SS180
- Page 1 THANK YOU FOR BUYING A RYOBI SPEED SAW. Your new Speed Saw has been engineered and manufactured to Ryobi's high standard for dependability, ease of operation, and operator safety. Properly cared for, it will give you years of rugged, trouble-free performance.
-
Page 2: Table Of Contents
Safety, performance, and dependability have been given top priority in the design of this Speed Saw making it easy to maintain and operate. The operation of any power tool can result in foreign objects being thrown into your eyes, WEAR YOUR which can result in severe eye damage. -
Page 3: General Safety Rules
Use battery only with charger listed. MODEL BATTERY SS180 1322401, 1323303 ■ Use battery operated tool only with specifically designated battery pack. Use of any other batteries may create a risk of fire. Use only with battery pack listed. -
Page 4: Specific Safety Rules
GENERAL SAFETY RULES SERVICE ■ Tool service must be performed only by quali- fied repair personnel. Service or maintenance per- formed by unqualified personnel could result in a risk of injury. SPECIFIC SAFETY RULES Hold tool by insulated gripping surfaces when performing an operation where the cutting tool may contact hidden wiring. -
Page 5: Specific Safety Rules
SPECIFIC SAFETY RULES WARNING: A damaged battery is subject to explosion. To avoid serious personal injury, properly dispose of a damaged battery. CHARGER SAFETY INSTRUCTIONS ■ Save these instructions. This manual contains important safety and operating instructions for charger. Following this rule will reduce the risk of electric shock, fire, or serious personal injury. -
Page 6: Symbols
Important: Some of the following symbols may be used on your tool. Please study them and learn their meaning. Proper interpretation of these symbols will allow you to operate the tool better and safer. SYMBOL NAME Volts Amperes Hertz Watt Minutes Alternating Current Direct Current... -
Page 7: Specifications
■ Do not discard the packing material until you have carefully inspected and satisfactorily operated the tool. With the proper bit, you may use your Speed Saw for the purposes listed below: ■ Cutting electrical outlet openings in drywall or wood paneling. ■ Creating decorative wood accents. -
Page 8: Features
A spindle lock secures the spindle and allows you to easily loosen the collet nut and change bits. NOTE: Do not run Speed Saw with spindle lock engaged. DEPTH ADJUSTMENT RING Your Speed Saw is equipped with a depth adjustment ring that allows you to adjust the depth of cut up to 1 in. -
Page 9: Adjustments
WARNING: Your Speed Saw should never be connected to power supply when you are assembling parts, making adjustments, cleaning, performing maintenance, or when not in use. Disconnecting your Speed Saw will prevent accidental starting that could cause serious injury. INSERTING/REMOVING BITS See Figure 2. - Page 10 ■ Attach pivot point knob with nut provided. ATTACHING CIRCLE CUTTER See Figure 6. Follow these directions when attaching the circle cutter. ■ REMOVE BATTERY PACK FROM SPEED SAW. WARNING: Failure to remove battery pack could result in accidental starting causing serious injury.
-
Page 11: Operation
Follow these directions when installing the battery pack. ■ Place battery pack on the Speed Saw. ■ Align raised rib on battery pack with groove in saw's battery port. ■ Make sure the latches on each side of the battery pack snap in place and that battery pack is secured on the tool before beginning operation. - Page 12 ■ Cut a pilot hole in the center of the intended circle. ■ Line up pivot point knob with the lead hole. ■ Begin cut, applying moderate, steady pressure. ■ Hold the Speed Saw firmly with one hand and the handle with the other. CAUTION: Too much force causes heat build up, which can shorten the life of the bit.
-
Page 13: Maintenance
WARNING: When servicing use only identical Ryobi replacement parts. Use of any other parts may create a hazard or cause product damage. GENERAL Avoid using solvents when cleaning plastic parts. Most plastics are susceptible to damage from various types of commercial solvents and may be damaged by their use. -
Page 14: Maintenance
"CHARGING BATTERIES" for normal recharging of batteries. If the charger does not charge your battery pack under normal circumstances, return both the battery pack and charger/charging assembly to your nearest Ryobi Authorized Service Center for electrical check. GREEN LIGHT "ON" INDICATES FULLY CHARGED YELLOW AND GREEN LIGHTS "ON"... - Page 15 NOTES...
-
Page 16: Parts, Ordering, And Service
Ryobi Authorized Service Center. Be sure to provide all pertinent facts when you call or visit. Please call 1-800-525-2579 for your nearest Ryobi Authorized Service Center. You can also check our Web site at www.ryobitools.com for a complete list of Authorized Service Centers.


