Table of Contents
Advertisement
Quick Links
OPERATOR'S MANUAL
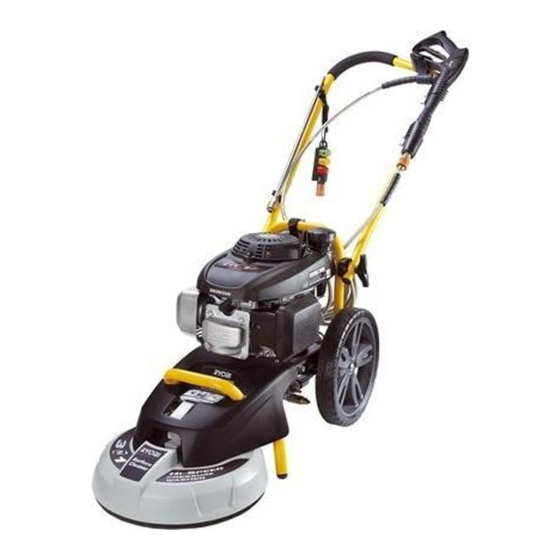
3-N-1 HI-SPEED GASOLINE
PRESSURE WASHER
RPW2500WB
3-N-1 HI-SPEED GASOLINE PRESSURE WASHER
F
3-N-1 HI-SPEED GASOLINE PRESSURE WASHER
GB
3-N-1 HI-SPEED GASOLINE PRESSURE WASHER
D
3-N-1 HI-SPEED GASOLINE PRESSURE WASHER
E
3-N-1 HI-SPEED GASOLINE PRESSURE WASHER
I
3-N-1 HI-SPEED GASOLINE PRESSURE WASHER
P
3-N-1 HI-SPEED GASOLINE PRESSURE WASHER
NL
3-N-1 HI-SPEED GASOLINE PRESSURE WASHER
CZ
3-N-1 HI-SPEED GASOLINE PRESSURE WASHER
RU
3-N-1 HI-SPEED GASOLINE PRESSURE WASHER
RO
3-N-1 HI-SPEED GASOLINE PRESSURE WASHER
PL
Your pressure washer has been engineered and manufactured to our high standard for dependability, ease of operation,
and operator safety. When properly cared for, it will give you years of rugged, trouble-free performance.
DANGER:
You WILL be KILLED or SERIOUSLY HURT if you do not follow the instructions in this operator's
manual.
Thank you for your purchase.
SAVE THIS MANUAL FOR FUTURE REFERENCE
USER'S MANUAL
USER'S MANUAL
USER'S MANUAL
USER'S MANUAL
USER'S MANUAL
USER'S MANUAL
USER'S MANUAL
USER'S MANUAL
USER'S MANUAL
USER'S MANUAL
USER'S MANUAL
1
Advertisement
Table of Contents

Related Manuals for Ryobi RPW2500WB


Summary of Contents for Ryobi RPW2500WB
- Page 1 3-N-1 HI-SPEED GASOLINE PRESSURE WASHER 3-N-1 HI-SPEED GASOLINE PRESSURE WASHER Your pressure washer has been engineered and manufactured to our high standard for dependability, ease of operation, and operator safety. When properly cared for, it will give you years of rugged, trouble-free performance.
-
Page 2: Table Of Contents
Introduction ...2 Important Safety Instructions ...3 Specific Safety Rules...4 Symbols ... 5-6 Features ... 7-8 Assembly ... 8-14 Operation ... 15-19 Maintenance ... 20-22 Troubleshooting ...23 Warranty ...24 Parts Ordering / Service ... Back Page This product has many features for making its use more pleasant and enjoyable. -
Page 3: Important Safety Instructions
IMPORTANT SAFETY INSTRUCTIONS WARNING: Read and understand all instructions. Failure to follow all instructions listed below may result in electric shock, fire and/or carbon monoxide poisoning which will cause death or serious personal injury. READ ALL INSTRUCTIONS Know your tool. Read the operator’s manual carefully. Learn the machine’s applications and limitations as well as the specific potential hazards related to this tool. -
Page 4: Specific Safety Rules
Never direct a water stream toward people or pets, or any electrical device. Before starting any cleaning operation, close doors and windows. Clear the area to be cleaned of debris, toys, outdoor furniture, or other objects that could create a hazard. -
Page 5: Symbols
GRADE SOLUTIONS in this product. To reduce the risk of injection or severe injury, keep hands and feet away from the cleaning deck while the pressure washer is running. To reduce the risk of injection or severe injury, only use cleaning deck on flat, horizontal surfaces. - Page 6 To avoid serious personal injury, do not attempt to use this product until you read thoroughly and understand com- pletely the operator’s manual. If you do not understand the warnings and instructions in the operator’s manual, do not use this product. Call Ryobi customer service for assistance.
-
Page 7: Features
PRODUCT SPECIFICATIONS Engine...Honda GCV160 Cylinder capacity ... 160 cm Motor ... See operating instructions of motor manufacturer Water connection Max feed temperature ... 60 ºC Min. feed volume ... 10 l/min Max. feed pressure ...0,6 MPa Performance data Working pressure ...16 MPa Max. -
Page 8: Assembly
HONDA GCV160 ENGINE This Honda engine enables the pressure washer to achieve 17 926 kPa at a rate of 8,7 liters per minute. Please read the engine manual included with this product. - Page 9 WARNING: If any parts are damaged or missing do not operate this product until the parts are replaced. Failure to heed this warning could result in serious personal injury. WARNING: Do not attempt to modify this product or create acces- sories not recommended for use with this product.
- Page 10 INSTALLING TRIGGER HANDLE HOLDERS See Figures 4 - 5. Place top trigger handle holder over handle bar and align holes. Secure using screws and nuts as shown. While holding screw with Phillips screwdriver, tighten each nut with wrench to secure. ...
- Page 11 CONNECTING HIGH PRESSURE HOSE TO TRIGGER HANDLE See Figure 7. Screw the collar on the high pressure hose into the trigger handle inlet coupler by turning the hose collar clockwise. Pull on the hose to be certain it is properly secured. CONNECTING THE HIGH PRESSURE HOSE TO THE PUMP See Figure 8.
-
Page 12: Pressure Washer
If using a garden hose that is not self-coiling, straighten the garden hose. NOTE: There must be a minimum of 3 meters of unre- stricted hose between the pressure washer intake and the hose faucet or shut off valve (such as a “Y” shut off connector). - Page 13 INSTALLING CLEANING DECK See Figures 12 - 14. To install the cleaning deck on the pressure washer: Connect the lower end of the high pressure water supply hose to the cleaning deck by inserting the deck inlet plug into the quick connect coupler on the water supply hose.
-
Page 14: Assembly
When adding gas to the pressure washer, make sure the unit is sitting on a flat, level surface. If the engine is hot, let the pressure washer cool before adding gas. -
Page 15: Starting And Stopping
WARNING: Do not allow familiarity with the product to make you care- less. Remember that a careless fraction of a second is sufficient to inflict serious injury. WARNING: Always wear safety goggles or safety glasses with side shields when operating power tools. Failure to do so could result in objects being thrown into your eyes, resulting in possible serious injury. - Page 16 Using the quick-connect collar, changing nozzles is easy. To connect a nozzle to the trigger handle: Turn off the pressure washer and shut off the water supply. Pull trigger to release water pressure. Engage the lock out on the trigger handle by pushing up on the lock out until it clicks into the slot.
- Page 17 To disconnect a nozzle from the trigger handle once the cleaning job is complete: Turn off the pressure washer and shut off the water supply. Point nozzle in a safe direction and pull trigger to release water pressure.
- Page 18 Point nozzle in a safe direction and pull trigger to release water pressure. RINSING WITH THE PRESSURE WASHER Turn off the pressure washer and shut off the water supply. Point nozzle in a safe direction and pull trigger to release water pressure.
-
Page 19: Operation
NOTE: The pressure washer is heavy and may require two people when lifting. To lift the pressure washer: Turn the pressure washer off. Point nozzle in a safe direc- tion and pull trigger to release water pressure. Turn fuel valve to OFF position to prevent spilling fuel. -
Page 20: Maintenance
AFTER TIGHTENING SECURELY, NOZZLE OPENING SHOULD BE POINTED IN SAME DIRECTION AS SPRAY BAR Turn off the pressure washer and shut off the water supply. Point nozzle in a safe direction and pull trigger to release water pressure. Remove the nozzle from the spray wand. -
Page 21: Cleaning The Air Filter
To clean nozzles on cleaning deck: Turn off the pressure washer and shut off the water supply. With the surface cleaner on the ground, pull trig- ger to release water pressure. Disconnect cleaning deck from pressure washer or spray wand. -
Page 22: Maintenance
STORING THE PRESSURE WASHER See Figure 32. Store the pressure washer with the gas tank empty by either draining the tank or running the pressure washer until the gas runs out. Allow 30 minutes of “cool down” time before storing the machine. Store in a dry, covered area where the weather can’t damage it. -
Page 23: Troubleshooting
PROBLEM Engine fails to start 1. No fuel in tank 2. Fuel valve turned off 3. Engine switch in OFF position 4. Spark plug shorted or fouled 5. Spark plug is broken (cracked 6. Ignition lead wire shorted, broken, 7. Ignition inoperative Engine hard to start 1. -
Page 24: Warranty
LIMITED WARRANTY RYOBI warrants this outdoor product to be free of defects in material or workmanship for 24 months from the date of pur- chase by the original purchaser, subject to the limitations below. Please keep your invoice as proof of date of purchase. - Page 25 RYOBI TECHNOLOGIES (UK) LIMITED Medina House, Fieldhouse Lane, Marlow, Buckinghamshire, SL7 1TB, UNITED KINGDOM Tel: + 44 (0) 1628 894400 Fax: + 44 (0) 1628 894401 Technical Helpline : + 44 (0) 800 389 0305 RYOBI TECHYNOLOGIES SAS Immeuble Le Grand Roissy Z.A.