Table of Contents
Advertisement
Owner's Manual
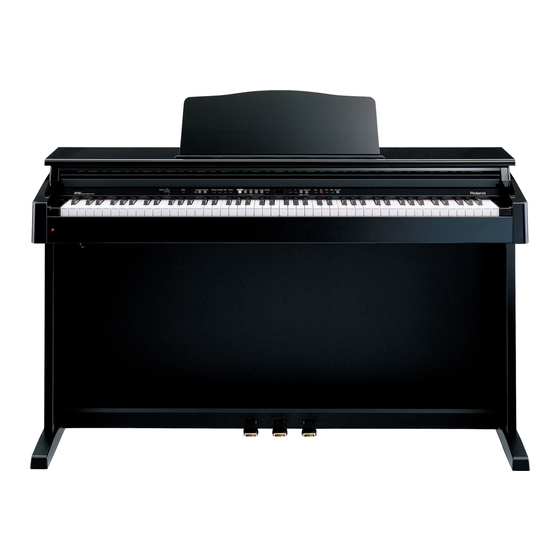
Thank you, and congratulations on your choice of the Roland Digital Piano HP103.
Main Features
Piano Sounds with Rich Resonance and Wide-ranging Expressiveness
The stereo sampling piano sound generator realistically reproduces even the sound
of the hammers striking the strings, producing the tones of a high-quality concert
grand piano. Maximum polyphony of 64 notes ensures that you can use the pedal
freely without running out of notes.
In addition, this instrument features a "Grand Sound" speaker system, and
simulates the full, three-dimensional nature of a concert grand piano (Grand Space),
which together help to deliver a sound with even greater clarity and power
(Dynamic Emphasis).
Pursuing the Playing Feel of a Grand Piano
This instrument features a progressive hammer action keyboard, which duplicates
the touch of a grand piano, with a heavier touch in the lower register, and a lighter
touch in the upper register.
The pedal is designed for good-feeling response, and allows subtle performance
nuances to be expressed.
Comfortable for Use with Headphones
Special effects applied to the sound when headphones are used make listening
through headphones comfortable, not fatiguing. And in addition to an indicator on
the front panel that lights up when you connect a pair of headphones, the HP103 also
provides a convenient hook where you can keep your headphones when they're not
in use.
A Variety of Helpful Practice Features and Built-in Piano Songs
A metronome function and "two-track recorder," the built-in songs for a collection
of scores (60 songs included), and other features let you experience piano lessons in
ways possible only with a digital piano.
Before using this unit, carefully read the sections entitled: "IMPORTANT SAFETY
INSTRUCTIONS" (p. 2), "USING THE UNIT SAFELY" (p. 3, 4), and "IMPORTANT NOTES" (p.
5, 6). These sections provide important information concerning the proper operation of the unit.
Additionally, in order to feel assured that you have gained a good grasp of every feature provided
by your new unit, Owner's manual should be read in its entirety. The manual should be saved and
kept on hand as a convenient reference.
Copyright © 2004 ROLAND CORPORATION
All rights reserved. No part of this publication may be reproduced in
any form without the written permission of ROLAND CORPORATION.
Advertisement
Table of Contents

Related Manuals for Roland HP103


Summary of Contents for Roland HP103
-
Page 1: Main Features
And in addition to an indicator on the front panel that lights up when you connect a pair of headphones, the HP103 also provides a convenient hook where you can keep your headphones when they’re not in use. -
Page 2: Important Safety Instructions
WARNING: To reduce the risk of fire or electric shock, do not expose this apparatus to rain or moisture. CAUTION RISK OF ELECTRIC SHOCK DO NOT OPEN ATTENTION : RISQUE DE CHOC ELECTRIQUE NE PAS OUVRIR CAUTION: TO REDUCE THE RISK OF ELECTRIC SHOCK, DO NOT REMOVE COVER (OR BACK). -
Page 3: Using The Unit Safely
• Do not attempt to repair the unit, or replace parts within it (except when this manual provides specific instructions directing you to do so). Refer all servicing to your retailer, the nearest Roland Service Center, or an authorized Roland distributor, as listed on the “Information” page. - Page 4 • Before using the unit in a foreign country, consult with your retailer, the nearest Roland Service Center, or an authorized Roland distributor, as listed on the “Information” page.
-
Page 5: Important Notes
Brass eventually darkens as the result of the natural oxidization process. If the brass becomes tarnished, polish it using commercially available metal polisher. For HP103-PE • Since your piano has a polished finish that is as delicate as that found on finely crafted wooden furniture, it needs careful, periodic care. -
Page 6: Additional Precautions
• Do not apply undue force to the music rest while it is in use. • Use a cable from Roland to make the connection. If using some other make of connection cable, please note the following precautions. -
Page 7: Table Of Contents
Contents USING THE UNIT SAFELY ...3 IMPORTANT NOTES ...5 Panel Descriptions...8 Front Panel ...8 Rear Panel...9 Before You Start Playing ...10 Connecting the Pedal Cord...10 Connecting the Power Cord ...10 Opening/Closing the Lid ...10 Setting Up the Music Rest...10 Using the Music Holders ...11 Connecting Headphones...11 Using the Headphones Hook ...11 Turning the Power On and Off ...11... -
Page 8: Panel Descriptions
(p. 13, p. 28). Also starts/stops recording of a performance (p. 31–p. 33). [Rec] button Puts the HP103 in recording-standby mode (p. 30–p. 34). [Left] button Plays back or records a performance separately for each hand (p. 29, p. 32–p. 34). -
Page 9: Rear Panel
Input jacks These jacks can be connected to another sound generating device or an audio device, so that the sound of that device will be output from the HP103’s speakers (p. 39). Output jacks Allows you to output the piano’s sound to sound reinforcement equipment to obtain a more powerful sound. -
Page 10: Before You Start Playing
Setting Up the Music Rest Insert the included music rest attachment screws into the screw holes on top of the HP103, and tighten the screws slightly. fig.00-03 Put the music rest between the screws and the HP103’s body. -
Page 11: Using The Music Holders
Attaching the Headphone Hook Press and twist the headphone hook included with the HP103 into the hole in the bottom of the HP103 (refer to the figure below). Turn the wing nut of headphone hook to secure the headphone hook. -
Page 12: Adjusting The Sound's Volume And Brilliance
When you hold down this pedal and play the keyboard, the sound will have a softer tone. About the Adjuster When you move the HP103 or if you feel that the pedals are unstable, adjust the adjuster located below the pedals as follows. -
Page 13: Enjoying The Internal Songs And Demo
Chapter 1. Enjoying the Internal Songs and Demo Listening to Internal Songs The HP103 comes with 66 piano songs onboard. ■ Playing Back All Songs Continuously (All Song Play) The internal songs can be played back consecutively. fig.panel1-1 Hold down the [Song/Tempo] button, and press the [Play] button. -
Page 14: Listening To The Demo Songs
Chapter 1. Enjoying the Internal Songs and Demo Stopping the playback Press the [Play] button. The button’s indicator goes out, and playback stops. The next time you press the [Play] button, the song that was stopped is played from the beginning. Listening to the Demo Songs You can listen to various demo songs, including those demonstrating the piano and other tones, as well as the function applied to the piano tones. -
Page 15: Listening To A Demo Of The Functions
■ Listening to a Demo of the Functions You can listen to the demo of the functions that can be applied to the piano tones. fig.panel1-3 1, 3 Press the [Demo] button. The button’s indicator flashes, and playback of the tone demo songs starts. Press any of the following buttons. -
Page 16: Chapter 2. Performance
Chapter 2. Performance Performing with a Variety of Sounds The HP103 contains 20 different internal tones. The tones are organized into five tone groups, which are assigned to the Tone buttons. fig.panel2-1 Selecting a tone group Press any Tone button. -
Page 17: Adjusting The Keyboard Touch (Key Touch)
Adjusting the Keyboard Touch (Key Touch) You can adjust the touch (playing feel) of the keyboard. fig.panel2-7 Press the [Key Touch] button. The button’s indicator will light, and the feel of the keyboard will change. Each time you press the [Key Touch] button, the button’s indicator will change color, and the feel of the keyboard will change. -
Page 18: Adding A Sense Of Depth To The Sound (Grand Space)
Adding a Sense of Depth to the Sound (Grand Space) The HP103 includes a “Grand Space” function that allows you to get sounds that have a sense of depth like you get by playing an acoustic grand piano. Using this function gives you the natural-sounding reverberation and depth of sound that an acoustic grand piano provides. -
Page 19: Adding The Right Sense Of Depth For Headphones (Grand Space)
Adding the Right Sense of Depth for Headphones (Grand Space) You can achieve the kind of sonic depth produced with a grand piano through headphones as well. This feature creates an ambience that makes it seem you are seated in front of a grand piano as you perform. Press the [Grand Space] button, getting its indicator to light. -
Page 20: Adding Liveliness To The Sound (Dynamic Emphasis)
Chapter 2. Performance Adding Liveliness to the Sound (Dynamic Emphasis) You can add liveliness to the sound to give it superb clarity and distinctness. Press the [Dynamics] button, getting its indicator to light. The Dynamic Emphasis function is switched on, enlivening the sound. To cancel the Dynamic Emphasis function, press the [Dynamics] button once more so its illumination is turned off. -
Page 21: Applying Effects To The Sound
Applying Effects to the Sound fig.panel2-5 ■ Adding Reverberation to the Sound (Reverb) By applying the reverb effect you can produce a pleasant reverberation, making it sound as though you were performing in a concert hall. Press the [Reverb] button. The button’s indicator will light, and a reverb effect will be applied to the sound. -
Page 22: Transposing The Key Of The Keyboard (Transpose)
Chapter 2. Performance Transposing the Key of the Keyboard (Transpose) By using the “Transpose function,” you can transpose your performance without changing the notes you play. For example, even if the song is in a difficult key with numerous sharps ( ) or flats ( to play. -
Page 23: Playing Two Sounds Together (Dual Play)
Playing Two Sounds Together (Dual Play) Simultaneously playing two tones when one key is pressed is called “Dual play.” Simultaneously press the two Tone buttons that you want to play together. The indicator of the button you pressed will light. When you play the keyboard, the tones of the two Tone buttons you selected will sound simultaneously. -
Page 24: Playing Different Tones With The Left And Right Hands (Split Play)
Chapter 2. Performance Playing Different Tones with the Left and Right Hands (Split Play) Dividing the keyboard into right-hand and left-hand areas, then playing different sounds in each is called “Split play.” The boundary key is called the “split point.” fig.splitpoint.e …... -
Page 25: Changing The Keyboard's Split Point
(F#3). fig.disp-splitpoint Using Metronome ■ Sounding the Metronome The HP103 features a built-in metronome. While a song plays back, the metronome will sound at the tempo and time signature (Beat) of that song. fig.panel2-4 Sounding the metronome Press the [Metronome/Count In] button. -
Page 26: Changing The Metronome Volume
Chapter 2. Performance Changing the beat of metronome Hold down the [Song/Tempo] button, and press the [-] or [+] button. The currently selected beat will be displayed. If you hold down the [Song/Tempo] button and press the [-] or [+] button, the beat will change. -
Page 27: Splitting The Keyboard Into Two Sections For Four-Hand Performances (Twin Piano Mode)
Splitting the Keyboard Into Two Sections for Four-Hand Performances (Twin Piano Mode) You can divide the keyboard into two separate sections, allowing two people to perform in the same registers. While holding down the [Split] button and press the [Piano] button. The [Split] button’s indicator will light, and Twin Piano Mode is switched on. -
Page 28: Playing Along With The Internal Songs
Sounding a “count sound” leading up to playback of a song is called “Count-In.” On the HP103, if you playback a song while the metronome is sounding, two measures of lead-in count will be heard at the beginning of the song. -
Page 29: Playing Each Hand Separately
Playing Each Hand Separately The internal songs allow you to select the performance part that will be played back. The left-hand performance of the internal songs is assigned to the [Left] button, while the right-hand performance is assigned to the [Right] button. The place where each part of the performance is held is called a “track,”... -
Page 30: Chapter 4. Recording Your Performance
A recorded performance can be played back to hear your own playing, or to add additional parts. The following types of recording can be done using the HP103. • Recording just your own keyboard performance (→ “Recording a New Song” p. -
Page 31: Recording A New Song
When recording songs that start on an upbeat (that start on a beat other than the first beat of the measure), press the [Rec] button to put the HP103 into recording standby, then press the [Play] button. Two measures of count sound are played, and then recording begins. -
Page 32: Recording Along With A Song
When you want to record the left-hand performance, press the [Left] button; to record that of the right hand, press the [Right] button. The indicators of the button you pressed and of the [Play] button will blink, and the HP103 enters recording-standby mode. Starting to record Press the [Play] button. -
Page 33: Selecting And Recording The Track For Each Hand Separately
Selecting and Recording the Track for Each Hand Separately The recorder of the HP103 has two recording tracks, allowing you to record the right and left hands separately. Use the [Left] button or [Right] button to specify the recording track. -
Page 34: Erasing Recorded Performances
Chapter 4. Recording Your Performance Play back the recorded performance Press the [Play] button. You will hear the recorded performance. Press the [Play] button once again, and playback will stop. Erasing Recorded Performances You can erase a recorded performance. ■ Erasing a Performance from the Specified Track You can select a recorded track and erase it. -
Page 35: Chapter 5. Changing Various Settings
The damper pedal on the HP103 recreates this resonance (damper resonance) when depressed. You can select from eight levels of depth for the resonant sound (resonance level). -
Page 36: Tuning To Other Instruments' Pitches (Master Tuning)
* When performing in ensemble with other instruments, be aware that depending on the key, there may be some shifting of the pitch. Tune the HP103 to the fundamental pitch of the other instruments. A_ A... -
Page 37: Setting The Tuning Curve (Stretch Tuning)
■ Setting the Tuning Curve (Stretch Tuning) A piano is generally tuned to a pitch with a lower bass range and a higher treble range than equal temperament. This special tuning method for pianos is called “Stretch Tuning.” If you press the [Harpsi] button in step 2 of “Making Detailed Settings (Function)”... -
Page 38: Preventing The Settings From Changing During Performance
Changing During Performance ■ Disabling Everything Except Piano Play (Panel Lock) The “Panel Lock” function locks the HP103 in a state where only piano performance can be used, and all buttons will be disabled. This prevents the settings from being inadvertently modified even if children press the buttons accidentally. -
Page 39: Chapter 6. Connecting External Devices
Turn on the power of the connected device. Turn on the power of the HP103. Adjust the volume of each device. * You cannot use the HP103 to adjust the volume of the connected sound generating device. Turning off the power Set the volume of the HP103 and of the connected devices to the minimum position. -
Page 40: Connecting Midi Devices
* MT-90s has no MIDI Out connector. MIDI HP103 * Set Local Off if you have connected the HP103 to a MIDI sequencer. Refer to “Switching Local Control on and Off” (p. 41). Also set your MIDI sequencer to MIDI Thru mode (so that messages received at MIDI IN will be re-transmitted without change from MIDI OUT). -
Page 41: Midi Send Channel Settings
Local Off setting. MT units transmit Local Off messages when their power is switched on. If you turn on the power in the order of the HP103 → MT series, Local Off will be set automatically. -
Page 42: Troubleshooting
Is the Tone locked? (p. 38) work Turn the power off, then back on. Is the volume level of the HP103 turned all the way down? (p. 12) Are headphones plugged in? (p. 11) Has a plug remained connected to the Phones... -
Page 43: Error Messages/Other Messages
Roland pianos faithfully abruptly beyond a simulate such characteristics of the acoustic certain key piano. On the HP103, the range that is unaffected by the damper pedal will change depending on the Key Transpose setting. When listening through headphones:... -
Page 44: Tone List
Tone List Button name Tone [Variation] Dark Grand Piano [Piano] Mellow Piano Green Piano + Strings Orange Piano + Choir Dark Electric Piano1 [E. Piano] Electric Piano2 Green Vibraphone Orange Electric Piano + Choir Dark Harpsichord [Harpsi] Coupled Harpsichord Green Harpsichord + Strings Orange Harpsichord + Choir... -
Page 45: Internal Song List
S. 41 Humoreske S. 42 Blumenlied S. 43 Alpenglöckchen Composer Copyright C. Debussy © 2004 Roland Corporation F. Chopin/ © 2002 Roland Corporation Arranged by John Maul John Maul © 1998 Roland Corporation Masashi & Kazuko © 2000 Roland Corporation Hirashita W. - Page 46 Having been a product specialist for Roland U.K., John is now actively involved in music software composing/programming for both Roland Japan and various music publishers. Quite recently his “Musical Picture Book,” a volume of original piano music encompassing all standards of musical ability, which included the piano and orchestral accompaniment data in SMF format, was published and printed.
-
Page 47: Easy Operation List
Easy Operation List You want to Press the [Split] and [Piano] buttons simultaneously. Twin Piano Mode Press the [Split] and [Reverb] buttons simultaneously, and press the [●] button. Grand Space Mode Master Tuning Selecting a temperament Specifying the keynote Stretch tuning Applying the damper pedal to the left-hand keyboard area MIDI send channel settings... -
Page 48: Midi Implementation Chart
MIDI Implementation Chart DIGITAL PIANO Model HP103 Function... Basic Default Channel Changed Default Mode Messages Altered Note True Voice Number : Note ON Velocity Note OFF After Key’s Touch Ch’s Pitch Bend 6, 38 Control Change 100, 101 Prog Change... -
Page 49: Main Specifications
55 W 1,388 (W) x 425 (D) x 836 (H) mm / 54-11/16 (W) x 16-3/4 (D) x 32-15/16 (H) inches (HP103-MH) 1,398 (W) x 427 (D) x 837 (H) mm / 55-1/16 (W) x 16-13/16 (D) x 33 (H) inches (HP103-PE) -
Page 50: Index
Index AC inlet ... 10 Adjuster ... 12 All Song Play ... 13 Audio Equipment ... 39 Beat ... 26 [Brilliance] knob ... 12 Computer ... 39 Count-In ... 28 Damper pedal ... 12, 37 Resonance ... 35 Damper Resonance ... 12, 35 Demo Demo of the Functions ... - Page 51 MEMO...
- Page 52 MEMO...
- Page 53 MEMO...
- Page 54 Information When you need repair service, call your nearest Roland Service Center or authorized Roland distributor in your country as shown below. AFRICA PHILIPPINES G.A. Yupangco & Co. Inc. 339 Gil J. Puyat Avenue EGYPT Makati, Metro Manila 1200, Al Fanny Trading Office...
- Page 55 This product complies with the requirements of European Directives EMC 89/336/EEC and LVD 73/23/EEC. FEDERAL COMMUNICATIONS COMMISSION RADIO FREQUENCY INTERFERENCE STATEMENT This equipment has been tested and found to comply with the limits for a Class B digital device, pursuant to Part 15 of the FCC Rules.
- Page 56 This owner’s manual is printed on recycled paper. 03679534 ’05-4-3N...