Table of Contents
Advertisement
Owner's Manual
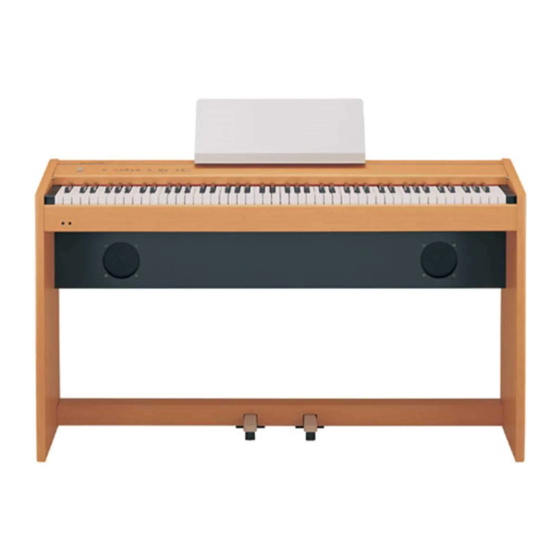
Congratulations on your choice of the Roland Digital Piano F-100.
201a
Before using this unit, carefully read the sections entitled: "USING THE UNIT
SAFELY" and "IMPORTANT NOTES" (p. 2; p. 4). These sections provide
important information concerning the proper operation of the unit. Additionally, in
order to feel assured that you have gained a good grasp of every feature provided by
your new unit, Owner's manual should be read in its entirety. The manual should be
saved and kept on hand as a convenient reference.
202
Copyright © 2002 ROLAND CORPORATION
All rights reserved. No part of this publication may be reproduced in any form without the
written permission of ROLAND CORPORATION.
Assembling the F-100
Before You Play
Listening to the Internal Songs
Playing the Keyboard
Contents
Index
☞
page 6
☞
page 10
☞
page 13
☞
page 15
☞
page 9
☞
page 39
Advertisement
Table of Contents

Related Manuals for Roland F-100


Summary of Contents for Roland F-100
- Page 1 Owner’s Manual Congratulations on your choice of the Roland Digital Piano F-100. 201a Before using this unit, carefully read the sections entitled: “USING THE UNIT SAFELY” and “IMPORTANT NOTES” (p. 2; p. 4). These sections provide important information concerning the proper operation of the unit. Additionally, in order to feel assured that you have gained a good grasp of every feature provided by your new unit, Owner’s manual should be read in its entirety.
-
Page 2: Using The Unit Safely
• Do not attempt to repair the unit, or replace parts within it (except when this manual provides specific instructions directing you to do so). Refer all servicing to your retailer, the nearest Roland Service Center, or an authorized Roland distributor, as listed on the “Information” page. - Page 3 012b • Immediately turn the power off, remove the AC adaptor from the outlet, and request servicing by your retailer, the nearest Roland Service Center, or an authorized Roland distributor, as listed on the “Information” page when: • The AC adaptor, the power-supply cord, or the plug has been damaged;...
-
Page 4: Important Notes
(such as an electric motor or variable lighting system). • When the AC adaptor is used for extended periods, both the adaptor itself, and the area around the F-100’s DC In connector will become somewhat warm; however, this does not indicate a malfunction. -
Page 5: Introduction
Checking the Included Items Check to see if you have all of the items that normally are supplied with the F-100. If any items are missing, please contact the dealer where you purchased this unit. ❏ F-100 (For installing the F-100, refer to p. 6) ❏... -
Page 6: Assembling The F-100
To move the piano, lift it carefully—all the while keeping it level. Be very careful, when you assemble and move the piano, to make sure that you do not drop it on your hands or feet. Always carry out this procedure with the F-100 lying horizontally, with the rear panel facing down. ■ Check the Parts Before you begin assembling the F-100, check that all the parts were supplied. - Page 7 If the Stand is Uneven If after lifting the F-100 back up you find that stand is crooked, try loosening the screws and then securing them again. When retightening, start with the top screws, then work your way down. When doing this, slightly loosen the screws before firmly tightening them.
-
Page 8: Panel Descriptions
Introduction Panel Descriptions Volume Reverb Volume Harpsi- Reverb Piano E.Piano chord 1. [Volume] Knob Adjusts the volume (p. 12). 2. [Reverb] Button Used to add reverberation to the sound (p. 17). 3. Tone Buttons The following five buttons are collectively referred to as the Tone buttons. -
Page 9: Table Of Contents
Connecting to MIDI Devices ... 30 About the MIDI Connectors ...30 Making the Connections ...30 Cautions when Connecting an External MIDI Device...31 Disconnecting the F-100’s keyboard and internal sound generator (Local On/Off)...31 Switching Local On/Off...31 Receiving on all MIDI channels (Omni On/Off)...31 Switching Omni On/Off ...31... -
Page 10: Before You Play
Unplugging a pedal cord from the unit while the power is on may cause the pedal’s effect to be applied without stopping. The power of the F-100 must be turned off before inserting or removing a pedal cord. Soft Pedal... -
Page 11: Installation Procedure
F-100. * Be careful not to lose the screws you've removed. You will need to put them back in place at the rear of the F-100 if you decide that you don't want to use the lid holders. -
Page 12: Turning On The Power
Volume Push the [Power] switch to turn on the F-100. After a few seconds, the unit becomes operable and playing the keyboard produces sound. Adjust the volume to obtain the proper volume level. -
Page 13: Listening To The Internal Songs
Listening to the Internal Songs The F-100 comes with sixty internal songs. Playing/Stopping the Internal Songs fig.01-01 Harpsi- Piano Reverb E.Piano chord Organ Press the [Song] button, getting its indicator to light. The internal songs will play back in succession. When the last song has been played, playback will return to the first song and begin again. -
Page 14: Playing Each Hand Separately
Listening to the Internal Songs ■ Playing Each Hand Separately The internal songs allow you to select the performance part that will be played back. The left-hand performance of the internal songs is assigned to the [1] button, while the right-hand performance is assigned to the [2] button. The place where each part of the performance is held is called a “track,”... -
Page 15: Playing The Keyboard
* A/B: dividing the keyboard into right-hand and left-hand areas, then playing different tones A, the right-hand tone; and B, the left-hand tone fig.02-01 When the F-100 is turned on, the tone is reset to Grand Piano. fig.02-01 Harpsi- Piano Reverb E.Piano... -
Page 16: Layering Two Instrument Sounds (Dual Play)
Playing the Keyboard Layering Two Instrument Sounds (Dual Play) You can hold down one Tone button and press another Tone button to layer two sounds for playing together. This function is called “Dual Play.” Example: Combining Piano and Strings fig.02-02 Harpsi- Piano Reverb... -
Page 17: Adding Reverberation To Sounds (Reverb Effect)
Adding Reverberation to Sounds (Reverb Effect) You can apply a reverb effect to the notes you play on the keyboard. Applying reverb adds pleasing reverberation to what you play, so it sounds almost as if you were playing in a concert hall. fig.02-03 Harpsi- Piano... -
Page 18: Changing The Tempo
D keys, you will return to a tempo of Using the “tempo setting sheet” included with the F-100 makes it easier to grasp the values assigned to each key. For details, refer to “Applying the Tempo Setting Sheet” (p. 8). -
Page 19: Changing The Beat
■ Changing the Beat To change the beat, specify the beat by pressing the key (A0–E1) to which the beat is assigned. You can select from the following five types: 0 (only upbeat sounds), 2 (2-beat), 3 (3-beat), 4 (4-beat), 6 (6-beat). fig.02-07 Volume Harpsi-... -
Page 20: Playing Rhythm
Playing the Keyboard Playing Rhythm The F-100 contains 16 different rhythms. By playing the rhythm instead of the metronome, you can enjoy performing as if you were playing with a session-like feel. To change the rhythm, specify the rhythm by pressing the key (F1–G3) to which the rhythm is assigned. -
Page 21: Recording Your Performance
Recording will start when you either press the [Play] button or play the keyboard. The F-100 counts down two measures, then recording starts. Note that recording will also begin as soon as you play anything on the keyboard, even if you do not press the [Play] button. There is no count sound played when you start in this manner. -
Page 22: Recording Along With The Rhythm
Recording Your Performance Recording Along with the Rhythm You can record a performance that uses the Rhythm function. fig.panel4-2 Harpsi- Piano Reverb E.Piano chord Organ Select the tone that you want to play (p. 15). Select the rhythm (p. 20). Set the tempo so that you can play comfortably. -
Page 23: Recording Along With A Song
You can record a performance that you play along with an internal song. The recorder of the F-100 has two recording tracks, allowing you to record the right and left hands separately. Use the [1] button or [2] button with holding down the [Track] button to specify the recording track. -
Page 24: Selecting And Recording The Track For Each Hand Separately
Recording Your Performance Selecting and Recording the Track for Each Hand Separately If you want to re-do the recording, you can re-record just a specific track. fig.panel4-4 Harpsi- Piano Reverb E.Piano chord Organ As necessary, turn on the metronome or rhythm (p. 17). Press the [Rec] button. -
Page 25: Erasing Recorded Performances
Erasing Recorded Performances You can erase a recorded performance. fig.panel4-4 Harpsi- Piano Reverb E.Piano chord Organ ■ Erasing a performance from the specified track You can select a recorded track and erase it. While holding down the [Track] button, press the [1] or [2] button;... -
Page 26: Some Handy Functions
Some Handy Functions Changing the Keyboard’s Touch You can change the touch sensitivity, or response of the keys. The setting is at “Medium” when the F-100 is powered up. fig.03-01 Harpsi- Piano Reverb E.Piano chord Organ Strings While holding down... -
Page 27: Transposing Without Changing Your Keyboard Fingering (Key Transpose)
Sound (Master Tuning) In situations such as when playing ensemble with other instruments, you can tune the F-100’s reference pitch to the pitch of another instrument. The reference pitch generally refers to the pitch of the note that’s played when you finger the middle A key. -
Page 28: Setting The Reference Pitch To 440.0 Hz
Some Handy Functions ■ Setting the Reference Pitch to 440.0 Hz While holding down the [Variation] button and [Song] button, press the “C 4” key on the keyboard. fig.7-08.e Variation Song Dual Balance Key Touch While holding down two buttons... The reference pitch will be set to 440.0 Hz. -
Page 29: Connecting To Audio Equipment
Connecting to Audio Equipment Read this chapter if you wish to connect the F-100 to an audio device. By connecting the F-100 with an audio device, you can listen to the sound of the F-100 through the speakers of the audio device, or record your performance onto a cassette tape or other recording media. -
Page 30: Connecting To Midi Devices
Connecting to MIDI Devices Read this chapter if you wish to connect the F-100 to an external MIDI device. If the F-100 is connected to a MIDI sequencer, such as one from the MT series, you can record your performance on the MIDI sequencer. -
Page 31: Cautions When Connecting An External Midi Device
■ Receiving on all MIDI channels Thru function On (Omni On/Off) When set to Omni On, the F-100 will sound as a result of received MIDI messages, no matter which channel the messages arrive on. When set to Omni Off, the F-100 will recognize only the messages that arrive on the MIDI channel that has been selected, as explained under “Set the MIDI Channel.”... -
Page 32: Set The Midi Channel
The connected devices must be set to use the same MIDI channels, otherwise no sound will be produced. In a setup where you wish to play the F-100 and also have another MIDI-equipped instrument or sound module play the same notes, you should first set the channel used for reception on your external device to the same channel that you have the F-100 set to use for transmission. -
Page 33: Troubleshooting
Any performance that has been recorded is deleted The recorded perfor- mance has disap- when the power to the F-100 is turned off. A perfor- peared mance cannot be restored once it’s been deleted. Raising the volume too high may distort the sound. -
Page 34: Internal Song List
J. Brahms press the key that corresponding to the song you wish to hear. Power Composer Copyright © 1995 Roland Corporation © 1996 Roland Corporation © 1997 Roland Corporation © 1995 Roland Corporation © 2001 Roland Corporation © 1997 Roland Corporation ©... - Page 35 * All rights reserved. Unauthorized use of this material for purposes other than private, personal enjoyment is a violation of applicable laws. Internal Song List Composer L. v. Beethoven © 1996 Roland Corporation F. Chopin © 1996 Roland Corporation F. Mendelsshon © 1996 Roland Corporation J.
-
Page 36: Midi Implementation
* A separate publication titled “MIDI Implementation” is also available. It provides complete details concerning the way MIDI has been implemented on this unit. If you should require this publication (such as when you intend to carry out byte-level programming), please contact the nearest Roland Service Center or authorized Roland distributor. MIDI Implementation Chart Transmitted 1–16... -
Page 37: Main Specifications
Main Specifications F-100: Roland Digital Piano Keyboard Keyboard 88 keys (Progressive Hammer Action Keyboard) Touch Sensitivity Light, Medium, Heavy, Fixed Keyboard Mode Whole Dual (adjustable volume balance) Sound Generator Maximum Polyphony 64 voices Tones 5 groups 20 variations Effects Reverb (5 levels) Chorus (fixed for E. -
Page 38: Functions Assigned To The Keyboard
Functions Assigned to the Keyboard Functions for Metronome/Rhythm Variation Dual Balance Volume Harpsi- Reverb Piano E.Piano chord Organ Strings Variation Demo Dual Balance Key Touch 0 2 3 4 6 Changing the Beat Specifying the Rhythm (p. 20) (p. 19) Other Functions Variation Dual Balance... -
Page 39: Index
Index Numerics 440.0 Hz ... 28 442.0 Hz ... 28 AC Adaptor ... 10 Assembly ... 6 Audio Equipment ... 29 Beat ... 19 Connecting Audio Equipment ... 29 MIDI Devices ... 30 Damper Pedal ... 10 Demo Song ... 34 Dual Play ... - Page 40 MEMO...
- Page 41 MEMO...
-
Page 42: Information
Information When you need repair service, call your nearest Roland Service Center or authorized Roland distributor in your country as shown below. SINGAPORE AFRICA AFRICA Swee Lee Company 150 Sims Drive, EGYPT SINGAPORE 387381 TEL: 6846-3676 Al Fanny Trading Office... - Page 43 This product complies with the requirements of European Directive 89/336/EEC. FEDERAL COMMUNICATIONS COMMISSION RADIO FREQUENCY INTERFERENCE STATEMENT This equipment has been tested and found to comply with the limits for a Class B digital device, pursuant to Part 15 of the FCC Rules.
- Page 44 This owner’s manual is printed on recycled paper. 02901323 ’03-9-7N...