
Related Manuals for Radio Shack PRO-66


Summary of Contents for Radio Shack PRO-66
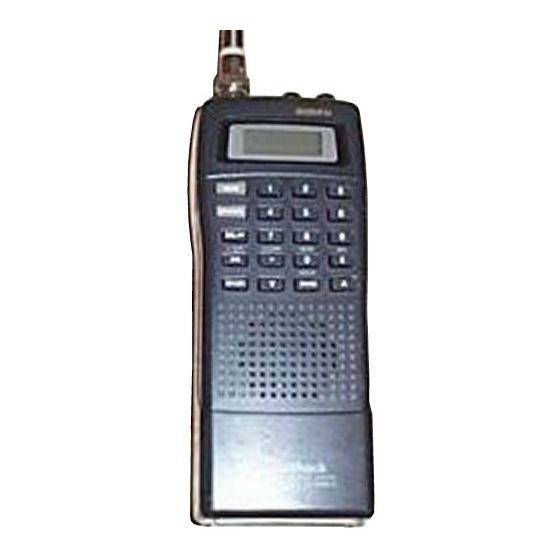
- Page 1 20-511.fm Page 1 Wednesday, August 4, 1999 2:13 PM 20-511 Cat. No. OWNER’S MANUAL PRO-66 50-Channel Direct Entry Programmable Scanner Please read before using this equipment.
- Page 2 20-511.fm Page 2 Wednesday, August 4, 1999 2:13 PM FEATURES Your new RadioShack PRO-66 50-Channel Direct Entry Programmable Scanner lets you in on all the action! This scanner gives you direct ac- cess to more than 28,000 frequencies that include the police depart- ment, fire department, ambulance, amateur radio, and transportation services.
- Page 3 1 hour during a power loss. Low Battery Alarm — lets you know when the batteries get low. Three Power Sources — let you power the scanner from internal bat- teries, a standard AC outlet (using an optional AC adapter), or a vehi- cle’s battery (using an optional DC power cord).
-
Page 4: Fcc Notice
Contact your local RadioShack store for help If you cannot eliminate the interference, the FCC requires that you stop using your scanner. Note: Mobile use of this scanner is unlawful or requires a permit in some areas. Check the laws in your area. -
Page 5: Scanning Legally
(telephone and telegraph) service provid- ers. It is legal to listen to almost every transmission your scanner can receive. However, there are some transmissions you should never in- tentionally listen to. -
Page 6: Table Of Contents
Attaching the Belt Clip....... . . 16 Understanding Your Scanner ......17 A Look at the Keypad . - Page 7 Troubleshooting ........36 Resetting the Scanner ....... . .37 Care and Maintenance .
-
Page 8: Preparation
Vehicle battery power (using an optional DC power cord) USING INTERNAL BATTERIES You can power your scanner with four AA batteries. For the longest op- eration and best performance, we recommend alkaline batteries (such as Cat. No. 23-552). Or, you can use rechargeable nickel-cadmium bat- teries (Cat. -
Page 9: Important Information About The External Power Jacks
Batteries can leak chemicals that destroy electronic circuits. 5. Replace the cover. flashes on the display and the scanner beeps every 15 seconds, im- mediately replace or recharge all four batteries. IMPORTANT INFORMATION ABOUT THE EXTERNAL POWER JACKS The scanner has two external power jacks —... -
Page 10: Using Standard Ac Power
If you try to recharge non-rechargeable batteries, they become very hot and could explode. USING STANDARD AC POWER To power the scanner from AC power, you need an AC adapter such as Cat. No. 273-1652 (not supplied). Warning: Do not use an AC adapter’s polarized plug with an extension cord, receptacle, or other outlet unless the blades can be fully inserted to prevent blade exposure. - Page 11 Connect the AC adapter to the POWER jack. This powers the scanner and recharges the batteries at the same time. See “Charging Nickel-Cadmium Batteries” on Page 13. 3. Plug the adapter’s power module into a standard AC outlet.
-
Page 12: Using Vehicle Battery Power
• To protect your vehicle’s electrical system, always plug the power cord into the scanner before you plug it into your vehicle’s ciga- rette-lighter socket. Always unplug the power cord from the vehi- cle’s cigarette lighter socket before you unplug it from the scanner. -
Page 13: Charging Nickel-Cadmium Batteries
20-511.fm Page 13 Wednesday, August 4, 1999 2:13 PM • If the scanner does not operate properly when you use a DC power cord, unplug the power cord from the cigarette lighter socket and clean the socket to remove ashes and debris. If it still does not operate properly, check the fuse in the power cord. -
Page 14: Connecting The Antenna
Connecting an Optional Antenna The antenna connector on your scanner makes it easy to use the scan- ner with a variety of antennas. Instead of the supplied antenna, you can attach a different one, such as an external mobile antenna or outdoor base antenna. -
Page 15: Connecting An Earphone/Headphones
For private listening, you can plug an earphone or mono headphones (such as RadioShack Cat. No. 33-175 or 20-210) into the of your scanner. This automatically disconnects the internal speaker. Listening Safely To protect your hearing, follow these guidelines when you use an ear- phone or headphones. -
Page 16: Connecting An Extension Speaker
ATTACHING THE BELT CLIP You can attach the supplied belt clip to make your scanner easier to use when you are on the go. Use the supplied screws to attach the belt clip to the scanner. Then slide the belt clip over your belt or waistband. -
Page 17: Understanding Your Scanner
20-511.fm Page 17 Wednesday, August 4, 1999 2:13 PM UNDERSTANDING YOUR SCANNER A LOOK AT THE KEYPAD Your scanner’s keys might seem confusing at first, but this information should help you understand each key’s function. — scans through the stored channels. -
Page 18: A Look At The Display
20-511.fm Page 18 Wednesday, August 4, 1999 2:13 PM A LOOK AT THE DISPLAY The display has several indicators that show the scanner’s current op- erating mode. A quick look at the display will help you understand how to operate your scanner. - Page 19 20-511.fm Page 19 Wednesday, August 4, 1999 2:13 PM — appears during a band search. — appears during a direct search. — appears during a band search hold. — appears during a direct search hold.
-
Page 20: Operation
SQUELCH O F F PRO-66 2. Turn clockwise until it clicks. If you already pro- VOLUME/OFF grammed channels, the scanner automatically scans those chan- nels. O F F PRO-66 3. Press to stop the scanning. The display shows the cur- MANUAL rent channel. -
Page 21: Storing Frequencies
20-511.fm Page 21 Wednesday, August 4, 1999 2:13 PM 5. Slowly turn counterclockwise until you hear a hissing SQUELCH sound. 6. Adjust to a comfortable listening level. VOLUME/OFF 7. Slowly turn clockwise until the hissing sound stops. SQUELCH Note: If you want to listen to a weak or distant station, turn counterclockwise to increase receiver sensitivity. -
Page 22: Searching For And Storing Active Frequencies
20-511.fm Page 22 Wednesday, August 4, 1999 2:13 PM Notes: • If you make a mistake in Step 2, and the scanner beeps three times. Simply start again from Step 2. • Your scanner automatically rounds the entered frequency to the nearest valid frequency. -
Page 23: Direct Search
3. To change the search direction, press t to search downward or s to search upward. , and t or s appear on the display. SRCH 4. When the scanner stops on an active frequency, you can do one of the following: • To store the displayed frequency into the monitor memory, press appears on the display. -
Page 24: Search Skip Memory
The scanner stores the frequen- cy in memory and resumes the search. To clear a single frequency from skip memory so the scanner can stop on it during a band or direct search, press search, press t or s to select the frequency, then press disappears from the display. -
Page 25: Listening To The Monitor Memory
This is handy for quickly storing an active frequency when you search through an entire band. Once you have temporarily stored a fre- quency into the scanner’s monitor memory, you can listen to it by press- then MANUAL... -
Page 26: Scanning The Stored Channels
To program a 2-second delay into a specific channel while the scanner is scanning, manually select the desired channel then press appears on the display. To program a 2-second delay when the scanner has stopped on an ac- tive channel during scanning, quickly press number is displayed. -
Page 27: Locking Out Channels
1. Press MANUAL 2. Enter the channel number. 3. Press again. MANUAL Or, if your scanner is scanning and stops at the desired channel, press one time. (Pressing MANUAL MANUAL scanner to step through the channels.) To resume automatic scanning, press . -
Page 28: Listening To The Weather Band
. Your scanner begins scanning through the weather band, WX/E appears on the display. Your scanner should stop within a few seconds, then you hear the local weather broadcast. If the broadcast is weak, you can press again WX/E to scan through the rest of the weather band. -
Page 29: A General Guide To Scanning
To find the birdies in your scanner, begin by disconnecting the antenna and moving it away from the scanner. Make sure that no other nearby radio or TV sets are turned on near the scanner. Use the search function and scan every frequency range from its lowest frequency to the high- est. -
Page 30: Guide To The Action Bands
20-511.fm Page 30 Wednesday, August 4, 1999 2:13 PM GUIDE TO THE ACTION BANDS Typical Band Usage VHF Band (30.00–300.0 MHz) Low Range 6-Meter Amateur U.S. Government 2-Meter Amateur High Range UHF Band (300.00 MHz–3.0 GHz) U.S. Government 70-cm Amateur Low Range FM-TV Audio Broadcast, Wide Band Public Service... -
Page 31: Specified Intervals
BAND ALLOCATION To help decide which frequency ranges to scan, use the following listing of the typical services that use the frequencies your scanner receives. These frequencies are subject to change, and might vary from area to area. For a more complete listing, refer to the “Police Call Radio Guide including Fire... - Page 32 20-511.fm Page 32 Wednesday, August 4, 1999 2:13 PM MARI ........Maritime Limited Coast .
- Page 33 20-511.fm Page 33 Wednesday, August 4, 1999 2:13 PM 6-Meter Amateur Band— (50–54 MHz) 50.00–54.00 ..........HAM U.S.
- Page 34 20-511.fm Page 34 Wednesday, August 4, 1999 2:13 PM 173.225–173.5375 ......MOV, NEWS, UTIL, MIL 173.5625–173.5875 .
-
Page 35: Avoiding Image Frequencies
20-511.fm Page 35 Wednesday, August 4, 1999 2:13 PM AVOIDING IMAGE FREQUENCIES You might discover one of your regular stations on another frequency that is not listed. It might be what is known as an image frequency. For example, you might find a service that regularly uses a frequency of 453.075 also on 474.775. -
Page 36: Troubleshooting
20-511.fm Page 36 Wednesday, August 4, 1999 2:13 PM TROUBLESHOOTING If you have problems, here are some suggestions that might help. If none of these suggestions help, take your scanner to your local RadioShack store for assistance. PROBLEM POSSIBLE CAUSE Keys do not work or Undetermined error. -
Page 37: Resetting The Scanner
RESETTING THE SCANNER If the scanner’s display locks up or does not work properly after you con- nect power, you might have to reset the scanner. Caution: This procedure clears all the information you have pro- grammed into the scanner. -
Page 38: Care And Maintenance
20-511.fm Page 38 Wednesday, August 4, 1999 2:13 PM CARE AND MAINTENANCE Your RadioShack PRO-66 50-Channel Direct Entry Programmable Scanner is an example of superior design and craftsmanship. The fol- lowing suggestions will help you care for your scanner so you can enjoy it for years. -
Page 39: Specifications
20-511.fm Page 39 Wednesday, August 4, 1999 2:13 PM SPECIFICATIONS Frequency Coverage: 806.0000–823.9375 MHz (in 12.5 kHz steps) 851.0000–868.9375 MHz (in 12.5 kHz steps) 896.1125–956.0000 MHz (in 12.5 kHz steps) Channels of Operation ......50 Channels Sensitivity: (FM: 20 dB S/N at 3 kHz deviation): 29–54 MHz . - Page 40 20-511.fm Page 40 Wednesday, August 4, 1999 2:13 PM RadioShack Limited Warranty This product is warranted against defects for 1 year from date of purchase from RadioShack company-owned stores and authorized RadioShack franchi- sees and dealers. Within this period, we will repair it without charge for parts and labor.