Table of Contents
Advertisement
Owner's Manual
Please read before using this unit.
DVD/CD Player with Video Cassette Recorder
©2006. RadioShack
All rights reserved. Presidian, RadioShack and
RadioShack.com are trademarks used by
RadioShack Corporation.
Table of Contents
Laser Safety. . . . . . . . . . . . . . . . . . . . . . . . . . . . . . . . . . . . . . . . 2
■ Important Safeguards . . . . . . . . . . . . . . . . . . . . . . . . . . . . . . . . 3
Installation Location . . . . . . . . . . . . . . . . . . . . . . . . . . . . . . . . . . 4
Avoid the Hazards of Electrical Shock and Fire. . . . . . . . . . . . . . 4
Moisture Condensation Warning . . . . . . . . . . . . . . . . . . . . . . . . . 4
Notice for Progressive Scan Outputs . . . . . . . . . . . . . . . . . . . . . 4
About Copyright . . . . . . . . . . . . . . . . . . . . . . . . . . . . . . . . . . . . . 4
Symbols Used in This Manual . . . . . . . . . . . . . . . . . . . . . . . . . . 4
Maintenance . . . . . . . . . . . . . . . . . . . . . . . . . . . . . . . . . . . . . . . 4
■ About the Video Cassettes and Discs . . . . . . . . . . . . . . . . . . . 5
Playable Video Cassettes . . . . . . . . . . . . . . . . . . . . . . . . . . . . . . 5
Playable Discs . . . . . . . . . . . . . . . . . . . . . . . . . . . . . . . . . . . . . . 5
Unplayable Discs . . . . . . . . . . . . . . . . . . . . . . . . . . . . . . . . . . . . 5
■ Connections . . . . . . . . . . . . . . . . . . . . . . . . . . . . . . . . . . . . . . . 6
RF Output Channel . . . . . . . . . . . . . . . . . . . . . . . . . . . . . . . . . . 6
Hint for Cable Box or Satellite Box . . . . . . . . . . . . . . . . . . . . . . . 6
Connection to an Audio System . . . . . . . . . . . . . . . . . . . . . . . . . 6
Connection to a TV . . . . . . . . . . . . . . . . . . . . . . . . . . . . . . . . . . 7
Front & Rear Terminals. . . . . . . . . . . . . . . . . . . . . . . . . . . . . . . . 7
■ Preparation for Use. . . . . . . . . . . . . . . . . . . . . . . . . . . . . . . . . . 8
Turn on the Unit for the First Time . . . . . . . . . . . . . . . . . . . . . . . 8
Clock Setup . . . . . . . . . . . . . . . . . . . . . . . . . . . . . . . . . . . . . . . . 8
■ Function Overview . . . . . . . . . . . . . . . . . . . . . . . . . . . . . . . . . . 9
Front Panel Display . . . . . . . . . . . . . . . . . . . . . . . . . . . . . . . . . . 9
VCR/DVD Switching . . . . . . . . . . . . . . . . . . . . . . . . . . . . . . . . . . 9
Remote Control . . . . . . . . . . . . . . . . . . . . . . . . . . . . . . . . . . . . 10
Installing the Batteries for the Remote Control . . . . . . . . . . . . . 10
■ Playback . . . . . . . . . . . . . . . . . . . . . . . . . . . . . . . . . . . . . . . . . 11
■ Other Operations . . . . . . . . . . . . . . . . . . . . . . . . . . . . . . . . . . 11
Index Search . . . . . . . . . . . . . . . . . . . . . . . . . . . . . . . . . . . . . . 11
Time Search. . . . . . . . . . . . . . . . . . . . . . . . . . . . . . . . . . . . . . . 11
Auto Repeat . . . . . . . . . . . . . . . . . . . . . . . . . . . . . . . . . . . . . . . 12
Basic TV Connection
Cable TV
Antenna
signal
or
(Back of TV)
Disconnect
Please refer to "Connections" on page 6.
®
Corporation.
Cable TV
Antenna
(Back of DVD/VCR)
signal
or
ANT-IN
Connect
ANT-OUT
RF cable
INSTRUCCIONES EN ESPAÑOL INCLUIDAS.
Supplied Accessory
• Remote control
• Audio/Video cables
■ Recording . . . . . . . . . . . . . . . . . . . . . . . . . . . . . . . . . . . . . . . . 12
Recording & OTR (One Touch Recording) . . . . . . . . . . . . . . . . 12
Timer Recording. . . . . . . . . . . . . . . . . . . . . . . . . . . . . . . . . . . . 12
Hints for OTR and Timer Recording . . . . . . . . . . . . . . . . . . . . . 13
Copying a Video Tape. . . . . . . . . . . . . . . . . . . . . . . . . . . . . . . . 14
■ MTS System (Multi-Channel Television Sound) . . . . . . . . . . . 14
When You Play Back a Tape Recorded in Hi-Fi Stereo . . . . . . . 14
■ Playback . . . . . . . . . . . . . . . . . . . . . . . . . . . . . . . . . . . . . . . . . 15
■ On-Screen Display . . . . . . . . . . . . . . . . . . . . . . . . . . . . . . . . . 16
■ Search Function . . . . . . . . . . . . . . . . . . . . . . . . . . . . . . . . . . . 17
Track Search / Title/Chapter Search / Time Search . . . . . . . . . 17
■ Marker Setup. . . . . . . . . . . . . . . . . . . . . . . . . . . . . . . . . . . . . . 17
■ Repeat / Random / Programmed Playback . . . . . . . . . . . . . . 18
■ Special Settings . . . . . . . . . . . . . . . . . . . . . . . . . . . . . . . . . . . 19
Black Level Setting / Stereo Sound Mode / Virtual Surround . . . . . . . 19
■ DVD Setup . . . . . . . . . . . . . . . . . . . . . . . . . . . . . . . . . . . . . . . . 20
LANGUAGE Setting . . . . . . . . . . . . . . . . . . . . . . . . . . . . . . . . . 20
DISPLAY Setting . . . . . . . . . . . . . . . . . . . . . . . . . . . . . . . . . . . 21
AUDIO Setting . . . . . . . . . . . . . . . . . . . . . . . . . . . . . . . . . . . . . 21
PARENTAL Setting . . . . . . . . . . . . . . . . . . . . . . . . . . . . . . . . . . 22
OTHERS Setting . . . . . . . . . . . . . . . . . . . . . . . . . . . . . . . . . . . 22
Information
■ Troubleshooting Guide . . . . . . . . . . . . . . . . . . . . . . . . . . . . . . 23
■ Specifications . . . . . . . . . . . . . . . . . . . . . . . . . . . . . . . . . . . . . 24
■ Language List . . . . . . . . . . . . . . . . . . . . . . . . . . . . . . . . . . . . . 24
■ Limited Ninety-Day Warranty . . . . . . . . . . . . . . . . . . . . . . . . . 24
Español . . . . . . . . . . . . . . . . . . . . . . . . . . . . . . . . . . . . . . . . . . 25
Quick Use Guide . . . . . . . . . . . . . . . . . . . . . . . . . . . . . . . . . . . 27
(Back of TV)
Connect
(supplied)
16-3286
• RF cable
• Owner's Manual
Owner's Manual
AC
outlets
Plug in
From DVD/VCR
From TV
Advertisement
Table of Contents

Summary of Contents for Presidian DVD / VCR
-
Page 1: Table Of Contents
Owner’s Manual Please read before using this unit. DVD/CD Player with Video Cassette Recorder ©2006. RadioShack ® Corporation. All rights reserved. Presidian, RadioShack and RadioShack.com are trademarks used by RadioShack Corporation. Table of Contents Precautions Laser Safety........2 ■... -
Page 2: Precautions
WARNING : TO REDUCE THE RISK OF FIRE OR ELECTRIC SHOCK, DO NOT EXPOSE THIS APPLIANCE TO RAIN OR MOISTURE. CAUTION RISK OF ELECTRIC SHOCK DO NOT OPEN CAUTION: TO REDUCE THE RISK OF ELECTRIC SHOCK, DO NOT REMOVE COVER (OR BACK). NO USER SERVICEABLE PARTS INSIDE. -
Page 3: Important Safeguards
IMPORTANT SAFEGUARDS 1. Read Instructions - All the safety and operating instruc- tions should be read before the appliance is operated. 2. Retain Instructions- The safety and operating instructions should be retained for future reference. 3. Heed Warnings - All warnings on the appliance and in the operating instructions should be adhered to. -
Page 4: Installation Location
Installation Location For safety and optimum performance of this unit: • Do not stand the unit up vertically. Install the unit in a horizontal and stable position. Do not place any- thing directly on top of the unit. Do not place the unit directly on top of the TV. -
Page 5: About The Video Cassettes And Discs
About the Video Cassettes and Discs Playable Video Cassettes Use only cassettes marked with this unit. Playable Discs Playable Mark (logo) discs DVD-Video * 1, 2, 4, 6, 10 DVD-RW DVD-R * 1, 3, 4, 5, 6, 7, 9, 10 Audio CD * 4, 6, 10 CD-RW... -
Page 6: Setup
Connections Please refer to “Basic TV Connection” on the front page before you use this unit. RF Output Channel If channel 3 is already occupied for broadcasting, 1) Set your TV to channel 4. 2) Insert a pre-recorded tape into this unit. 3) Press [OUTPUT] on the unit so that the VCR OUTPUT light is lit. -
Page 7: Connection To A Tv
Connection to a TV Basic Audio AUDIO IN Audio cable (supplied) DVD/VCR DVD/VCR AUDIO OUT DIGITAL AUDIO OUT DVD/VCR DIGITAL AUDIO S-VIDEO COMPONENT AUDIO OUT AUDIO IN VIDEO OUT AUDIO OUT ANT-IN COAXIAL VIDEO OUT VIDEO IN ANT-OUT (Analog) AUDIO OUT Hint Hint •... -
Page 8: Preparation For Use
Preparation for Use Turn on the Unit for the First Time Turn on the TV and set it to channel 3. • If channel 3 is already occupied for broadcasting, see“RF Output Channel” section on page 6. • If your antenna is connected to an antenna ampli- fier, the amplifier’s gain adjustment may need to be temporarily reduced in order for Auto-Setup to program all channels properly. -
Page 9: Function Overview
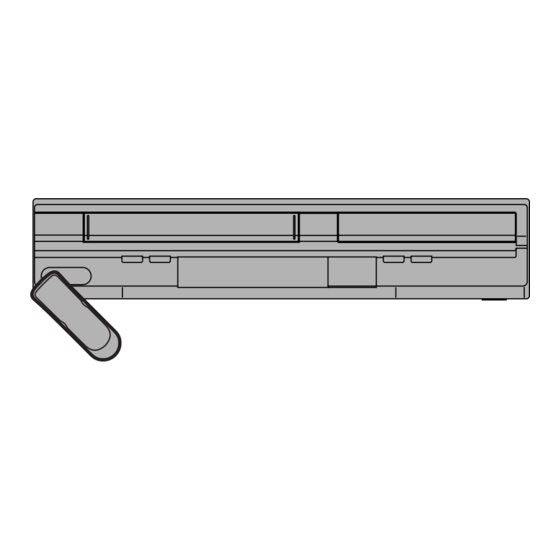
Function Overview Front Panel Display Lights up when power is on. OPEN/CLOSE POWER STOP/EJECT PLAY CHANNEL VIDEO L - AUDIO - R F.FWD REC/OTR No disc inserted / cannot read disc Opening the tray Closing the tray Loading the disc When a disc or tape is being played back VCR/DVD Switching... -
Page 10: Remote Control
Remote Control Button OPEN/CLOSE POWER /EJECT (Alphabetical order) SPEED AUDIO SKIP/CH. VCR/TV SLOW DISPLAY PAUSE PLAY STOP REC/OTR MENU ENTER SETUP TOP MENU RETURN SEARCH CLEAR/ MODE ZOOM MODE C. RESET SUBTITLE ANGLE REPEAT T-SET Installing the Batteries for the Remote Control Install two AA batteries (commer- cially available) matching the polar- ity indicated inside battery com-... -
Page 11: Vcr Functions
Playback Before: Turn on the TV and set it to channel 3. • If channel 3 is already occupied for broadcasting, see “RF Output Channel” on page 6. To start playback PLAY To stop To eject the playback cassette OPEN/CLOSE /EJECT STOP Other Operations... -
Page 12: Auto Repeat
Auto Repeat This function will playback a tape repeatedly from the beginning when the tape reaches to the end. Hint Hint • To cancel Auto Repeat, follow step 1) above. Then, press [ ], so that [OFF] appears beside AUTO REPEAT. Press [CLEAR/C.RESET] to exit. •... -
Page 13: Hints For Otr And Timer Recording
Select the desired start time (hour). ONE TIME PROGRAM PROGRAM NUMBER 1 DATE 1 0 / 2 3 MON START TIME 0 7 : 3 0 – – TIME – – : – – – – CHANNEL – – REC SPEED – – Select the minute. -
Page 14: Copying A Video Tape
Copying a Video Tape Warning: Unauthorized recordings of copyrighted video tapes may be an infringement of copyright laws. (Back of another source) Connect AUDIO OUT VIDEO OUT Audio/Video cables (commercially available) 1) Insert a pre-recorded tape into the playing VCR. 2) Insert a tape with its record tab into the recording unit. -
Page 15: Playback
Operations described after this section are mainly based on the remote control use. Some operations can be carried out on main unit. Playback Before: Turn on the TV, amplifier and any other components which are connected to this unit. Make sure the TV and audio receiver (commercially available) are set to the correct channel. -
Page 16: On-Screen Display
On-Screen Display You can check the information about the current disc by pressing [DISPLAY] on the remote control. DVD-V DVD-V Angle icon appears only when avail- DISPLAY able on the DVD Current playback status 11/16 0:00:00 - 0:03:30 Remaining time of the current chapter Elapsed time of the current chapter CH(Chapter): Current chapter number / Total chapters... -
Page 17: Search Function
Search Function Track Search Using [SEARCH MODE] Using [SEARCH MODE] SEARCH MODE within 30 seconds • For the disc with less than 10 tracks, press the track number directly. • For discs with more than 10 but less than 99 tracks, to play a single-digit track, press first, then the track number (e.g. -
Page 18: Repeat / Random / Programmed Playback
Repeat / Random / Programmed Playback Repeat Playback DVD-V DVD-V Repeat function is available only during playback. PLAY REPEAT Each time you press [REPEAT], repeat function changes as example below. DVD-V DVD-V (repeat off) (current chapter repeat) CHAPTER TITLE (current title repeat) (repeat off) (current track repeat) TRACK... -
Page 19: Special Settings
Special Settings Subtitle Language DVD-V DVD-V This unit allows you to select a subtitle language (if available) during DVD play- back. PLAY 1.ENG/6 SUBTITLE T-SET Each time you press [SUBTITLE/T-SET], subtitle language changes as example below. (no subtitles) (English subtitles) (French subtitles) To set subtitle ON/OFF PLAY... -
Page 20: Dvd Setup
DVD Setup UICK SETUP Men UICK SETUP Men You can select the “PLAYER MENU”, “TV ASPECT”, “PROGRESSIVE” or “DOLBY DIGITAL” from the QUICK SETUP menu quickly. SETUP STOP <SETUP MENU> Confirm that “QUICK” is selected. SETUP QUICK CUSTOM INITIALIZE CUST OM Men CUST OM Men... -
Page 21: Display Setting
DISPLAY Setting You can change the display functions. Follow steps 1) to 3) in the “CUSTOM Menu” section on page 20. Select the desired item. TV ASPECT: (Default: 4:3 LETTER BOX) See Hint on the right. DISPLAY menu SETUP DISPLAY STILL MODE: TV ASPECT 4:3 LETTER BOX... -
Page 22: Parental Setting
PARENTAL Setting Parental Control limits the disc viewing that exceed your settings. (An incorrect password will not be accepted.) This feature prevents your children from viewing inappropriate materials. arental vels arental vels Parental Level allows you to set the rating levels of your DVD discs. Playback will stop if the ratings exceed the levels you set. Follow steps 1) to 3) in the “CUSTOM Menu”... -
Page 23: Reset To The Default Setting (Except For Parental Setting)
Reset to the Default Setting (Except for PARENTAL Setting) SETUP STOP <SETUP MENU> Select “INITIALIZE”. SETUP QUICK CUSTOM INITIALIZE Troubleshooting Guide If this unit does not perform properly when operated as instructed in this Owner's Manual, check this unit consulting the following checklist. PROBLEM No power. -
Page 24: Specifications
Specifications Video Heads : Four Heads Output signal format : NTSC color Power source : 120 V AC +/- 10%, 60 Hz +/- 0.5% Power consumption : 21W (standby: 3.8W) Language List Language Code Language French [FRE] Abkhazian 4748 Frisian Afar 4747 Galician... -
Page 25: Español
Conexiones Consulte la “Basic TV Connection” en la página delantera antes de utilizar esta unidad. Canal de salida RF Si el canal 3 se está utilizando para una transmisión. 1)Programe su televisor al canal 4. 2)Inserte una cinta pregrabada en esta unidad. -
Page 26: Control Remoto
Reproducción de la grabadora de vídeo Antes: Encienda el televisor y cambie al canal 3. • Si el canal 3 se está utilizando para una transmisión, vea la sección “Canal de salida RF”. Para empezar la reproducción PLAY Para parar la Para expulsar reproducción OPEN/CLOSE... -
Page 27: Quick Use Guide
Connections Please refer to “Basic TV Connection” on the front page before you use this unit. RF Output Channel If channel 3 is already occupied for broadcasting, 1)Set your TV to channel 4. 2)Insert a pre-recorded tape into this unit. 3)Press [OUTPUT] on the unit so that the VCR OUTPUT light is lit. -
Page 28: Vcr Playback
VCR Playback Before: Turn on the TV and set it to channel 3. • If channel 3 is already occupied for broadcasting, see “RF Output Channel” section. To start playback PLAY To stop To eject playback OPEN/CLOSE /EJECT STOP Remote Control Button (Alphabetical order) ENTER...