
Related Manuals for Quinny Buzz Stroller


Summary of Contents for Quinny Buzz Stroller
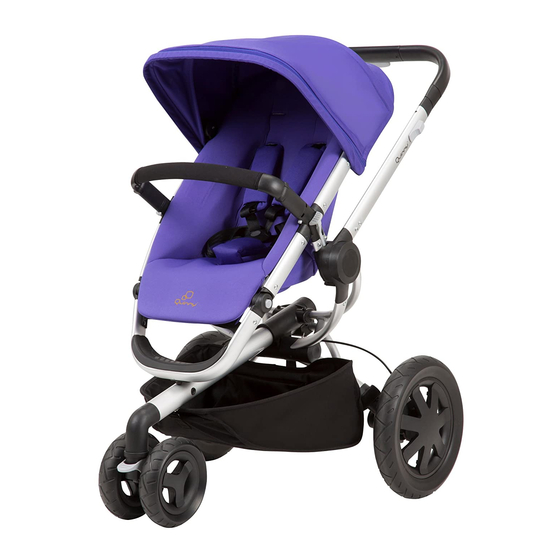
- Page 1 01638 User Guide Guía del Usuario Spanish Guide Included Guía en español incluida...
-
Page 2: Table Of Contents
Contents English User Guide: Warnings Parts List Assembly To Use Install Infant Car Seat Care and Maintenance Replaceable Parts Warranty Guía en español: Advertencias Lista de piezas Armado Cómo utilizar Instalación del autoasiento para bebé Cuidado y mantenimiento Piezas reemplazables Garantía 12-14 14-16... -
Page 3: Warnings
• NEVER allow children to climb into the stroller unassisted. Stroller may tip over and injure child. • NEVER place or hang parcels, bags or accessories on the handle or canopy. The stroller may tip over or the canopy may collapse. -
Page 4: Parts List
• Do not return this product to the place of purchase. If any parts are missing, call Consumer Relations at (800) 951-4113. Or visit our website at www.quinny.com. • Include the model number and manufacture date (found on the bottom rail of stroller). - Page 5 Push front wheel fork into frame tube until you hear a “click” (Figure 3). Pull to confirm it is assembled securely. Unfold Stroller Unfasten the transport hook and push the handle- bar upward (Figure 4). The frame will unfold itself.
-
Page 6: Assembly
Assembly NOTES: The seat can be positioned facing backward or for- ward. The Buzz seat is suitable for children from 6 months to age 4 (maximum 50-LBS. / 22.73-kg). If your child is unable to sit up unassisted, use the semi-reclined position only. Attach Seat Facing Handlebar Indicator... -
Page 7: To Use
(Figure 12). Swivel Wheel Lock the swivel wheel when using the stroller in a straight direction for a long period. To lock, push the lock lever downward and turn the front wheel into the backward position until you hear a “click”... - Page 8 To Use Adjust Restraint Height The shoulder straps have three height positions for your growing child. Unsnap shoulder cushions. Unhook straps from shoulder con- nectors. Slide each hook into the desired slot and secure snaps (Figure 15). WARNING – SUFFOCATION HAZARD •...
- Page 9 Close canopy (Figure 20). Stand at the front of the stroller. Push the left but- ton (with ridges), while using your thumb to slide the right button (with arrows) in the direction of the arrows (and then press it) (Figure 20a).
-
Page 10: Install Infant Car Seat
(Figure 21). Be sure that the pivots are in the upright position, otherwise the adapters will not fit. Stand at the back of the stroller. Insert the car seat adapter labeled “R” into right side of the frame until you hear a “click”. -
Page 11: Care And Maintenance
• Car seat adapters • To order parts call (800) 951-4113. • Include the model number and manufacture date (found on the bottom rail of stroller) and a brief description of the part. One-Year Limited Warranty Dorel Juvenile Group, Inc. warrants to the original purchaser that this product (Buzz workmanship defects when used under normal conditions for a period of one (1) year from the date of purchase. -
Page 12: Advertencias
Advertencias ADVERTENCIA POR LA SEGURIDAD DE SU HIJO, POR FAVOR LEA LAS SIGUIENTES ADVERTENCIAS E INSTRUCCIONES DE ENSAMBLE, Y GUÁRDELAS PARA CONSULTA FUTURA. • El montaje debe realizarlo un adulto. Este producto tiene piezas pequeñas que son para que un adulto ensamble el producto solamente. -
Page 13: Lista De Piezas
Si faltan piezas, llame al Departamento de Relaciones con el Consumidor, (800) 951-4113, o visite nue- stro sitio web www.quinny.com. • Incluya el número de modelo y la fecha de fabricación (se encuentran en los rieles inferiores de la carriola). -
Page 14: Armado
Armado Instalación de las ruedas traseras Presione el botón, mientras desliza el eje de la rueda trasera en el armazón hasta oír un “clic” (Figura 1). Repita el proceso para la otra rueda trasera. Tire para verificar que estén armadas firmemente. Cómo colocar la canasta de compras Deslice la aleta en el tubo,... - Page 15 NOTAS: El asiento puede posicionarse orientado hacia atrás o hacia delante. El asiento del cochecito Buzz™ es apto para bebés de 6 meses a 4 años de edad (máximo de 22.73-kg) . Si su bebé no puede sentarse sin ayuda, utilice única- mente la posición semirreclinada.
-
Page 16: Cómo Utilizar
Cómo utilizar Barra de seguridad Inserte la barra de seguri- dad en las aberturas del asiento hasta oír un clic de ambos lados (Figura 11). Para retirar la barra de seguridad Presione los botones ubi- cados debajo de cada lado de la barra de seguridad y tire de ella para quitarla del asiento (Figura 11a). - Page 17 Cómo ajustar la altura Las correas de los hombros tienen tres posiciones de altura, para adaptarse al tamaño del niño. Desabroche las hombreras. Desabroche las correas de sus conectores de hombro. Deslice cada gancho en la ranura deseada y asegure los broches (Figura 15). ADVERTENCIA –...
- Page 18 Cómo utilizar Cómo plegar el cochecito NOTA: Puede optar por retirar el asiento antes de plegar el cochecito. Cierre la capota (Figura 20). Párese frente al cochecito. Presione el botón izquier- do (con surcos) mientras utiliza el pulgar para deslizar el botón derecho (con flechas) en la direc- ción que indican las fle- chas, y luego presiónelo...
-
Page 19: Instalación Del Autoasiento Para Bebé
ADVERTENCIA Para evitar lesiones graves: • Utilice ÚNICAMENTE el autoasiento Mico™ (modelo 22371-no incluido) para esta carriola (modelo 01638). • Consulte las instrucciones del fabricante para el uso del autoasiento de bebé. • SIEMPRE instale el autoasiento mirando hacia atrás de la carriola. -
Page 20: Cuidado Y Mantenimiento
Cuidado y mantenimiento Piezas reemplazables Garantía Cuidado y mantenimiento • Limpie las manchas del acojinado con agua fría y jabón suave. Deje secar al aire. • De vez en cuando revise que no haya tornillos flojos, piezas desgastadas, material rasgado ni costuras sueltas. Apriete o cambie las piezas según sea necesario. - Page 21 ©2007 Dorel Juvenile Group. All Rights Reserved. www.quinny.com (800) 951-4113 Made in CHINA. Hecho en CHINA. Styles and colors may vary. Los estilos y los colores pueden variar. Distributed by (distribuido por) Dorel Juvenile Group, Inc., 2525 State St., Columbus, IN 47201-7494 Dorel Distribution Canada, 873 Hodge, St.