Quadra-Fire 31M-ACC-MBK Owner's Manual
3100 wood stove series
Hide thumbs
Also See for 31M-ACC-MBK:
- Owner's manual (52 pages) ,
- Manual (28 pages) ,
- Owner's manual (48 pages)
Table of Contents
Advertisement
Quick Links
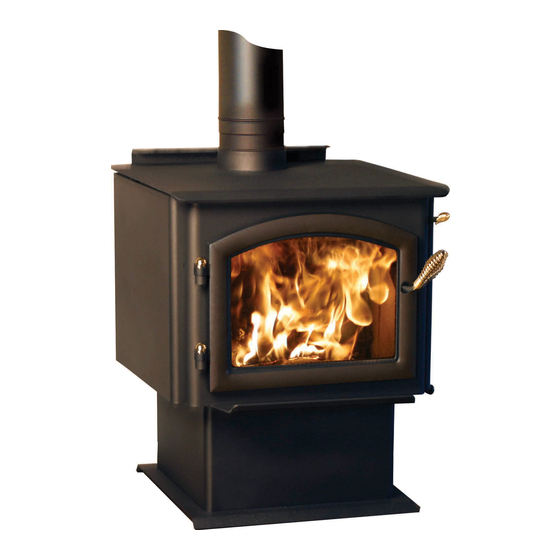
Step Top Uni-Body Model
(Pedestal Model Shown)
•
Important operating
a n d m a i n t e n a n c e
instructions included.
If the information in these instruc-
tions is not followed exactly, a
fi re may result causing property
damage, personal injury, or death.
• Do not store or use gasoline or other fl am-
mable vapors and liquids in the vicinity of
this or any other appliance.
• Do not overfi re - If heater or chimney con-
nector glows, you are overfi ring. Overfi ring
will void your warranty.
• Comply with all minimum clearances to
combustibles as specifi ed. Failure to
comply may cause house fi re.
Installation and service of this appliance should
be performed by qualifi ed personnel. Hearth &
Home Technologies recommends NFI certifi ed
professionals, or technicians supervised by an
NFI certifi ed professional.
www.quadrafi re.com
3100 WOOD STOVE SERIES
Automatic Combustion Control (ACC)
Owner's Manual
Installation and Operation
Models:
31M-ACC-MBK
31ST-ACC
DO NOT DISCARD THIS MANUAL
• Read, understand and
follow these instructions
for safe installation and
operation.
WARNING
Millennium Model
CAUTION
• Leave this manual with
party responsible for
use and operation.
Hot glass will cause burns.
•
Do not touch glass until it is cooled
•
NEVER allow children to touch glass
•
Keep children away
•
CAREFULLY SUPERVISE children in same room
as fi replace.
•
Alert children and adults to hazards of high
temperatures.
High temperatures may ignite clothing or other
fl ammable materials.
•
Keep clothing, furniture, draperies and other
fl ammable materials away.
Fire Risk.
7033-277I
R
Tested and
Listed by
OMNI-Test Laboratories, Inc.
WARNING
HOT SURFACES!
Glass and other surfaces are
hot during operation AND
cool down.
WARNING
For use with solid wood fuel only.
Other fuels may overfi re and generate
poisonous gases (i.e. carbon monoxide).
Portland
O-T L
Oregon USA
C
US
July 7, 2011
Advertisement
Table of Contents

Related Manuals for Quadra-Fire 31M-ACC-MBK


Summary of Contents for Quadra-Fire 31M-ACC-MBK
-
Page 1: Installation And Operation
NFI certifi ed professional. www.quadrafi re.com 3100 WOOD STOVE SERIES Owner’s Manual Installation and Operation Models: 31M-ACC-MBK 31ST-ACC CAUTION DO NOT DISCARD THIS MANUAL • Read, understand and follow these instructions for safe installation and operation. - Page 2 3100 Wood Stove Series (ACC) Hearth & Home Technologies welcomes you to our tradi- tion of excellence! In choosing a Quadra-Fire appliance, you have our assurance of commitment to quality, durabil- ity, and performance. This commitment begins with our research of the market, including ‘Voice of the Customer’...
-
Page 3: Table Of Contents
D. Flue Draft Considerations ...7 E. Venting Systems ...7 F. Tools and Supplies Needed...7 G. Inspect Appliance & Components...7 H. Typical Stove System ...8 Section 3: Dimensions & Clearances A. Appliance Dimensions ...9-10 B. Clearances to Combustibles ...11 Section 4: Installation Consideration Hearth Requirements ...12-13... -
Page 4: Section 1: Listing And Code Approvals
Standard: UL1482 and ULC S627-00 and (UM) 84-HUD, Mobile Home Approved. The Quadra-Fire 3100 Series Wood Stove (ACC) meets the U.S. Environmental Protection Agency’s 1990 particulate emission standards. B. Mobile Home Approved This appliance is approved for mobile home installations when not installed in a sleeping room and when an outside combustion air inlet is provided. -
Page 5: Section 2: Getting Started
(483mm) is required on the right side of stove in order to remove the tubes with the stove in place. If space is not available, the stove will have to be discon- nected from the chimney to proceed with the tube replace- ment. -
Page 6: Negative Pressure
• Preventing negative pressure • Location of appliance and chimney Negative pressure results from the imbalance of air avail- able for the stove to operate properly. Causes for this imbal- ance include: • Exhaust fans (kitchen, bath) etc.) • Range hoods •... -
Page 7: Flue Draft Considerations
E. Venting Systems The venting system consists of a chimney connector (also known as stove pipe) and a chimney. These get extremely hot during use. Temperatures inside the chimney may exceed 2000°F (1100°C) in the event of a creosote fi re. To protect against the possibility of a house fi... -
Page 8: Typical Stove System
3100 Wood Stove Series (ACC) H. Typical Stove Systems Stove system with masonry chimney consists of: • Stove • Chimney Connector (stove pipe) • Thimble • Masonry Chimney • Hearth Pad Floor Protection Stove system with prefabricated metal chimney consists of: •... -
Page 9: Appliance Dimensions
3100 Wood Stove Series (ACC) Dimensions and Clearances A. Appliance Dimensions NOTE: Flue Collar size is 6 inch (152mm) diameter (ID) Millennium Model Figure 9.1 Front View Figure 9.2 Side View Page 9 July 7, 2011 7033-277I... - Page 10 3100 Wood Stove Series (ACC) Appliance Dimensions (Cont’d) 3100 Step Top Pedestal Model Figure 10.1 Figure 10.2 Page 10 3100 Step Top Leg Model Figure 10.3 6-11/16 in. (170mm) 3-11/16 in. (94mm) 21-1/8 in. (537mm) Figure 10.4 7033-277I 3-1/2 in.
-
Page 11: Clearances To Combustibles
MINIMUM CLEARANCES TO COMBUSTIBLE MATERIALS In Inches & (Millimeters) NOTE: All "A" , "C" and "F" Dimensions are to the inside diameter of the flue collar. INSTALLATION: Full Vertical OR Horizontal with Minimum 2 FT Vertical Off Stove Top SINGLE WALL PIPE Flat Top Model 15.25 (387) 11.75 (298) 25.5 (648) -
Page 12: Section 4: Installation Consideration A. Hearth Requirements
In Canada, similar fl oor protection must be provided 18 inches (457mm) in front and 8 inches (203mm) from the sides and rear of the stove. *See exception. *EXCEPTION: Non-combustible fl oor protections must extend beneath the fl ue pipe when installed with horizontal venting and extend 2 inches (51mm) beyond each side. - Page 13 *See page 12 for Canadian clearances and hori- zontal venting exception. See Page 24 for calculation for alternate fl oor protection. Figure 13.3 CANADA Figure 13.4 7033-277I 3100 Wood Stove Series (ACC) 48-9/16 in. 29-1/4 in. USA required Canada recommended Page 13...
-
Page 14: Outside Air
1. Remove all materials from packing box. 2. Using a #2 Phillips screw driver attach the fl ex adapter to the stove using 4 screws. Figure 14.1 3. For fl oor instatllations, remove circular” knock-out” in the base of the pedestal. -
Page 15: Blower Installation
Secure wires with wire tie MANUAL AUTO HIGH 7033-277I 3100 Wood Stove Series (ACC) CAUTION Shock Risk. • Do NOT remove grounding prong from plug. • Plug directly into properly grounded 3 prong receptacle. • Route cord away from appliance. -
Page 16: Section 5: Chimney Requirements
A. Venting Components Chimney Connector: It is also known as fl ue pipe or stove pipe. The chimney connector joins the stove to the chimney. It must be a 6 inch (152mm) minimum diameter 24 gauge mild steel black or 26 gauge blued steel, or an approved air-insulated double wall venting pipe. - Page 17 9. Seal the end of the chimney connector to the clay liner with refractory mortar. 10. Install trim collar around the sold pack chimney section. July 7, 2011 3100 Wood Stove Series (ACC) ceiling Minimum18.0” NFPA 211 17.0” OD 14.0”...
-
Page 18: Installing Chimney Components
The sections must be attached to the appliance and to each other with the crimped (male) end pointing toward the stove. All joints, including the connection at the fl ue collar, should be secured with 3 sheet metal screws. Make sure to follow the minimum clearances to combustibles. -
Page 19: Chimney Termination Requirements
E. 2-10-3 Rule These are safety requirements and are not meant to assure proper fl ue draft. Figure 19.1 Figure 19.2 July 7, 2011 3100 Wood Stove Series (ACC) NOTE: • Chimney performance may vary. • Trees, buildings, roof lines and wind conditions affect performance. -
Page 20: Section 6: Mobile Home
3100 Wood Stove Series (ACC) Mobile Home Installation You must use a Quadra-Fire Outside Air Kit Part OAK-ACC and (depending on fl oor installation), Part SRV7033-041 for installation in a mobile home. 1. An outside air inlet must be provided for combustion See page 14 for installation information. - Page 21 Begin installing the ARS System. 1. Remove 2 front bricks as shown in Figure 21.1. 2. Lay body of stove on its back on a protective pad or pallet. 3. Remove the 2 nuts and 2 bolts holding the channel in place and set the channel aside.
- Page 22 NOTE: If installing a fl oor installation of an outside air kit on a Step Top model with a pedestal assembly you must attach the enclosed cover plate to the back of the stove. Other wise you may discard this piece. Figure 22.3.
-
Page 23: Leg Kit & Ash Removal System (Ars) Installation
Do NOT tilt up on the cast iron legs, it could damage the legs. 6. Use leveling bolts on legs to stabilize and level stove. Finishing the ARS Installation 1. Follow steps 1 through 3 on page 22. See also Figure 22.2. -
Page 24: Door Handle Assembly
3100 Wood Stove Series (ACC) C. Door Handle Assembly 1. Install washer on door handle shaft. 2. Slide door handle through door. 3. Install second washer(s) as shown. 4. Install key in groove. 5. Align groove in latch cam with key; slide latch cam over shaft 6. -
Page 25: Section 8: Operating Instructions
Much of the blame for poor air quality has been placed on the burning of wood for home heating. In order to improve the situation, we at Quadra-Fire have developed cleaner-burning woodstoves that surpass the requirements for emissions established by our governing agencies. These... -
Page 26: Automatic Combustion Control (Acc)
This activates the ACC system and opens the front air channel and allows air to enter the front of the stove for approximately 25 minutes. The front air channel gradually shuts down until it is completely closed at the end of the 25 minutes. -
Page 27: E. Air Controls
Open both controls fully by raising the Burn Rate Air Control all the way up until it stops and slide the Start-up Air Control back until it stops. After loading the stove with wood and starting the fi re, set both controls to the desired setting by following the burn rate instructions below. -
Page 28: Building A Fire
3100 Wood Stove Series (ACC) G. Building A Fire Before lighting your fi rst fi re in the stove: 1. Confi rm the baffl e is correctly positioned. It should be even with the front tube and resting on all tubes. Figure 28.1. -
Page 29: Baffl E & Blanket Placement
CAUTION The baffl e boards are FRAGILE. Use extreme caution when loading fi rewood to prevent: • Cracking, breaking or damaging the baffl e boards DO NOT operate the stove without baffl e boards CORRECT POSITION Ceramic Blanket Baffle Board Ceramic Blanket and Baffl... -
Page 30: Blower Operating Instructions
3100 Wood Stove Series (ACC) I. Blower Operating Instructions NOTE: If your Quadra-Fire wood stove is equipped with an optional blower, you should follow these guidelines: Initial (cold) start-up and all Burn Settings The blower can be plugged in and turned on right away. -
Page 31: Quick Reference Maintenance Guide
These are generic drawings and may not represent your model. July 7, 2011 3100 Wood Stove Series (ACC) INSPECT FIREBRICKS & ASH COVER (AFTER EACH CLEANING) Step Top Models Only Firebrick is designed to protect your fi rebox. Replace fi... -
Page 32: General Maintenance & Cleaning
Ash Removal System. Reach down and locate the ash removal door handle under the left side of the stove in the center. Squeeze the handle and push all the way back. A magnet will hold the handle in place which in turn holds the ash door open. - Page 33 fi nish and little maintenance is required. Wipe clean as needed. CAUTION • Do not use polishes with abrasives. It will scratch plated surfaces. July 7, 2011 3100 Wood Stove Series (ACC) 5. Glass Cleaning • Frequency: As desired • By: Homeowner Clean glass with a non-abrasive glass cleaner.
-
Page 34: Glass Replacement
DO NOT OVERTIGHTEN. Replace the door on the appliance. Quadra-Fire stoves are equipped with ceramic super heat-resistant glass, which can only be broken by impact or misuse. Do not slam stove door or impact the glass. -
Page 35: Firebrick Replacement
3 in. NOTE: The Ash Removal System is avail- able for the Step Top Model only and not for the Millennium Model. 7033-277I 3100 Wood Stove Series (ACC) 9 in. 1-1/4 in. 1-1/4 in. 2 in. 2 in. -
Page 36: Baffl E Removal
1. Locate the snap disc bracket assembly at the bottom left rear corner of the stove. Figure 36. 3 2. A magnet holds the bracket to the stove. Pull the bracket down away from the stove to expose the snap disc. -
Page 37: Tube Channel Replacement
NOTE: Service Space In order to replace the tube channel assembly a clearance of 19 inches (483mm) is required on the right side of stove in order to remove the tubes with the stove in place. If space is not available, the stove will have to be discon- nected from the chimney to proceed with the tube replace- ment. -
Page 38: Section 10: Troubleshooting
3100 Wood Stove Series (ACC) Troubleshooting Start Fire Problems Can’t get fi re started Excessive smoke or spillage Burns too slowly Smolders, sizzles Fire burns too fast Page 38 With proper installation, operation, and maintenance your woodstove will provide years of trouble-free service. If you do experience a prob- lem, this troubleshooting guide will assist a qualifi... -
Page 39: Section 11: Reference Material A. Exploded Drawings (Step Top)
3100 ACC (Step Top) Service Parts Beginning Manufacturing Date: Sept. 2006 Step Top - Wood Stove Ending Manufacturing Date: Active 31ST-ACC (Advanced Combustion Control) A. Exploded Drawing Part number list on following page. Figure 39.1 04/11 Page 39 July 7, 2011... -
Page 40: Srv Parts & Accessories (Step Top)
IMPORTANT: THIS IS DATED INFORMATION. When requesting service or replacement parts for your appliance please provide model number and serial number. All parts listed in this manual may be ordered from an authorized dealer. ITEM DESCRIPTION Air Channel, Convection Air Supply Back Panel Assembly, Side, Left #4 Brick Set Assembly Brick Assembly - Complete Set... -
Page 41: Service Parts
IMPORTANT: THIS IS DATED INFORMATION. When requesting service or replacement parts for your appliance please provide model number and serial number. All parts listed in this manual may be ordered from an authorized dealer. ITEM DESCRIPTION #14 Burn Rate Control Assembly 14.1 14.2 14.3... -
Page 42: Door Assembly
IMPORTANT: THIS IS DATED INFORMATION. When requesting service or replacement parts for your appliance please provide model number and serial number. All parts listed in this manual may be ordered from an authorized dealer. ITEM DESCRIPTION #17 Door Assembly 17.1 Door Assembly 17.2 Hinge Pins, 1/2”... -
Page 43: Service Parts
DESCRIPTION Blower, Convection - Replacement Blower Channel, Ash Removal Component Pack (Includes Spring Handles (1) 1/2” & (2) 1/4”, (2) Hinge Pins, Quadra-Fire Logo) Hinge Pins, 1/2” (Qty 2) Logo, Quadra-Fire Spring Handle, 1/4” Component Pack, Step Top, (Touch-Up Paint, Owners Manual &... -
Page 44: Exploded Drawing (Millennium)
31M-ACC-GT (7/06 - 10/06), Part number list on following page. Page 44 Service Parts Millennium - Wood Stove Advanced Combustion Control (ACC) 31M-ACC-MBK (7/06 - Active), 31M-ACC-NT (7/06 - 10/06) 7033-277I 3100 ACC (Millennium) Beginning Manufacturing Date: July 2006 Ending Manufacturing Date: Active... -
Page 45: Srv Parts & Accessories (Mill.)
IMPORTANT: THIS IS DATED INFORMATION. When requesting service or replacement parts for your appliance please provide model number and serial number. All parts listed in this manual may be ordered from an authorized dealer. ITEM DESCRIPTION Air Channel, Convection Air Supply Back Flue Collar Panel Assembly, Side, Left Rear Channel Assembly... -
Page 46: Pedestal Assembly
IMPORTANT: THIS IS DATED INFORMATION. When requesting service or replacement parts for your appliance please provide model number and serial number. All parts listed in this manual may be ordered from an authorized dealer. ITEM DESCRIPTION #14 Burn Rate Controls & Accociated Parts 14.1 Burn Rate Control Assembly Spring Handle, 1/4”, Gold... - Page 47 17.10 Nut, Locking Door Handle Component Pack (Includes Spring Handles (1) 1/2” & (2) 1/4”, (2) Hinge Pins, Quadra-Fire Logo) Gasket, Glass Tape - Field Cut to Size Rope, Door, 3/4” X 84” - Field Cut to Size Screw, Flat Head Philips 8-32 X 1/2 Washer, Sae, 3/8 Additional service part numbers appear on following page.
- Page 48 DESCRIPTION Blower, Convection - Replacement Blower Hinge Pins, 1/2”, Gold Hinge Pins, 1/2”, Nickel Hinge Pins, 1/2”, Black Logo, Quadra-Fire Spring Handle, 1/2”, Gold Spring Handle, 1/2”, Nickel Spring Handle, 1/2”, Black Spring Handle, 1/4”, Gold Spring Handle, 1/4”, Nickel Spring Handle, 1/4”, Black...
-
Page 49: Service And Maintenance Log
3100 Wood Stove Series (ACC) E. Service and Maintenance Log Date of Service Performed By Description of Service Page 49 July 7, 2011 7033-277I... -
Page 50: Warranty Policy
3100 Wood Stove Series (ACC) F. Warranty Policy Page 50 7033-277I July 7, 2011... - Page 51 3100 Wood Stove Series (ACC) Page 51 July 7, 2011 7033-277I...
-
Page 52: Contact Information
Please contact your Quadra-Fire dealer with any questions or concerns. For the number of your nearest Quadra-Fire dealer, • Important operating a n d m a i n t e n a n c e instructions included. We recommend that you record the following pertinent...