Table of Contents
Advertisement
Model No. 831.24745.3
Serial No.
Write the serial number in the
space above for future reference.
Serial
Number
Decal
• Assembly
• Operation
• Maintenance
• Part List and Drawing
CAUTION
Read all precautions and instruc-
tions in this manual before using
this equipment. Save this manual
for future reference.
TREADMILL EXERCISER
Sears, Roebuck and Co., Hoffman Estates, IL 60179
User's Manual
Advertisement
Table of Contents

Related Manuals for ProForm XP 615 831.24745.3


Summary of Contents for ProForm XP 615 831.24745.3
- Page 1 • Operation • Maintenance • Part List and Drawing CAUTION Read all precautions and instruc- tions in this manual before using this equipment. Save this manual for future reference. TREADMILL EXERCISER Sears, Roebuck and Co., Hoffman Estates, IL 60179 User’s Manual...
-
Page 2: Table Of Contents
HOW TO FOLD AND MOVE THE TREADMILL ........ -
Page 3: Important Precautions
To reduce the risk of serious injury, read all important precautions and in- structions in this manual and all warnings on your treadmill before using your treadmill. Sears as- sumes no responsibility for personal injury or property damage sustained by or through the use of this product. - Page 4 (See the drawing on page 5 for the location of the circuit breaker.) 21. Do not attempt to raise, lower, or move the treadmill until it is properly assembled.
-
Page 5: Before You Begin
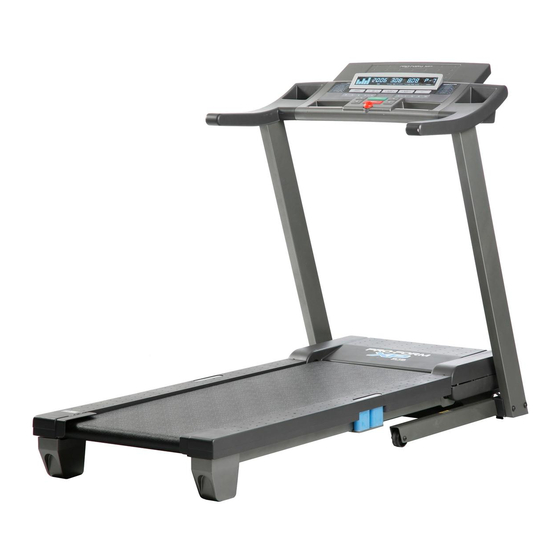
BEFORE YOU BEGIN Thank you for selecting the revolutionary PROFORM XP 615 TRAINER treadmill. The XP 615 TRAINER treadmill offers an impressive array of features de- signed to make your workouts at home more enjoyable and effective. And when you’re not exercising, the... -
Page 6: Assembly
This is a normal con- dition and does not affect treadmill performance. If there is lubricant on top of the walking belt, simply wipe off the lubricant with a soft cloth and a mild, non-abrasive cleaner. - Page 7 2. Remove the 3/8" Nut (8), the 3/8" x 2" Bolt (4), and the shipping bracket (C) from the Base (80). Attach a Base Wheel (81) with the Bolt and the Nut that you just removed. Do not overtighten the Nut; the Wheel must turn freely. Discard the shipping bracket.
- Page 8 5. With the help of a second person, carefully tip the treadmill onto its right side. Partially fold the Frame (53) so the treadmill is more stable; do not fully fold the Frame yet. Remove and discard the two indicated bolts (A) and the shipping bracket (B).
- Page 9 8. Insert the Book Rack (84) into the console as- sembly; it may be helpful to rock the Book Rack up and down as you insert it. Attach the Book Rack with five 3/4" Screws (10); start all five Screws and then tighten them. See steps 4 and 6.
- Page 10 13. Make sure that all parts are properly tightened before you use the treadmill. If there are sheets of clear plastic on the treadmill decals, remove the plastic. To protect the floor or carpet, place a mat under the tread- mill.
-
Page 11: Operation And Adjustment
Failure to use a properly functioning surge suppressor could result in damage to the control system of the treadmill. If the control system is damaged, the walking belt may change speed, accelerate, or stop unexpect- edly, which may result in a fall and serious injury. - Page 12 In addition, the console offers twelve preset workouts. Each workout automatically controls the speed and in- cline of the treadmill as it guides you through an effec- tive exercise session. To use the manual mode of the console, follow the steps beginning on page 13.
- Page 13 THE INFORMATION MODE on page 17 to turn off the demo mode. Next, stand on the foot rails of the treadmill. Find the clip attached to the key (see the drawing on page 12) and slide the clip onto the waistband of your clothes.
- Page 14 Step onto the foot rails, press the Stop button, and adjust the incline of the treadmill to the lowest setting. The incline must be at the lowest setting or you may damage the treadmill when you fold it to the storage position.
- Page 15 4. Press the Start button or the Go button to start the workout. A moment after the button is pressed, the treadmill will automatically adjust to the first speed and in- cline settings of the workout. Hold the handrails and begin walking.
- Page 16 Monitor your progress with the matrix and the displays. See step 5 on pages 13 and 14. Measure your heart rate if desired. See step 6 on page 14. When you are finished exercising, remove the key from the console. See step 7 on page 14.
-
Page 17: Information Mode
Note: The console features a display demo mode, de- signed to be used if the treadmill is displayed in a store. While the demo mode is turned on, the console will function normally when you plug in the power cord, switch the circuit breaker to the reset position, and in- sert the key into the console. -
Page 18: How To Fold And Move The Treadmill
HOW TO LOWER THE TREADMILL FOR USE 1. Hold the upper end of the treadmill with your left hand. Pull the latch knob to the left and hold it. It may be nec- essary to push the frame forward as you pull the knob to the left. Pivot the frame downward and release the latch knob. -
Page 19: Troubleshooting
SOLUTION: a. Make sure that the power cord is plugged into a surge suppressor, and that the surge suppressor is plugged into a properly grounded outlet (see page 11). Use only a single-outlet surge suppres- sor that meets all of the specifications described on page 11. Important: The treadmill is not com- patible with GFCI-equipped outlets. - Page 20 PROBLEM: The console displays remain lit when you remove the key from the console SOLUTION: a. The console features a display demo mode, designed to be used if the treadmill is displayed in a store. If the displays remain lit when you remove the key, the demo mode is turned on. To turn off the demo mode, hold down the Stop button for a few seconds.
- Page 21 2 to 3 in. (5 to 7 cm) off the walking platform. Be careful to keep the walking belt centered. Then, plug in the power cord, insert the key, and carefully walk on the treadmill for a few minutes. Repeat until the walking belt is prop- erly tightened.
-
Page 22: Exercise Guidelines
EXERCISE GUIDELINES WARNING: Before beginning this or any exercise program, consult your physi- cian. This is especially important for persons over the age of 35 or persons with pre-exist- ing health problems. The pulse sensor is not a medical device. Various factors may affect the accuracy of heart rate readings. -
Page 23: Part List
PART LIST—Model No. 831.24745.3 To locate the parts listed below, see the EXPLODED DRAWING near the end of this manual. Key No. Qty. Description 1/2" Screw 3/4" Tek Screw Bolt Spacer 3/8" x 2" Bolt 5/16" x 1" Bolt 3/8" x 4" Bolt 5/16"... -
Page 24: Exploded Drawing
EXPLODED DRAWING A—Model No. 831.24745.3 R0607A... - Page 25 EXPLODED DRAWING B—Model No. 831.24745.3 R0607A...
- Page 26 EXPLODED DRAWING C—Model No. 831.24745.3 R0607A...
- Page 27 EXPLODED DRAWING D—Model No. 831.24745.3 R0607A...
-
Page 28: One Year Full Warranty
® Marca Registrada / ONE YEAR FULL WARRANTY If this Sears Treadmill Exerciser fails due to a defect in material or workmanship within 1 year of the date of purchase, call 1-800-4-MY-HOME pair proves impossible). The incline motor is warranted for 1 year from the date of purchase; the drive motor is warranted for 12 years from the date of purchase.