Table of Contents
Advertisement
Model No. PFTL05051
Serial No.
QUESTIONS?
As a manufacturer, we are com-
mitted to providing complete
customer satisfaction. If you
have questions, or find that there
are missing or damaged parts,
we will guarantee you complete
satisfaction through direct assis-
tance from our factory.
TO AVOID UNNECESSARY DE-
LAYS, PLEASE CALL DIRECT TO
OUR TOLL-FREE CUSTOMER
HOT LINE. The trained techni-
cians on our Customer Hot Line
will provide immediate assis-
tance, free of charge to you.
CUSTOMER HOT LINE:
1-800-999-3756
Mon.–Fri., 6 a.m.–6 p.m. MST
CAUTION
Read all precautions and instruc-
tions in this manual before using
this equipment. Save this
manual for future reference.
Serial
Number
Decal
®
USER'S MANUAL
Advertisement
Table of Contents

Related Manuals for ProForm T10.0 PFTL05051


Summary of Contents for ProForm T10.0 PFTL05051
- Page 1 Model No. PFTL05051 Serial No. Serial Number Decal QUESTIONS? As a manufacturer, we are com- mitted to providing complete customer satisfaction. If you have questions, or find that there are missing or damaged parts, we will guarantee you complete satisfaction through direct assis- tance from our factory.
-
Page 2: Limited Warranty
LIMITED WARRANTY ICON Health & Fitness, Inc. ("ICON"), warrants this product to be free from defects in workmanship and material, under normal use and service conditions, for a period of ninety (90) days from the date of pur- chase. This warranty extends only to the original purchaser. ICON's obligation under this warranty is lim- ited to replacing or repairing, at ICON's option, the product at one of its authorized service centers. -
Page 3: Table Of Contents
TABLE OF CONTENTS LIMITED WARRANTY ...............2 IMPORTANT PRECAUTIONS . -
Page 4: Important Precautions
2. Use the treadmill only as described in this manual. 3. Place the treadmill on a level surface, with 8 feet of clearance behind it. Do not place the treadmill on a surface that blocks any air openings. -
Page 5: Before You Begin
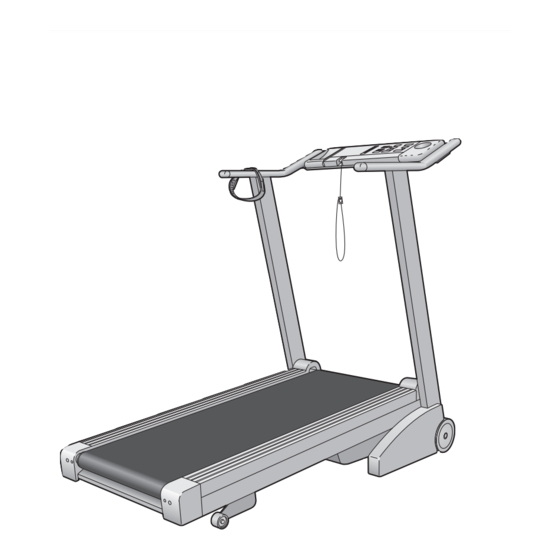
BEFORE YOU BEGIN Thank you for selecting the state-of-the-art PROFORM T10.0 treadmill. The T10.0 treadmill combines ad- vanced technology with innovative styling to offer you an effective form of cardiovascular exercise, in the con- venience and privacy of your home. -
Page 6: Assembly
ASSEMBLY Assembly requires two people. Set the treadmill in a cleared area and remove all packing materials. Do not dispose of the packing materials until assembly is completed. Assembly requires the following tools: The included allen wrench included) , and a phillips screwdriver (not included) 1. - Page 7 The use of the pulse sensor is explained on pages 8 and 9. Make sure that all parts are properly tightened before you use the treadmill. Important: Place a mat beneath the treadmill to protect the floor or carpet. Sensor...
-
Page 8: How To Use The Pulse Sensor
HOW TO USE THE PULSE SENSOR The treadmill features a state-of-the-art cordless pulse sensor, specially designed for greater accuracy, com- fort, and durability. Please read the following in- structions before using the pulse sensor. HOW TO INSTALL BATTERIES The pulse sensor requires two “AAA” batteries. - Page 9 5. The sensor window should be cleaned weekly when the treadmill is used regularly. Moisten a cotton swab with water, and carefully wipe the sensor window. 6. Because your pulse constantly changes, the pulse sensor will sample and average your pulse every few seconds.
-
Page 10: Operation And Adjustment
OPERATION AND ADJUSTMENT THE PERFORMANT LUBE Your treadmill features a walking belt coated with PERFORMANT LUBE , a high-performance lubricant. IMPORTANT: Never apply silicone spray or other substances to the walking belt or the walking plat- form. They will deteriorate the walking belt and cause excessive wear. - Page 11 CAUTION ! TO AVOID INJURY: • Read User's Manual first. • Don't stand on walking belt when starting treadmill. • Moving parts can cause injury; use caution, and keep children away. • Stop if you feel faint, dizzy, or short of breath.
-
Page 12: How To Use The Manual Mode
HOW TO USE THE MANUAL MODE Insert the key fully into the console. Stand on the foot rails and insert the key. Various displays and in- dicators will light. Find the clip attached to the key, and slide it onto the waistband of your cloth- ing. - Page 13 CLINE (% Grade) display. The incline range is 1.5% to 10%. Note: After the INCLINE buttons are pressed, it may take a few seconds for the treadmill to reach the selected incline setting. Follow your progress with the five displays and the TRAINING ZONE monitor.
-
Page 14: How To Use Programs A, B, C, And D
• FAT BURN and MAXIMUM FAT BURN—To burn fat effectively, you must exercise at a rela- tively low intensity level for a sustained period of time. (See BURNING FAT on page 21.) If you are exercising at the proper intensity level for burning fat, the FAT BURN or MAXIMUM FAT BURN indicator will light. - Page 15 Change the incline of the treadmill, if desired. When program A, B, C, or D is selected, the incline of the treadmill can be changed with the INCLINE buttons. See step 7 on page 13. Follow your progress with the five displays and the TRAINING ZONE monitor.
-
Page 16: How To Use The Fat Burn And Aerobic Programs
HOW TO USE THE FAT BURN AND AEROBIC PROGRAMS The FAT BURN and AEROBIC programs automatically control the speed and incline of the treadmill to keep your pulse within a predetermined range during your workouts. Both programs are 30-minute programs. The speed profiles on the left side of the console show how your pulse will change during each program. -
Page 17: How To Use The Fitness Test Program
The FITNESS TEST program consists of seven 4- minute periods, and is followed by a 2-minute cool- down period. The speed and/or incline of the treadmill will automatically increase at the beginning of each 4- minute period. - Page 18 The FITNESS TEST will continue in this manner until your pulse reaches 70% of your maximum heart rate, and the current 4-minute period is completed. The FITNESS TEST will then be com- pleted, regardless of how many periods remain.
-
Page 19: Trouble-Shooting
2. SYMPTOM: THE POWER TURNS OFF DURING USE a. Check the circuit breaker located on the treadmill near the power cord (see 1. c. above). If the circuit breaker has tripped, wait for five minutes and then press the switch back in. - Page 20 Remove the key, wait for ten seconds, and then reinsert it. If you weigh over 200 pounds, it may be helpful to increase the incline of the treadmill. If the error code appears again, call our Customer Service Department.
-
Page 21: Conditioning Guidelines
If your goal is to burn fat, adjust the speed and incline of the treadmill until the FAT BURN indicator is lit. (See TRAINING ZONE MONITOR on pages 13 and 14.) - Page 22 Training Zone Exercise After warming up, increase the intensity of your exer- cise until your pulse is in your training zone for 20 to 60 minutes. (During the first few weeks of your exer- cise program, do not keep your pulse in your training zone for longer than 20 minutes.) Breathe regularly and deeply as you exercise—never hold your breath.
- Page 23 SUGGESTED STRETCHES The correct form for several basic stretches is shown in the drawings below. Move slowly as you stretch—never bounce. 1. Toe Touch Stretch Stand with your knees bent slightly and slowly bend forward from your hips. Allow your back and shoulders to relax as you reach down toward your toes as far as possible.
- Page 24 PART LIST—Model No. PFTL05051 Key No. Qty. Description Handrail Endcap Handrail Handrail Cover Pulse Sensor Console Screw/Foot Screw Upright Wire Harness 24” Cable Loom Handrail Pivot Bolt Cage Nut 7/32 Allen Wrench (not used) 8” Wire Tie Upright Plug Small Screw Cable Tie Holder Left Upright Foot Rail w/Fastener...
-
Page 26: Ordering Replacement Parts
• The DESCRIPTION OF THE PART(S) (see the EXPLODED DRAWING and PART LIST attached to the center of this manual). If possible, place the treadmill near your telephone for easy reference when calling. Part No. 131446 F04035-C R1296A T10.0 treadmill).