Advertisement
Model No. 831.293330
Serial No.
• Assembly
• Operation
• Maintenance
• Part List and Drawing
CAUTION
Read all precautions and instruc-
tions in this manual before using
this equipment. Save this manual
for future reference.
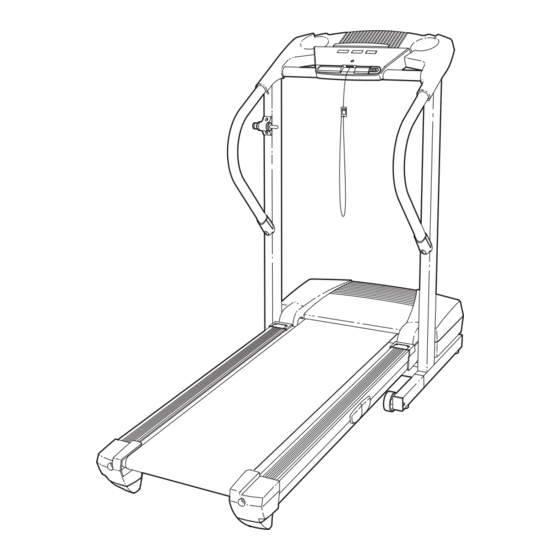
TREADMILL EXERCISER
Serial
Number
Decal
Sears, Roebuck and Co., Hoffman Estates, IL 60179
User's Manual
Advertisement
Table of Contents

Related Manuals for Pro-Form 831.293330


Summary of Contents for Pro-Form 831.293330
- Page 1 Model No. 831.293330 Serial No. Serial Number Decal • Assembly • Operation • Maintenance • Part List and Drawing CAUTION Read all precautions and instruc- tions in this manual before using this equipment. Save this manual for future reference. TREADMILL EXERCISER Sears, Roebuck and Co., Hoffman Estates, IL 60179...
-
Page 2: Table Of Contents
HOW TO FOLD AND MOVE THE TREADMILL ........ -
Page 3: Important Precautions
2. Use the treadmill only as described in this manual. 3. Place the treadmill on a level surface, with at least eight feet of clearance behind it and two feet on each side. Do not place the treadmill on any surface that blocks air openings. - Page 4 SAVE THESE INSTRUCTIONS The decals shown have been placed on your treadmill. If a decal is missing, or if it is not legible, please call toll-free 1-800-999-3756 to order a free replacement decal (see the front cover of this manual).
-
Page 5: Before You Begin
4663).To help us assist you, please note the product model number and serial number before calling. The model number of the treadmill is 831.293330. The ser- ial number can be found on a decal attached to the treadmill (see the front cover of this manual for the lo- cation). -
Page 6: Assembly
This is a normal condition and does not affect treadmill performance. If there is lubricant on top of the walking belt, simply wipe off the lubricant with a soft cloth and a mild, non-abrasive cleaner. - Page 7 2. With the help of a second person, carefully lower the treadmill frame and then tip the Uprights (69) down as shown. (Note: It may be helpful to place your foot on one of the Extension Legs [63] as you tip the Uprights.) Make sure that the Extension Legs remain in the Uprights.
- Page 8 5. Attach the end of the ground wire to the small hole in the side of the Right Handrail (72) with a Silver Ground Screw (75). 6. Place the Console Base (47) on the Right Handrail (72) and the Left Handrail (not shown). Attach the Console Base with four 3/4”...
- Page 9 4. Then, lower the frame to the floor. 9. Make sure that all parts are properly tightened before you use the treadmill. Note: Extra hardware may be included. Keep the included allen wrenches in a secure place. The large allen wrench is used to adjust the...
-
Page 10: Operation And Adjustment
OPERATION AND ADJUSTMENT THE PERFORMANT LUBE WALKING BELT Your treadmill features a walking belt coated with PERFORMANT LUBE , a high-performance lubricant. IMPORTANT: Never apply silicone spray or other substances to the walking belt or the walking plat- form. Such substances will deteriorate the walking belt and cause excessive wear. -
Page 11: Console Diagram/Operation
Before operating the console, make sure that the power cord is properly plugged in (see page 10). Next, stand on the foot rails of the treadmill. Find the clip attached to the key (see the drawing above), and slide the clip onto the waistband of your clothes. - Page 12 To stop the walking belt, press the Stop button. The elapsed time will begin to flash in the Time/Distance display. Note: During the first few minutes that the treadmill is used, inspect the alignment of the walking belt, and align it if necessary (see page 16).
-
Page 13: How To Fold And Move The Treadmill
2. Move your right hand to the position shown and hold the treadmill firmly. Using your left hand, pull the latch knob to the left and hold it. Raise the treadmill until the latch pin is aligned with the square hole between the frame and the foot rail. - Page 14 HOW TO LOWER THE TREADMILL FOR USE 1. Hold the upper end of the treadmill with your right hand as shown. Using your left hand, pull the latch knob to the left and hold it. Pivot the treadmill down until the frame is past the latch pin.
-
Page 15: Troubleshooting
PROBLEM: The power turns off during use SOLUTION: a. Check the on/off circuit breaker located on the treadmill frame near the power cord (see the draw- ing above). If the on/off circuit breaker has tripped, wait for five minutes and then press the switch back in. - Page 16 3 inches off the walking platform. Be careful to keep the walking belt centered. Plug in the power cord, in- sert the key, and run the treadmill for a few minutes. Repeat until the walking belt is properly tightened. c. If the walking belt still slows when walked on, please call toll-free 1-800-4-MY-HOME 469-4663).
-
Page 17: Conditioning Guidelines
For maximum fat burning, adjust the speed and incline of the treadmill until your heart rate is near the middle number in your training zone. Aerobic Exercise If your goal is to strengthen your cardiovascular sys- tem, your exercise must be “aerobic.”... - Page 18 SUGGESTED STRETCHES The correct form for several basic stretches is shown at the right. Move slowly as you stretch—never bounce. 1. Toe Touch Stretch Stand with your knees bent slightly and slowly bend forward from your hips. Allow your back and shoulders to relax as you reach down toward your toes as far as possible.
- Page 19 NOTES...
- Page 20 PART LIST—Model No. 831.293330 Qty. Description Hood 3/4” Screw Motor Belt Motor Tension Bolt Flat Washer Motor Star Washer Flywheel Motor Motor Assembly Reed Switch Latch Warning Decal Frame Spacer Frame Pivot Nut/Motor Nut Frame Pivot Bolt Walking Platform Screw...
- Page 21 EXPLODED DRAWING—Model No. 831.293330 R0503A...
-
Page 22: Full 90 Day Warranty
Sears will repair or replace the Treadmill Exerciser, free of charge. This warranty does not apply when the Treadmill Exerciser is used commercially or for rental purposes. This warranty gives you specific legal rights, and you may also have other rights which vary from state to state.