Advertisement
Table of Contents
- 1 Table of Contents
- 2 Warning Decal Placement
- 3 Important Precautions
- 4 Before You Begin
- 5 Assembly
- 6 How to Plug in Power Cord
- 7 Operation and Adjustment
- 8 How to Fold and Move the Treadmill
- 9 Troubleshooting
- 10 Exercise Guidelines
- 11 Part List
- 12 Exploded Drawing
- 13 Ordering Replacement Parts
- 14 Limited Warranty
- Download this manual
Model No. 30755.0
USER'S MANUAL
Serial No.
Write the serial number in the
space above for future reference.
Serial Number Decal
QUESTIONS?
As a manufacturer, we are com-
mitted to providing complete cus-
tomer satisfaction. If you have
questions, or if parts are damaged
or missing, PLEASE DO NOT
CONTACT THE STORE. For assis-
tance, contact our Customer
Service Department.
CALL TOLL-FREE:
1-888-936-4266
Mon.–Fri., 8:00 until 17:00 EST
(excluding holidays)
OR E-MAIL US:
customerservice@iconcanada.ca
CAUTION
Read all precautions and instruc-
tions in this manual before using
Notre site internet
this equipment. Save this manual
for future reference.
www.proform.com
Advertisement
Table of Contents

Related Manuals for ProForm 30755.0


Summary of Contents for ProForm 30755.0
- Page 1 Model No. 30755.0 USER’S MANUAL Serial No. Write the serial number in the space above for future reference. Serial Number Decal QUESTIONS? As a manufacturer, we are com- mitted to providing complete cus- tomer satisfaction. If you have questions, or if parts are damaged or missing, PLEASE DO NOT CONTACT THE STORE.
-
Page 2: Table Of Contents
HOW TO FOLD AND MOVE THE TREADMILL ........ -
Page 3: Important Precautions
To reduce the risk of serious injury, read all important precautions and in- structions in this manual and all warnings on your treadmill before using your treadmill. ICON as- sumes no responsibility for personal injury or property damage sustained by or through the use of this product. - Page 4 (See the drawing on page 5 for the location of the circuit breaker.) 22. Do not attempt to raise, lower, or move the treadmill until it is properly assembled.
-
Page 5: Before You Begin
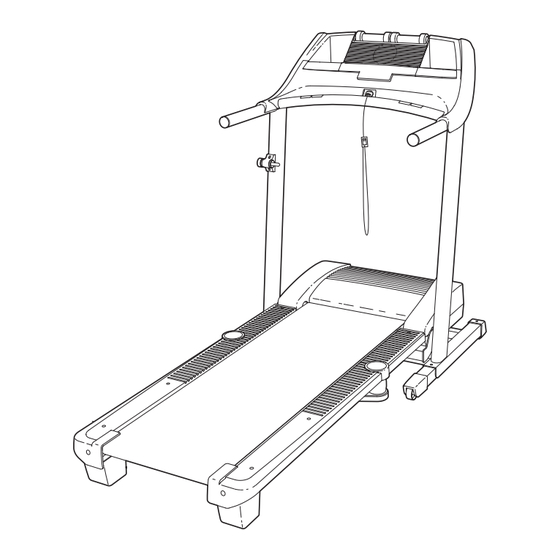
BEFORE YOU BEGIN Thank you for selecting the revolutionary PROFORM XP 580 CROSSTRAINER treadmill. The XP 580 CROSSTRAINER treadmill offers an impressive array of features designed to make your workouts at home more enjoyable and effective. And when you’re not ex-... -
Page 6: Assembly
During shipping, a small amount of lubricant may be transferred to the top of the walking belt or the shipping carton. This is a normal condition and does not affect treadmill perfor- mance. If there is lubricant on top of the walking belt, simply wipe off the lubricant with a soft cloth and a mild, non-abrasive cleaner. - Page 7 2. With the help of a second person, carefully tip the treadmill onto its right side. Do not fully fold the treadmill until it is completely assem- bled. Insert the other Extension Leg (89) into the base of the Uprights (84). Hold an Extension Leg Nut (67) in the bottom of the Extension Leg, and thread a 2.5"...
- Page 8 6. Make sure that all parts are properly tightened before you use the treadmill. If there are sheets of clear plastic on the treadmill decals, remove the plastic. To protect the floor or carpet, place a mat under the tread- mill.
-
Page 9: Operation And Adjustment
Failure to use a properly functioning surge suppressor could result in damage to the control system of the treadmill. If the control system is damaged, the walking belt may change speed, accelerate, or stop unexpect- edly, which may result in a fall and serious injury. - Page 10 When you select the manual mode of the console, you can change the speed and incline of the treadmill with the touch of a button. As you exercise, the console will display continuous exercise feedback. You can even...
- Page 11 THE INFORMATION MODE on page 17 to turn off the demo mode. Next, stand on the foot rails of the treadmill. Find the clip attached to the key (see the drawing on page 10) and slide the clip onto the waistband of your clothes.
- Page 12 0.5%. Note: After the buttons are pressed, it may take a moment for the treadmill to reach the se- lected incline setting. 6. Follow your progress with the display. Note: The display features six background col- ors.
- Page 13 The incline must be at the lowest setting or you may damage the treadmill when you fold it to the storage position. Next, remove the key from the console and put it in a secure place.
- Page 14 4. Press the Start button to start the workout. A moment after the button is pressed, the treadmill will automatically adjust to the first speed and in- cline settings of the workout. Hold the handrails and begin walking.
- Page 15 3. Press the Start button to start the program. A moment after the button is pressed, the treadmill will automatically adjust to the first speed and in- cline settings of the workout. Hold the handrails and begin walking.
- Page 16 Remove the clip from the waistband of your clothes, step off the treadmill, and prepare to begin the first strength exercise. Every few seconds, the console will sound a tone; when a tone sounds, perform one repetition of the exercise.
- Page 17 Speed increase button. Note: The console features a display demo mode, de- signed to be used if the treadmill is displayed in a store. While the demo mode is turned on, the console will function normally when you plug in the power cord, switch the circuit breaker to the reset position, and in- sert the key into the console.
-
Page 18: How To Fold And Move The Treadmill
HOW TO LOWER THE TREADMILL FOR USE 1. See drawing 2 above. Hold the upper end of the treadmill with your right hand. Pull the latch knob to the left and hold it. Pivot the frame down until it is past the latch pin. Then, release the latch knob. -
Page 19: Troubleshooting
TROUBLESHOOTING Most treadmill problems can be solved by following the simple steps below. Find the symptom that applies, and follow the steps listed. If further assistance is needed, call the telephone number on the front cover of the manual. PROBLEM: The power does not turn on SOLUTION: a. - Page 20 PROBLEM: The console displays remain lit when you remove the key from the console SOLUTION: a. The console features a display demo mode, designed to be used if the treadmill is displayed in a store. If the displays remain lit when you remove the key, the demo mode is turned on. To turn off the demo mode, hold down the Stop button for a few seconds.
-
Page 21: Exercise Guidelines
EXERCISE GUIDELINES WARNING: Before beginning this or any exercise program, consult your physi- cian. This is especially important for persons over the age of 35 or persons with pre-exist- ing health problems. The pulse sensor is not a medical device. Various factors may affect the accuracy of heart rate readings. -
Page 22: Part List
PART LIST—Model No. 30755.0 To locate the parts listed below, see the EXPLODED DRAWING near the end of this manual. Key No. Qty. Description Foot Rail Cover 3/4" Screw Screw Reset/Off Circuit Breaker Foot Rail Screw Isolator Lower Incline Bolt... - Page 23 Key No. Qty. Description Photo Switch Bolt Dumbbell Latch Plate Wire Tie Roller Ground Wire Photo Switch Wire Isolator Bracket Cover Center Isolator Bolt Rear Roller Lock Washer Crossbar Screw Crossbar Star Washer Hood Clip Key No. Qty. Description Crossbar Fan Cover Console Ground Wire –...
-
Page 24: Exploded Drawing
EXPLODED DRAWING A—Model No. 30755.0 R0607A... - Page 25 EXPLODED DRAWING B—Model No. 30755.0 R0607A...
- Page 26 EXPLODED DRAWING C—Model No. 30755.0 R0607A...
- Page 27 EXPLODED DRAWING D—Model No. 30755.0 R0607A...
-
Page 28: Ordering Replacement Parts
ORDERING REPLACEMENT PARTS To order replacement parts, please see the front cover of this manual. To help us assist you, be prepared to pro- vide the following information when contacting us: • the model number and serial number of the product (see the front cover of this manual) •...