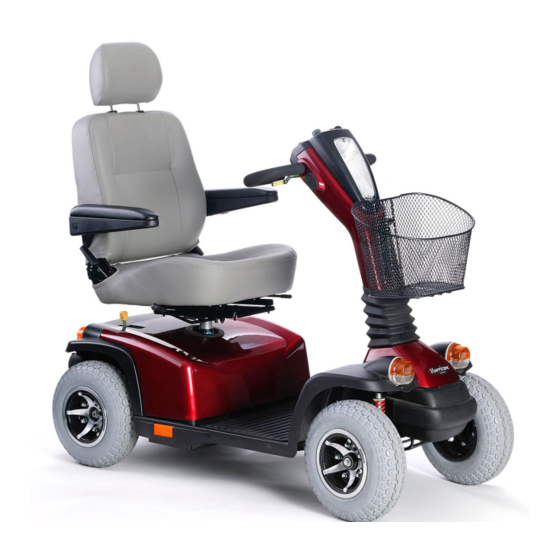
Pride Hurricane PMV Owner's Manual
Pride mobility hurrican pmv owner's manual
Hide thumbs
Also See for Hurricane PMV:
- User manual (35 pages) ,
- Owner's manual (43 pages) ,
- Owner's manual (43 pages)
Table of Contents
Advertisement
Advertisement
Table of Contents

Related Manuals for Pride Hurricane PMV


Summary of Contents for Pride Hurricane PMV
- Page 1 HURRICANE...
- Page 2 The latest/current version of this manual is available on our website. 088 609 661 Copyright © 2007 Pride Mobility Products Corp. INFMANU2635/Rev D/April 2007 G U I D E L I N E S Serial Number:_____________________________...
-
Page 3: Table Of Contents
INTRODUCTION ... 4 SAFETY ... 5 III. EMI/RFI ... 17 IV. SPECIFICATIONS ... 18 YOUR PMV... 20 VI. BATTERIES AND CHARGING ... 24 VII. OPERATION ... 29 VIII. COMFORT ADJUSTMENTS... 31 IX. DISASSEMBLY AND ASSEMBLY ... 34 BASIC TROUBLESHOOTING ... 36 XI. -
Page 4: Introduction
I N T R O D U C T I O N SAFETY WELCOME to Pride Mobility Products Corporation (Pride). The product you have purchased combines state of the art components with safety, comfort and styling in mind. We are confident the design features will provide you with the conveniences you expect during your daily activities. -
Page 5: Safety
PRODUCT SAFETY SYMBOLS The symbols below are used on the PMV to identify warnings, mandatory actions, and prohibited actions. It is very important for you to read and understand them completely. Read and follow the information in the owner’s manual. Do not allowed unsupervised children to play near the PMV while the batteries are charging. - Page 6 I I . S A F E T Y Use only AGM or Gel-Cell batteries. Front-to-rear plug orientation. Do not raise or lower the power seat while the PMV is in motion. Do not remove anti-tip wheels. Do not use a cell phone, walkie/talkie, laptop, or other radio transmitter while operating.
- Page 7 Do not open the battery pack until reading the instructions within the owner’s manual on how to do so. Do not use batteries with different amp-hour (Ah) capacities. Do not mix old and new batteries. Always replace both batteries at the same time. Do not lift the mobility product while seated in it.
- Page 8 GENERAL MANDATORY! Do not operate your new PMV for the first time without completely reading and understanding this owner’s manual. Your PMV is a state-of-the-art life-enhancement device designed to increase mobility. Pride provides an extensive variety of products to best fit the individual needs of the PMV user. Please be aware that the final selection and purchasing decision regarding the type of PMV to be used is the responsibility of the PMV user who is capable of making such a decision and his/her healthcare professional (i.e., medical doctor, physical therapist, etc.).
- Page 9 Perform the following inspections prior to using your PMV: Check for proper tire inflation (if equipped with pneumatic tyres). Check all electrical connections. Make sure they are tight and not corroded. Check all harness connections. Make sure they are secured properly. Check the brakes.
- Page 10 When climbing an incline, try to keep your PMV moving. If you must stop, start up again slowly, and then acceler- ate cautiously. When driving down an incline, do so by setting the speed adjustment dial to the slowest setting and driving in the forward direction only.
- Page 11 When you approach an incline, it is best to lean forward. See figures 2 and 2A. This shifts the center of gravity of you and your PMV toward the front of the PMV for improved stability. NOTE: When negotiating ramps, if the throttle control lever is released while moving forward, the powered PMV may "rollback"...
- Page 12 OUTDOOR DRIVING SURFACES Your PMV is designed to provide optimum stability under normal driving conditions—dry, level surfaces com- posed of concrete, blacktop, or asphalt. However, Pride recognizes that there will be times when you will encoun- ter other surface types. For this reason, your PMV is designed to perform admirably on packed soil, grass, and gravel.
- Page 13 INCLEMENT WEATHER PRECAUTIONS Exposure of your PMV to inclement weather conditions should be avoided whenever possible. If suddenly caught up in rain, snow, severe cold or heat while operating your PMV, proceed to shelter at the earliest opportunity. Thoroughly dry your PMV before storing, charging, or operating your PMV. WARNING! Operating in rain, snow, salt, mist/spray conditions and on icy/slippery surfaces may have an adverse affect on the electrical system.
- Page 14 ELEVATORS Modern elevators have a door edge safety mechanism that, when pushed, reopens the door(s). If you are in the doorway of a elevator when the door(s) begin to close, push on the rubber door edge or allow the rubber door edge to contact the PMV and the door will reopen. Use care that pocketbooks, packages, or PMV accessories do not become caught in elevator doors.
- Page 15 WARNING! Always be sure your PMV and its batteries are properly secured when it is being transported. Batteries should be secured in an upright position, and protective caps should be installed on the battery terminals. Batteries should not be transported with any flammable or combustible items.
- Page 16 POSITIONING BELTS Your authorized Pride Provider, therapist(s), and other healthcare professionals are responsible for determining your requirement for a positioning belt in order to operate your PMV safely. WARNING! If you require a positioning belt to safely operate your PMV, make sure it is fastened securely.
-
Page 17: Emi/Rfi
ELECTROMAGNETIC AND RADIO FREQUENCY INTERFERENCE (EMI/RFI) WARNING! Laboratory tests have shown that electromagnetic and radio frequency waves can have an adverse affect on the performance of electrically-powered mobility vehicles. Electromagnetic and Radio Frequency Interference can come from sources such as cellular phones, mobile two- way radios (such as walkie-talkies), radio stations, TV stations, amateur radio (HAM) transmitters, wireless computer links, microwave signals, paging transmitters and medium-range mobile transceivers used by emergency vehicles. -
Page 18: Specifications
I V . Figure 4. Hurricane Dimensions 13" Figure 4A. Hurricane Tire Dimensions (Front and Rear) S P E C I F I C A T I O N S 20.5" 16.5" - 19.5" 4" 18" 18" 24" 19" 24" 4"... - Page 19 I V . Model Number Colors Overall Length Overall Width Total Weight Total Weight Without Batteries Heaviest Piece When Disassembled Turning Radius Speed (Maximum) Range Per Charge Ground Clearance Weight Capacity Standard Seating Drive System Dual Braking System Tires Battery Requirements Battery Charger (1) Varies with user weight, terrain type, battery amp-hour (Ah raiting), battery charge, battery condition, and (2) Due to manufacturing tolerances and continual product improvement, this specification can be subject to a variance of (+ or –...
-
Page 20: Your Pmv
TILLER CONSOLE The tiller console houses all of the controls needed to drive your PMV, including the speed adjustment dial, half/full speed switch, throttle control lever, battery condition meter, lights switch, hazard lights switch, turn signal buttons, status LED, and horn buttons. See figure 5. WARNING! Do not expose the tiller console to moisture. - Page 21 Key Switch Insert the key into the key switch and turn it clockwise to power up (turn on) your PMV. Turn the key counterclockwise to power down (turn off) your PMV. WARNING! If the key is moved to the “off” position while your PMV is in motion, the electronic brakes engage and your PMV will come to an abrupt stop! Lights Switch This switch controls your PMV’s lights.
- Page 22 Status LED The status LED alerts you to electrical problems that may occur with the PMV. The LED remains constantly lit while your PMV is on. If your PMV develops an elec- trical problem, the status LED will flash a code. See X. “Basic Troubleshooting”...
- Page 23 Motor/Transaxle Assembly (Not Shown) The motor/transaxle assembly is an electromechanical unit that converts electrical energy from your PMV’s bat- teries into the controlled mechanical energy that drives the PMV’s wheels. Manual Freewheel Lever Whenever you need or want to push your PMV for short distances, you can put it in freewheel mode. Remove the key from the key switch.
-
Page 24: Batteries And Charging
V I . B A T T E R I E S A N D C H A R G I N G Your PMV requires two long-lasting, 12-volt, deep-cycle batteries that are sealed and maintenance free. They are recharged by an off-board charging system. Charge your PMV’s batteries prior to using it for the first time. - Page 25 V I . B A T T E R I E S A N D C H A R G I N G WARNING! You must recharge your PMV’s batteries with the supplied off-board charger. Do not use an automotive-type battery charger. WARNING! Inspect the battery charger, wiring and connectors for damage before each use.
- Page 26 V I . B A T T E R I E S A N D C H A R G I N G FREQUENTLY ASKED QUESTIONS How does the charger work? When your PMV’s battery voltage is low, the charger works harder, sending more electrical current to the batteries to bring up their charge.
- Page 27 V I . B A T T E R I E S A N D C H A R G I N G How can I get maximum range or distance per charge? Rarely will you have ideal driving conditions—smooth, flat, hard driving surfaces with no wind or curves. Often, you will face hills, pavement cracks, uneven and loosely packed surfaces, curves, and wind, all of which affect the distance or running time per battery charge.
- Page 28 V I . B A T T E R I E S A N D C H A R G I N G BATTERY DISPOSAL AND RECYCLING If you encounter a damaged or cracked battery, immediately enclose it in a plastic bag and call your authorized Pride Provider for instructions on disposal.
-
Page 29: Operation
V I I . BEFORE GETTING ON YOUR PMV Have you fully charged the batteries? See VI. “Batteries and Charging.” Is the manual freewheel lever in the drive (backward) position? Never leave the manual freewheel lever pushed forward unless you are manually pushing your PMV. GETTING ONTO YOUR PMV WARNING! Never attempt to get onto or off of your PMV without first removing the key from the key switch. - Page 30 V I I . Pull on the left handgrip to steer your PMV to the left. Pull on the right handgrip to steer your PMV to the right. Move the tiller to the center position to drive straight ahead. To stop, slowly release the throttle control lever. After you release the throttle control lever, gently squeeze the handbrake (if equipped) to come to a complete stop.
-
Page 31: Comfort Adjustments
V I I I . C O M F O R T WARNING! Remove the key from the key switch before adjusting the tiller or the seat. Never attempt to adjust the tiller or the seat while the PMV is in motion. TILLER ANGLE ADJUSTMENT Your PMV is equipped with a pivoting tiller that allows adjustment to several positions from the PMV deck to... -
Page 32: Disassembly And Assembly
V I I I . C O M F O R T ARMREST ANGLE ADJUSTMENT The armrest angle of your PMV can be adjusted up- ward or downward by turning the adjustment dial. See figure 12B. NOTE: Pivot the armrests upward to make get- ting onto and off of your PMV easier. - Page 33 V I I I . C O M F O R T POWER SEAT (OPTIONAL) Your PMV may be equipped with a power seat option, a power seat switch will be located on the tiller console. See figure 5. The power seat will be equipped with one of two operating systems. Refer to figures 14 and 15 to determine which system your PMV uses and follow the appropriate instructions for safe operation.
- Page 34 I X . D I S A S S E M B L Y DISASSEMBLY You can disassemble the PMV into seven pieces: the seat, the front section, the rear section, the rear shroud, the basket, and the batteries. See figure 14. No tools are required to disassemble or assemble your PMV. Since the disassembled sections of the PMV take up more floor space than the assembled unit, place the PMV on a level, dry surface with sufficient room to move the parts around.
- Page 35 I X . D I S A S S E M B L Y Toggle Latch Release 1. Push in the toggle latch release button while pulling back the toggle latch. See figures 16 and 18A. 2. Position the toggle latch buckle over the top of the toggle latch.
- Page 36 B A S I C Any electromechanical device occasionally requires some troubleshooting. However, most of the problems that may arise can usually be solved with a bit of thought and common sense. Many of these problems occur because the batteries are not fully charged or because the batteries are worn down and can no longer hold a charge. DIAGNOSTIC FLASH CODES The diagnostic flash codes for your PMV are designed to help you perform basic troubleshooting quickly and easily.
-
Page 37: Basic Troubleshooting
B A S I C What if the main circuit breaker repeatedly trips? Charge the PMV’s batteries more frequently. See VI. “Batteries and Charging.” If the problem continues, have both of your PMV’s batteries load tested by your authorized Pride Provider. You may also perform the load test yourself. -
Page 38: Care And Maintenance
X I . C A R E A N D M A I N T E N A N C E Your PMV requires a minimal amount of care and maintenance. If you do not feel confident in your ability to perform the maintenance listed below, you may schedule inspection and maintenance at your authorized Pride Provider. - Page 39 X I . C A R E A N D M A I N T E N A N C E WIRING HARNESSES Regularly check all wiring connections. Regularly check all wiring insulation, including the charger power cord, for wear or damage. Have your authorized Pride Provider repair or replace any damaged connector, connection, or insulation that you find before using your PMV again.
- Page 40 X I . C A R E A N D M A I N T E N A N C E LIGHT BULB REPLACEMENT The PMV’s light bulbs are easily replaceable. Do not use regular automotive-type 12-volt light bulbs; your PMV is equipped with a 24-volt electrical system.
-
Page 41: Warranty
X I I . W A R R A N T Y THREE-YEAR LIMITED WARRANTY For three (3) years from the date of purchase, Pride will repair or replace at our option to the original purchaser, free of charge, any of the following parts found upon examination by an authorized representative of Pride to be defective in material and/or workmanship: Structural frame components, including: Main Frame... - Page 42 Circumstances beyond the control of Pride Labor, service calls, shipping, and other charges incurred for repair of the product, unless specifically autho- rized, IN ADVANCE, by Pride Mobility Products Corporation Repairs and/or modifications made to any part without specific consent from Pride...
- Page 43 N O T E S Hurricane www.pridemobility.com...
- Page 44 *INFMANU2635*...