Table of Contents
Advertisement
Quick Links
Advertisement
Table of Contents

Related Manuals for Planet ADW-4100


Summary of Contents for Planet ADW-4100
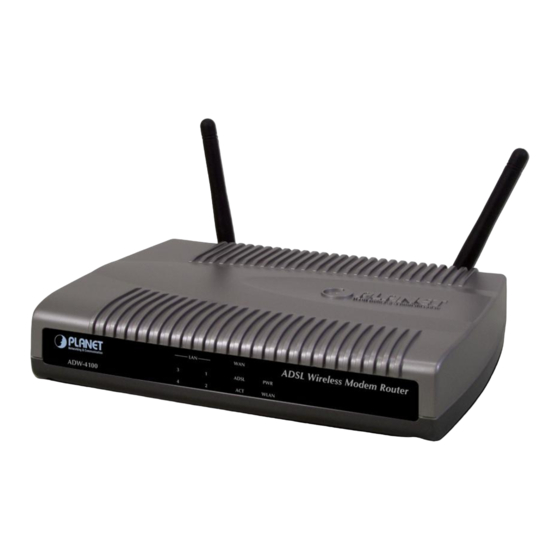
- Page 1 ADSL Wireless Modem Router With 4-port Switch ADW-4100 User’s Manual...
-
Page 2: Fcc Compliance Statement
PLANET Technology. Disclaimer PLANET Technology does not warrant that the hardware will work properly in all environ- ments and applications, and makes no warranty and representation, either implied or expressed, with respect to the quality, performance, merchantability, or fitness for a particu- lar purpose. - Page 3 Trademarks The PLANET logo is a trademark of PLANET Technology. This documentation may refer to numerous hardware and software products by their trade names. In most, if not all cases, these designations are claimed as trademarks or registered trademarks by their respective companies.
-
Page 4: Table Of Contents
Rear Panel ...3 CHAPTER 2 INSTALLATION ...5 System Requirements ...5 Installation Procedure...5 CHAPTER 3 LOGIN AND SYSTEM STATUS...7 Login...7 Preparation...7 Connecting to ADW-4100 ...7 Status ...9 CHAPTER 4 SYSTEM CONFIGURATION...11 Overview ...11 WAN configuration ...11 Per VC Setting ...11 Internet connection services...12 Bridge Mode ...12... - Page 5 Learned MAC Table ...41 ADSL Configuration...42 RIP Configuration ...42 Password Configuration ...44 Misc Configuration...44 Reset to Factory Default...47 Diagnostic Test...47 Code Image Update ...48 Network Code Image Update...48 System Log ...48 APPENDIX A TROUBLESHOOTING ...49 Overview ...49 General Problems ...49 Configuration and Internet Access ...49 APPENDIX B SPECIFICATIONS...51 ADW-4100A/ADW-4100B ...51...
-
Page 6: Chapter 1 Introduction
ADW-4100 incorporates many advanced features, carefully designed to provide sophisticated functions for user’s convenience while surfing in the net. Internet Access Features Shared Internet Access. Internet through ADW-4100, using only a single external IP Address. (Routing mode) Standard Compliance. G.992.1 (G.DMT), and G.992.2 (G.lite). -
Page 7: Lan Features
64-bit and 128-bit WEP encryption, the security of wireless connection can be assured. DHCP Server support. dynamic IP address to PCs and other devices upon request. ADW-4100 can act as a DHCP Server for devices on your local LAN. Configuration & Management Easy Setup. -
Page 8: Physical Details
Transmit data or receive data over Ethernet link. Figure 1-3: Rear Panel This button has two (2) functions: When pressed and released, ADW-4100 will reboot (restart). When reset button is pressed over 10 seconds and then release. ALL data will be clear and restore ALL settings to the factory default values. - Page 9 ADW-4100 User Manual Restore Default IP Address and Clear Password If ADW-4100's IP Address or password is lost, the following procedure can be used to recover from this situation. Pressing the Reset button for more than 10 seconds. ADW-4100 will restore to factory default setting.
-
Page 10: Chapter 2 Installation
Select a suitable place on the network to install ADW-4100. Ensure ADW-4100 is powered OFF. Step 2 Connect LAN Cables Use standard LAN cables to connect PCs to the LAN port on ADW-4100. Either 10BaseT or 100BaseT connections can be used. Step 3 Connect WAN Cable Connect one end of the RJ-11 phone cord to the LINE port on your ADSL modem. - Page 11 ADW-4100 User Manual Connect the supplied power adapter to ADW-4100 and power up. Use only the power adapter provided. Using a different one may cause hardware damage. Step 5 Check the LEDs For each LAN (PC) connection, the corresponding LAN LED should be ON (pro- vided the PC is also ON.).
-
Page 12: Chapter 3 Login And System Status
ADW-4100 must be installed and powered ON. If ADW-4100's default IP Address (10.0.0.2) is already used by another device, the other device must be turned OFF until ADW-4100 is allocated a new IP Ad- dress during configuration. Connecting to ADW-4100 To establish a connection from your PC to ADW-4100: 1. - Page 13 255.0.0.0. See Chapter 5 - PC Configuration for details on checking your PC's TCP/IP settings. Ensure that your PC and ADW-4100 are on the same network segment. (If you don't have a router, this must be the case.) Figure 3-1: Logon Window...
-
Page 14: Status
Login And System Status Status Home Once you login in ADW-4100, its Home page will appear. It shows the firmware versions and WAN and LAN interface status. Figure 3-2: Home page ADSL The ADSL Status page shows the ADSL physical layer status. - Page 15 ADW-4100 User Manual The LAN page shows the information and status of LAN port, DHCP client table, and linking status of Ethernet interface. The PPP page shows the status of PPP for each PPP interface. Figure 3-4: LAN status Figure 3-5: PPP status...
-
Page 16: Chapter 4 System Configuration
Chapter 4 System Configuration This Chapter details the configurations for ADW-4100 Overview This chapter describes the setup procedure for: WAN Access LAN configuration PCs on your local LAN may also require configuration. For details, see Chapter 5 - PC Configuration. -
Page 17: Internet Connection Services
Submit button to switch over. Figure 4-3: Switch between PVCs Internet connection services Types of Internet connection services supported by ADW-4100 are explained below. Bridge Mode Step 1 At the WAN Configuration page, insert the VCI/VPI provided by ISP. -
Page 18: Pppoe, Pppoa Connection For Wan (Routing Mode)
System Configuration Figure 4-5: Encapsulation types of Bridge mode Step 2 Click “submit” to commit modifications you’ve done, then click “Save Configura- tion” to store settings. (Modifications will not take effects until next reboot.) Step 3 Click on “NAT” tab on left panel, and disable the NAT function in the option menu. Figure 4-6: NAT Disable screen Step 4 Click “Save settings”... - Page 19 ADW-4100 User Manual be obtained from ISP. And VCI/VPI values must be obtained from them as well, for some local ISPs don’t offer this information actively. To set up a PPPoE or PPPoA connection for WAN, follow the instructions below: Step 1 Fill in the VCI/VPI entries with the information you get from ISP.
- Page 20 System Configuration connection handshake. The default value is 1432. Authentication When AUTO option is chosen, the PAP mode will run first then CHAP. Automatic Reconnect If you check this option, the Disconnect Timeout should set to 0 second. Otherwise there will be a conflict between them. DHCP Leave this option unchecked.
-
Page 21: Fixed Ip For Wan
Dynamic IP for WAN If ISP provides a dynamic IP for Internet connection, following steps illustrate how to enable the connection via ADW-4100. Step 1 Choose suitable packet encapsulation (1483 Bridged/ Routed LLC, 1483 Bridged/ Routed Mux, Classical IP over ATM). And Disable “Bridge” function. -
Page 22: Other Settings
Step 3 Click on “NAT” tab on left panel, and enable the NAPT function in the option menu. Step 4 Click “Save settings” on left panel to write configuration into machine, and reboot to make settings effective. Other settings Here are explanations about some fields not mentioned above. MAC Spoofing The MAC Spoofing is developed to solve the scenario when the ISP only recog- nizes one MAC address. - Page 23 ADW-4100 User Manual • Special purpose multicast packet (such as RIP 2 packet) should run without interference. Table 4-1 IGMP packets process Note: Before the IGMP mode is enabled; please go to the Misc Configuration page to enable the IGMP proxy. Otherwise, the IGMP selection will not be valid.
- Page 24 Table 4-2 WAN configurations Overview Bridge Mode (Dynamic IP) Configuration - WAN Enabled? Provided by ISP Provided by ISP Static IP Address N/A (0.0.0.0) Subnet Mask N/A (0.0.0.0) Gateway N/A (0.0.0.0) Encapsulation 1483 Bridged IP Bridge Enabled PPP Service Name PPP User Name PPP Password Virtual Circuit...
-
Page 25: Lan Configuration
ADW-4100 User Manual LAN Configuration The LAN IP and Subnet Mask of ADW-4100 are the values seen by the users on their internal network. The default IP is 10.0.0.2 for IP and 255.0.0.0 for Subnet Mask. DHCP Setting A DHCP (Dynamic Host Configuration Protocol) Server automatically assigns IP address to each computer on your network. -
Page 26: Ppp Configuration
System Configuration Figure 4-14: DHCP server settings • Ethernet Mode Setting: By clicking this link, you will be directed to Ethernet Mode page. You can specify the type of LAN connection or use AutoSense. Default is AutoSense. Figure 4-15: Ethernet Mode PPP Configuration This page allows the user to configure multiple PPP sessions for each PVC. - Page 27 ADW-4100 User Manual Ÿ Session Name This field allows the user to enter his/her own session Name to distinguish dif- ferent session for different PPP accounts and different PVCs. Ÿ PVC This field allows the user to choose the specific PVC for PPP session.
-
Page 28: Nat Settings
PPP Configuration Status will be displayed at the bottom of this page to show all the Session Names with its Adapter (PVC number), Mode (PPPoA or PPPoE), Service Name, Account to Use (PPP Account ID), Disconnect Timeout configu- ration, MRU, MTU, MSS, Authentication Mode (Auto, CHAP or PAP), and Auto Reconnect configuration. - Page 29 ADW-4100 User Manual more than one local PC can be associated with one WAN Interface. Click the Session Name Configuration link to add the session name for WAN interface. Ÿ Session Name This field allows the user to select the session from the configured NAT Session Name Configuration.
-
Page 30: Virtual Servers
For Internet users to access all virtual Servers on LAN side, they have to connect to WAN port IP on ADW-4100 allocated by ISP. To provide server-based service, WAN IP address should be static, rather than dynamic, to make it easier for Internet users to connect to your Servers. - Page 31 ADW-4100 User Manual requests of your network, ADW-4100 will forward those requests to the appropriate computer. (Note: DHCP function must be disabled or the local server itself has to be fix-IP addressed to use this function.) This function is generally used to set up a web server, ftp server, or e-mail server on your network.
-
Page 32: Dns Configuration
The DNS Configuration page allows you to set the configuration of DNS proxy. ADW-4100 supports the DNS proxy function. For the DHCP requests from local PCs, the DHCP server will set the LAN port IP as the default DNS server. Thus, all DNS query messages will come into LAN port first. -
Page 33: Wireless Configuration
For example, 0800 is for IP protocol. Figure 4-22: Bridge Filtering Screen Wireless Configuration This page allows user to configure the wireless settings of ADW-4100. Figure 4-23: Wireless Configuration Screen SSID The SSID is the name shared among all points in the wireless network system, must be identical for all points. -
Page 34: Save Settings
13 digits for 128-bit WEP encryption. Save Settings If any modification is made by administrator via web interface, the new settings need to be saved into the flash and reboot ADW-4100 to make the changes effec- tive. Figure 4-24: Save Settings... -
Page 35: Chapter 5 Pc Configuration
This section describes how to configure Windows clients for Internet access via ADW-4100. The first step is to check the PC's TCP/IP settings. ADW-4100 uses the TCP/IP network protocol for all functions, so it is essential that the TCP/IP protocol be installed and configured on each PC. TCP/IP Settings If default ADW-4100 settings are loaded, and default Windows 95/98/ME/2000 TCP/IP configuration, no changes need to be made. - Page 36 If your PC is already configured, do NOT change the settings on the IP Address tab shown in Figure above. On the Gateway tab, enter ADW-4100's IP address in the New Gateway field and click Add, as shown below. Your LAN administrator can advise you of the IP Address they assigned to ADW-4100.
- Page 37 ADW-4100 User Manual Figure 5-3: Gateway Tab (Win 95/98) On the DNS Configuration tab, ensure Enable DNS is selected. If the DNS Server Search Order list is empty, enter the DNS address provided by your ISP in the fields beside the Add button, then click Add.
- Page 38 System Configuration Figure 5-5: Network Configuration (Win 2000) 3. Select the TCP/IP protocol for your network card. 4. Click on the Properties button. You should then see a screen like the following.
- Page 39 If your PC is already configured, check with your network administrator before making the following changes. Enter ADW-4100's IP address in the Default gateway field and click OK. (Your LAN administrator can advise you of the IP Address they assigned to ADW- 4100.)
- Page 40 System Configuration Windows XP 1. Select Control Panel - Network Connection. 2. Right click the Local Area Connection and choose Properties. You should see a screen like the following: Figure 5-7: Network Configuration (Windows XP) 3. Select the TCP/IP protocol for your network card. 4.
-
Page 41: Internet Access
Figure above, unless advised to do so by your network administrator. You can enter ADW-4100's IP address in the Default gateway field and click OK. Your LAN administrator can advise you of the IP Address they assigned to ADW-4100. -
Page 42: Macintosh Clients
Router Address field to ADW-4100's IP Address. Linux Clients To access the Internet via ADW-4100, it is only necessary to set ADW-4100 as the "Gateway". Ensure you are logged in as "root" before attempting any changes. -
Page 43: Chapter 6 Admin Privilege
Chapter 6 Admin Privilege This Chapter details the operation of ADW-4100 and the status screens. The links under Admin Privilege are only to be accessed and configured, when it is login with administrator login name and password. WAN Status The WAN Status page shows the information and status of WAN PVCs. Select the VC number to view connection status. -
Page 44: Tcp Status
Admin Privilege Figure 6-2: ATM Status Screen TCP Status The TCP Status page shows the statistics for all TCP connections. This is for internal network only. Figure 6-3: TCP Status Screen... -
Page 45: Route Table
ADW-4100 User Manual Route Table The Route Table page displays routing table and allows you to manually enter the routing entry. The interface br0 means the USB interface; lo0 means the loop back interface. Routing Table The Gateway field of the static route entry allows users to either enter a Gateway IP address or select a Network Interface. -
Page 46: Learned Mac Table
Admin Privilege System Default Gateway Configuration The system-wide Default Gateway now provides three options: Auto, User- selected Network Interface, and None. None This field allows the user to choose to have no Default Gateway in the CPE Auto This field allows the user to select the CPE to automatically decide the Default Gateway. -
Page 47: Adsl Configuration
ADW-4100 User Manual ADSL Configuration The ADSL Configuration page allows you to set the configuration for ADSL proto- cols. Trellis Trellis Code. By default, it is always enabled. Handshake Protocol This is for the ADSL handshake protocol. Wiring Selection The wiring selection for the RJ-11. - Page 48 Privilege This field allows the user to Enable or Disable the RIP session. The resulting RIP session will monitor all network interfaces that are currently available for messages from other RIP routers. Supplier Interval This field allows the user to enter the Supplier Interval timer in second. This timer specifies how often RIP sends announcements as a RIP Supplier.(Default = 30 seconds) Expire Timeout...
-
Page 49: Password Configuration
ADW-4100 User Manual V2 MC: The supplier transmits in RIPv2 Multicast. Listener This field allows the user to select the Listener Mode (RIP Receive) V1: The listener receives the RIPv1 only. V2: The listener receives the RIPv2 only. V1+V2: This listener receives the both RIPv1 and RIPv2. - Page 50 Figure 6-9: Miscellaneous Configuration Screen WAN side HTTP server When it is enabled, the Web setting pages of ADW-4100 can be accessed from the WAN side. Users can limit the administration privileges to a specified IP address or limit to LAN side user. Meantime,...
- Page 51 Figure 6-10: Example for TFTP server HTTP server port HTTP server port in ADW-4100 can be changed to other secure port number. For example, when it is changed to 8888, the HTTP server address for the LAN side is http://10.0.0.2:8888.
-
Page 52: Reset To Factory Default
Admin Privilege nect: Some ISPs would terminate the PPP session due to the inactivity. For the PPP connect on WAN access, the PPP will be automatically reconnected when an URL is entered in the browser (packet interested in going out the WAN). For the Automatic Reconnect, it will reconnect the PPP session whenever it is terminated by ISP. -
Page 53: Code Image Update
ADW-4100 User Manual Code Image Update The Code Image Update page allows you to upgrade the image code locally. Browse the location of firmware file, and click the Upload to start the update. Network Code Image Update The Network Code Image Update page allows user to upgrade the image code from remote FTP server. -
Page 54: Appendix A Troubleshooting
This Appendix covers the most likely problems and their solutions. Overview This chapter covers some common problems that may be encountered while using ADW-4100 and some possible solutions to them. If you follow the suggested steps and ADW-4100 still does not function properly, contact your dealer for further advice. - Page 55 ADW-4100 User Manual If the PPP is disconnected after the Disconnect Timeout and how can Question 2 I reconnect it? You have to go to the PPP link under Status column, choose the Answer 2 correct PVC and Connect option, and then click Execute to restart a new PPP secession.
-
Page 56: Appendix B Specifications
Appendix B Specifications ADW-4100A/ADW-4100B Product ADSL Wireless Modem Router Model ADW-4100A ADSL Standards Annex A Full-rate ANSI T1.413 issue 2 and ITU-T G992.1 (G.DMT), Splitterless ITU-T G.992.2 (G.lite) Wireless Standard IEEE802.11b Wireless Channel FCC: 11 Channels (US, Canada) ETSI: 13 Channels (Europe) TELEC: 14 Channels (Japan) Protocol Support RFC2364 - PPP over ATM (LLC/VCMUX)