Table of Contents
Advertisement
Quick Links
Advertisement
Table of Contents

Related Manuals for Planet WDAP-2000PE


Summary of Contents for Planet WDAP-2000PE
- Page 1 54/108Mbps Super A+G Wireless Access Point WDAP-2000PE User’s Manual...
-
Page 2: Federal Communication Commission Interference Statement
Copyright Copyright© 2005 by PLANET Technology Corp. All rights reserved. No part of this publica- tion may be reproduced, transmitted, transcribed, stored in a retrieval system, or translated into any language or computer language, in any form or by any means, electronic, mechanical, magnetic, optical, chemical, manual or otherwise, without the prior written permission of PLANET. -
Page 3: Ce Mark Warning
This is a Class A product. In a domestic environment, this product may cause radio interfer- ence, in which case the user may be required to take adequate measures. Revision User’s Manual for PLANET 54/108Mbps Super A+G Wireless Access Point Model: WDAP-2000PE Rev: 1.0 (August, 2005) Part No. EM-WDAP2000PE... -
Page 4: Table Of Contents
CHAPTER 1 INTRODUCTION ... 3 1.1 Package Contents ... 3 1.2 Features... 3 1.3 Physical Details ... 4 1.4 Specification ... 5 1.6 Wireless Performance... 6 CHAPTER 2 INSTALLATION... 7 2.1 General Installation ... 7 2.2 Using PoE (Power over Ethernet) ... 7 CHAPTER 3 SETUP &... - Page 5 4.5.6 Grant Remote Access for Users ... 40 4.6 802.1x Client Setup on Windows XP ... 41 4.6.1 Client Certificate Setup... 41 4.6.2 802.1x Authentication Setup ... 44 4.7 Using 802.1x Mode ... 47 APPENDIX A TROUBLESHOOTING... 48 APPENDIX B COMMAND LINE INTERFACE ...
-
Page 6: Introduction
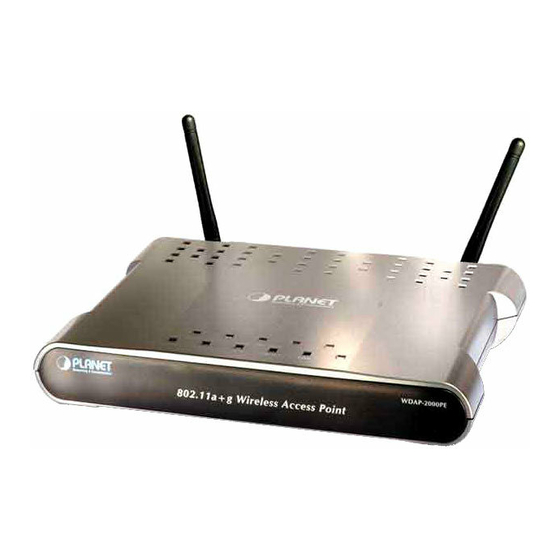
PLANET WDAP-2000PE is an IEEE 802.11a+g dual band Wireless Ac- cess Point with PoE. With the latest innovative Super A/G technology integrated, the maximum data rate of WDAP-2000PE is 108Mbps, which doubles the speed of standard 802.11a/g. WDAP-2000PE is also backward compatible and interoperable with IEEE 802.11b compliant wireless devices. -
Page 7: Physical Details
1.3 Physical Details Top View POWER PWR Link/Act 100M 5 GHz WLAN 2.4GHz Status Description Steady Green – Power on OFF – Power off Steady Green - Link is active Flashing Green - Transmit or receive data OFF - No connection Steady Green - Link is active on 100M speed Flashing Green - Transmit or receive data OFF - Link is active on 10M speed... -
Page 8: Specification
Reset Button down continuously for 5 seconds. Use a standard LAN cable (RJ-45 connectors) to connect this port to a 10BaseT or 100BaseT hub on your LAN. WDAP-2000PE IEEE 802.11b, 802.11g, 802.11a DSSS (Direct Sequence Spread Spectrum) OFDM with BPSK, QPSK, 16QAM, 64QAM, DBPSK, DQPSK, 10/100Mbps RJ-45 port * 1, 802.3af compliant... -
Page 9: Wireless Performance
Keep the number of walls, or ceilings between AP and clients as few as possible; otherwise the signal strength may be seriously reduced. Place WDAP- 2000PE in open space or add additional WDAP-2000PE as needed to improve the cover- age. -
Page 10: Installation
3. Connect the other end of the LAN cable to the powered Ethernet port on a suitable PoE Adapter or switch. (IEEE 802.3af compliant) 4. Check the LEDs on the WDAP-2000PE to see it is drawing power via the Ethernet connection. -
Page 11: Setup & Management
In the Address box, enter the IP address of the WDAP-2000PE you want to configure. Please also make sure your PC’s IP address is in the same IP subnet with WDAP-2000PE. You should see a main configuration screen in the web page as the picture below. -
Page 12: Setup Wizard
192.168.1.2 ~ 192.168.1.254, with a Network Mask of 255.255.255.0. 3.3 Setup Wizard The setup wizard helps you to configure the basic settings of WDAP-2000PE in four steps. 3.3.1 Time Settings The time of WDAP-2000PE is automatically synchronized to the local time of the management PC at the first time a connection is made. -
Page 13: Wireless Settings
• Select this option if you have a DHCP Server on your LAN, and you Use the DHCP want the WDAP-2000PE to obtain an IP address automatically. protocol to … 3.3.3 Wireless Settings You can set the SSID, Operating Standard and Channel of 5GHZ and 2.4GHz radios, Common Security Policy in this page. - Page 14 Network ID (SSID) Disable SSID Broadcasting Regulatory Domain WLAN standard for Radio 1 / 2 Select Common Secu- The SSID (up to 32 printable ASCII characters) is the unique name identified in a WLAN. The ID prevents the unintentional merging of two co-located WLANs. Please make sure that the SSID of all stations in the same WLAN network are the same.
-
Page 15: Save Config
This also makes your new settings saved into the permanent memory on your system. connect to your network. WEP: WDAP-2000PE allows you to use WEP data encryption to secure your data from being eavesdropping by unauthorized users. There are WEP64, WEP128 and WEP152 provided for data encryption. -
Page 16: Device Status
3.4 Device Status You can monitor the system general information from the Device Information field. 3.4.1 System Log The system log allows you to track events that have occurred in the system. Such event mes- sages can sometimes be helpful in determining the cause of a problem that you may have encountered. -
Page 17: Bridge Table
3.4.3 Bridge Table The bridge table shows all MAC entries learned from the wired LAN interface, wireless clients, and WDS peers (if running in the WDS mode). -
Page 18: Radio Table
3.4.4 Radio Table Radio table lists current Mode, channel, client associated with them and transmit packet, re- ceived packet, data error. 3.4.5 Site Survey Table This page shows other APs currently in the environment that the system can detect. -
Page 19: Advanced Settings
3.5 Advanced Settings The advanced settings tab contains more configurations for experienced users. However, changing your login password from the default factory setting is highly recommended for secu- rity purposes. 3.5.1 Password Settings The default administrative password is “password”. To change the password, type the current password followed by the new password twice. - Page 20 10 minutes. The Universal Plug and Play (UPnP) feature allows a Windows XP/ME PC to discover this WDAP-2000PE and automatically show an icon on the screen. Then a user can double-click the icon to access this device directly (without having to find out its IP...
-
Page 21: Snmp Settings
2000PE will send logged events over network to the specified server for remote storage and future reviewing. If you check the "Enable Email Log" button, the WDAP-2000PE will send log information to the configured email address through the configured mail server. -
Page 22: Mac Filtering Settings
Assign a specific name and IP address … 3.5.4 MAC Filtering Settings The WDAP-2000PE allows you to define a list of MAC addresses that are allowed or denied to access the wireless network. are enabled, the device can send out TRAP messages automati- cally to the TRAP manager if configured. -
Page 23: Ssid Settings
The table lists all configured MAC Filter entries. To delete entries, check the corresponding select boxes and then press DELETE SELECTED. 3.5.5 SSID Settings The WDAP-2000PE allows you to configure multiple SSID's and correspondiing QoS settings if QoS is enabled. When selected, no MAC address filtering will be performed. - Page 24 Enable VLAN for all SSIDs Enable QoS Enable DiffServ Marking NEW, DELETE SELECTED, SET AS PRIMARY SSID name VLAN ID 802.1p priority DSCP value Once this function is enabled, you can specify an individual VLAN ID and priority tag for each SSID. In this way, you can separate traffic from stations using different SSIDs and so protect the wired network from being accessed by unauthorized stations using certain SSIDs.
-
Page 25: Wireless Settings
3.5.6 Wireless Settings Beacon interval RTS threshold Configure the security policy for the SSID. The WDAP-2000PE broadcasts beacon frames regularly to Default is 100, i.e., ten beacons per announce its existence. second. Decreasing the beacon interval makes passive scanning more reliable and faster. Increasing the beacon interval may improve throughput by decreasing contention for the medium. -
Page 26: Operational Mode
If this frame is not ACKed, the station will be disassociated and then deauthenticated. Currently, each radio of the WDAP-2000PE can be configured to operate in AP or WDS mode. When configured as a WDS, you... -
Page 27: Radius Settings
(a Radius Server) that provides authentication services, and an authen- ticator that provides necessary translation and mediating functions between the authentication server and the stations to be authenticated. The WDAP-2000PE acts as an authenticator, and it relays authentication messages between the RADIUS server and client devices being authenti- cated. -
Page 28: Dos Settings
A Denial of Service attack is one of the popular hacking methods. The attacker tries to make some resource too busy to answer legitimate requests, or to deny legitimate users access to your machine. WDAP-2000PE can be configured to prevent such attack. Authentication fails... - Page 29 When the ping (to the AP) traffic reaches the configured degree Ping flooding filtering (e.g. High, Low), any more such ping packets will be dropped. Higher degree allows less ping traffic to the AP.
-
Page 30: System Tools
3.6 System Tools 3.6.1 Firmware Upgrade You can upgrade the firmware of your WDAP-2000PE. Normally, this is done when a new version of firmware is released. Upgrade procedures: Step 1: Select System Tools Firmware Upgrade from the menu. Step 2: To update the WDAP-2000PE firmware, first download the firmware from the distribu- tor’s web site to your local disk, and then from the above screen enter the path and filename of... -
Page 31: Configuration Save And Restore
3.6.2 Configuration Save and Restore You can save system configuration settings to a file, and later download it back to the WDAP- 2000PE by following the steps below. Step 1: Select Configuration Save and Restore from the System Tools menu. Step 2: Enter the path of the configuration file to save-to/restore-from (or click the Browse button to locate the configuration file). -
Page 32: Factory Default
3.6.3 Factory Default You can reset the configuration of your WDAP-2000PE to the factory default settings. Step 1: Select Factory Default from the System Tools menu. Step 2: Click YES to go ahead and restore the configuration to the factory default. -
Page 33: Pc And Server Configuration
4.1 Overview All Wireless Stations need to have settings which match the Wireless Access Point. These settings depend on the mode in which the WDAP-2000PE is being used. • If using WEP or WPA-PSK, it is only necessary to ensure that each Wireless station's settings match those of the WDAP-2000PE, as described below. -
Page 34: Using Wpa
• The WDAP-2000PE will use its Default Name as its Client Login name. • The Shared Key, set on the Security Screen of the WDAP-2000PE, must match the Shared Secret value on the Radius Server. • Encryption settings must be correct. -
Page 35: Windows 2000 Domain Controller Setup
• rras • webserver (IIS) • Radius Server (Internet Authentication Service) • Certificate Authority 4.5.1 Windows 2000 Domain Controller Setup 1. Run dcpromo.exe from the command prompt. 2. Follow all of the default prompts, ensure that DNS is installed and enabled during installation. -
Page 36: Dhcp Server Configuration
6. Enter the information for the Certificate Authority, and click Next. 7. Click Next if you don't want to change the CA's configuration data. 8. Installation will warn you that Internet Information Services are running, and must be stopped before continuing. Click Ok, then Finish. 4.5.3 DHCP server configuration 1. - Page 37 3. Click Next when the New Scope Wizard Begins. 4. Enter the name and description for the scope, click Next. 5. Define the IP address range. Change the subnet mask if necessary. Click Next. 6. Add exclusions in the address fields if required. If no exclusions are required, leave it blank.
-
Page 38: Certificate Authority Setup
11. If you don't want a WINS server, just click Next. 12. Select Yes, I want to activate this scope now. Click Next, then Finish. 13. Right-click on the server, and select Authorize. It may take a few minutes to complete. - Page 39 4. Select Start - Programs - Administrative Tools - Active Directory Users and Com- puters. 5. Right-click on your active directory domain, and select Properties. 6. Select the Group Policy tab, choose Default Domain Policy then click Edit.
- Page 40 7. Select Computer Configuration - Windows Settings - Security Settings - Public Key Policies, right-click Automatic Certificate Request Settings - New - Automatic Certificate Request. 8. When the Certificate Request Wizard appears, click Next. 9. Select Computer, then click Next.
-
Page 41: Internet Authentication Service (Radius) Setup
2. Right-click on Clients, and select New Client. 3. Enter a name for the access point, click Next. 4. Enter the IP address of the WDAP-2000PE, and set the shared secret, as entered on the Security Profile screen of the WDAP-2000PE. -
Page 42: Grant Remote Access For Users
9. Click Permitted, then OK. Select Next. 10. Select Grant remote access permission. Click Next. 11. Click Edit Profile... and select the Authentication tab. Enable Extensible Authenti- cation Protocol, and select Smart Card or other Certificate. Deselect other authentication methods listed. Click OK. 12. -
Page 43: 802.1X Client Setup On Windows Xp
3. Select the Dial-in tab, and enable Allow access. Click OK. 4.6 802.1x Client Setup on Windows XP Windows XP ships with a complete 802.1x client implementation. If using Windows 2000, you can install SP4 (Service Pack 4) to gain the same functionality. If you don't have either of these systems, you must use the 802.1x client software provided with your wireless adapter. - Page 44 4. On the first screen (below), select Request a certificate, click Next. 5. Select User certificate request and select User Certificate, the click Next.
- Page 45 6. Click Submit. 7. A message will be displayed, then the certificate will be returned to you. Click Install this certificate.
-
Page 46: 802.1X Authentication Setup
8. . You will receive a confirmation message. Click Yes. 9. Certificate setup is now complete. 4.6.2 802.1x Authentication Setup 1. Open the properties for the wireless connection, by selecting Start - Control Panel - Network Connections. 2. Right Click on the Wireless Network Connection, and select Properties. 3. - Page 47 Encryption Settings The Encryption settings must match the APs (WDAP-2000PE) on the Wireless net- work you want to join. • Windows XP will detect any available Wireless networks, and allow you to config- ure each network independently. • Your network administrator can advise you of the correct settings for each net- work.
- Page 48 2. Select the wireless network from the Available Networks list, and click Configure. 3. Select and enter the correct values, as advised by your Network Administrator. For example, to use EAP-TLS, you would enable Data encryption, and click the checkbox for the setting: The key is provided for me automatically, as shown be- low.
-
Page 49: Using 802.1X Mode
4.7 Using 802.1x Mode The procedures are similar to using 802.1x. The only difference is that on your client, you must NOT enable the setting: The key is provided for me automatically. Instead, you must enter the WEP key manually, ensuring it matches the WEP key used on the Access Point. -
Page 50: Troubleshooting
If your PC uses a Fixed (Static) IP address, ensure that it is using an IP Address which is compatible with the WDAP-2000PE. (If no DHCP Server is found, the WDAP-2000PE will default to an IP Address and Mask of 192.168.1.1 and 255.255.255.0.) On Windows PCs, you can use Control Panel-Network to check the Properties for the TCP/IP protocol. -
Page 51: Appendix B Command Line Interface
If desired, the Command Line Interface (CLI) can be used for configuration. This creat possibility of creating scripts to perform common configuration changes. Using the CLI - Telnet Start your Telnet client, and establish a connection to the WDAP-2000PE. e.g. Telnet 192.168.1.1 You will be prompted for the password. - Page 52 Description: Set the HTTP server port (for device management) to the one specified. set http timeout <timeout value in minutes, 1-60> Description: Set the timeout value for the HTTP management session. set prompt <string up to 15 characters> Description: Set the command line prompt. set system contact <string up to 60 characters>...
- Page 53 show snmp statistics Description: Display the current SNMP statistics. show trap manager [<string up to 30 characters>] Description: Display the settings of the specified SNMP trap manager. If no trap manager is specified, this command displays the settings of all trap managers. (4) Diagnostics Commands disable log <facility>...