Advertisement
Available languages
Available languages
Quick Links
Front panel
Remote control
9
2
RECEIVER
SLEEP
DIMMER ANALOG ATT
8
1
INPUT SELECTOR
DVD
TV
DVR
RECEIVER
9
F.AUDIO
ADVANCED
ST/DIRECT/
STANDARD
SURR
AUTO SURR
DVD/LD
CD-R
CD
FM
AM
LISTENING MODE
MIDNIGHT/
STANDARD ADV.SURR STEREO
LOUDNESS
2
ANALOG
MIDNIGHT/
10
DIMMER
ATT
LOUDNESS
STANDBY / ON
TOP MENU
MENU
PHONES
TUNER
11
MUTE
TONE
3
EDIT
SETUP
DIALOG E
12
ENTER
ONE
TOUCH
COPY
TUNER EDIT
4
13
S.RETRIEVER
RETURN
5
VOLUME
1
EFFECT/CH SEL
LEVEL
6
MUTE
14
8
PHONES jack
DVD/DVR
HDD
DVD
SUBTITLE
CH
CH
DIMMER
GUIDE
REC
AUDIO
15
TIMER REC
INFO
REC STOP
JUKEBOX
14
DVD/DVR
DISPLAY
CLASS
16
MUTE
SHIFT
MPX
TUNING
STATION
7
TUNER
17
RECEIVER
Display
Note
Keep in mind the following when using the
21
remote control:
• Make sure that there are no obstacles between
the remote and the remote sensor on the unit.
• The remote has a range of about 7 m.
• Remote operation may become unreliable if
strong sunlight or fluorescent light is shining on
the unit's remote sensor.
• Remote controllers for different devices can
interfere with each other. Avoid using remotes
for other equipment located close to this unit.
• Replace the batteries when you notice a fall off
Character display
in the operating range of the remote.
Using the Quick Setup
Important
You can use the Quick Setup to get your
• Certain features explained in this section will
system up and running with just a few button
not be possible depending on the source (for
presses. The receiver automatically makes
example, PCM 88.2 kHz / 96 kHz, DTS 96 kHz
the necessary settings after you have
(24 bit) or WMA9 Pro sources).
selected your room size and listening
Auto playback
position.
The simplest, most direct listening option is the
If you want to make more specific settings,
refer to The System Setup menu.
Auto Surround feature. With this, the receiver
Use the front panel controls for the steps
automatically detects what kind of source you're
below.
playing and selects multichannel or stereo
1 Press
STANDBY/ON to switch on.
playback as necessary.
2 Press QUICK SETUP.
• While listening to a source, press STEREO
3 Use the MULTI JOG dial to choose your
for auto playback of a source.
room size.
Press repeatedly until AUTO SURR. shows briefly
Depending on the distance of your speakers
in the display (it will then show the decoding or
from the listening position, choose between
playback format). Check the digital format
small, medium, or large (S, M or L), M being
indicators in the display to see how the source is
an average-sized room.
being processed.
4 Press ENTER.
Note
5 Use the MULTI JOG dial to choose your
• Stereo surround (matrix) formats are decoded
listening position.
accordingly using 2 Pro Logic II MOVIE.
You can cycle between the following choices:
• The Auto Surround feature is canceled if you
• FWD — If you are nearer to the front
connect headphones or select the multichannel analog
speakers than the surround speakers
inputs.
• MID — If you are equal distance from the
Listening in surround sound
front and surround speakers
• BACK — If you are nearer to the surround
Using this receiver, you can listen to any source
speakers than the front speakers
in surround sound. However, the options
6 Press ENTER to confirm your setup.
available will depend on the type of source you're
The display shows the room size and listening
listening to.
position that you have selected.
• While listening to a source, press STANDARD.
If the source is Dolby Digital, DTS, or Dolby
Surround encoded, the proper decoding format
Making receiver settings from
Note
• If you are using a Sound Pressure Level (SPL) meter,
the System Setup menu
take the readings from your main listening position
The following section shows you how to make
and adjust the level of each speaker to 75 dB SPL
detailed settings to specify how you're using the
(C-weighting/slow reading).
receiver and also explains how to fine-tune
• The subwoofer test tone is output at low volumes.
individual speaker system settings to your liking.
You may need to adjust the level after testing with an
1 Press RECEIVER on the remote control, then
actual soundtrack.
press the SETUP button.
Speaker Distance
2 Use
/
to select the setting you want to
1 Select 'SP DISTN.' from the SP SETUP
adjust then press ENTER.
menu.
• SP SETUP allows you to specify the distance
2 Use
and balance of the speakers you've connected:
want then set the distance.
CH LEVEL — Adjust overall balance of your
Use
speaker system.
speaker (in 10 cm (0.5 ft.) increments).
SP DISTN. — Specify the distance of your
3 When you're finished, press RETURN.
speakers from the listening position.
Tip
• OTHER allows you to make customized settings
• For best surround sound, make sure the
to reflect how you are using the receiver.
surround back speakers are the same distance
DRC — This setting specifies the amount of
from the listening position.
dynamic range adjustment to Dolby Digital
and DTS movie soundtracks (use this when
Dynamic Range Control Setup
listening to surround sound at low volumes).
• Default setting: OFF
DUAL MONO — You can specify how dual
1 Select DRC from the OTHER setup menu.
mono encoded Dolby Digital soundtracks
2 Use
should be played (dual mono is sometimes
want.
used when two languages need to be sent to
• OFF — No dynamic range adjustment (use
separate channels).
when listening at higher volume).
LFE ATT — Some Dolby Digital and DTS
• MID — Mid setting.
audio sources include ultra-low bass tones.
• MAX — Dynamic range is reduced (loud
Set the LFE attenuator as necessary to
sounds are reduced in volume while quieter
prevent the ultra-low bass tones from
sounds are increased).
distorting the sound from the speakers.
3 When you're finished, press RETURN.
Channel level
Dual Mono Setup
1 Select CH LEVEL from the SP SETUP menu.
• Default setting: CH1
2 Use
/
to select a setup option.
1 Select DUAL MONO from the OTHER setup
• T. TONE M. — Move the test tone manually
menu.
from speaker to speaker and adjust individual
2 Use
channel levels.
want.
• T. TONE A. — Adjust channel levels as the test
• CH1 — Only channel 1 is played
tone moves from speaker to speaker
• CH2 — Only channel 2 is played
automatically.
• CH1 CH2 — Both channels are played
3 Confirm your selected setup option.
through the front speakers
The test tones will start after you press ENTER.
3 When you're finished, press RETURN.
After the volume increases to the reference level,
Note
test tones will be output.
• This setting works only with dual mono
4 Adjust the level of each channel using
/
.
encoded Dolby Digital and DTS soundtracks.
If you selected T. TONE M., use
/
to switch
speakers.
LFE Attenuator Setup
The T. TONE A. setup will output test tones in the
• Default setting: ATT 0 dB
following order:
1 Select LFE ATT from the OTHER setup menu.
L
C
R
RS
LS
SW
2 Use
want.
Adjust the level of each speaker as the test tone is
• LFEATT 0 — No limiting (recommended
emitted.
setting)
5 When you're finished, press RETURN.
• LFEATT 10 — 10 dB of limiting
Tip
• LFEATT ** — No sound from LFE channel
• You can change the channel levels at any time
3 When you're finished, press RETURN.
by using EFFECT/CH SEL and +/– on the remote.
Resetting the main unit
Use this procedure to reset all the receiver's settings to the factory default. Use the front panel controls to do
this.
1 Switch the receiver into standby.
2 While holding down the TONE button, press and hold the
seconds.
3 When you see 'RESET?' appear in the display, press the ENTER button.
OK? shows in the display.
4 Press SETUP to confirm.
OK appears in the display to indicate that the receiver has been reset to the factory default settings.
Display
ENTER
MULTI JOG dial
AUDIO MULTI-CHANNEL RECEIVER
SX-217
MULTI JOG
ENTER
VSB
DIALOGUE
TV / SAT
DVR
CD
CD-R / TAPE / MD
FRONT AUDIO
FM
AM
TUNING
STATION
MPX
MODE
ENHANCEMENT
MASTER
SLEEP
VOLUME
QUICK
SETUP
RETURN
SETUP
FRONT
AUDIO INPUT
MULTI JOG
DOWN
UP
FRONT AUDIO INPUT
5
8
10
8
17
18
11
ANALOG
MIDNIGHT/
ATT
LOUDNESS
SLEEP
VSB
DIALOGUE
MPX
MODE
ENHANCEMENT
4
19
20
3
13
TUNER
QUICK
EDIT
TONE
SETUP
SETUP
RETURN
MULTI JOG
22
23 24 25 26
27
28 29 30
31
SP
A
32
33
34 35
36
Master volume level
will automatically be selected and shows in the
display.
With two channel sources, press STANDARD
repeatedly to select from:
• 2 Pro Logic II MOVIE — Up to 5.1 channel
sound, especially suited to movie sources
• 2 Pro Logic II MUSIC — Up to 5.1 channel
sound, especially suited to music sources
• 2 Pro Logic II GAME — Up to 5.1 channel
sound, especially suited to video games
• 2 PRO LOGIC — 5.1 channel surround sound
Using the Advanced surround effects
Try different settings with various soundtracks to see
which you like.
• Press ADV.SURR.(ADVANCED SURROUND)
repeatedly to select a listening mode.
• ADV. MOVIE — Suitable for movie sources.
• ADV. MUSIC — Suitable for music sources.
• TV SURR. — Provides surround sound for both
mono and stereo TV sources.
• SPORTS — Suitable for sports programs.
• ADV. GAME — Suitable for video games.
• EXPANDED — Simulates multichannel surround
sound for two-channel sources.
• EX. POWER (Extra Power) — Gives multichannel
sound to a stereo source, using all of your speakers.
• VIR. SURR — A virtual surround effect using just
the subwoofer and front speakers.
• PHONESUR. (Phones Surround) — Creates the
effect of overall surround with headphones.
Note
Use with Dolby Pro Logic for a stereo surround
•
effect (stereo field is wider than Standard modes
with Dolby Digital sources).
Listening to the radio
The following steps show you how to tune in to FM and AM radio
broadcasts and memorize the frequency for recall later.
1 Press AM or FM to select the tuner band.
2 Tune to a station.
There are three ways to do this:
• Automatic tuning — Press and hold TUNING +/– for about a
second. Searching automatically stops at the next station.
• Manual tuning — To change the frequency one step at a time,
press TUNING +/–.
• High speed tuning — Press and hold TUNING +/– continuously.
If the signal is weak, press the MPX button to switch the receiver
/
to choose the speaker that you
into mono reception mode.
/
to adjust the distance of each
Saving station presets
This receiver can memorize up to 30 stations, stored in three banks
of 10 stations each.
1 Tune to a station you want to memorize.
2 Press TUNER EDIT to select 'ST. MEMORY'.
3 Press CLASS to select one of the three classes then press
STATION (+/–) to select the station preset you want.
You can also use the MULTI JOG dial after pressing STATION (front
panel) to select station presets.
4 Press ENTER to store the station.
Note
to choose the setting that you
/
• When saving an FM frequency, the MPX setting is also stored.
Troubleshooting
Incorrect operations are often mistaken for trouble and malfunctions. If you think that there is something wrong with this component, check
the points below. Take a look at the other components and electrical appliances being used, because sometimes the problem may lie there. If
the trouble isn't sorted out even after going through the checks below, ask your nearest Pioneer authorized independent service company to
carry out repair work.
Note
If the unit does not operate normally due to external effects such as static electricity, disconnect the power plug from the outlet and insert
again to return to normal operating conditions.
/
to choose the setting that you
Problem
The power does not turn on.
No sound is output when a function is
selected.
No image is output when a function is
selected.
/
to choose the setting that you
Considerable noise in radio broadcasts.
Broadcast stations cannot be selected
automatically.
No sound from surround or center
speakers.
No sound from subwoofer.
Noise during playback of a cassette deck.
No sound is output or a noise is output
when software with DTS is played back.
STANDBY/ON button for about three
During a playback search, noise is output
from a DTS compatible CD player.
Can't operate the remote
control.
The display is dark or off.
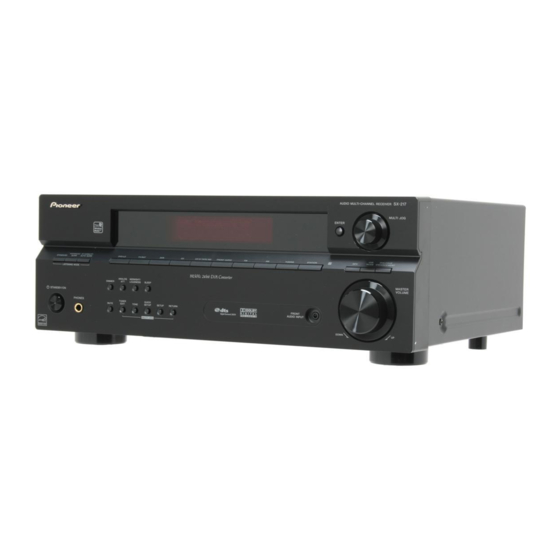
Operating Instructions for the SX-217-K Audio Multi-Channel Receiver
1 RECEIVER
(STANDBY/ON )
10 MIDNIGHT/LOUDNESS
Switches the receiver between standby and on.
These features give you good sound at low volume
2 Listening mode buttons
levels when listening to movie (Midnight) or music
STANDARD
(Loudness) sources. Press to switch between
Press for Standard decoding and to switch between
MIDNIGHT, LOUDNESS, and OFF.
Pro Logic II options.
11 MENU
ADV.SURR.
Displays the disc menu of DVD-Video discs.
Switches between the various surround modes.
DIALOG E (DIALOGUE ENHANCEMENT)
STEREO
This feature localizes dialog in the center channel to
Switches between direct and stereo playback. Direct
make it stand out from other background sounds in a
playback bypasses the tone controls for the most
TV or movie soundtrack.
12
/ENTER
accurate reproduction of a source. Also selects the
Auto Surround mode.
13 RETURN
3 TOP MENU
Confirm and exit the current menu screen.
Displays the disc 'top' menu of a DVD disc.
ONE TOUCH COPY
SETUP
Copies the currently playing title from DVD to HDD or
Press to access the System Setup menu.
vice-versa.
*
4 TUNER EDIT
14 MUTE
Press to memorize and name a station for recall. Also
Mutes/unmutes the sound.
functions as the SETUP button for DVD/DVR units.
15 DVD/DVR control buttons
S.RETRIEVER
You can use these buttons to control a Pioneer DVD
Press to restore CD quality sound to compressed
player or recorder connected to your system.
audio sources.
5 (MASTER) VOLUME +/–
Button
What it does
Use to set the listening volume.
6 EFFECT/CH SEL
Turns DVD player or recorder power on/off.
DVD/DVR
Press repeatedly to select a channel, then use LEVEL
AUDIO
Changes the audio language or channel.
+/– to adjust the level. Also selects the Advanced
SUBTITLE
Displays/changes the subtitles on
Surround effect level (use LEVEL +/– to adjust).
multilingual DVD-Video discs.
LEVEL +/–
Use to adjust the effect and channel levels.
CH +/–
Switches channels.
7 SHIFT
Starts/resumes normal playback.
Press to access commands in a rectangle (above the
Pauses/unpauses a disc.
buttons) on the remote. These buttons are marked
Stops playback.
with an asterisk (
*
) in this section.
8 SLEEP
Press to start fast reverse scanning.
Press to change the amount of time before the
Press to start fast forward scanning.
receiver switches into standby (30 min - 60 min - 90
Skips to the start of the current track or
min - Off).
chapter, then previous tracks/chapters.
DIMMER
Skips to the next track or chapter.
Dims or brightens the display.
ANALOG ATT
HDD/DVD
*
Switch between the hard disk and DVD
controls for DVD/HDD recorders.
Attenuates (lowers) the level of an analog input signal
to prevent distortion.
GUIDE
*
Displays the guides on a DVD recorder.
9 INPUT SELECTOR buttons
ìREC
*
Starts recording.
Press to select an input source (press DVD/DVR to
TIMER REC
*
Accesses the timer recording menu.
use the DVD player/recorder controls on the remote).
RECEIVER
INFO
*
Displays additional EPG information.
Use to switch to the receiver controls on the remote
REC STOP
*
Stops recording.
control. Also used when setting up the surround
JUKEBOX
*
Switches to the Jukebox feature.
sound for the receiver.
Setting the effect options
When using surround effects, there are a number of
settings you can adjust.
1 Press EFFECT/CH SEL repeatedly to select the
setting you want to adjust.
Depending on the current status / mode of the
receiver, certain options may not appear. Check the
table below for notes on this.
2 Use the LEVEL+/– buttons to set it as necessary.
See the table below for the options available for each
setting. The defaults, if not stated, are listed in bold.
3 Press EFFECT/CH SEL again to adjust other
settings.
Setting
What it does
Center Width*
Spreads the center channel
between the front right and
left speakers, making it sound
wider (higher settings) or
narrower (lower settings).
Dimension*
Adjusts the surround sound
balance from front to back,
making the sound more
distant (minus settings), or
more forward (positive
settings).
Panorama*
Extends the front stereo image
to include surround speakers
for a 'wraparound' effect.
Effect
Sets the effect level for the
currently selected Advanced
Surround mode (each mode
can be set separately).
* Only available with 2 ch sources in Dolby Pro Logic II
Music mode.
Naming station presets
You can your station presets for easy recall.
1 Choose the preset you want to name.
See Listening to station presets below.
2 Press TUNER EDIT to select 'ST. NAME'.
A cursor appears at the first character position.
3 Input the name you want then press ENTER.
Use the MULTI JOG dial (front panel) or the STATION +/- buttons
(remote) to select characters, and ENTER to confirm. If no
character is input, a space is input.
Tip
• Once you have named a station preset, you can press DISPLAY when
listening to a station to switch the display between the name and the
frequency.
Listening to station presets
You will need to have some presets stored to do this. See Saving
station presets if you haven't done this already.
1 Press AM or FM to select the tuner.
2 Press CLASS to select the class in which the station is
stored.
Press repeatedly to cycle through classes A, B and C.
3 Press STATION +/– to select the station preset you want.
Remedy
• Connect the power plug to the wall outlet.
• Disconnect the power plug from the outlet, and insert again.
• Make sure there are no loose strands of speaker wire touching the rear panel. This could
cause the receiver to shut off automatically.
• If the power shuts off automatically, take the unit to your nearest Pioneer authorized service
center or your dealer for servicing.
• Make sure the component is connected correctly.
• Press MUTE on the remote control to turn muting off.
• Adjust the MASTER VOLUME.
• Make sure the component is connected correctly.
• Select the correct component (use the INPUT SELECTOR buttons).
• Tune in the correct frequency.
• Connect the antenna and adjust the direction and position for best reception.
• Route any loose cables away from the antenna terminals and wires.
• Fully extend the FM wire antenna, position for best reception, and secure to a wall.
• Connect an outdoor FM antenna.
• Connect an additional internal or external AM antenna.
• Turn off the equipment causing the noise or move it away from the receiver.
• Move antennas farther away from equipment causing the noise.
• Connect an outdoor antenna.
• Connect the speakers properly.
• Refer to Channel level to check the speaker levels.
• The Dolby Digital or DTS source you are listening to may not have an LFE channel.
• Switch the LFE Attenuator Setup to LFEATT 0 or LFEATT 10.
• Move the cassette deck further from your receiver, until the noise disappears.
• Set the digital volume level of the player to full, or to the neutral position.
• This is not a malfunction, but be sure to turn the volume down to prevent the output of loud
noise from your speakers.
• Replace the batteries.
• Operate within 7 m (23 ft.), 30 of the remote sensor on the front panel.
• Remove the obstacle or operate from another position.
• Avoid exposing the remote sensor on the front panel to direct light.
• Press DIMMER on the remote control repeatedly to return to the default.
16 TUNER controls
The TUNING +/– buttons can be used to find radio
frequencies and the STATION +/– buttons can be used
to select preset radio stations.
DISPLAY
Switches the display between station preset name and
frequency.
CLASS
Switches between the three banks (classes) of station
presets.
17 MPX
Use to switch between auto stereo and mono reception
of FM broadcasts. If the signal is weak then switching to
mono will improve the sound quality.
*
18 VSB MODE
Selects the Virtual Surround Back (VSB) mode.
19 TONE
Press this button to access the bass and treble controls,
which you can then adjust with the MULTI JOG dial.
20 QUICK SETUP
21 SIGNAL indicators
Lights to indicate the type of input signal assigned for
the current component:
DIGITAL
Lights when a digital audio signal is detected.
2 DIGITAL
Lights when a Dolby Digital encoded signal is detected.
DTS
Lights when a DTS encoded audio signal is detected.
ANALOG
Lights when an analog signal is detected.
22
When the STANDARD mode of the receiver is on, this
lights to indicate decoding of a DTS multichannel
signal.
23 2 DIGITAL
When the STANDARD mode of the receiver is on, this
lights to indicate decoding of a Dolby Digital
multichannel signal.
24 2 PRO LOGIC II
When the (STANDARD) Pro Logic II mode of the
receiver is on, 2 PRO LOGIC II lights to indicate Pro
Logic II decoding.
25 VIR.SB
Lights during Virtual surround back processing.
26 DIRECT
Lights when source direct playback is in use. Direct
playback bypasses the tone controls for the most
accurate reproduction of a source.
Using the Virtual Surround Back mode
Selecting this mode allows you to hear a virtual
surround back channel through your surround
speakers. For example, you can choose to listen to
sources with no surround back channel information
(for example, 5.1 encoded material) with emulated 6.1
encoding (VSB ON). Sometimes the material may
sound better in the 5.1 format for which it was
originally encoded. In this case you can simply switch
it off (VSB OFF).
• Press VSB MODE (front panel) to select a virtual
surround back channel option.
Each press cycles through the options as follows:
• VSB ON — Virtual Surround Back is always used
Options
(for example, on 5.1 encoded material)
• VSB OFF — Virtual Surround Back mode is
0 to 7
Default: 3
switched off
Note
• You can't use the Virtual Surround Back mode with
headphones or with the STEREO / DIRECT mode.
–3 to +3
Default: 0
Listening in stereo
When you select STEREO or DIRECT, you will hear the
source through just the front left and right speakers
(and subwoofer). Dolby Digital and DTS multichannel
OFF
sources are downmixed to stereo.
• While listening to a source, press STEREO for
ON
stereo playback.
10 to 90
Press repeatedly to switch between:
• STEREO — The audio is heard with your surround
settings and you can still use the Midnight,
Loudness, and tone functions.
Register Your Product at:
http://www.pioneerelectronics.com
http://www.pioneerelectronics.ca
27 AUTO SURR.
Lights when the Auto Surround feature is switched
on.
28 ATT
Lights when ANALOG ATT is used to attenuate
(reduce) the level of the analog input signal.
29 SLEEP
Lights when the receiver is in sleep mode.
30 Tuner indicators
/ MONO
Lights when the mono mode is set using the MPX
button.
/ STEREO
Lights when a stereo FM broadcast is being received
in auto stereo mode.
/ TUNED
Lights when a broadcast is being received.
31 Speaker indicator
Shows if the speaker system is on or not. SP A
means the speakers are switched on. SP means
the headphones are connected.
32 ADV.SURR. (Advanced Surround)
Lights when one of the Advanced Surround modes
has been selected.
33 WMA9 Pro
Lights to indicate decoding of a WMA9 Pro signal.
34 MIDNIGHT
Lights during Midnight listening.
35 D.E.
Lights when Dialog Enhancement (DIALOG E) is
switched on.
36 LOUDNESS
Lights during Loudness listening.
Manufactured under license from Dolby Laboratories.
"Dolby", "Pro Logic", and the double-D symbol are
trademarks of Dolby Laboratories.
"DTS" is a registered trademark of DTS, Inc. and "DTS
96/24" is a trademark of DTS, Inc.
• DIRECT — Bypass all effects and surround
settings so that the audio remains as close to the
source audio signal as possible.
• AUTO SURR. — See Auto playback above.
Note
• DIRECT switches to STEREO when using Midnight,
Loudness, Dialog Enhancement, or the tone controls.
Using the Sound Retriever
When audio data is removed during the
compression process, sound quality often suffers
from an uneven sound image. The Sound Retriever
feature employs new DSP technology that helps
bring CD quality sound back to compressed
2-channel audio by restoring sound pressure and
smoothing jagged artifacts left over after
compression.
• While listening to a source, press S.RETRIEVER.
Press repeatedly to switch between:
• RTRV1 ON — This option is engineered
especially for portable digital audio players.
• RTRV2 ON — This option is engineered
especially for portable digital radio devices (only
applicable when using the FRONT AUDIO INPUT).
• OFF — Switches the Sound Retriever off.
Specifications
Amplifier section
• Continuous power output
Front
100 W per channel* (200 Hz to 20 kHz, 0.7 %**, 8 Ω)
100 W*(200 Hz to 20 kHz, 0.7 %**, 8 Ω)
Center
Surround
100 W per channel*(200 Hz to 20 kHz, 0.7 %**, 8 Ω)
100 W*(45 Hz to 200 kHz, 0.7 %**, 8 Ω)
Subwoofer
• RMS Power Output
144 W per channel (1 kHz, THD, 10 %, 8 Ω)
Front
144 W (1 kHz, THD, 10 %, 8 Ω)
Center
144 W per channel (1 kHz, THD, 10 %, 8 Ω)
Surround
144 W (1 kHz, THD, 10 %, 8 Ω)
Subwoofer
* Measured pursuant to the Federal Trade Commission's Trade
Regulation rule on Power Output Claims for Amplifiers.
** Measured by Audio Spectrum Analyzer.
FM Tuner Section
Frequency Range
87.5 MHz to 108 MHz
75 Ω unbalanced
Antenna Input (DIN)
AM Tuner Section
Frequency Range
530 kHz to 1700 kHz
Antenna
Loop antenna
Miscellaneous
Power requirements
AC 120 V / 60 Hz
Power consumption
320 W / 420 VA
In standby
0.5 W
Dimensions
420 mm (W) x 158 mm (H) x 348 mm (D)
16 9/16 in. (W) x 6 1/4 in. (H) x 13 11/16 in. (D)
Weight (without package)
8.6 kg (19.0 lb)
Furnished Parts
AM loop antenna
1
FM wire antenna
1
AA/R6 dry cell batteries
(to confirm system operation)
2
Remote control
1
Mini-plug audio cable
1
These operating instructions
Note
Specifications and the design are subject to possible
modifications without notice, due to improvements.
Published by Pioneer Corporation.
Copyright © 2007 Pioneer Corporation.
All rights reserved.
(US)
(Canada)
<XRE3165-A>
Advertisement

Related Manuals for Pioneer sx 217 k


Summary of Contents for Pioneer sx 217 k
- Page 1 Take a look at the other components and electrical appliances being used, because sometimes the problem may lie there. If the trouble isn’t sorted out even after going through the checks below, ask your nearest Pioneer authorized independent service company to carry out repair work.
- Page 2 • Si l’alimentation de l’appareil se coupe automatiquement, veuillez amener l’appareil au service après- vente Pioneer agréé le plus proche de chez vous ou à votre revendeur pour effectuer les réparations. Aucun son n’est émis lorsqu’une fonction •...