Table of Contents
Advertisement
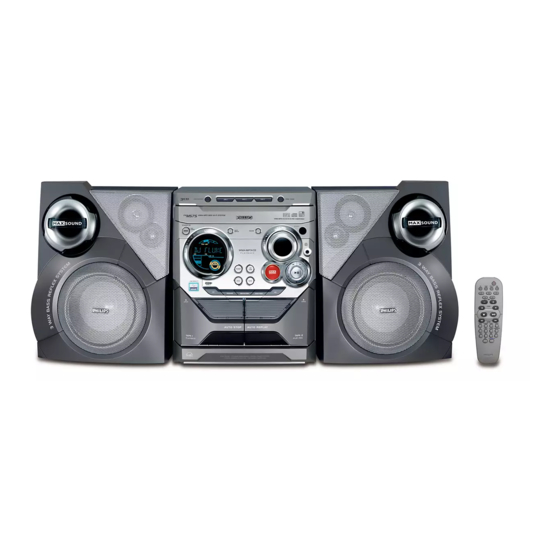
MP3-CD Mini Hi-Fi System
Thank you for choosing Philips.
Need help fast?
Read your Quick Use Guide and/or
Owner's Manual first for quick tips
that make using your Philips product
more enjoyable.
If you have read your instructions
and still need assistance,
you may access our online help at
www.philips.com/support
or call
1-888-PHILIPS (744-5477)
while with your product.
(and Model / Serial number)
Philips vous remercie de
votre confiance.
Besoin d'une aide
rapide?
Les Guide d'utilisation rapide et Manuel de
l'utilisateur regorgent d'astuces destinées à
simplifier l'utilisation de votre produit Philips.
Toutefois, si vous ne parvenez pas à résoudre
votre probléme, vous pouvez accéder à
notre aide en ligne à l'adresse
www.philips.com/support
ou formez le
1-800-661-6162 (Francophone)
1-888-PHILIPS (744-5477) (English speaking)
Veillez à avoir votre produit à
portée de main.
(et model / serial nombre)
FWM575
Gracias por escoger Philips
Necesita ayuda
inmediata?
Lea primero la Guía de uso rápido o el
Manual del usuario, en donde encontrará
consejos que le ayudarán a disfrutar
plenamente de su producto Philips.
Si después de leerlo aún necesita ayuda,
consulte nuestro servicio de
asistencia en línea en
www.philips.com/support
o llame al teléfono
1-888-PHILIPS (744-5477)
y tenga a mano el producto.
(y número de model / serial)
Advertisement
Table of Contents

Related Manuals for Philips FWM575/37B


Summary of Contents for Philips FWM575/37B
- Page 1 Thank you for choosing Philips. Need help fast? Read your Quick Use Guide and/or Owner's Manual first for quick tips that make using your Philips product more enjoyable. If you have read your instructions and still need assistance, you may access our online help at www.philips.com/support...
- Page 2 Canada English: This digital apparatus does not exceed the Class B limits for radio noise emissions from digital apparatus as set out in the Radio Interference Regulations of the Canadian Department of Communications. Français: Cet appareil numérique n'emet pas de bruits radioélectriques dépassant les limites applicables aux appareils numériques de Class B prescrites dans le Règlement sur le Brouillage...
- Page 3 ™ º ª ≥ & § ∞ ª ≤ £ ¡ & •...
- Page 4 Return your Product Registration Card today to get the very most from your purchase. Registering your model with PHILIPS makes you eligible for all of the valuable benefits listed below, so don't miss out. Complete and return your Product Registration Card at once to ensure:...
- Page 5 “family!” Dear PHILIPS product owner: Thank you for your confidence in PHILIPS. You’ve selected one of the best-built, best-backed products available today. We’ll do every- thing in our power to keep you happy with your purchase for many years to come.
-
Page 6: Important Safety Instructions
IMPORTANT SAFETY INSTRUCTIONS Clean only with dry cloth. materials Class II equipment symbol This symbol indicates that the unit has a double insulation system... - Page 7 Index English ------------------------------------------------ 8 Français -------------------------------------------- 36 Español --------------------------------------------- 64...
-
Page 8: Table Of Contents
Contents General Information Supplied accessories ... 9 Acknowledgement ... 9 Environmental information ... 9 Safety information ... 9 Preparations Rear connections ... 10–11 Power Antennas connection Speakers connection Optional connection ... 11 Connecting a USB device or memory card Connecting a non-USB device Inserting batteries into the remote control ... -
Page 9: General Information
This device complies with Part 15 of the FCC Rules. Operation is subject to the following two conditions: (1) this device may not cause harmful interference, and (2) this device must accept any interference received, including interference that may cause undesired operation. Supplied accessories –... -
Page 10: Preparations
Preparations Rear connections The type plate is located at the rear of the system. A Power – Before connecting the AC power cord to the wall outlet, ensure that all other connections have been made. WARNING! – For optimal performance, use only the original power cable. -
Page 11: Speakers Connection
FM Antenna ● For better FM stereo reception, connect an outdoor FM antenna to the FM ANTENNA terminal. Speakers Connection Front Speakers Connect the speaker wires to the SPEAKERS terminals, right speaker to "R" and left speaker to "L", red wires to "+" and black wires to "-" of the woofer connection terminals, gray wires to "+"... -
Page 12: Controls On The System And Remote Control
Controls (illustrations on page 3) Controls on the system and remote control STANDBY-ON/ ECO POWER (B) – switches the system on or to Eco Power standby/normal standby with clock display. DISC 1/2/3 (CD 1/2/3) – to select a disc tray for playback. Source selection –... - Page 13 – to select different brightness for the display screen : DIM 1, DIM 2, DIM 3 or DIM OFF. OPEN # – to open the tape deck door. PROGRAM for CD/ MP3-CD/USB tracks. for Tuner ... to programme preset radio stations.
-
Page 14: Basic Functions
Basic Functions IMPORTANT! Before you operate the system, complete the preparation procedures. Plug and Play (for tuner installlation) Plug and Play allows you to store all available radio stations automatically. First time setup/power up When you turn on the main supply, "AUTO INSTALL - PRESS PLAY"... -
Page 15: Demonstration Mode
Demonstration mode The system has a demonstration mode that shows the various features offered by the system. To activate the demonstration ● In standby mode, press and holdÇon the system for 5 seconds to switch to demonstration. To deactivate the demonstration ●... -
Page 16: Sound Control
Basic Functions Sound control For optimal sound listening, select only one of the following navigation sound controls at a time : MAX, DSC or VAC. MAX Sound MAX sound provides the best mixture of various sound features (DSC, VAC, DBB, for example). ●... -
Page 17: Cd/Mp3-Cd Operations
IMPORTANT! – This system is designed for regular discs. Therefore, do not use any accessories such as disc stabiliser rings or disc treatment sheets, etc., as offered on the market, because they may jam the changer mechanism. – Do not load more than one disc into each tray. -
Page 18: Playing Discs
CD/MP3-CD Operations Press OPEN•CLOSE to close the disc tray. ➜ "READING DISC" scrolls. The selected disc tray, total number of tracks and the playing time will appear on the display. ➜ A lighted button indicates that a disc is loaded on the disc tray. -
Page 19: Different Play Modes: Shuffle And Repeat
Different play modes: SHUFFLE and REPEAT You can select and change the various play modes before or during playback. Press REPEAT on the remote control to select: ➜ "REPEAT TRACK" – to repeat playback of the current track. ➜ "REPEAT DISC" – to repeat playback of the current disc. -
Page 20: Radio Reception
Radio Reception Tuning to radio stations Press TUNER to select TUNER mode. ➜ "TUNER" is displayed. A few seconds later, the current radio frequency will appear on the display. Press TUNER again to select the desired waveband : FM or MW (AM). Press and hold ALBUM-/+à... -
Page 21: Manual Preset Programming
Manual Preset Programming Tune to your desired radio station (refer to “Tuning to radio stations”). Press PROGRAM. ➜ starts flashing. PROG ➜ The next available preset number is displayed for selection. To store the radio station to another preset number ●... -
Page 22: Tape Operation/Recording
Tape Operation/Recording IMPORTANT! – Before playing a tape, check and tighten slack tape with a pencil. Slack tape may get jammed or may burst in the mechanism. – C-120 tape is extremely thin and is easily deformed or damaged. It is not recommended for use in this system. -
Page 23: Rewinding/Fast Forwarding
Rewinding / Fast forwarding Stop playback, press à or á. ➜ The tape will stop automatically at the end of rewinding or fast forwarding. Press Ç to stop rewinding or fast forwarding. Note: – During rewinding or fast forwarding of a tape, it is also possible to select another source (CD or TUNER, for example). -
Page 24: Cd/Usb Synchronised Start Recording
Tape Operation/Recording CD/USB Synchronised start recording Select CD or USB source. ● Press TITLE-/+í/ë to select the desired track, then press RECORD to start recording. ● You can programme the tracks in the order you want them to be recorded (refer to “CD Operation - Programming the disc tracks”). -
Page 25: External Sources
External Sources Using a non-USB device Connect the audio out terminals of the external equipment (TV, VCR, Laser Disc player, DVD player or CD Recorder) to the AUX IN terminals of your system. Press AUX to select external equipment. ➜ "AUX"... - Page 26 External Sources How to organize your MP3/WMA files on the USB mass storage device This Hi-Fi system will browse the MP3/WMA files in the folders/sub-folders/titles order. Example: Root Title 001 Title 002 Title 003 Album 01 Title 001 Title 002 Title 003 Album 02 Album 03...
-
Page 27: Clock/Timer
IMPORTANT! – Use CLOCK•TIMER on the set to set the clock and timer. – To set clock in the Eco Power mode, press and hold STANDBY-ON/ECO POWER 2 on the set for 3 seconds or more to switch to normal standby mode first before proceeding with the procedures below. -
Page 28: Timer Setting
Clock/Timer Timer setting The system can switch on to CD or TUNER mode automatically at a preset time, serving as an alarm to wake you up. IMPORTANT! – Before setting the timer, ensure that the clock is set correctly. – The timer will always be switched on after it has been set. -
Page 29: Specifications
AMPLIFIER FTC output power LF channel ... 64 W per channel HF channel ... 64 W per channel Total Bi-Amp power ... 248 W RMS output power LF channel ... 90 W per channel HF channel ... 90 W per channel Total Bi-Amp power ... -
Page 30: Maintenance
Do not open the system as there is a risk of electric shock. If a fault occurs, first check the points listed below before taking the system for repair. If you are unable to remedy a problem by following these hints, consult your dealer or Philips for help. - Page 31 Radio reception is poor. Recording or playback cannot be made. The tape deck door cannot open. The system does not react when buttons are pressed. Sound cannot be heard or is of poor quality. The left and right sound outputs are reversed.