
Related Manuals for Philips FW320C


Summary of Contents for Philips FW320C
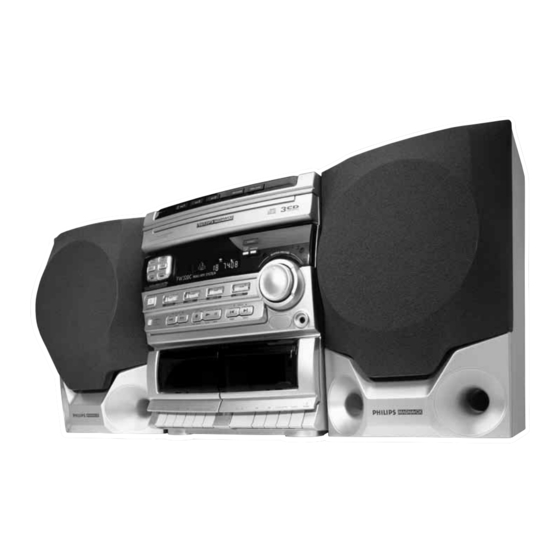
- Page 1 FW55C FW45C mini hifi system FW320C Toll Free Help Line Ligne d'assistance en service libre Linea de ayuada telefónica sin cargo 800-531-0039...
- Page 2 ’re e n t i t l e d t o. • Once your Philips Magnavox purchase is registered, you’re eligible to receive all the privileges of owning a Philips Magnavox product. Warranty...
- Page 3 As a member of the Philips Magnavox “family,” you’re enti- tled to protection by one of the most comprehensive war- ranties and outstanding service networks in the industry.
- Page 4 CAUTION RISK OF ELECTRIC SHOCK DO NOT OPEN CAUTION: TO REDUCE THE RISK OF ELECTRIC SHOCK, DO NOT REMOVE COVER (OR BACK). NO USER-SERVICEABLE PARTS INSIDE. REFER SERVICING TO QUALIFIED SERVICE PERSONNEL. This symbol warns the user that uninsulated voltage within the unit may have sufficient magnitude to cause electric shock.
- Page 5 INDEX FW320C English ...6 Français ...28 Español ...54 FW45C FW55C CLASS 1 LASER PRODUCT...
- Page 6 SAFETY INSTRUCTIONS – Read before operating equipment This product was designed and manufactured to meet strict quality and safety standards. There are, however, some installation and operation precautions which you should be particularly aware of. Read Instructions - All the safety and operating instructions should be read before the appliance is operated.
-
Page 7: Safety Instructions
Note to the Cable TV system installer This reminder is provided to call the Cable TV system installer's attention to Article 820-40 of the NEC that provides guidelines for proper grounding and, in particular, specifies that the cable ground shall be connected to the grounding system of the building, as close to the point of cable entry as practical. Example of Antenna Grounding as per NEC - National Electrical Code Electric Service Equipment... -
Page 8: Limited Warranty
TO GET WARRANTY SERVICE IN U.S.A., PUERTO RICO OR U.S. VIRGIN ISLANDS... Take the product to a Philips factory service center (see enclosed list) or authorized service center for repair.When the product has been repaired, you must pick up the unit at the center. -
Page 9: Table Of Contents
CONTENTS General Information ... 9 Safety Information ... 9 Preparation ... 10 - 11 Controls ... 12 - 13 Operating The System ... 14 - 15 CD ... 16 - 18 Tuner ... 18 - 19 Tape ... 20 - 21 Aux ... -
Page 10: Preparation
PREPARATION Rear Connections FM AERIAL FRONT REAR AM AERIAL – – – – AUX IN AUDIO OUT VOLTAGE SELECTOR 110V- 127V 220V- 240V MAINS... - Page 11 A AM Loop Antenna Connection Connect the supplied loop antenna to the AM AERIAL terminal. Place the AM loop antenna far away from the system and adjust its position for the best reception. B FM Wire Antenna Connection Connect the supplied FM wire antenna to the FM AERIAL terminal.
-
Page 12: Controls
CONTROLS DISC OPTIMAL JAZZ REPEAT SHUFFLE PROGRAM TIMER TECHNO ROCK FW 318C DIGITAL SOUND CONTROL CD 1 • 2 • 3 STANDBY . ON DUBBING TUNING DUBBING • FAST • NORMAL NORMA•HIGH RECORD REPLAY SEARCH TAPE 1 DISC CHANGE OPEN • CLOSE DISC DISC C H A N G E R... - Page 13 Controls on the system and remote control 1 STANDBY-ON – to switch the system on or to standby mode. – to store radio stations automatically by pressing and holding for 5 seconds. 2 SOURCE : to select the following. CD / (CD 1•2•3) –...
-
Page 14: Operating The System
OPERATING THE SYSTEM STEREO OPTIMAL JAZZ NEWS REPLAY REPEAT SHUFFLE PROGRAM TIMER TECHNO ROCK FW 318C DIGITAL SOUND CONTROL TUNER CD 1 • 2 • 3 BAND STANDBY . ON DUBBING TUNING DEMO DUBBING • FAST • NORMAL NORMA•HIGH RECORD REPLAY SEARCH STOP•CLEAR... - Page 15 Selecting the Source • Press the respective source selection button: CD, TUNER, TAPE or AUX. ™ The display indicates the selected source. Note: – For an external source, make sure that you have connected the audio left and right OUT terminals of the external equipment (TV, VCR, Laser Disc or DVD player) to the AUX IN terminals.
- Page 16 DISC DISC 3 CD ROTARY CHANGER SYSTEM • CD SYNCHRO RECORDING OPTIMAL JAZZ STEREO NEWS REPLAY REPEAT SHUFFLE PROGRAM TIMER TECHNO ROCK DIGITAL SOUND CONTROL TUNER CD 1 • 2 • 3 BAND STANDBY . ON DUBBING TUNING DUBBING • FAST •...
-
Page 17: During Playback
Note: – All the available discs will play once, then stop. When the CD has stopped playing, the system will switch to the standby mode after 15 minutes if no button is pressed. Disc Change You can change the outer 2 discs while the third inner disc is at the stop or playing mode. -
Page 18: Tuner
Shuffle (only on remote control) It will play all the available discs and their tracks in random order. Shuffle may also be used when tracks are programmed. To shuffle all the discs and tracks 1 Press SHUFFLE. ™ “SHUFFLE” will be displayed. ™... -
Page 19: Tuner
Tuning to radio stations 1 Press TUNER to select TUNER mode. ™ "TUNER" will be displayed. A few seconds later, the current frequency is displayed. 2 Press TUNER (BAND) again to select the desired waveband : FM or AM. 3 Press TUNING à or á for more than one second, then release. -
Page 20: Tape
TAPE OPTIMAL JAZZ STEREO NEWS REPLAY REPEAT SHUFFLE PROGRAM TIMER TECHNO ROCK DIGITAL SOUND CONTROL TUNER CD 1 • 2 • 3 BAND STANDBY . ON DUBBING TUNING DUBBING • FAST • NORMAL NORMA• HIGH RECORD REPLAY SEARCH STOP•CLEAR TAPE 1 NEWS! CLOCK PROGRAM... -
Page 21: Aux
TAPE Continuous Playback From Tape Deck 2 to Tape Deck 1 1 Press TAPE to select TAPE mode. 2 Load the tapes in tape deck 1 and 2. 3 Press PLAY 2 on tape deck 2. 4 Press PAUSE on tape deck 1. 5 Press PLAY 2 on tape deck 1. -
Page 22: Recording
RECORDING OPTIMAL JAZZ STEREO NEWS REPLAY REPEAT SHUFFLE PROGRAM TIMER TECHNO ROCK DIGITAL SOUND CONTROL TUNER CD 1 • 2 • 3 BAND STANDBY . ON DUBBING TUNING DEMO DUBBING • FAST • NORMAL NORMA• HIGH RECORD REPLAY SEARCH STOP•CLEAR TAPE 1 NEWS! CLOCK... - Page 23 Dubbing tapes (from tape deck 2 to tape deck 1) 1 Load the prerecorded tape into tape deck 2 and a blank tape into tape deck 1. ™ Make sure that both tapes have their full spool to the left. 2 Press DUBBING to switch between normal and high speed dubbing.
-
Page 24: Clock
CLOCK STEREO OPTIMAL JAZZ NEWS REPLAY REPEAT SHUFFLE PROGRAM TIMER TECHNO ROCK DIGITAL SOUND CONTROL TUNER CD 1 • 2 • 3 BAND STANDBY . ON DUBBING TUNING DEMO DUBBING • FAST • NORMAL NORMA• HIGH RECORD REPLAY SEARCH STOP•CLEAR View Clock You can view the clock (if it is set) at standby or any source mode. - Page 25 • At the preset time, the TIMER will be activated. ™ The selected source will be played. ™ The TIMER flag disappears from the display. Notes: – During timer setting, if no button is pressed within 90 seconds, the system will exit timer setting mode automatically.
-
Page 26: Maintenance
SPECIFICATIONS Specifications AMPLIFIER Output power FW45C/FW320C (3 , 1 kHz, 10% THD) . 2 x 5 W RMS FW55C (6 , 1 kHz, 10% THD) ... 2 x 10, 2 x 2 W RMS Signal-to-noise ratio ... 67 dBA (IEC) Frequency response ... -
Page 27: Troubleshooting
• The signal strength is too weak. ™ Adjust the antenna. • The TV or VCR is too close to the stereo system. ™ Separate the stereo system from the TV or VCR. ™ Connect an external antenna for better reception.