Table of Contents
Advertisement
Quick Links
Register your product and get support at
www.philips.com/welcome
EN
LCD television
________________________________
DE
LCD-Fernsehgerät
________________________________
FR
Téléviseur LCD
________________________________
NL
LCD televisie
________________________________
IT
Televisore LCD
________________________________
ES
Televisor LCD
________________________________
PT
Televisor LCD
________________________________
EL
TËÏÂfiÚ·Û˘ LCD
________________________________
32PFL9603
32PFL9613
37PFL9603
42PFL9603
42PFL9703
42PFL9803
47PFL9603
47PFL9703
52PFL9703
Advertisement
Table of Contents

Related Manuals for Philips 32PFL9603


Summary of Contents for Philips 32PFL9603
- Page 1 Register your product and get support at www.philips.com/welcome LCD television ________________________________ LCD-Fernsehgerät ________________________________ Téléviseur LCD ________________________________ LCD televisie ________________________________ Televisore LCD ________________________________ Televisor LCD ________________________________ Televisor LCD ________________________________ TËÏÂfiÚ·Û˘ LCD ________________________________ 32PFL9603 32PFL9613 37PFL9603 42PFL9603 42PFL9703 42PFL9803 47PFL9603 47PFL9703 52PFL9703...
-
Page 3: Table Of Contents
Connection setup 42 Preparing for digital services 43 PC network 44 Technical data 50 Troubleshooting 52 Index 54 UK Digital TV switchover info 56 Remote control setup codes at the end of this book. Register your product and get support at www.philips.com/welcome. - Page 4 Philips is committed to develop, produce and market products that cause no adverse health effects. Philips confirms that if its products are handled properly for their intended use, they are safe to use according to scientific evidence available today.
-
Page 5: Important
Important Read this user manual before you start to use this product. Pay attention to this section and closely follow the instructions. The warranty does not apply to damage caused by not taking into account the instructions. Safety • To avoid short circuit, do not expose the product to rain or water. -
Page 6: Your Tv
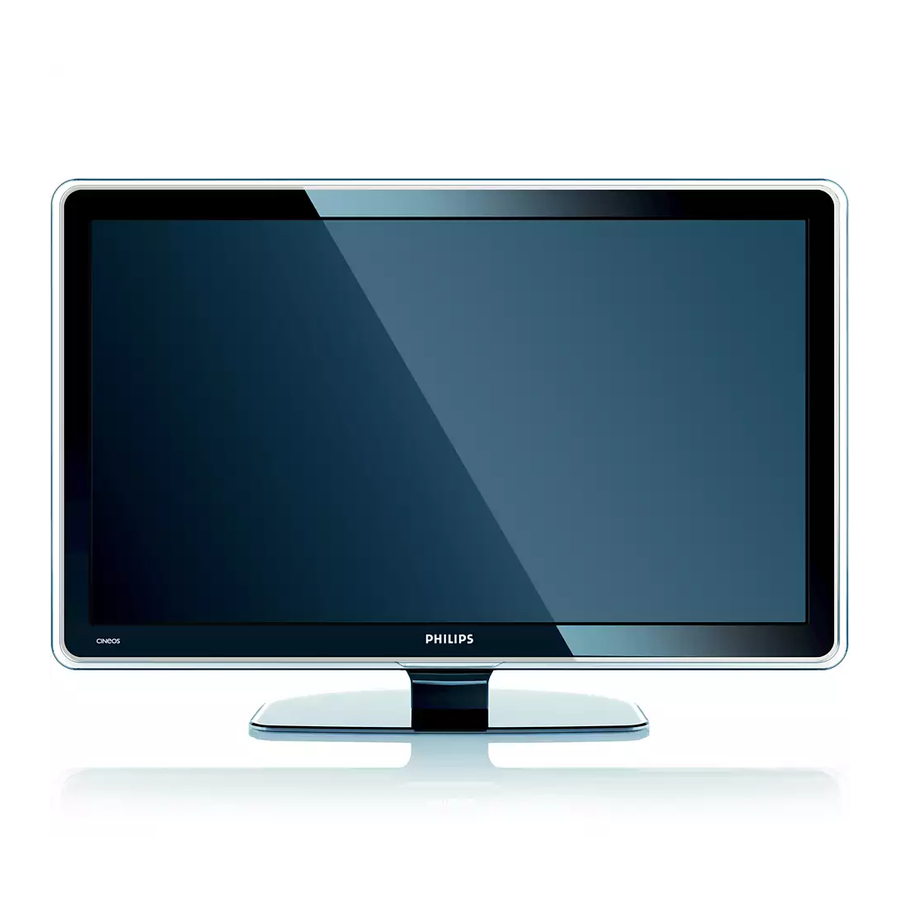
Your TV This section gives you an overview of the controls and functions of this TV. Television overview Controls LightGuide Indicator light Remote control sensor Volume up and down Menu Program/Channel up and down Power switch Connectors Back connectors Side connectors For more info see section 7 Connections. -
Page 7: Product Highlights
Your TV remote control is a universal remote control that can operate other devices such as DVD players and recorders, digital receivers (STB) or Home Theatre Systems (HTS) of Philips and many other brands. MPEG4 broadcast (if available) A higher quality videostandard offered by HD transmitted broadcasts. -
Page 8: Wall Mounting - Vesa
) Caution Consider the TV’s weight when you wall mount it. Improper mounting can result in severe injury or damage. Koninklijke Philips Electronics N.V. bears no responsibility for improper mounting or mounting that results in accident or injury. Your TV is prepared for VESA compliant wall mounting. -
Page 9: Remote Control Batteries
Remote control batteries ‡ Open the battery cover on the back of the remote control. ® Insert the 3 batteries supplied (Type AAA- LR03-1,5V). Make sure the + and - ends of the batteries line up correctly (inside of case is marked.) Ò... -
Page 10: Use Your Tv
Use your TV Learn how to operate your TV for daily use. Turn on or off - Standby rNote The TV may take up to 15 seconds to turn on. To turn on the TV: • Press B Power at the right of the TV if the standby indicator is off. -
Page 11: Watch Tv
Watch TV 4.2.1 Switch channels ‡ To switch TV channels: • Press a number (1 to 999) or press P+ or P- on your remote control. • Press - or + on the side Program/Channel controls of the TV. ® Press R to return to the previously viewed TV channel or connected device. -
Page 12: Watch A Dvd
Watch a DVD ‡ Switch on your DVD player. ® Insert a DVD disc in your player. The DVD picture automatically appears on the screen. Ò Press Play πon the DVD player. If the picture does not appear : ‡ Press the Source v key. ®... -
Page 13: Change Ambilight Mode
Change Ambilight mode You can adjust the speed at which Ambilight responds to the on-screen images. Adjust the Ambilight mode: ‡ Press Ambilight to switch on. ® Press Mode to adjust Ambilight between a relaxed and a dynamic setting. PQRS WXYZ CLOCK The Mode settings are only available if Ambilight... -
Page 14: Use More Of Your Tv
Use more of your TV This section helps you perform advanced TV operations including how to: • use the menus • adjust picture, sound and Ambilight settings • make use of Teletext • create favourite channel lists Remote control 5.1.1 Remote control overview DEMO •... - Page 15 DVD players and recorders, digital receivers (Set- top boxes – STB) or Home Theatre Systems (HTS) of Philips and many other brands. ‡ Press DVD, STB or HTS to select a DVD, a cable receiver (STB) or a Home Theatre (HTS) device.
- Page 16 If you entered a known code, all universal mode keys will blink to confirm the selection. If you entered an unknown code, all universal mode keys will light up for 2 seconds. Repeat Step 2 with a different code. Ò Point the remote control at the device, and press B to test if the code is known for your device.
-
Page 17: Lightguide Brightness
• Digital or Satellite receiver No change of functions. • Home Theatre System Menu key = HTS Disc menu V key = HTS volume P+/- = HTS Next/Previous 5.1.6 Remote control setup codes See the end of this manual. LightGuide brightness The LightGuide at the front of the TV indicates the start up of the TV. -
Page 18: Picture And Sound Settings
- to use the connection assistant which will help you to connect your devices to the TV. 5.3.2 Use of the menu Learn to use the menus with this example. ‡ Press Menu Ï. The TV menu appears on the screen. TV menu Smart settings Picture... - Page 19 5.4.3 Picture settings This section describes how to adjust all picture settings individually. ‡ Press Menu Ï. ® Select Picture and press π to enter the list. Ò Press o or œ to select a setting. TV menu Picture Contrast Smart settings Picture Brightness...
- Page 20 5.4.4 Widescreen picture format Avoid black bars on the sides or on top and bottom of the picture. Change the picture format to a format that fills the screen. ‡ Press q to switch on the Picture format menu. UNIVERSAL MODE TELETEXT SUBTITLE DEMO...
-
Page 21: Ambilight
• Volume – Visually impaired (UK only) Changes the volume of the selected Visually impaired audio language in the Setup, Installation menu. See section 6.1 Automatic installation. • Balance Sets the balance of the left and right loudspeakers to fit best your listening position. •... -
Page 22: Teletext
Teletext Your TV has a 1200 pages memory that stores broadcasted teletext pages and subpages to reduce waiting time. To select a teletext page see section 4.6 Select a Teletext page. 5.6.1 Select a teletext language Some digital TV broadcasters offer the possibility to select your preferred teletext language. -
Page 23: Create Favourite Channel Lists
• Language Some languages use a different set of characters. Switch to the other group to show the text correctly. ‡ Press Teletext. ® Press Menu Ï. Teletext menu Reveal Cycle subpages Language Gr. II Ò Press o or œ to select an option. †... -
Page 24: Electronic Programme Guide
5.7.3 Select a channel from a favourite list ‡ Press The last selected channel list appears. ® Use o or œ to highlight a channel. Ò Press The TV tunes to that channel. à Tip • Use to go through the TV channels of the selected favourite list. - Page 25 Programme guide Around 09:55 07:50 Commonwealth 12:30 BBC ONE 09:50 Tweenies 10:15 BBC TWO 09:00 The Wright Stuff 10:30 five 05:32 This is BBC THREE 12:00 BBC THREE 05:32 This is BBC FOUR 12:00 BBC FOUR 09:20 Moonlighting 10:15 abc1 Remind Watch Jump to ...
-
Page 26: Timers And Locks
Timers and locks This section describes how to switch the TV on or off at a specified time and to lock or unlock the TV. 5.9.1 Automatically switch to standby Sleeptimer switches the TV to standby after a time. ‡ Press Menu Ï on the remote control and select Features >... -
Page 27: 5.10 Subtitles
Philips is not responsible if your USB device is not supported nor shall Philips accept any liability for damage or loss of stored data. 5.11.1 Insert the USB device ‡... - Page 28 5.11.3 Watch your pictures, start a slideshow and play music Look up your pictures in the Picture album of your USB device. ‡ Select the Picture folder for the picture files you have stored on your USB device. Picture Picture Afrika_2001 Music Paris_2006...
-
Page 29: Listen To Digital Radio Channels
Watch a slideshow with background music Watch a slideshow of your stored pictures accompanied with your stored background music. ‡ Select an album of songs first and press ® Highlight the Picture folder and select an album of pictures and press 5.11.4 Watch photos or listen to music from your PC To watch photos and listen to music from a... -
Page 30: 5.13 Software Update
5.13 Software update Philips continually tries to improve its products. To benefit, update the TV software regularly. To update your TV software you need a USB Memory device (not supplied). Verify that your USB memory device has at least 128Mb free space. Make sure the write protection is switched off. - Page 31 † The update process starts automatically. Please wait. The update is finished when the message ‘Operation successful’ appears on the screen. º Remove the USB memory device from the TV. ◊Press B on the remote control. Do not press more than once and do not use the Power B switch on the TV.
-
Page 32: Channel Installation
Channel installation The first time you turned on your TV • you have selected the language of the TV menus and the country where you are located • all the available TV Channels have been installed. This chapter provides instructions on how to reinstall channels as well as other useful channel installation features. -
Page 33: Manual Channel Installation
Step 3: Select Antenna or Cable This selection is only available when this TV is prepared to receive DVB-C channels in your country. Select Antenna to install all digital terrestrial (DVB- T) and analogue channels available. Select Cable to install all digital cable (DVB-C) and analogue channels available. -
Page 34: Rearrange Stored Channels
6.2 Analogue: Manual installation You can tune-in analogue TV channels channel by channel manually with Manual installation. 6.2.1 Select the system ‡ Press Menu Ï and select Setup > Installation > Channel installation > Analogue: Manual installation. ® Press π to enter the Manual installation menu. System is highlighted. -
Page 35: Channel Management
Ò Press o or œ in the channel list to select the channel you want to uninstall or reinstall. † Press the green key to uninstall or reinstall the channel. º Press Menu Ï to quit the menu. 6.3.3 Reorder the channels Change the order of the stored channels. -
Page 36: Connections (Dvd, Receiver
Connections Connection overview Side connectors Headphones Stereo Mini jack Audio L/R Audio L/R input to be used together with Video or S-Video on the side of the TV. Video Video input to be used together with the Audio L/R on the side of the TV. S-Video S-Video input to be used together with the Audio L/R on the side of the TV. -
Page 37: About Connections
About connections 7.2.1 What you need to know Connect your device with the highest possible quality connection. Look for the highest quality connection on your device. Use that connection to your TV. HDMI - Highest quality An HDMI connection has the best picture and sound quality. -
Page 38: Connection Assistant
Video - Basic quality Use a Video (cinch) cable together with an Audio L/R (cinch) cable. Match the cable colours when you connect. Combined Video - yellow and Audio L/R cable - red and white 7.2.2 HDMI with EasyLink Connected devices that are compliant with the HDMI CEC standard can work together. - Page 39 7.4.1 DVD player Use a scart cable to connect the device to the EXT1 input at the back of the TV. EXT 3 EXT 2 SERVICE UART Y Pb Pr DIGITAL AUDIO AUDIO 7.4.2 DVD Recorder or Digital Receiver Use a scart cable and 2 antenna cables. EXT 3 EXT 2 SERVICE...
- Page 40 7.4.4 DVD Recorder and Home Theatre System Use a scart cable, 2 antenna cables and 1 digital audio (cinch) cable. EXT 3 EXT 2 SERVICE UART Y Pb Pr DIGITAL DIGITAL AUDIO AUDIO AUDIO 7.4.5 DVD Recorder and DVD Home Theatre System Use 2 scart cables, 2 antenna cables and 1 digital audio (cinch) cable.
- Page 41 7.4.7 HD Digital receiver / HD satellite receiver Use an HDMI cable and 2 antenna cables. NETWORK AUDIO HDMI HDMI 1 HDMI 2 HDMI 3 7.4.8 DVD-R, Home Theatre System and Digital receiver Use 3 scart cables, 3 antenna cables and 1 audio (cinch) cable.
- Page 42 7.4.10 Game console The most practical connections for a game console are at the side of the TV. Connected at the side of the TV Use the HDMI connection or the S-Video and Audio L/R connections or the Video and Audio L/R connections.
- Page 43 7.4.12 Personal Computer You can connect your PC directly to the TV. The TV works as a monitor of your PC. For more features you can connect your PC in a PC network. See section 7.7 PC network. As a monitor the PC can be connected at the side with a DVI to HDMI adaptor or with a PC to TV cable.
-
Page 44: Connection Setup
Connection setup The TV needs to know what connections you have made and which device is connected to which connector. If you have used the Connection assistant the connection setup is already done. 7.5.1 Naming your devices Name the connected devices for easy selection and best signal handling. -
Page 45: Preparing For Digital Services
Preparing for digital services Scrambled digital TV channels can be decoded with a Conditional Access Module (CAM) and a Smart card provided by a digital TV service operator. The CAM may enable several services depending on the operator you choose (e.g. Pay TV). Contact your digital TV service operator for more information and terms. -
Page 46: Pc Network
PC network You can link up your TV on a PC network in your home. Watch your photos and listen to your music from any linked PC on the TV. The PC network feature of this TV is DLNA certified. You can use Microsoft Windows XP or Vista, Intel Mac OSX or Linux. - Page 47 7.7.4 Media server settings Media servers need to be set for sharing their files and folders. Follow the instructions closely to set your specific server. Windows Media Player v11on Windows Vista Set for network sharing In Windows Media Player select Library from the menu and select Media sharing.
- Page 48 With Advanced Options open, you can add specific folders to the list to share. Click Add. In the Add Folder window select a folder with music, photos or videos you want to share with other devices (your TV). Click OK. In the Add To Library window the newly added folder is shown.
- Page 49 In the Media Sharing window, check the Share my media box. When the TV is connected, by the router, to the PC and everything is switched On, the Media sharing window will show the TV as an Unkown Device. Select the device and click Allow. You can open the Settings window to change particular settings on sharing.
- Page 50 Now everything is set to enjoy music, photos and videos on your TV. TVersity v.0.9.10.3 on Windows XP Set for network sharing Click the Settings tab and click the Start Sharing button. A pop-up window tells you that the media server service is started.
- Page 51 Twonky Media v4.4.2 on Macintosh OS X Set for network sharing In Twonky Media click Basic Setup > First steps. In this window you can change the server name that appears on your TV. Click Basic Setup > Clients/Security. Check the box next to Enable sharing for new clients automatically.
-
Page 52: Technical Data
• Macrovision Network Media Server (on Windows XP) • Fuppes (on Linux) • UShare (on Linix) • Philips Media Manager (on Microsoft Windows • Philips NAS SPD8020 * For this media server software a step by step setting instruction is available in the online User manual on www.philips.com/support. - Page 53 Power • Mains power: AC 220-240V (±10%) • Power and standby power consumption: See technical specification on www.philips.com • Ambient temperature: 5°C - 35°C Specifications are subject to change without notice. For more specification details of this product see www.philips.com/support.
-
Page 54: Troubleshooting
Troubleshooting Television and remote control The TV does not switch on • Verify the mains cord connection. • Verify if the batteries of the remote control are not empty or weak.Verify their + / - orientation. You can use the keys on the TV to switch the TV on. •... - Page 55 If your problem is not solved Switch your TV off and on again, that may help. If not, call our Consumer Care or consult our website www.philips.com/support. Find the Consumer Care telephone numbers on the back cover of this manual.
-
Page 56: 10 Index
10 Index 100 Hz Clear LCD 5,17 Active control 17 Advanced sharpness 17 Ambilight active mode 19 LoungeLight 11 menu / settings 19 modes 19 Analogue manual installation 31 TV channels 31 Antenna cable 7 connect 7 with devices 34 Audio setup 42 Auto clock mode 31 Auto format 18... - Page 57 Language subtitle 25 LightGuide 15 Light sensor 17 Location 47 Locks 24 LoungeLight 11 Menu key 13 Mono 19 Movie expand 18 MPEG artefact reduction 17 Music 25 Mute key 12 Naming devices 42 Network setup 44 Noise reduction 17 OK key 12 On timer 24 Perfect Pixel HD 17...
-
Page 58: Uk Digital Tv Switchover Info
Information about how to re-tune your TV during the digital TV switchover. Keep this user manual safe - you'll need it. Television in the UK is going digital, bringing us all more choice and new services. Starting in late 2007 and ending in 2012, television services in the UK will go completely digital, TV region by TV region. - Page 59 Digital UK, the body leading the digital TV switch- over, will advise you when you need to re-tuner during the switchover. If you choose to connect your TV to satellite or cable with a digital box then it will no be affected by switchover, and you won't need to re-tune.
- Page 61 Satellite receiver Blu-ray Disc - DVB-S Cable receiver - DVB-C DVD Codes PHILIPS 0000, 0001, 0002, 0003, 0013, 0021, 0030, 0049, 0100, 0105, 0107, 0111, 0123, 0127, 0131, 0135, 0145, 0150, 0153, 0154,0155, 0156, 0161, 0163, 0164, 0177, 0193, 0197, 0204,...
- Page 62 Yakumo 0144 Yamada 0144 Yamaha 0015, 0038, 0131, 0143, 0158, 0184, 0271, 0307 STB Codes PHILIPS 0000, 0001, 0003, 0020, 0043, 0066, 0068, 0069, 0073, 0085, 0087, 0095, 0097, 0098, 0105, 0109, 0113, 0114, 0117, 0122, 0124, 0174, 0176, 0184, 0187,...
- Page 63 Axiel 0122 Axis 0010, 0013, 0021, 0077, 0082, 0108, 0115, 0405 Barcom0009 Best 0009, 0010, 0108, 0115 Blaupunkt 0017, 0066, 0113 Blue Sky 0123, 0128 Boca 0037, 0059, 0085, 0091, 0123, 0222, 0225, 0237, 0242, 0251 Boston 0122, 0222 Brain Wave 0019, 0075, 0094 Brandt 0049, 0334, 0335, 0336 Broadcast 0018, 0076 Broco 0082, 0123...
- Page 64 Hirschmann 0017, 0033, 0066, 0078, 0079, 0081, 0084, 0113, 0115, 0116, 0119, 0122, 0127, 0165, 0322, 0323, 0328, 0389, 0413 Hisawa 0019, 0075 Hitachi 0003, 0020, 0212, 0313 0222 Houston 0025, 0069 Humax 0157, 0161, 0163, 0190, 0215, 0217, 0296, 0346 Huth 0005, 0018, 0019, 0021, 0025, 0033, 0069, 0072, 0075, 0076, 0077,...
- Page 65 Panasoic 0003, 0020, 0044, 0101, 0155, 0192, 0318 Panda 0003, 0007, 0061, 0064, 0113, 0119 Patriot 0122, 0222 Phoenix 0021, 0031, 0068, 0077 Phonotrend 0003, 0005, 0025, 0033, 0072, 0346 Pioneer 0109, 0114, 0197, 0373, 0405, 0415, 0416 Polsat 0055 Polytron 0022 Predki 0019, 0075 Preisner 0078, 0085, 0091, 0222...
- Page 66 0115, 0124, 0171, 0219, 0299, 0317, 0381, 0382 Zenith 0125 Zinwell 0157 Zodiac 0005, 0087 HTS Codes Philips 0000, 0002, 0003, 0004, 0009, 0020, 0027, 0030, 0031, 0032, 0033, 0034, 0052, 0062, 0063, 0064, 0065, 0066, 0067, 0071, 0078, 0079, 0080, 0081, 0121,...
-
Page 68: Contact Information
Contact information België / Belgique 078 250 145 0.06/min Danmark 3525 8759 Local Deutschland 01803 386 852 0.09/min France 0821 611 655 0.09/min E§§A™ 0 0800 3122 1280 ¢ˆÚÂ¿Ó España 902 888 784 0.10/min Ireland 01 601 1777 Local Italia 8403 20086 0.08/min Luxembourg...